
 Twirl, leap, coast and spin! The skating rink is open and you’re invited to strut your stuff, courtesy of a magnet attached to the bottom of a toilet paper tube skater. If things start to get a little chilly, glide through our cozy hot chocolate shack for a fill up!
 We read Little Red Gliding Hood, written by Tara Lazar, and illustrated by Troy Cummings (Random House, 2015). Little Red is a great skater, but her ice skates have definitely seen better days. When a skating competition is announced, along with a prize of brand new skates, Little Red is thrilled. Unfortunately, it’s a pairs skating competition, and she has no partner. Unfortunately, while searching for a partner, she encounters the Big Bad Wolf! After a face-paced and spirited chase across the ice, he finally catches her. But he’s not going to eat her…he just wanted to tell her that her laces were untied! Turns out the not-so-bad Wolf needs new skates too, and he’s a great skater to boot. The day of the competition, Little Red and the Wolf enter the completion. They put on such a great performance, the judges give them a perfect 10 and the grand prize!
You’ll need:
- 2 toilet paper tubes
- 2 circles of tagboard or cardboard (approximately 1.75″ in diameter)
- Construction paper, various colors
- 4 s
- 2 champagne (or wine) corks
- 1 small tissue box
- 1 hot chocolate shack template, printed on 8.5″ x 11″ card stock
- 8 medium craft sticks (4.5″ long)
- 1 skating rink (more on that later!)
- Tape and scissors for construction
- Markers for decorating
- Hot glue
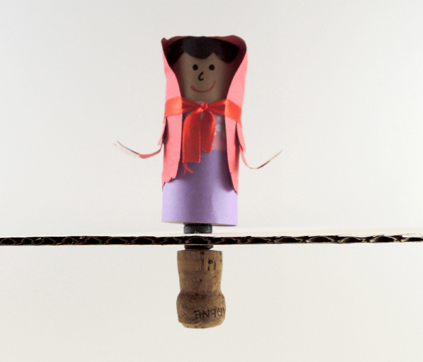
We’ll begin with the skaters, which are toilet paper tubes with magnets glued to the bottoms of them. Later, the skaters’ magnets will connect with a magnet wand held underneath the cardboard skating rink. Move the magnet wand, and the skater magically glides!
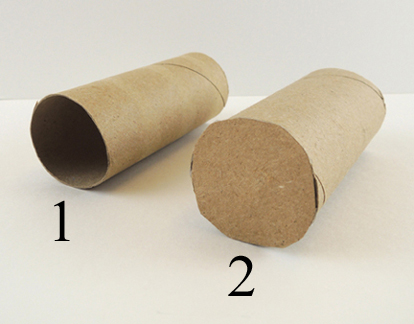
First, hot glue 2 tagboard circles to the bottoms of 2 toilet paper tubes. Definitely use hot glue – you really want those circle to stay adhered to the tubes.
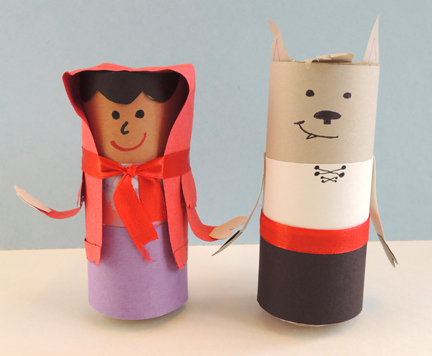
 Next, use construction paper and markers to turn your tubes into a pair of ice skaters. In keeping with the book, one of our skaters was Little Red, and the other was the Big Bad Wolf. Katie put this adorable duo together, and added a bit of red ribbon for Red’s hood and the Wolf’s sash.
 Hot glue a button magnet to the bottom of each tube.The bigger the magnet, the better the results on the rink! Our magnets were 0.75″ in diameter. We tried smaller ones, but they just couldn’t keep the connection.
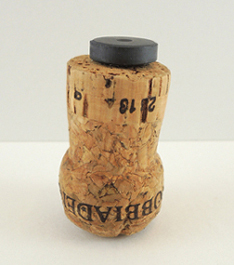
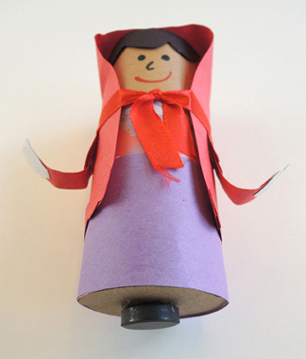 Next, hot glue button magnets to the bottoms of 2 corks (but test to make sure the skater magnets and the wand magnets attract before hot gluing them to the corks). We used champagne corks because they have a bulge at the bottom that was easier for little kids to grip. But wine corks work too.
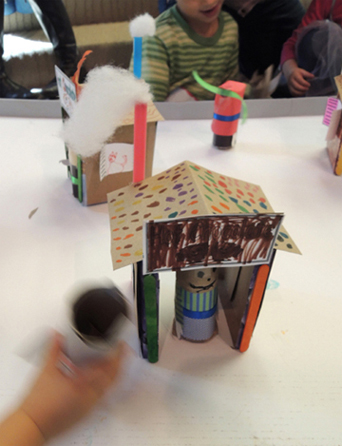
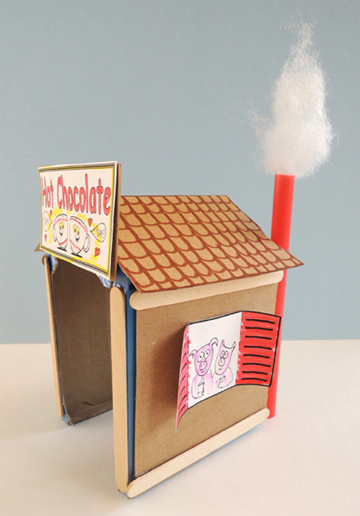
 Now for the hot chocolate shack! Cut the bottom and 2 sides off a small tissue box. Your shack should have no floor, and the doorways should be tall enough for your skaters to glide through easily.
 We used tagboard for the sides of the shack and the roof, but construction paper works too. Cut and color the sign and 2 windows from the shack template and attach them to the shack. We reinforced the sides of the box by gluing craft sticks on above and below the windows and on both sides of the doorways. The final touch – a chimney- is totally optional. Cut a bubble tea straw down to 6.75″ and add a little polyester fill smoke rising from it.
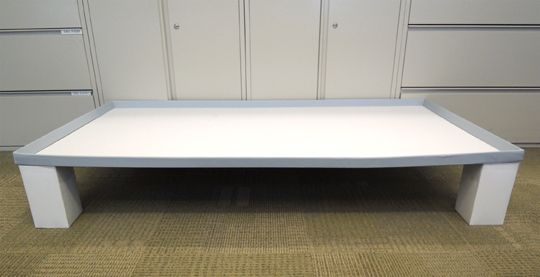
Now for the ice skating rink. We snagged a huge, 3″ x 63″ box lid through this program. Since kids needed to reach underneath the rink, we hot glued four 4.5” X 4.5” x 9” craft boxes in each corner, and reinforced them with packing tape.
 Place your skater on the top of the box, then place your magnet wand underneath the box. The magnets will connect through the cardboard, and you can start skating!
 Plunk your hot chocolate shack down, crank up the Tchaikovsky, and skate!
We learned that if you tilt the magnet cork juuuust so while you’re pulling your skater, you can actually make him/her spin rapidly. Check out these fantastic moves:
When story time was over, the giant skating rink stayed at the library for a future project. But we did give each kid a 14″ cardboard cake circle to continue the skating fun at home.
Looking for another way to enjoy the ice? How about a little ice fishing? Or maybe you need a little frozen magic? Or you might be dreaming of spring…
 When it’s time for your next library visit, perhaps you’d consider bringing a canary with you? I hear they’re friendly, quiet, and quite avid readers. Make a sweet little canary on a perch and a sparkly, decorative birdcage to go with it. And don’t forget that mini library book!
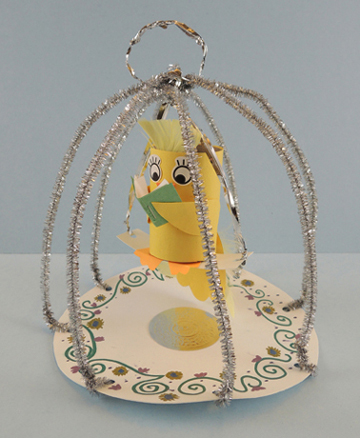 We’ll begin with the birdcage, and finish with the reading canary! Punch 8 symmetrical holes into a circle of poster board, then decorate the poster board with markers (we used Crayola metallic markers and they looked fantastic).
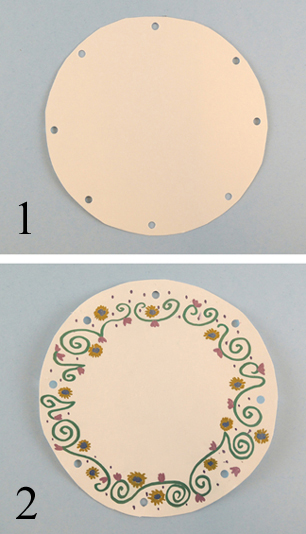 Wrap the ends of 8 sparkle stems through each hole.
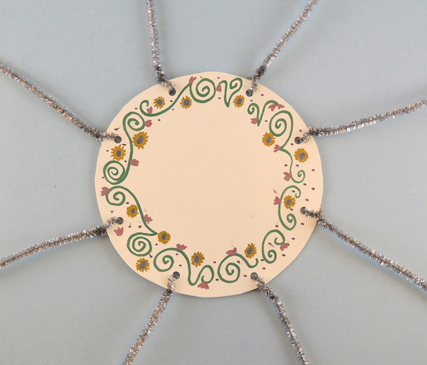 Gather the free ends of the sparkle stems together over top of the poster board circle. Adjust the stems, as needed, to create a birdcage, then twist the ends of the stems together. We also added a decorative silver
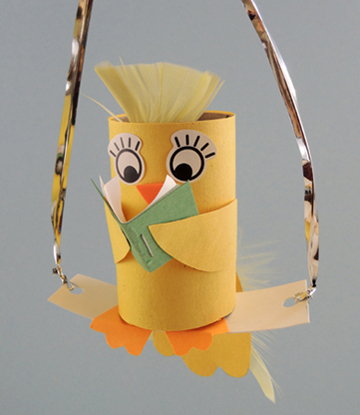
 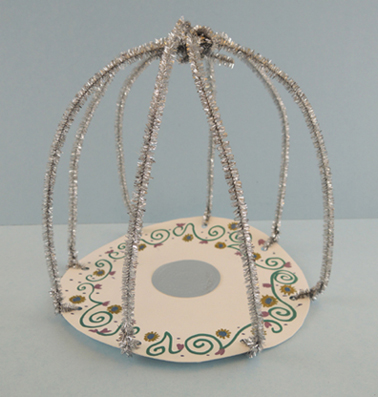 To make the canary, cut a toilet paper tube down to 2.75″ and wrap it with yellow construction paper. Add a small feather crest, and use markers to draw a beak and eyes (or use
 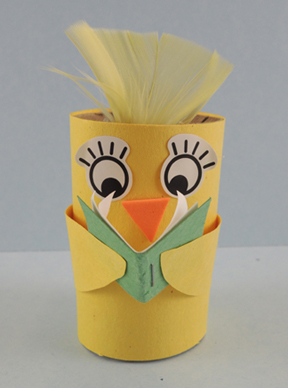 Cut a tail out of yellow construction paper (our tail was about 2.75″ long). Hot glue (or tape) it to the canary’s body, and add a small feather on top. We covered the top of the feather with a yellow
 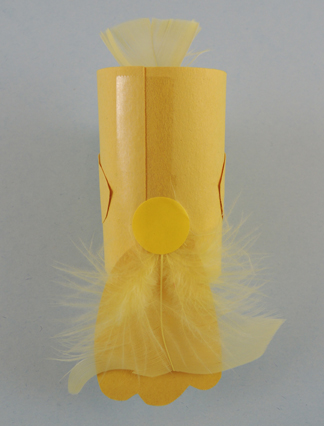 Now for the perch! Punch a hole in each end of a 1″ x 3.75″ piece of poster board. Cut a pair of orange canary feet from construction paper, then hot glue them in the center of the perch. Finally, hot glue a 0.75″ x 6″ strip of tagboard on top of the feet. Bend both ends of the tagboard strip upwards to create perch “prongs.” Your perch should now look like this:
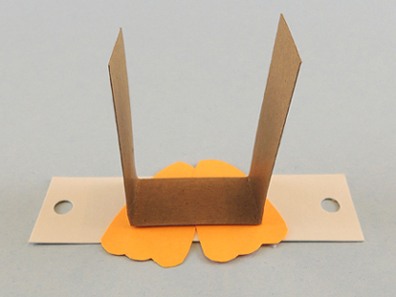 Slide the prongs into the bird tube, then secure them to the inside of the tube with tape.
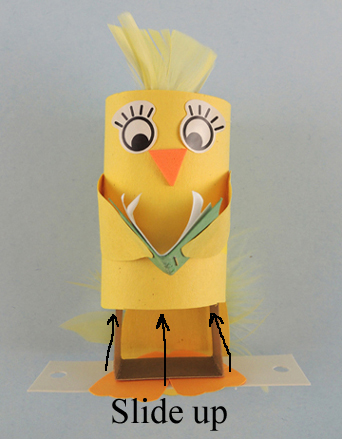 Next, wrap a silver craft tie in each hole of the perch. Bring the ties over the canary’s head and twist them together. Note! Because of the height of the birdcage, you’ll need to twist the craft ties fairly close to the top of the canary’s head. Finally, curl the little orange canary toes over the edge of the perch.
 Slide your perched canary inside the cage, adjust for height, and then wrap the free ends of the craft ties around the top of the cage to secure it in place. Circle and twist the extra craft tie to create a carrying handle for your birdcage.
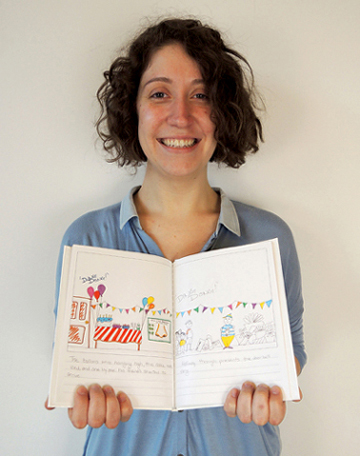 You love books. You think it’s a clever idea. You’ve picked it up while shopping and mused over it a dozen time. But each time you put it back, thinking…do those make your own book mail-in kits really deliver the goods? Well, ponder no more! Today, we’re reviewing the IlluStory Make Your Own Book kit by Lulu Jr.
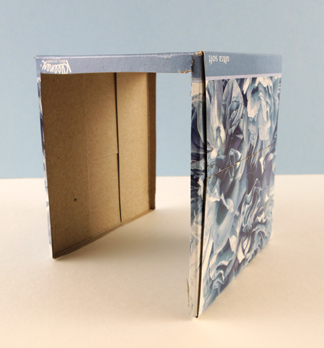
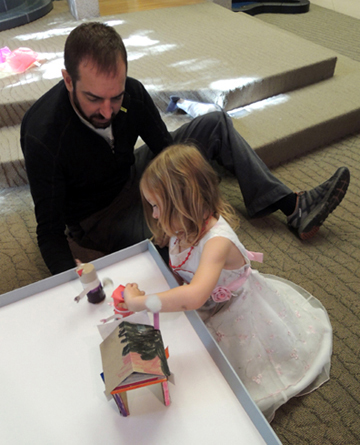
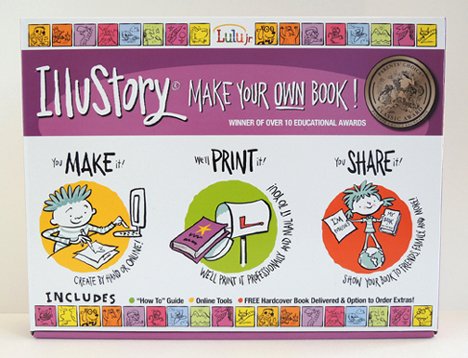 The kit retails for around $20 – $30. It includes 10 washable markers, 20 blank book pages, 2 blank cover pages, a mailing envelope, and detailed instructions. It also has multiple prompt sheets to get young writers going (including – and I really liked this – nonfiction stories and biographies). The kit price includes the production of your book and shipping costs from, and back to, your house (USA only). The final product is a 7.25″ x 9.25″ hardcover book with an illustrated story that is a maximum of 18 pages long.
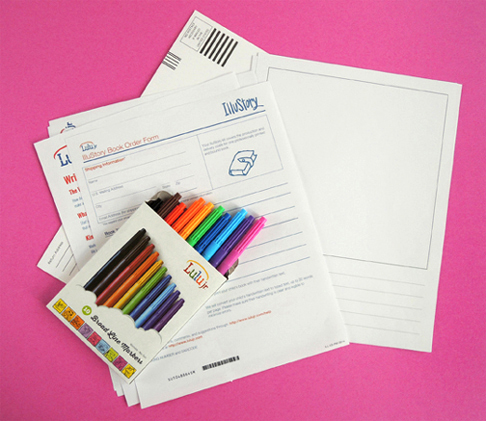 Getting started, you have two creation options with this kit: 1) Draw the book by hand; or 2) Design it online using templates, backgrounds, and digital stickers (you can also upload drawings and photos). We went as low tech as possible and chose to create the book by hand. The 8.5″ x 11″ story pages have a big box for illustrations, and 5 lines for text. Since your story can’t be over 18 pages, there are a couple of extra pages, just in case you mess up.
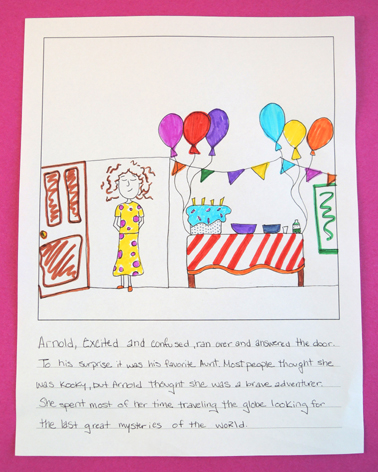 When the book was finished, we turned to the order form. Here, we were presented with two options: 1) Produce the book using your handwritten text; or 2) Have the company convert your handwritten words to type (but there is a 20 word per page limit, and they don’t correct spelling or edit). We went with hand lettering.
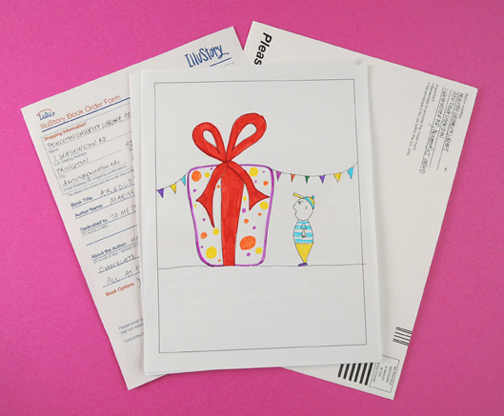 IlluStory say the books are printed less than 2 weeks from the date received, and ship 3-5 days after printing. They were right on the money. In just under 3 weeks, Marissa’s book was back. It looked fantastic.
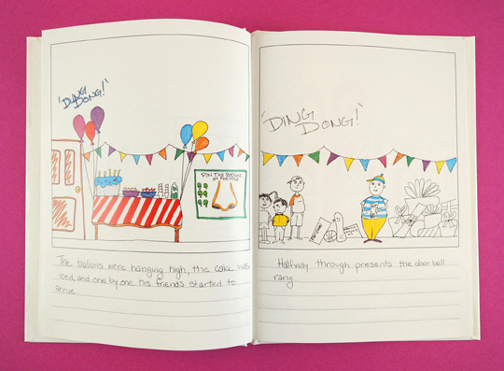 I was worried that the binding might look cheap. Nope. This is a real, honest-to-goodness book. Glossy white cover, crisp printing, text well clear of the binding margins. The author photo we sent was reproduced nicely. They even put the title and author’s name down the book’s spine! There’s a title page too. It looks really cute:
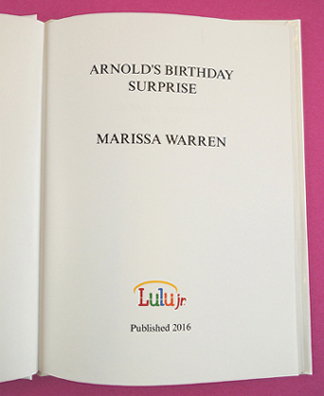 You also have the option to purchase additional copies and send them to your adoring fans (copies of our book, for example are $14.99). You can order multiple copies in advance, or use the info printed on the back of the book to order copies later.
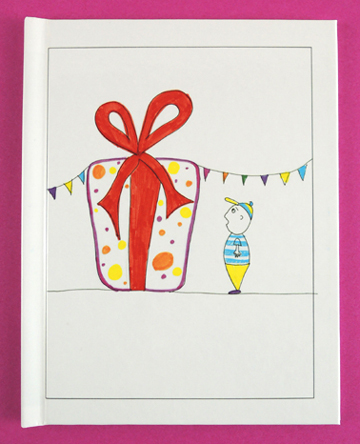 In summary, the IlluStory Make Your Own Book kit is terrific! It’s easy to put together with really nice, professional-looking results. Make sure to read all the instructions and fine print and remember – what you send is exactly what is printed. If you know an aspiring author or illustrator, or are looking to create something special for someone, this kit is a sure bet.