Tiny Potter

In addition to being super into show jumping story times, freaked out by clowns, and unusually influenced by a cookbook, I really really REALLY love miniatures (ask my daughter about my obsession with dollhouse cakes). So when MGA’S Mini Verse released a “Wizarding World: Harry Potter Make it Mini Potions Class” set, I was beyond thrilled to enter the miniature world of Hogwart’s.

The set, which is intended for ages 8+ and contains over 100+ pieces, retails for around $30. I’ll say it from the jump…the quality of the materials in this set was outstanding. The pieces were good quality plastic, felt substantial, had a lot of details, and were really pleasing to work with. Everything was packed extraordinarily well, with easy instructions printed on the outside of each of the parts containers.

However, there was one set of instructions floating free inside the box. While it did say “Read Me First!” in big letters, I honestly almost missed the piece of paper as I unpacked everything. Good thing I did spot it because it had all the information about resin, glue, and potions. I’m not sure why these instructions weren’t incorporated with the others. It would have been much easier to construct everything that way.

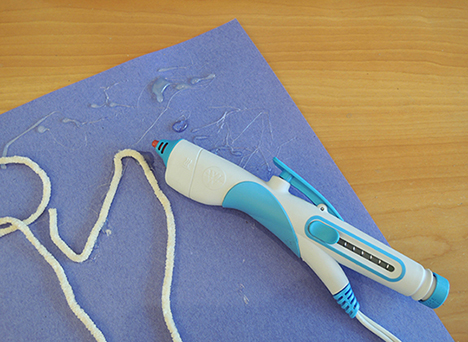
I must also say…this set puts you to WORK! One of the first steps is to lay each individual classroom floor tile using a pot of glue (cleverly disguised as a wooden bucket) and a mini float (which yes, know I am technically holding the wrong way in the photo).

I also had to lay each brick on the walls, using more glue and a mini trowel. Like the floor tiles, the spaces for the bricks were individually numbered, so matching each to its assigned space was easy.

At this point, I was honestly looking for Dobby the house elf to help me out. But I forged on, snapping together the pieces for the two bookcases, work table, and arranging all the little bottles and jars.

When the classroom was finished, it was time for the main event: concocting the mini potion! You had a choice of two: purple or teal. Following the instructions, I gathered all the equipment and ingredient bottles.

To make a potion, you have to pour the powder into the resin inside the cauldron, stir it, use tongs to add some color beads to an empty bottle, funnel the purple resin into said bottle which you then seal and tie a label on. What could possibly go wrong? Ummmmmmm…

Oh, I made a mess. The purple powder went everywhere, I dropped the funnel, everything got all over my fingers, my shirt, my desk. Snape would have absolutely deducted 50 points from Ravenclaw for my potions ineptitude. But when it was finally complete, it was a very pretty potion. I’m not sure if the resin was ultimately supposed to harden, but weeks later, the potion is still sloshing around in the bottle. So caretakers with curious children who like to unbottle things be warned. You may want to keep this particular potion far out of reach.

The amount of labor, glue, resin, and general potential for messiness leads me to suggest that this set for kids ages 10+ (but ok for 8 year-olds with adult assistance). As I mentioned before, the details on the set are exquisite and it’s fun to arrange and re-arrange the miniatures. This would be fantastic for a Harry Potter fan, and a great art kit to boot. 4.75 out of 5!

Alice’s Adventures on the Bookshelf

We swore it would never happen again. Never EVER would we put together another miniature library kit. Gentle people of the jury, I present exhibits A, B, and C as evidence. But then Katie found the most adorable Alice in Wonderland miniature puzzle kit at our local toy store, and she went right back down that rabbit hole. Was it an adventure in wonderland for Katie? Read on to find out!


Here we go again! Leave it to our friends at Princeton’s fabulous toy store, Jazams, to convince us to break the promise we made ourselves to NOT build another miniature library kit. To be fair, this Alice’s Adventures in Wonderland inspired diorama bookend is so cool, it was basically a forgone conclusion we would change our minds.

The Tonecheer Alice’s Adventure 3D Puzzle (HTQ128) is quite similar to the Sunshine Town book nook I tackled in 2023, though there are some differences that make this kit both faster and easier to build. It is available for purchase on Amazon for $42.99, the difficulty rating is 4.5 out of 5 stars and, like our other three kits, the age suggestion is 14+.

Upon opening the box, I found multiple precut wood plates with various sized pieces and parts that needed to be carefully popped out. There was an 11 x17 inch folded instruction sheet, the electronic lighting kit, and construction items to assist with the build (batteries not included).

The most important tool was the “Three-in-one Tool” wood piece, which was critical in saving my fingertips and, in some instances, my sanity as I was trying to push smaller pieces out of the plates as well as connecting bits and parts together.

One extremely nice touch to this kit is all of the pieces are ready to go right out of the box. Zero paint required. There are parts that need to be glued together, but even those are few and far between. Assisted by the handy “Three-in-one Tool,” I quickly put together the two levels of Alice’s adventure. The instructions were clear and very easy to understand. All told, it took about three hours to finish.

During the build, I had one struggle and made one mistake. The struggle was building the stump that surrounds the infamous rabbit hole where Alice falls. It took nearly ten attempts to connect the smallish pieces in a circle and then push the tabs of the round stump into the wood base. My once nimble fingers are clearly not as nimble.

My mistake was forgetting to tuck the light power cord behind two bars that connect the ceiling of Wonderland to the grassy ground. I completely missed the arrows and typed message alerting me to route the wires in a certain direction. Thankfully it was relatively easy to work backward, take sections apart and correct the error, but it was still a “duh!” moment.

There’s a lot to look at in the 3D Puzzle book nook! Alice herself is floating inside, along with the White Rabbit and Cheshire Cat. The mirrors at the back of the nook offer a deeper look to see all of the charming details.

As I mentioned, this kit is wired for lights, and it has a motion sensor to wow your friends as they walk by. The motion light illuminates for one minute before turning off, but the sensor is sensitive enough to quickly turn the light back on with gentle movement.

Has Alice surpassed the other builds as my favorite miniature library? No, I’m still enamored with the Sunshine Town cats! I will say Alice’s Adventure 3D Puzzle was the least tedious mini library build. It would also be much better for our younger crafters, though they may need an adult to help with installing the electronics. Another 4.5 out of 5 stars rating from me!

Give ‘Em the Old Razzle-Dazzle

razzle dazzle sign 3If you’re going to write something, why not make it extra fancy, glowing, blinking, AND neon? I absolutely love anything that lights up, so I was thrilled to test drive the Crayola Widescreen Light Designer. It was fun!
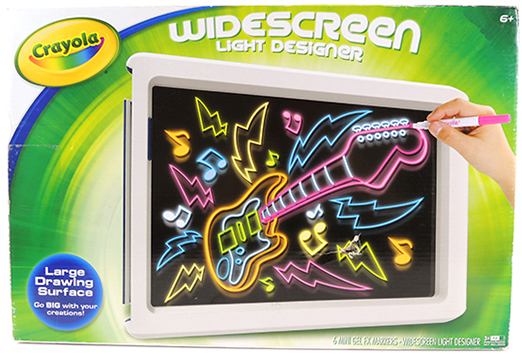
This toy is intended for children ages 6+ and retails for about $18 on Amazon. We’ve tested Crayola products on the blog before (including an airbrush kit I was very skeptical about but it totally worked!). I have to say, Crayola never disappoints. Their products are solid, easy to use, and the colors are always vivid. This light designer was no exception.

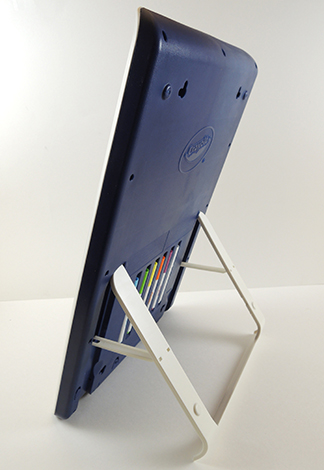
Out of the box, the light designer is 18″ tall (the actual drawing screen is 9.5″ x 15″). There’s an easel stand built into the back, as well as some clever little holders for the six markers that come with the set (blue, green, yellow, orange, purple, and white). You can also see the holes that allow you to mount the light designer to a wall.
Load in a couple AA batteries, flip the on the power switch, press the light button on the front, and start drawing! The colors go on beautifully with a lot of vibrancy. You can also press the front button multiple times to change the light settings (blinking, fading in and out, etc.). Three small quibbles: 1) The blue marker came out of the box bone dry, so I was unable to use it; 2) You have to cycle through seven light settings to get back to the original solid glow one, which seemed a bit excessive; 3) Wiping the marker off the screen with a dry paper towel took a LOT of elbow grease. Definitely use a slightly damp paper towel when it’s time to erase.

Essentially, this is a white board you can use in a darkened room with neon colors and blinking lights. But the little kid me would have been SO excited to see my artwork and writing presented in this unusual dynamic way. It just makes your drawings and announcements all the more special.

And speaking of Crayola light designers and razzle-dazzle special announcements…
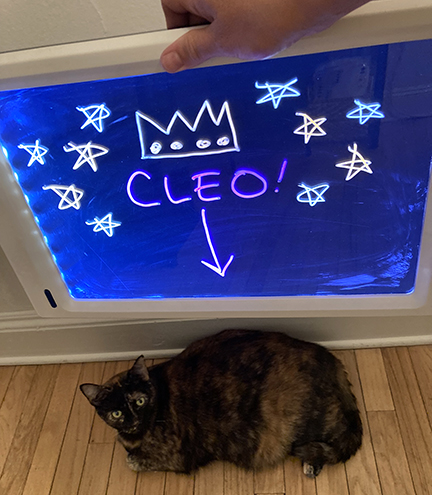
Everyone, this is CLEO! You met Katie’s rescue pup Finley in 2021, and now I’m delighted to introduce the newest member of my family. Cleo recently joined us from SAVE animal shelter. She is 7.5 years old, 18 pounds, and the undisputed Queen of the Household.
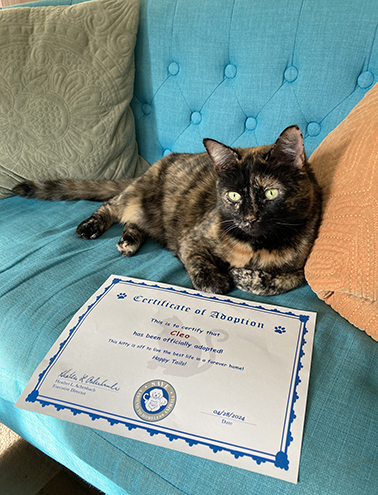
Long may she reign!