
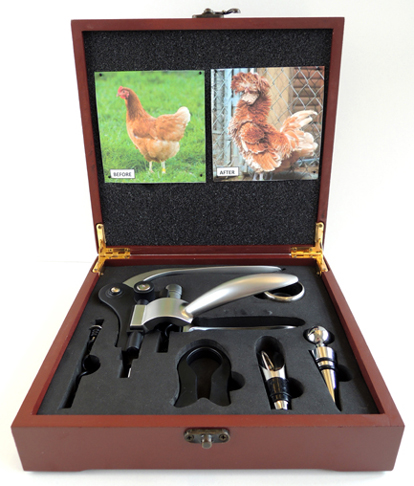
Deluxe Chicken Grooming Kit [c.2011]
Click on the images below to enlarge both the image and the caption.
-

- 1. Automatic Disk Thrower [c.2005] This product took the muggle market by storm in 2005. Adults and teenagers alike could load disks (made of a metal alloy) into the shooter. One would crank the white arm on the back of the shooter to launch the disks, which could be stored in the plastic container when not in use. While popular, this device was quickly taken off the market after a series of machine malfunctions involving – of all things – vegetables.
-
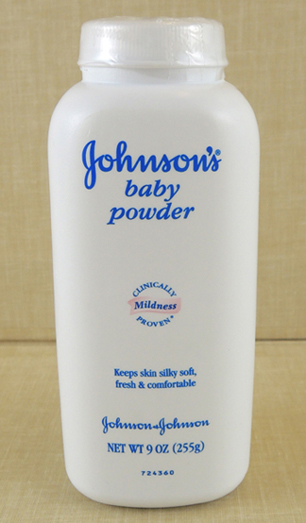
- 2. Baby Powder [c.1985] Like squirting flowers and whoopee cushions, Baby Powder is a popular Muggle joke. Traditionally, it appears at weddings – the idea being that if the newlyweds pour the powder into their hands, a new baby will appears within ten minutes.
-
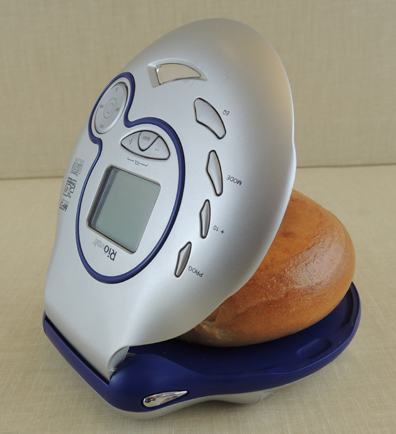
- 3. The Bagelman [c.2001] Invented for busy businessmen and women in corporate America, the Bagelman holds and warms bagels. Buttons on the top control temperature, speed of rotation, and even check the progress of the heating bagel during a busy commute. Later models included earphones to listen to the delicious crackling of one’s cooking bagel.
-
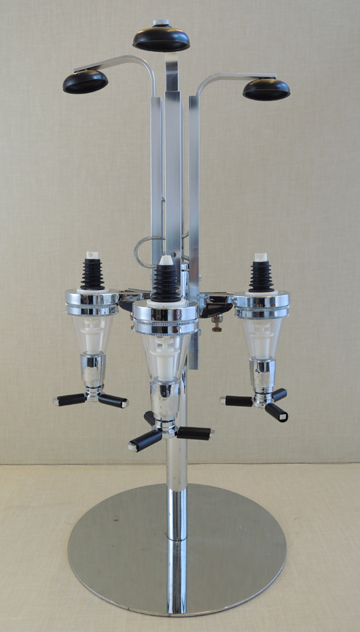
- 4. Cloud Exam-O-Tron [c.2007] An indispensable tool of Muggle climatologists, the white and black nodes on top of the collection jars are carefully tuned to gather data on cloud samples. Press the levers on the top to activate filters, separate trace elements, and analyze cloud composition. Special thundercloud models are mounted on a rubber mat.
-

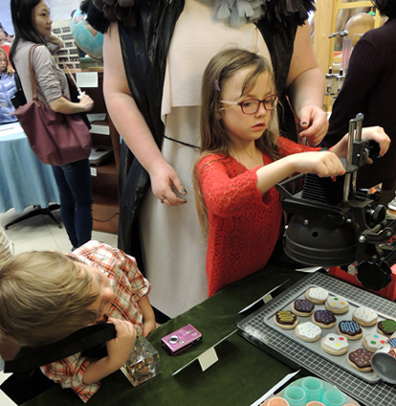
- 5. Cookie Slicer [c.1942] I am always delighted to find historic Muggle artifacts, and this Cookie Slicer from the early 20th century does not disappoint. Simply load a roll of cookie dough in the top feeder and use the red slicing device to cut the dough into sections. The knob allows you to adjust the thickness of the cookie. Once cut, the cookies drop onto the collecting tray below the device.
-
- 6. Crowd Finders [c.1915] Muggles are quite fond of festivals, concerts and large gatherings. However, it can be nerve-wracking to become separated from your friend, significant other, or sibling at an event. In crowds of thousands of people, Muggles use one of these Crowd Finders to connect and pull the other person to them, thus navigating large crowds safely.
-
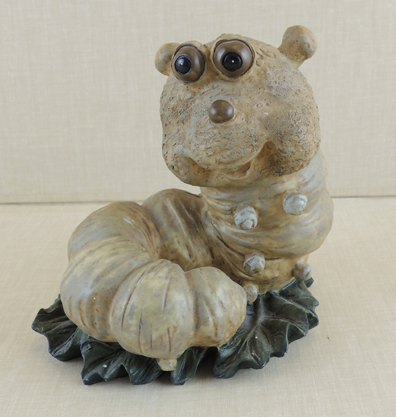
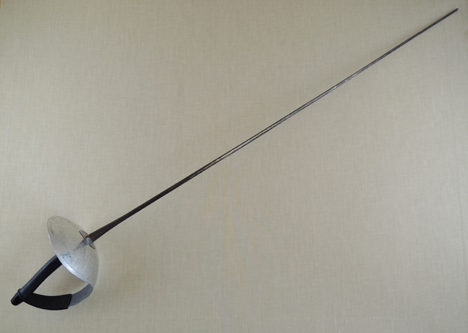
- 7. Crumple-Horned Snorkack Statue [c.2005] The Muggle and Wizarding Worlds seldom cross. Imagine my surprise, then, when I discovered this Crumple-Horned Snorkack statue in a Muggle shop! You will recall that Luna Lovegood and her father, Xenophilius Lovegood, reported on the magical creature in their journal, The Quibbler. Clearly, a Muggle found a copy of the Quibbler and decided to make a sculpture of the creature. There is no other plausible justification for the existence of this statue.
-
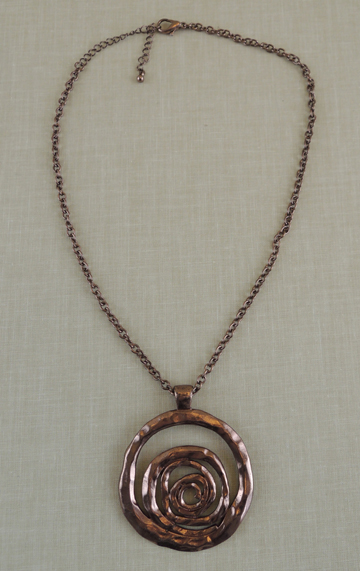
- 8. Cursed Necklace [c.1995] My research indicates that this is the exact necklace that Katie Bell was taking to Dumbledore when she was bewitched! DO NOT TOUCH.
-
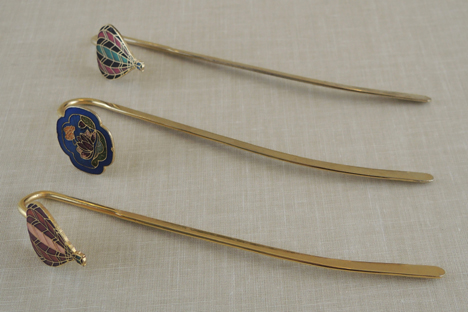
- 9. Curtain Hooks [c.1915] In the early 1900s, in many aristocratic circles, it was considered rude to pull delicate lace curtains away from windows with your bare hands. Curtain hooks were used instead. The more costly hooks were gold-plated with a family crest was emblazoned on the end.
-

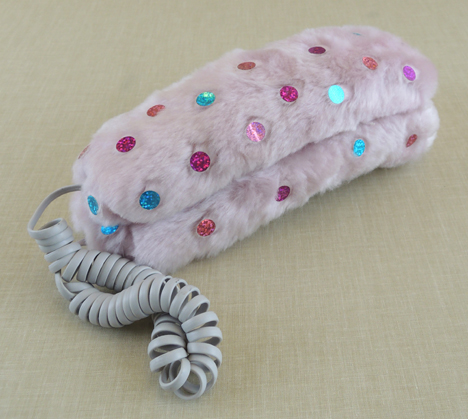
- 10. Deflector [c.2012] Some Muggles are inclined to introversion, only socializing with others when they truly feel like it. However, more gregarious friends and family members might not recognize when they are intruding on someone’s personal space. Thus, the Deflector was born. At first glance, the deflector looks like a traditional phone receiver (intended to make one appear to be otherwise engaged). However, in the event of a dire conversational emergency, the suction cups at either end of the bar can be placed on the invading Muggle’s mouth. Note: not for use with children or teenagers.
-

- 11. Deluxe Chicken Grooming Kit [c.2011] Chicken aficionados will no doubt recognize the various components of this Deluxe Chicken Grooming Kit. A staple at high-end chicken competitions, the before and after photos reflect just one of the many styles one can achieve with this kit.
-

- 12. Drink Coaster [c.1980] These hard, plastic squares act as coasters for cold or hot Muggle drinks. Interestingly, they contain a hidden function. Retract the silver slider, and a space for storing small scraps of paper is revealed. We postulate that this was a popular way for Muggle students to pass notes in class (and keep beverage rings from staining their desks).
-
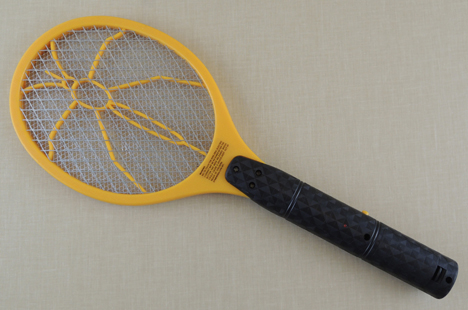
- 13. Electroball Racket [c.2014] From hot dog eating contests to formation escalator riding, Muggles pastimes can sometimes venture into danger and recklessness. Take this game, for example. Electroball is not unlike tennis. However, it is played with 40 – 500 volts of electrical energy, depending on the game’s score.
-
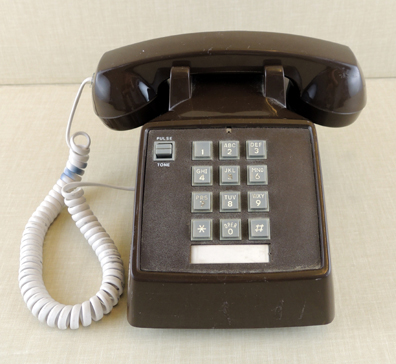
- 14. Electronic Reminder Calendar [c.1965] A staple in Muggle households until the early 1980s, Electronic Reminder Calendars were so popular, you often found one in every room of the house! Depress the number/letter buttons to program the reminder, and press the “#” button to set the alarm. Later, the device would ring with your reminder. Pick up the receiver to listen to the full message.
-
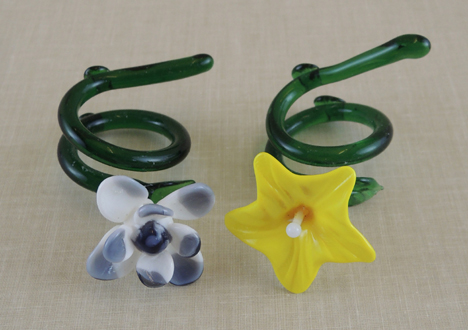
- 15. Custom Engagement Rings [c.1885] Muggles are a romantic race, and often share tokens of love with one another. In the late 1880s “Romantic Period,” these flashy glass-blown engagement rings were all the rage. Purple would be worn by women, yellow by men. Beyond valuable, the rings – particularly ones made for extremely large fingers – retail in modern America for 3.2 million dollars.
-
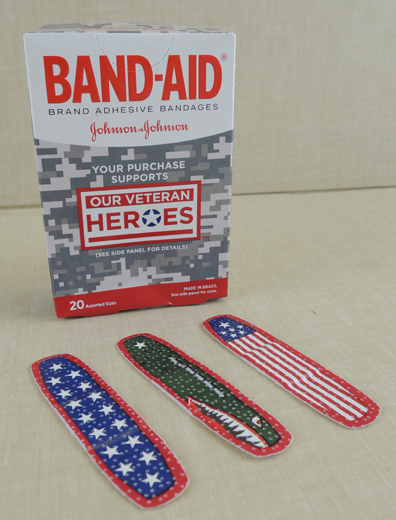
- 16. Muggle Epi-Bands [c.2002] This is the Muggle version of the Wizarding World’s Episkey spell. In this case, Epi-Bands are applied directly to the injury. It boggles the mind when one considers that even minor Muggle cuts can take up to 1-2 weeks to heal.
-
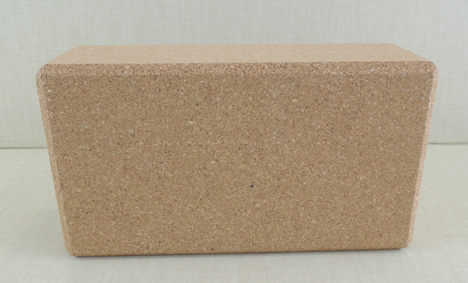
- 17. Expand-A-Home [c.2012] This cork block may appear to have no purpose, but it is actually expandable housing called Expand-A-Home. Simply add water to the cork block to expand a home within thirty minutes. Judging by its hue, this is one of the cheapest models – containing two bedrooms and only one bathroom.
-
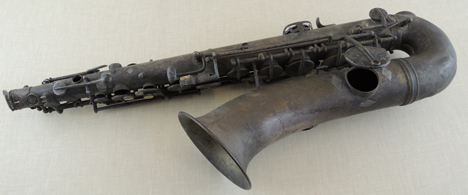
- 18. Flor-O-Phone [c.1945] Although this specimen isn’t in very good condition, one can appreciate its semblance of beauty and recognize its importance in floral décor. The main holes (located at the top and bottom) hold the bouquets. The additional holes along the length of the object are for larger, more complicated arrangements.
-
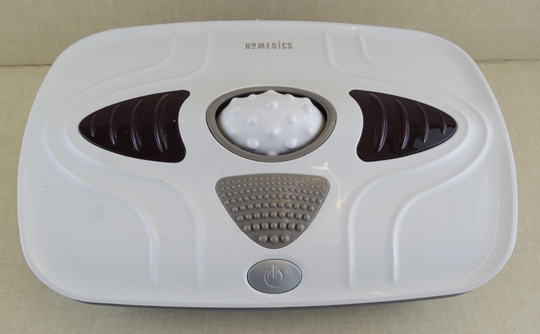
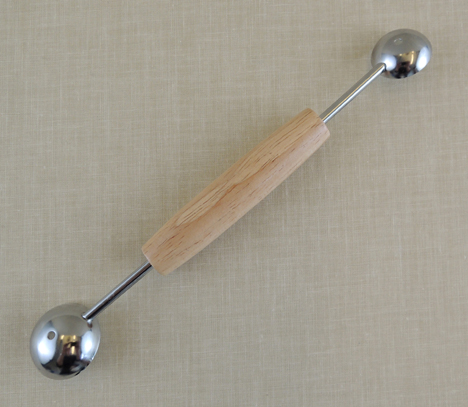
- 19. Fantastic Food Tenderizer [c.2007] Due to its lack of effectiveness, this Fantastic Food Tenderizer wasn’t on the market very long. So spectacular was its failure, it is now sought after for its kitsch value. To operate, a Muggle would lay the food item (such as a boiled potato or tough steak) across the knobs in the middle, then set the machine in motion. The tenderized food would be collected on the Muggle’s plate, which is set beneath the arrow.
-
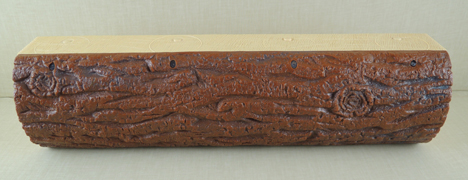
- 20. Frog Trap [c.2002] Perhaps one of the most fascinating items in my collection, these plastic Frog Traps originated in rural Illinois. When in use, the log emits ultrasonic music only audile to frogs. They quickly gather, hypnotized. The frogs are then either kept as pets or harvested for their frog legs, a regional delicacy served at family gatherings.
-
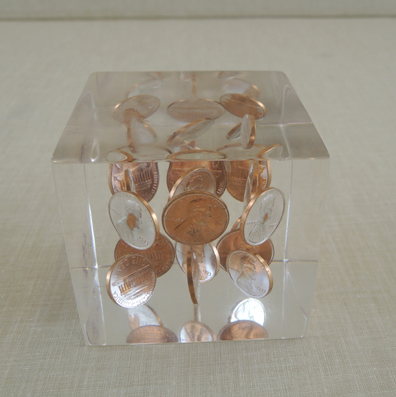
- 21. Fudged Leviosa Spell [c.1992] Due to the unpredictable nature of magic in genealogy, some Muggle children are born with small, specific magics. This explains Muggle reports of telepathy and telekinesis. Thus, it is believed that these pennies were levitated briefly by a young semi-magic Muggle child before the spell backfired, suspending them forever in plastic. This object is highly unstable. DO NOT TOUCH.
-
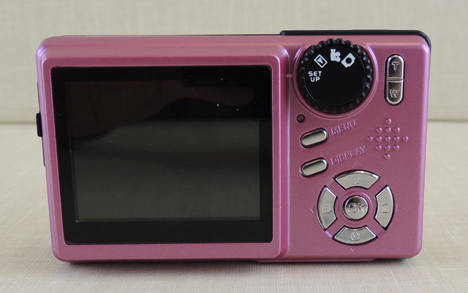
- 22. Ghost Hunting Box [c.2007] The concept is simple. Point the box at a room, depress the button, and if a “ghost” is in the room, it will “appear” on the view screen. Even though there hasn’t been a single case of a ghostly image being captured by one of these devices (the infamous “White Blur” of 2009 having been discredited as a hoax), it doesn’t stop hopeful Muggles from using them almost constantly.
-
- 23. Hand Massager [c.2012] Commonly found next to Muggle computer keyboards, the Hand Massager relaxes the stressed muscles of the fingers and palm. To operate, squeeze the Massager and roll it around on the white knob for 5 minutes on each hand.
-
- 24. Human Radio Antenna [c.1920] In the centuries following Guglielmo Marconi’s invention of the radio, researchers have attempted to develop other transmission devices. Here we have a fine example of a human radio antenna, credited to French Muggle inventor Phillipe Mensur. The devices were eventually banned by the Citizen Brigade pour l’harmonie intérieure (“Citizen Brigade for Inner Harmony”) who felt that the constant flow of information to individuals was too “distracting, diverting, and socially isolating.”
-
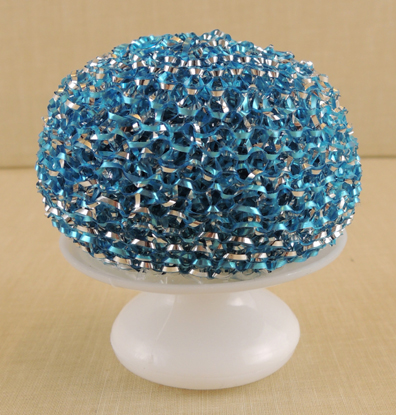
- 25. Imp Trap [c.1910] An interesting example of how Muggles almost got it right! While it’s true that imps are highly attracted to the crystal top of the imp trap, they will not enter the trap without bait. Muggles, sadly misinformed, have been using the wrong bait for decades (coffee grounds). Even Wizarding children know that imps love insects and will do anything to get them.
-
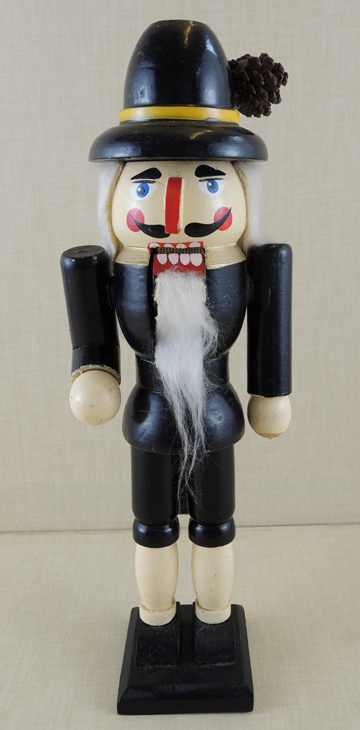
- 26. Jewelry Man [c.1965] The mouth of this object opens to hold necklaces or bracelets. The fierce expression on the man’s face is believed to indicate guardianship over the jewelry at night. Peculiarly, this object is most commonly seen during Muggle holidays.
-

- 27. Dementor’s Kiss Blockers [c.1994] Very rarely, Muggles are given actual information about the Wizarding world. Preceding the Second Wizarding War, incited by the 1995 dementor’s attack on Dudley Dursley, strategies for protecting Muggles from the Dementor’s Kiss of Death were dispersed to select Muggle leaders. The Kiss Blockers were developed out of this collaboration. Until the Dark Lord’s evil forces were defeated in 1997, it was believed that every man, woman, and child wore a blocker over their chests to ward off dementors and their soul-sucking kisses.
-
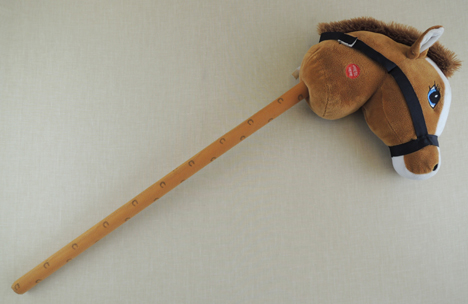
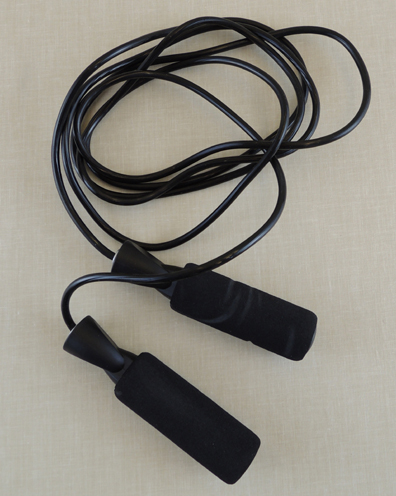
- 28. Muggle Broom Substitute [c.2002] In the 1800s, a well-known Squib named Denis Johnson made this object for his young Squib daughter, who demanded to know why she couldn’t fly on a broom like her magical aunts and uncles. Naturally, other children became jealous and thus, the rest is history. These objects are still popular in the Muggle world.
-
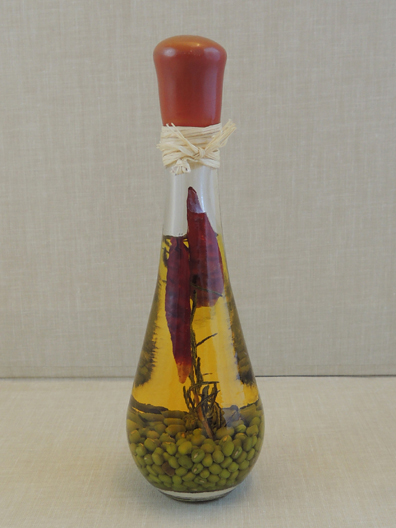
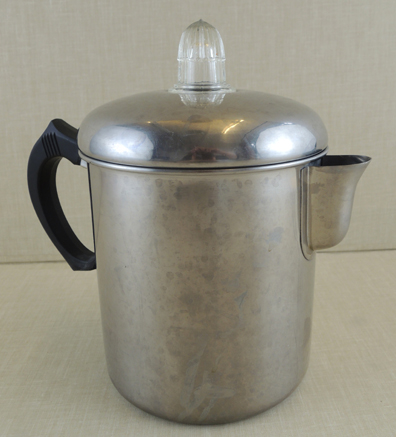
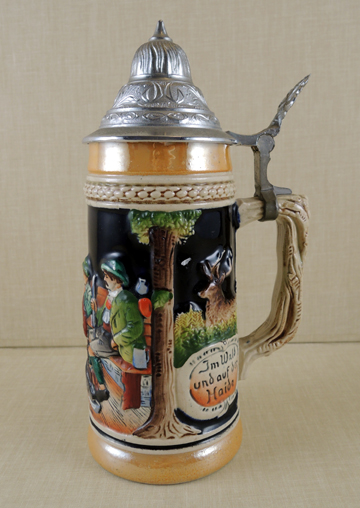
- 29. Muggle Potion [c.1933] Muggles have tried to copy the wizarding world’s potions for centuries. When the creations inevitably fail, Muggles apparently use the potions as decorations in their kitchens. This potion appears to be a replication of the Totalitium Smell-Goodititius potion, used in many of Madam Rosmerta’s recipes at Hogsmeade.
-
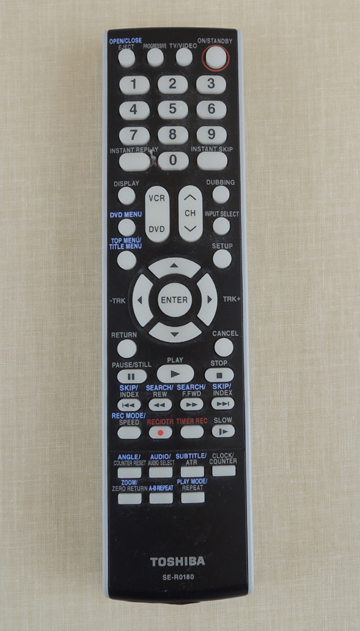
- 30. Muggle Wand [c.1980] A classic example of Muggles inadvertently imitating the Wizarding World. I have observed Muggles invisibly controlling various electrical appliances in their home with this device, particularly the “Tellavhishun.” However, it operates using a light emitting diode, not magic.
-
- 31. Music Machine [c.1930s] Common during a historical period Muggles call the “Great Depression,” these Music Machines were typically played by vagabonds called “hoebows.” Musicians would vigorously shake the object in time with the other musicians at fireside performances. The separate beads and shapes were made from random trinkets found by Muggles whilst traveling around the country, creating not only a unique sound, but a map of their travels.
-
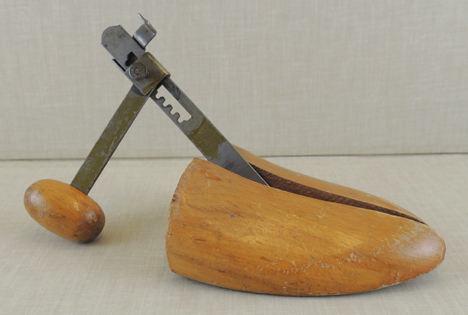
- 32. Nutcracker [c.1946] To operate, pull back the metal core, then place the nut in between the two wood pieces. Ram the metal core through the nut. Not recommended for children under 11.
-
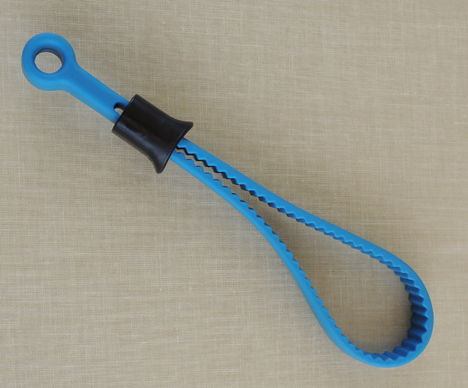
- 33. Pesk Procurer [c.2004] Argus Filch originally invented the Pesk Procurer to catch Cornish Pixies. The device is used somewhat differently in the Muggle world. Acting like a gentle lasso, it is primarily used to capture escaped mice, gerbils, hamsters, and the occasional guinea pig.
-
- 34. Reading Tool [c.1840] Primarily used by children learning to read in school. The tiny holes in the middle of each eye cup can be used to focus on individual words. The two different sizes of eye cups indicate they are used by younger and older children.
-
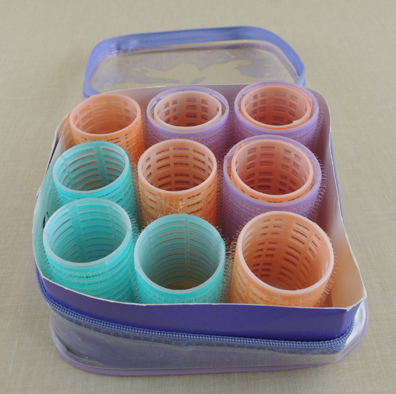
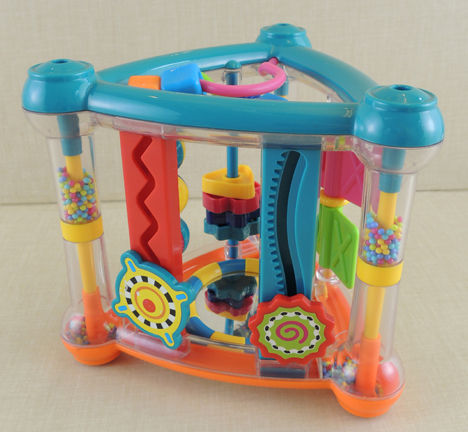
- 35. Shape Game [c.1977] My research indicates that this is one of the hardest Muggle games in existence. Fit the blue ring inside the peach ring inside the purple ring, perfectly. None of my fellow researchers or academicians have been able to complete the challenge.
-
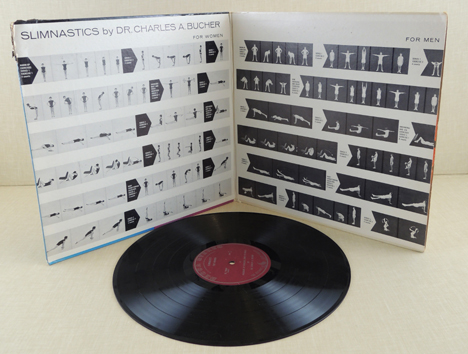
- 36. Slimnastics Language Guide [c.1955] The 1960s saw a handful of new language initiatives. In this era, physical fitness educator (and novice linguist) Charles Bucher developed “Slimnastics,” a language in which speakers use their entire bodies to form a sort of “hieroglyphic.” Here, one can view the entire alphabet corresponding to gender, along with music to accompany training. Unfortunately, Bucher’s vision never quite caught on.
-
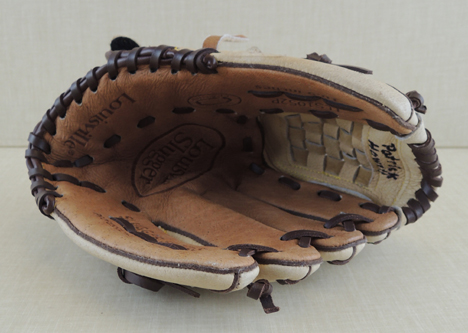
- 37. Slugger Hand Protector [c.2009] Imagine Quidditch without brooms or magic and you’ve got the American game called Slugger. The title of the game suggests why they might need unnecessarily large gloves.
-

- 38. Herbinius Prewett’s Stunning Stealthy Sneak-O-Scope [c.1835] Created by Molly Weasley’s great-great-great-uncle Herbinius Prewett, the Sneak-O-Scope was invented to eavesdrop on conversations. One simply places the dial-shaped piece on the door or wall to listen in. Prewett sold this object to the Muggle medical world in the early 19th century. Its unique super-sharp hearing abilities are used to assess heart health.
-

- 39. Snow Charm [c.2003] Children hoping for a snow day from school would use this object, which activates when the switch is flipped (results would vary). Snow Charms were banned after the 1993 “Storm of the Century” affected 26 US States and Canada. Contraband snow charm use was suspected in a series of 2010 blizzards. It’s interesting to note that teachers have, at times, been caught with these prohibited objects in their homes.
-
- 40. Suspected Horcrux [c.1605] Deeply unsettling, this object is rumored to be one of Grindelwald’s horcruxes. DO NOT TOUCH.
-

- 41. Time Capsule [c.2000] Highly compactable and portable, these time capsules are quite popular in the Muggle world. Small, significant objects are packed in layers of twine and covered with leather, which is then stitched closed. Traditionally, the initials of the owner are written on the front, as well as the year the capsule should be opened. (note the “BMC”, and the 2013 on this sample). It is exceedingly rare to find one of these still intact, which makes this artifact almost priceless.
-
- 42. Muggle Trophy [c.1996] This object can be found in the domiciles of teenage Muggles. The fact that it is displayed in a place of importance (most commonly the nightstand) leads me to believe that these are faux fur trophies of the Crinitus Fortuna Furorem, which is reputed to bring the owner luck, love, and superior fashion sense.
-
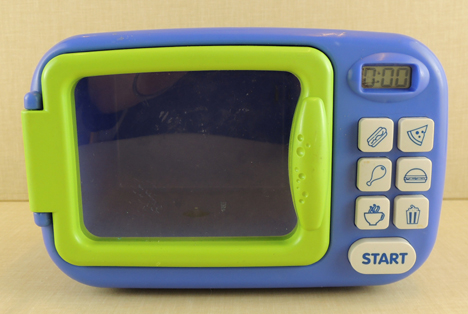
- 43. Squib Assimilation Kit Item: Wave-Cooker [c.1984] As Squibs enter Muggle culture, it is essential that they understand Muggle gadgets. Idris Oakby, founder of the Society for the Support of Squibs, created an “Assimilation Kit” to help Squibs prepare for their new lives. This particular item models the Muggle Wave-Cooker. Remarkably, it doubles as a toy for children. The reason is simple. After a squib is fully assimilated, portions of the kits (most commonly the Wave-Cooker) are traditionally donated to child-care centers.
-
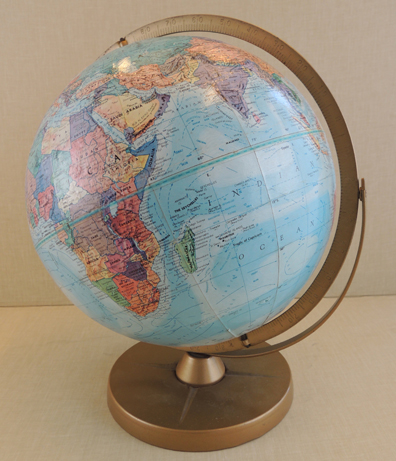
- 44. World Checker [c.1922-1991] After much observation, it is clear that Muggles must use the World Checker to do precisely that — check on the world. From scholar’s houses to schoolrooms, one can observe Muggles far and wide walking up to the World Checker, spinning it for a bit, and pinpointing certain countries. Curiously, the most commonly checked area of this object is the North Pole.
-

- 45. Unknown [c.???] Despite extensive research, I’m still unable to determine what this object is. In the spirt of intellectual camaraderie, I ask that you offer your best guess as to its use *See end of post for kids’ suggestions
MEET TÉA WIMER, CURATOR OF MUGGLE ARTIFACTS
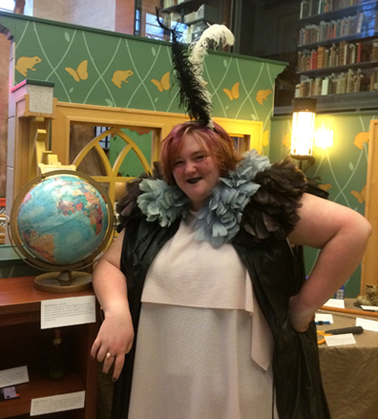
Téa Wimer is a sophomore at Princeton University who intends to pursue Anthropology as her major, as well as creative writing. She’s also a massive Harry Potter fan, which made her the perfect Curator of Muggle Artifacts. With boundless energy, Téa sailed through everything with us – acquisitions, brain-storming, writing, edits, and installation – with creativity and confidence. The labels are a hoot (I couldn’t resist the fun of writing some too), but I particularly like object number 45. Stumped for an explanation, Téa decided to turn it over to the kids for feedback. You can see some of their responses at the end of the post.
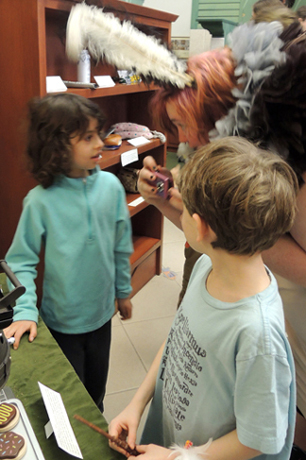
The day of the event, Téa donned her Curator’s uniform (thank you Lewis Center for the Arts Costume Shop!) and strolled the exhibit floor, answering questions, doing demonstrations, and chatting about her findings. All with a tremendous sense of humor and a twinkle in her eye.
How would you describe your relationship with the Harry Potter books?
I was (and still am!) absolutely crazy about the Harry Potter series! I read whatever was released in the series up to that point early in elementary school in a short amount of time, and then my grandmother got me the last two books through pre-order. It’s hard to imagine that the series was still being written and released when I was growing up, because now it’s blown up to be a cultural phenomenon!
My dad is a huge fan of the movies, too, so every weekend spent at his house was spent re-watching at least one of them. Now, I definitely look back on Harry Potter with nostalgia. I keep meaning to re-read them because I’ve forgotten little things, but college and ever-increasing adult responsibilities make it to where I can’t spend as much time as I would like. So now I watch the movies a lot and spend more time on Pottermore than I probably should.
What skills did you bring to the table as Curator of Muggle Artifacts?
I think one of the coolest things about this process was that my developing skills as an ethnographer and anthropologist met with my creative side. I’ve always been looking for ways that those two (seemingly separate) parts of my interests can intersect, and even if this seems a bit “silly,” I really enjoyed taking a previously known object and regarding it as an anthropologist might look at an unknown cultural rite or artifact and creatively thinking up a way that a Muggle might use the given object.
I also had to think of myself as a different character sometimes too, as a wizard who is genuinely baffled by Muggles and their weird ways. I think that my child-like curiosity and imagination has never really left me, and that was also a huge plus as the Curator of Muggle Artifacts.
Where did you get the artifacts?
Dana, Katie, and I took a day and went to a nearby thrift store. We sifted through every inch of the store and picked out the most bizarre and random objects, and then convened at the end and I chose what I thought would be best to use. [Note: Objects 2 and 12 are from the private collection of Katie Zondlo].
How did you decide between the different artifacts?
There wasn’t really a set system for deciding between the different things we all amassed. I tend to be pretty impulsive, so sometimes it was just simply knowing that the object had to be in my collection because it was so weird – such as the Slimnastics language guide or the fuzzy pink Muggle trophy. You just can’t pass it up! Of course, sometimes I had to be practical, so if I felt like an object wasn’t giving me ideas, we would put it to the side. As we drew nearer to the event, some of the objects still weren’t prepared, so they were scratched and used as props or conjoined with other items in the collection.
 How did you decide to approach your exhibit labels?
Dana and I set up a lot of deadlines. I had to have a certain amount of labels done by a certain date, which was intimidating because we had nearly fifty objects and only so much imagination (plus it was really my first project with a real deadline that mattered, outside of school of course). But I just ended up doing the ones that I could think of very quickly first, and then the ones that needed a bit more time and consideration, I went to Dana and Katie for inspiration.
Which was the hardest object to write a label for?
There wasn’t any one particular object that was the hardest, but rather a bunch of the items gave me a hard time. It tended to be objects that had very straightforward uses, such as the World Checker (globe) or the Muggle wand (remote). I also noticed that it tended to be more modern items that gave me trouble, for obvious reasons. It was hard to be imaginative about things that I use on a daily basis, but a lot easier to imagine what a rusty old saxophone could be used for!
Which object is your favorite?
My favorite object is the Wave-Cooker, which is part of the Squib Assimilation Kit. It gave me so many cool ideas about what it must be like in J.K. Rowling’s world, as a magical family member who has no actual magic. What would that look like historically? What if there were social justice movements to make magical witches and wizards more accepting of their magically mute friends, relatives, and neighbors? What if some of the geniuses we know in history were actually Squibs who just knew more about the universe due to their upbringing in the magic world? It’s so interesting to me.
Another favorite few objects are the ones used by rich Muggles, like the curtain hooks (fancy bookmarks) and the custom engagement rings (beautiful glass napkin holders with giant flowers) because I think that working class people like my family really have no clue or can even grasp what a more well-off person can do with their time and money, so I think the imaginative process was close to the real thing (being a wizard and thinking about Muggles academically).
 How did the event attendees react to your exhibit?
Overall, I think a lot of people loved it. Some parents were quick to explain what the objects actually were, and a couple of kids even came up to tell me that I had no clue what I was talking about – my favorite being when one of the children said I should be fired from my job at Hogwarts. Everyone seemed to really enjoy it, parents more than kids sometimes, and I’m very grateful that I got to share it with everyone at the event!
* Suggested uses for unknown object number 45 include, but are not limited to: hairbrush, spoon, sled, back scratcher (both human and cat), scalp scratcher, glove cleaner, jewelry hanger, shower scrub, mermaid’s display hanger, lost DAB, hat holder, fish’s home, hand of glory decoration, something that makes things smell good, telepathic device, skin exfoliating loofa, plant that makes you inconspicuous, very flammable device, future-predicting crystal, torch (both Muggle and ever-burning), booger holder, part of an underwater volcano, teleportation device (specifically, to the bathroom), space artifact, petrification device, monster that will grab you, exploding popcorn butter that’s frozen in time, and weirdly…coral.
** I’ve got the Deluxe Chicken Grooming Kit in my office if anyone needs to borrow it.
 Of everything in the Harry Potter universe, I must admit I find the wands most fascinating. Not just because they play an integral part of spell casting – they also reflect the unique personalities of their owners. Additionally, shouting in Latin is so much more exciting when waving a wand. We tried to capture a little of that magic at Wand Works, our Harry Potter event.
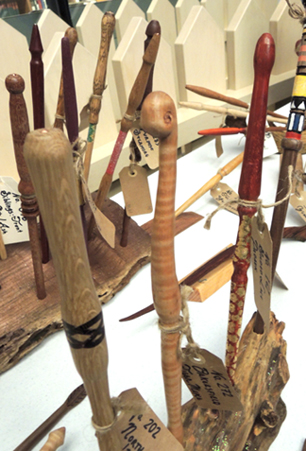 Originally, the event was just going to be about wands, wand making, and wand testing. But then I started thinking about the other ways students prepare for Hogwarts. So we brought book bags, text books, and owls into the mix. And, while I’ve recreated an assortment of Hogwarts classes over the years (check out this
 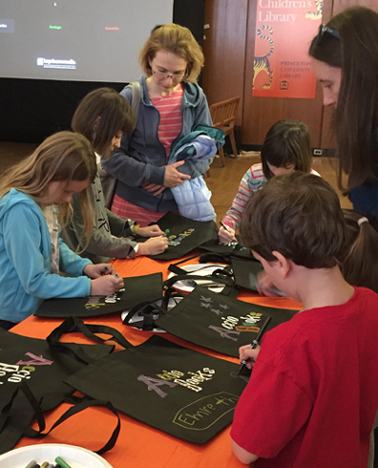 Those are 13.5″ x 14.5″ polypropylene totes from 4Imprint. Specifically, it’s the “Value Polypropylene Tote (item #103873). We tested a couple of polypropylene bags for this project, and 4Imprint’s held the Crayola metallic markers ink beautifully (it smeared on the others). Also, 4Imprint had the best prices and customer service, flat out.
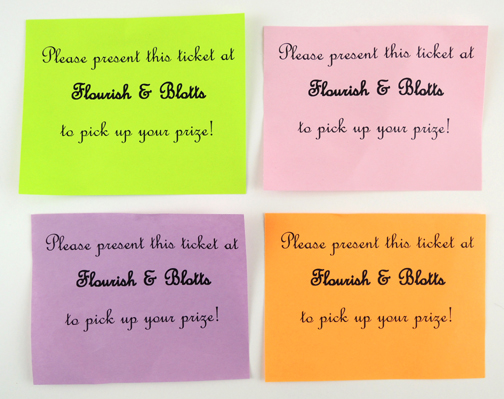 Here’s our Flourish & Blotts, staffed by Princeton junior Gabrielle Chen (she’s also the artist behind that fantastic sign)!
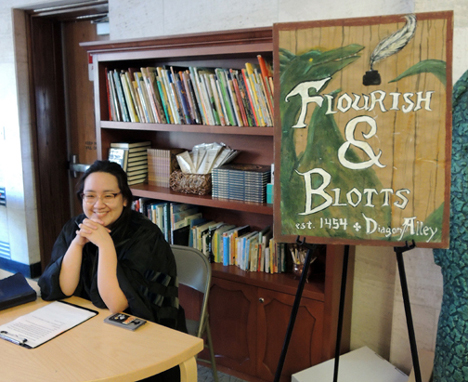 Behind Gabrielle was a shelf stocked with copies of The Tales of Beedle the Bard, Quidditch Through the Ages, Hogwarts: A Cinematic Yearbook, and the Fantastic Beasts and Where to Find Them screenplay (alas, we missed the release of the text book version of Fantastic Beasts by mere weeks). There were also real quill pens with powdered ink packets, and some adorable Harry Potter Magical Creatures coloring kits.
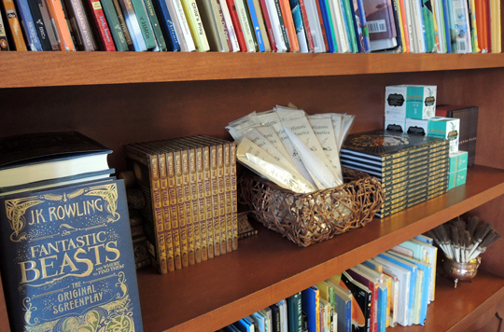 The tickets were color-coded with items on the shelves. Hand in your ticket, and receive the matching item! Just in case you’re wondering, we did sort and distribute the event bags by estimated age of the child. This was to insure that a 4 year-old received a Harry Potter coloring kit, not a copy of Fantastic Beasts.
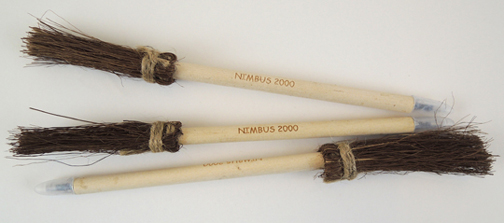 These are “Personalized Witch’s Broom Pens” from Oriental Trading Company ($12 a dozen). For no extra fee, you can customize them with 1 line of text up to 16 characters in length. We went with “Nimbus 2000.” Everyone LOVED them! In fact, the whole table was a lot of fun. It was terrific to see kids, holding books (or quills, or coloring kits, or broom pens) with big grins on their faces.
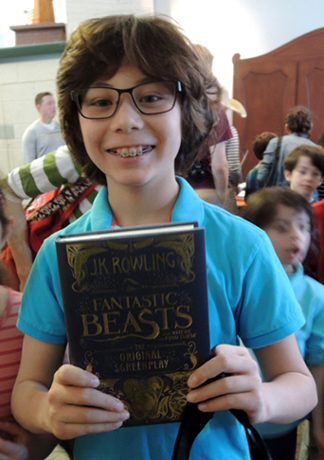 Elsewhere on the event floor was real-life wandmaker Lane O’Neil from Gray Magic Woodworking. You previously met Lane in
 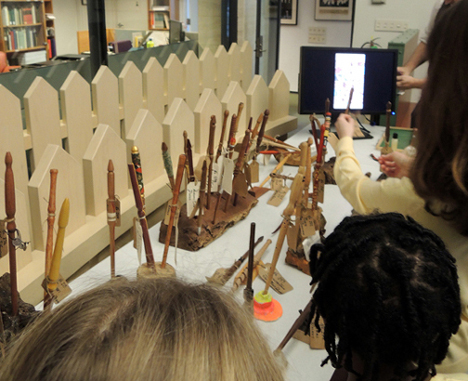 Lane also displayed his lathe, tools, different types of wood, and wands in different stages of completion. He did demonstrations, showed slides, and answered questions throughout the entire event.
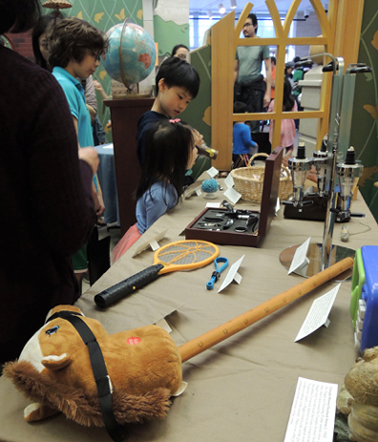
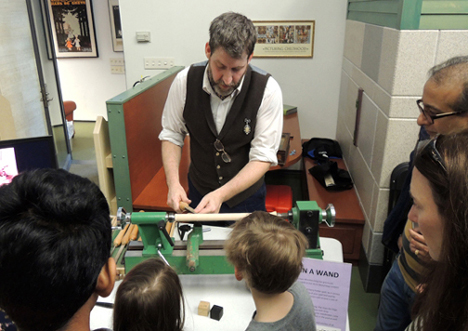 Not far from Lane was our Muggle Artifact exhibit, curated by Princeton University sophomore Téa Wimer. The exhibit consisted of 45 Muggle objects complete with informative exhibit labels. Below, two attendees ponder a Cookie Slicer (which, amazingly, looks just like an old school photo enlarger).
 Owls are another must for Hogwarts students, so we had a table where kids could make these awesome and super simple
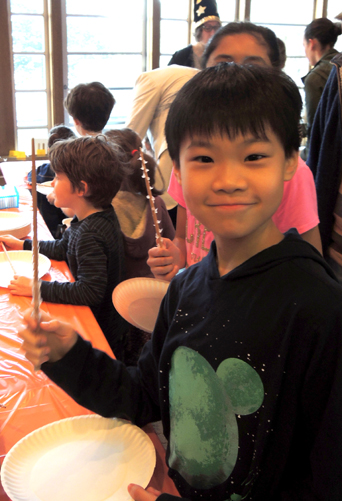
 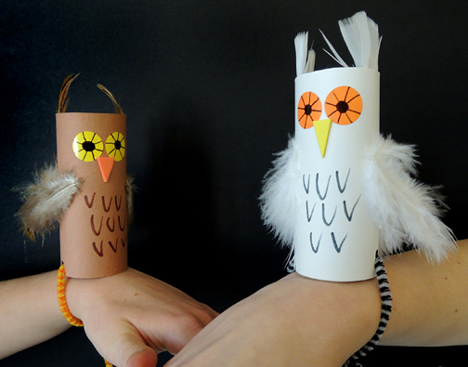 And now we come to the main event – THE WANDS. After much searching and testing, we settled on wands made from cooking chopsticks, hot glue, and paint. They are, in fact, very much like the wands our kid tester made for her
 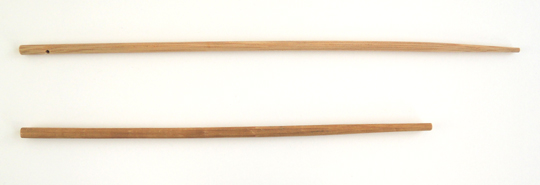 For the event, we made trays out of box lids, separating the wands into blunt and pointy sections. This was primarily for the benefit of parents and caretakers. The pointy chopsticks were definitely the most popular, but we also had many adults who were very grateful for the blunt wands. There was even some quietly-switch-from-pointy-to-blunt-while-the-kid-is-distracted going on.
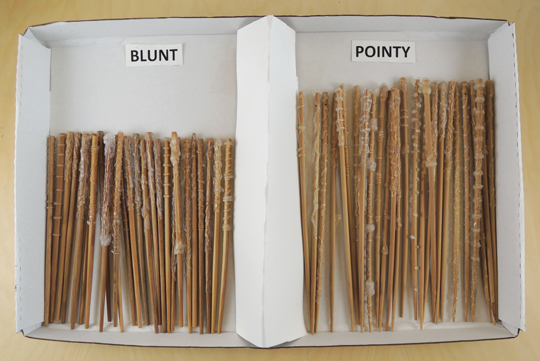 Next came the hot glue. While we would have loved for kids to make their own hot glue designs at the event, we knew that just wasn’t possible on a large scale. So we hot glued all the wands in advance. It took us a couple months of chipping away here and there, but in the end we had hundreds of wands, and no two were alike.
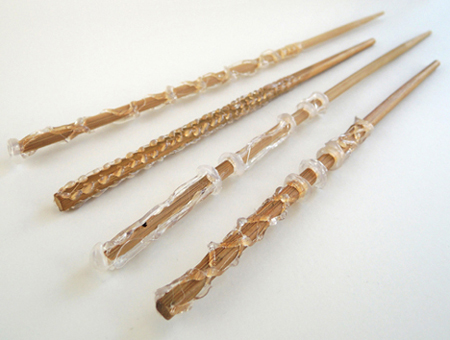 Next, the paint! After testing a number of different paints, we settled on Michaels Craft’s in-store brand, CraftSmart. We used their satin acrylic paint because it was water-based, non-toxic, fast-drying, and there were lots of different shades of brown. The regular acrylic paint was too dull, but the satin left a really nice finish on the wand.
 At the event, kids selected the wand they liked from the tray, and then picked the paint color they wanted. To make the color selection easier, we made several paint choice panels out of
 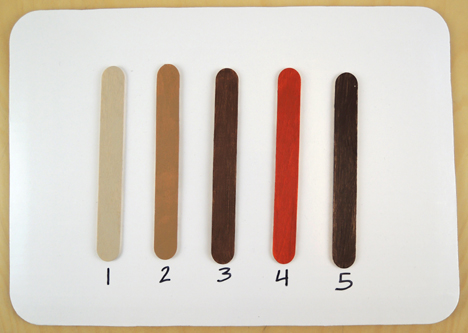 From left to right, the CraftSmart satin acrylic paint colors are khaki, golden brown, brown, burnt orange, and espresso. Burnt orange and espresso were definitely the most popular. But all the colors looked fantastic.
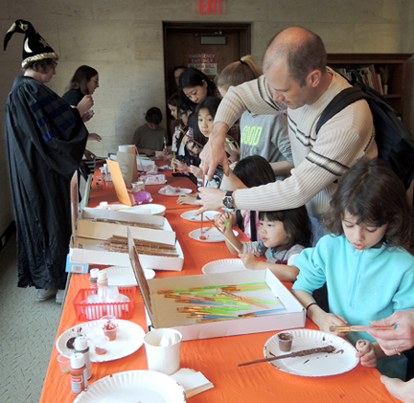 This paint was extremely fast drying on the wood, even with multiple coats. The hot glue, however, was another story. In order to dry the wands faster, we put together a wand-drying chamber out of a piece of cardboard, jumbo binder clips held down with packing tape, and 2 box fans running on low.
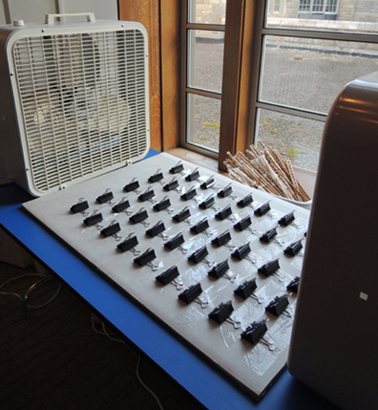 Below you can see the wand drying chamber in action, with the wands inserted in the clips. At the event, kids wrote their names on little bits of paper, which were clipped with the corresponding wands. Depending on how many coats of paint were on the wand, it typically took 5 – 10 minutes for a wand to dry in the chamber (15 if there was a LOT of paint).
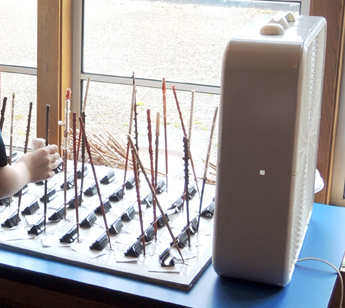 To be clear – the wand drying chamber was tucked behind the event tables, away from the crowds. Only event staff had access to it for obvious reasons. However, if I was to do this event again, I would definitely add a designated “Wand Pick-Up Area” to make things run even more smoothly.
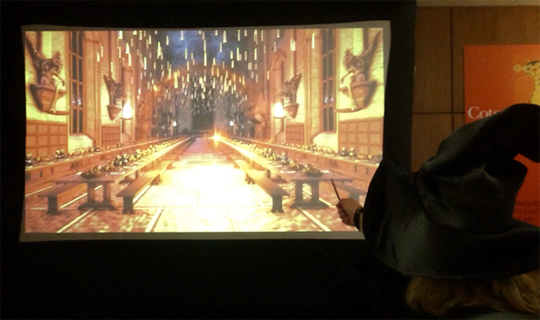 All the details of the game, as well as video and a free download, can be found
 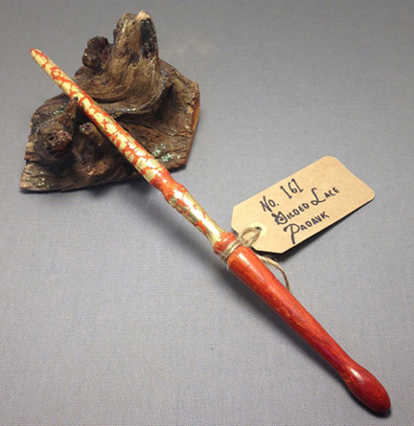 Does the wizard choose the wand? Or does the wand choose the wizard?
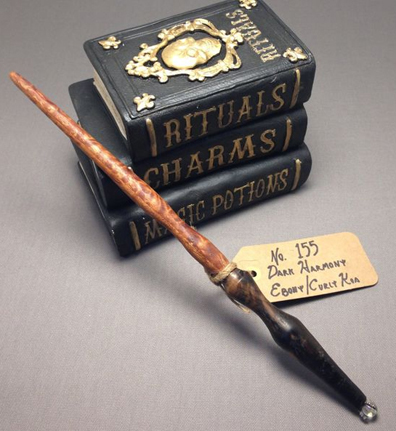 Fantastically, Lane donated 3 of his wands to our Accio Wand blog contest! Readers of all ages were invited to submit an original Harry Potter spell, be it silly or serious. The winning entries are posted
 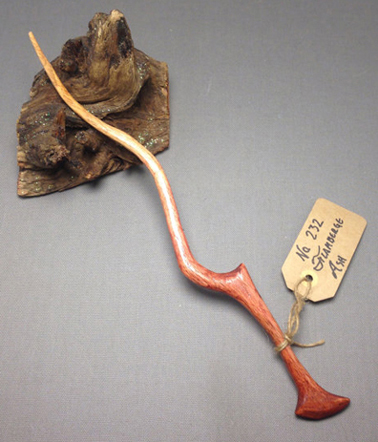 What sorts of woods do you use?
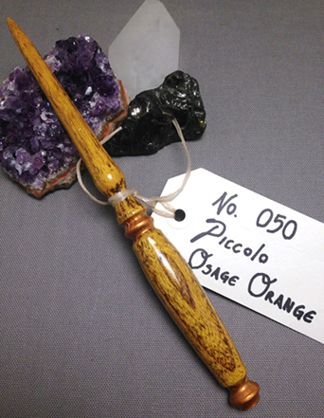 Where do you acquire the wood for your wands?
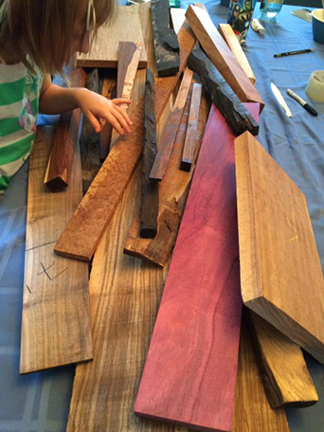 My favorite place is called Hearn, they are located in Oxford, PA. It’s like a candy store for people who craft wood. They have everything from domestic scraps to 16′ slabs of exotic wood shipped from the hearts of far away continents.
 When it’s just about fully shaped, I use sandpaper to smooth it – working to smaller grits until I’m happy with the texture. I can also stain or paint the wand while it’s spinning. I usually use a carnauba wax/ tung oil blend to finish fully.
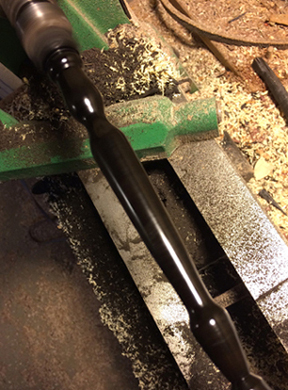 When I’m just about done, I “part” the wand from the lathe by cutting the material away by the tip or pommel until the wand falls off. I move the piece to the work bench, saw the remaining scrap block off, sand the two rough ends, and finish with carving, wood burning, or other decorations. I tag it, give it a name, and a number.
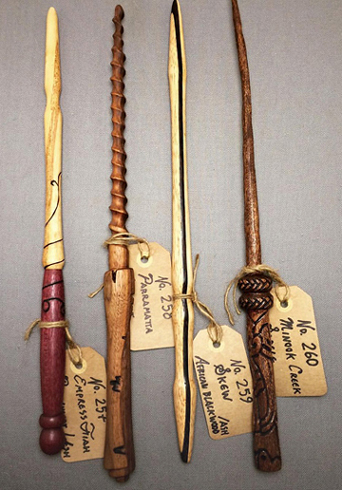 How long does it take to make a wand?
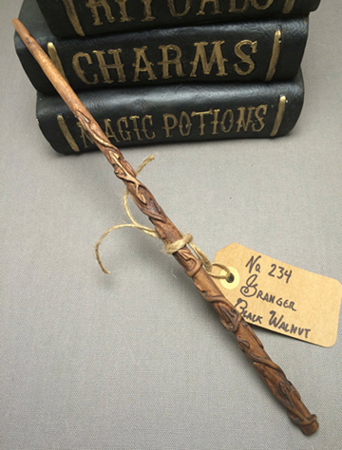 What locations have your wands shipped to?
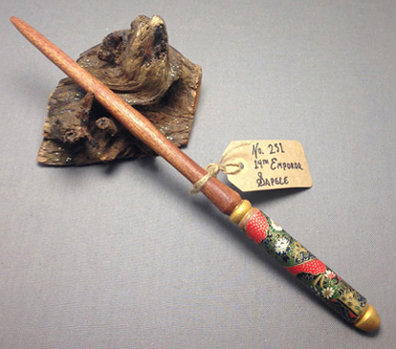 What’s the most unusual or significant wand you’ve ever made?
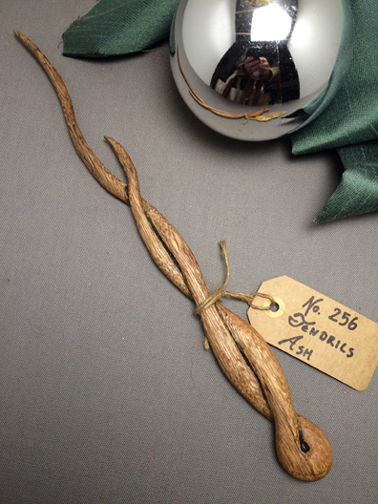 The most significant wand I’ve ever made is a tie. I made a Beech wand that was chosen by a young girl from the Make-A-Wish Foundation. There wasn’t anything too special about it other than the leather wrapped handle, but she chose it.
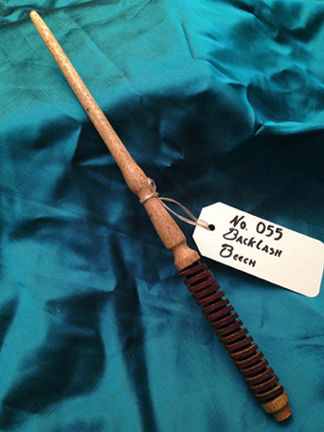 The other one was purchased by a mother in London, England. She bought a Japanese Maple for her son Harry for his 10th birthday…that was pretty cool. His mother sent me a photo.