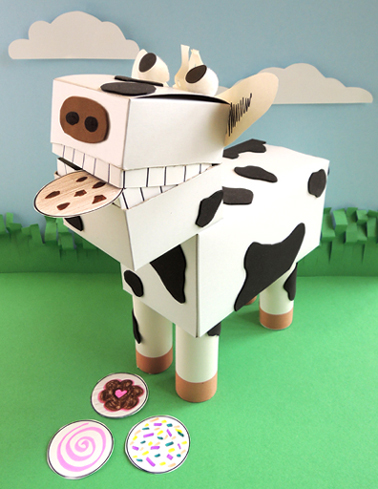
 Do cows and cookies go together? You bet. Especially in this matching and sequencing game we created, complete with a grinning, cookie-eating cow!
We read The Cow Loves Cookies, written by Karma Wilson, and illustrated by Marcellus Hall (Simon & Schuster, 2010). All the animals on the farm enjoy their daily fare. Horses eat hay, the chickens enjoy chicken feed, and the hogs dig enthusiastically into slop. But the cow gets (and LOVES) cookies! Why? Everyday, the farmer and the cow share a picnic, and finish the meal with cookies (which he provides) and milk (which she provides). The clever rhymes make this a super fun read-aloud. By the end, the kids were all joining me in the refrain, “But the cow LOVES cookies!”
You’ll need:
- 1 small box (mine was 4″ x 4″ x 4″)
- A box cutter
- 2 strips of white card stock (mine were 1.25″ x 10.5″)
- 1 large box (mine was 4 ½” X 4 ½” x 9”)
- 4 toilet paper tubes
- White, brown, black, and pink construction paper
- 2 medium pom-poms (approximately 0.75″ in diameter)
- 2 black dot stickers
- 1 cookie game template, printed on 2 sheets of 8.5″ x 11″ white card stock
- Scissors, tape, and glue for construction
- Markers for decorating
- Hot glue
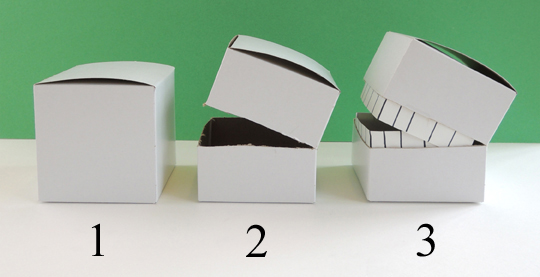
First, the cow’s head. Use a box cutter to slice 3 sides of a small box. The uncut 4th side of the box is the hinge of your cow’s mouth. Use a black marker to draw “tooth lines” on 2 strips of white card stock, then attach the strips to the upper and lower parts of the mouth.
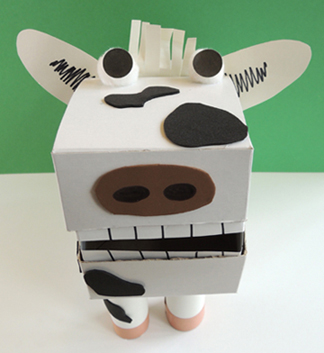
 Stick a brown oval nose on the front of the box (we used self-adhesive foam, but construction paper works too). Hot glue a pair of pom-pom eyes to the top of the box, and use black dot stickers (or circles of black construction paper) to create pupils. Use white construction paper to add ears and a fringed forelock.
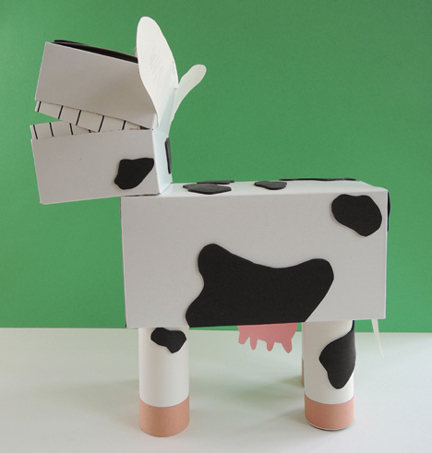
 Wrap 4 toilet paper tubes with white construction paper, then hot glue them to the bottom of a large box. Hot glue the cow’s head to the edge of the box as well. Add an udder, a tail, and 4 brown construction paper hooves.
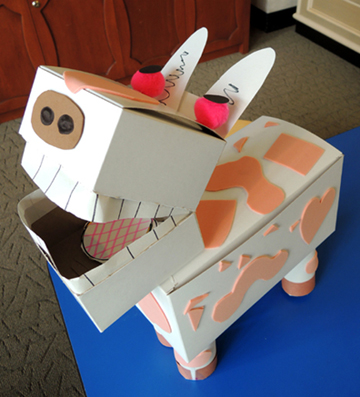
 The final step is to cover your cow with spots. We used sheets of self-adhesive foam that the kids cut into customized spots, but construction paper is also an option. I definitely recommend offering a rainbow of spot colors – the results are fantastic. Check out this pink and white cow with the heart spot on her flank!
 The cow is finished, now for the cookie matching and sequencing game! Here’s how it works. Cut 4 white circles from the template, then use markers to decorate each circle like a cookie. All the cookies needs to be different.
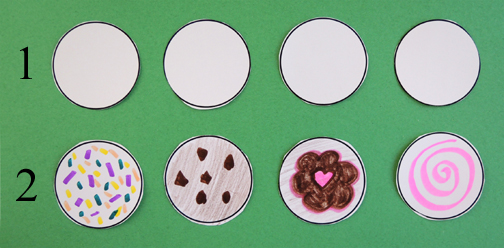 Cut the rest of the template into 5 strips, making sure that each strip contains 4 cookie circles. Decorate the strips with different cookie sequences. All the strips should be different (and it’s totally OK if you don’t decorate all 5 strips).
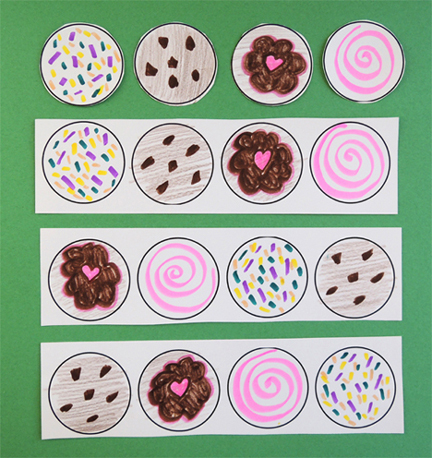 To play the game, randomly select a cookie strip. Match your cookie circles to the sequence on the strip, and then feed the cookies to the cow in that order. When done, remove the cookies from your cow’s mouth, select a different strip, and play again! You can play the game at your own pace, or have a countdown from 10 to make it more challenging. Another option – place the cow on the other side of the room, so you have to run back and forth from the cookies to the cow!

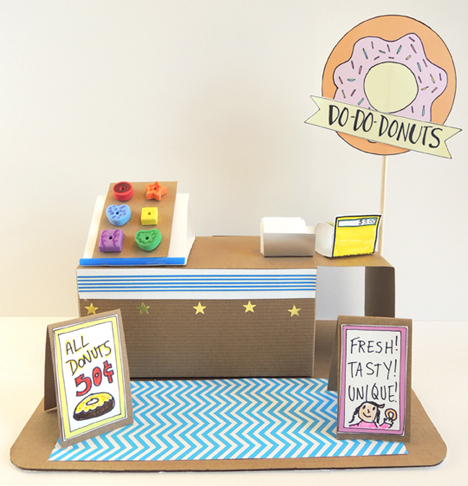
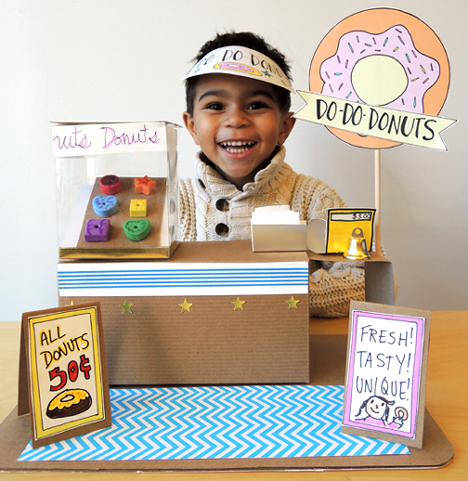 The shop is open, the customers are arriving, and you, the donut chef, must make the most delicious, different, and decadent donuts you possibly can. But wait, there’s more! Your donut shop doubles as a matching game, thanks to the coupons tucked behind the counter!
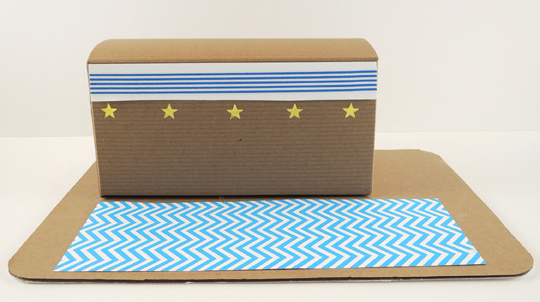
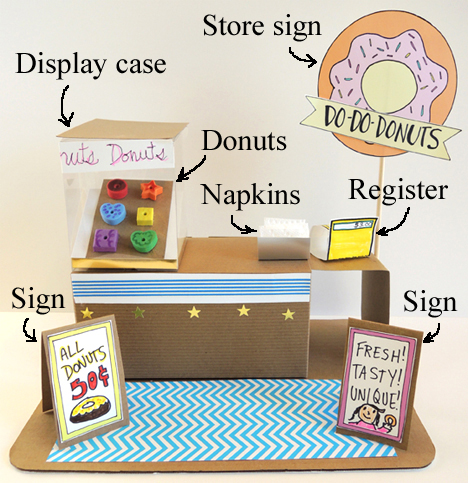 First, glue a piece of patterned paper (or construction paper) to the top of the corrugated cardboard base. It’s OK if it doesn’t cover the entire base. Decorate a box with patterned tape and/or markers (we also used star stickers). Hot glue the box to the base, but not smack in the middle. You’ll need to leave a little room in the front for your shop signs, and a little room on the right-hand side for an extra counter.
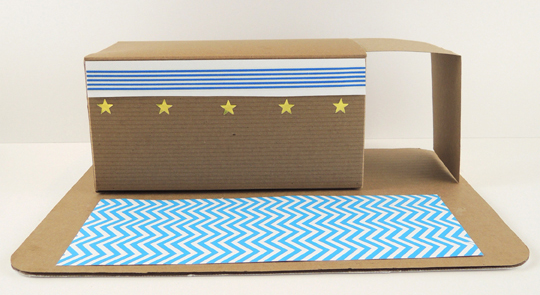
 Fold, then tape a piece of tagboard to the side of the box to create the extra counter.
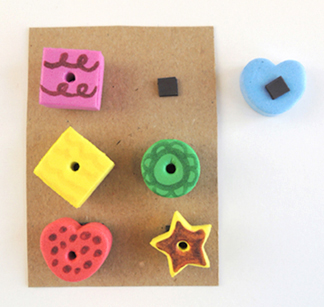
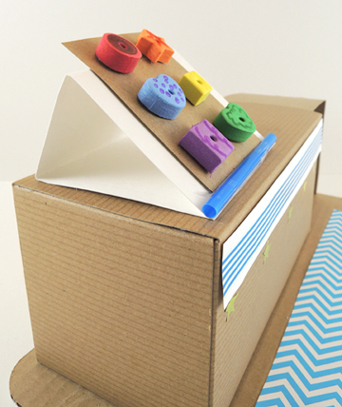
 Set the base aside for a moment, it’s time for donuts! Because we wanted to display, remove, and reset the donuts on the tray, we made them magnetic. Use markers to decorate various foam beads like “donuts,” then attach a little piece of self-adhesive magnetic tape to the back. Attach a matching piece of magnetic tape to a tagboard “tray.” We made 2 trays of donuts for our shops.
 I made display cases for the shop using leftover plastic boxes from
 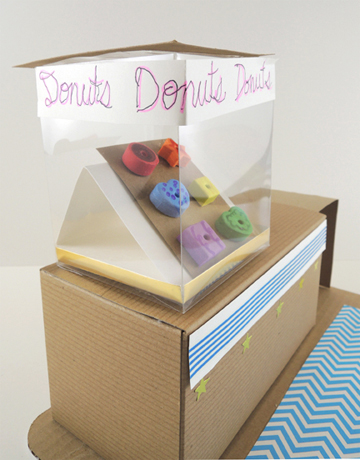 If you don’t have a plastic box, just use the triangular base! To keep your donut tray from sliding off, tape a small piece of plastic drinking straw to the bottom of the base.
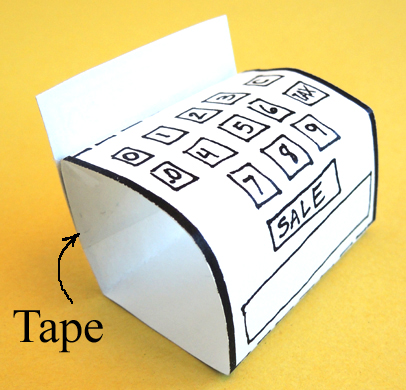
 Your shop will need a cash register, and you might recognize the one on the template from
 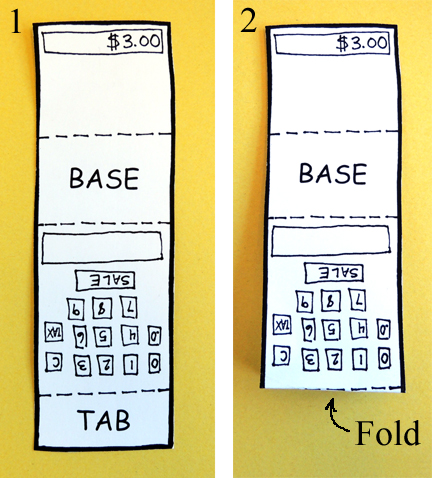 Then, fold both sides downwards from the base like this:
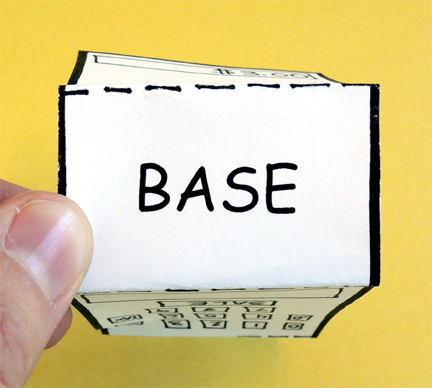 Curl the tab around to meet the opposite side of the register
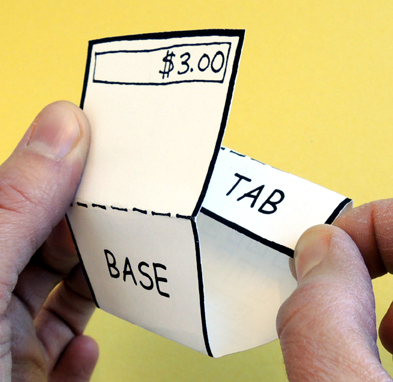 Then secure the tab with tape. Hot glue (or tape) the register to the extra counter.
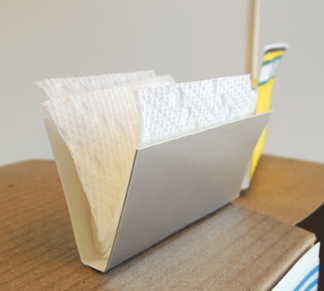
 I couldn’t resist adding a napkin holder to the set too. It’s a folded piece of silver poster board with little bits of paper towel tucked into it. Hot glue (or tape) it to the counter.
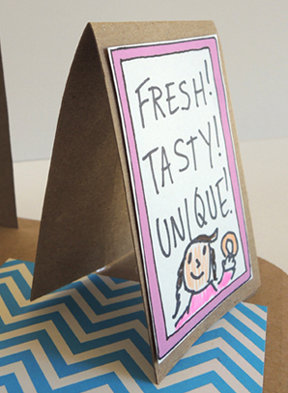
 The blank signs on the template get colored in and attached to folded pieces of tagboard.
 And finally…the giant donut sign! Write the name of your shop on the banner, and tape (or glue) it across the giant donut. Tape the sign to a wooden dowel, then tape the dowel to the side of the extra counter. Here’s a finished stand with a display case:
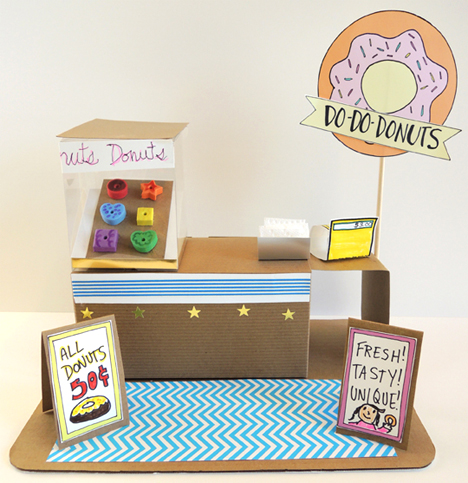 And here’s the version with the simple display stand. Both are totally adorable.
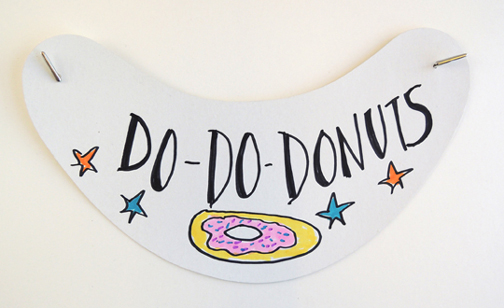
 We had some blank white visors in the art cabinet (from Discount School Supply – 24 cost $9), so I dug them out and we decorated them with the names of our donut shop as well.
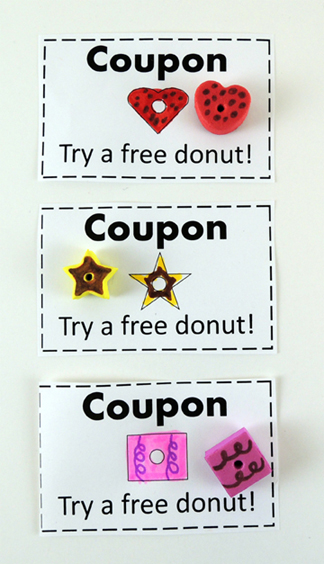
 Your shop is ready, now you need to entice your customers to try some donuts! We developed a simple coupon matching game for the kids. Print the coupons from the template, then draw donuts on the coupons that match the donuts in your case. As your customers arrive with their coupons, see how fast you can find and match their orders!
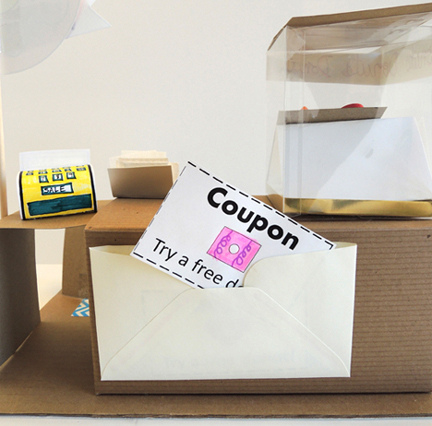
 Make sure to hot glue (or tape) an envelope to the back of the counter for convenient coupon storage.
 We wish you the sweetest success in all your donut endeavors!