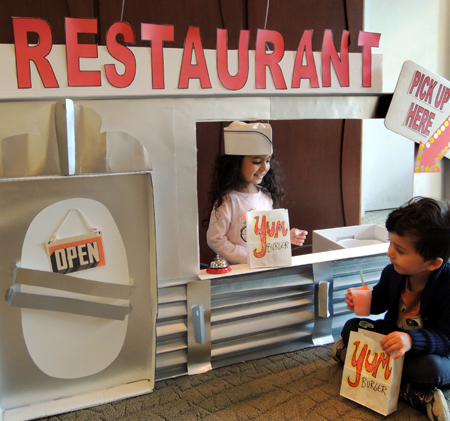
 Get your piping hot hamburger, crispy crinkle fries, and ice cold soda served over the counter of this awesome 1950s diner! The cook is taking orders, and our fun matching game insures that your customers will get exactly what they like.
We read Hamburger Heaven by Wong Herbert Yee (Houghton Mifflin, 1999).
Every Friday after school, Pinky Pig works at Hamburger Heaven. She’s saving for a new clarinet. But slow business means that Pinky might soon be out of a job! Instead of despairing, she gets to work, asking different animals what they like to eat. She puts together a new menu and then papers the town with ads for Hamburger Heaven’s new offerings. That Friday, a huge line of customers is waiting to try burgers with pine needles, burgers with worms, burgers with beetles, burger with slugs, snails, stinkbugs, crickets…there’s something for everyone! Hamburger Heaven is back in business, and Pinky’s clarinet dream becomes a joyful reality.
You’ll need:
- 3 paper bags
- 3 small plastic cups (ours were 5oz)
- Brown, yellow, and orange tissue paper
- 2 drinking straws
- 3 pieces of white card stock (approximately 4.25″ x 5.75″)
- 3 jumbo craft sticks (mine were 8″ long)
- Brown, green, orange, red, and tan construction paper
- A 1950s diner (more on this later!)
- Scissors and tape for construction
- Markers for decorating
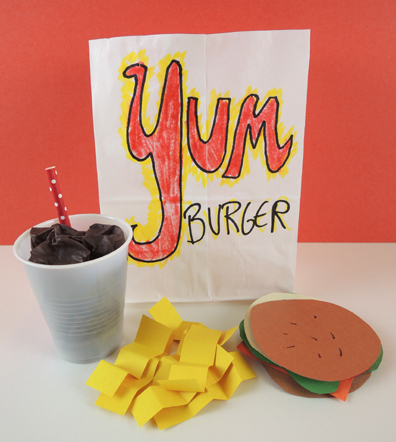 This project consists of 3 paper bags, 3 sodas, 3 sets of fries, 3 burgers, and 3 “customer cards.” First, cut the paper bags down to 7″, then decorate the fronts with your restaurant’s logo. To make the soda, squish three, 9″ x 13″ pieces of tissue paper into 3 small plastic cups. Add a half of a drinking straw to each cup (our straws were 4′ long). For the fries, accordion fold 1″ x 3″ pieces of yellow construction paper. We’ll get to the burgers in just a moment.
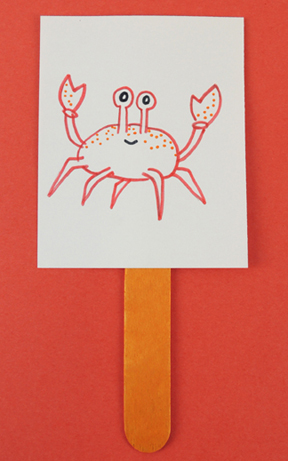
In addition to the play food, this project is also a game in which you match individualized burgers to pictures of your customers. To make the “customer cards,” draw 3 creatures on 3 pieces of white card stock. Then tape each “customer card” to a jumbo craft stick, like so…
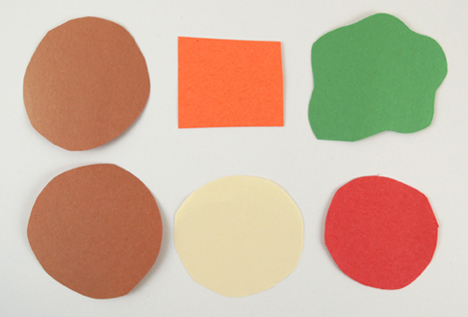
 Now for the matching burger! Each burger consists of 6 pieces of construction paper: 2 brown buns, 1 slice of cheese, 1 lettuce leaf, 1 tan burger patty, and 1 tomato slice. Since you’re making 3 burgers, you’ll need 3 sets of those 6 pieces.
 To customize the 3 burger patties, draw what each creature eats on a patty. For example, one of our creatures is a crab. Among other things, crabs eat fish parts and algae. So we drew them on the burger patty (here’s a creature diet information sheet we posted during story time to help kids).
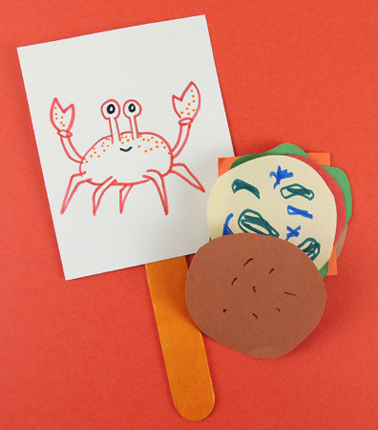 Use tape loops to stack and secure your burgers (just make sure you can lift the bun a little and see what you drew on the burger patty). We used a brown marker to add some “sesame seeds” on the top of the bun as well. Grab your food, and your customer cards, and head for the diner!
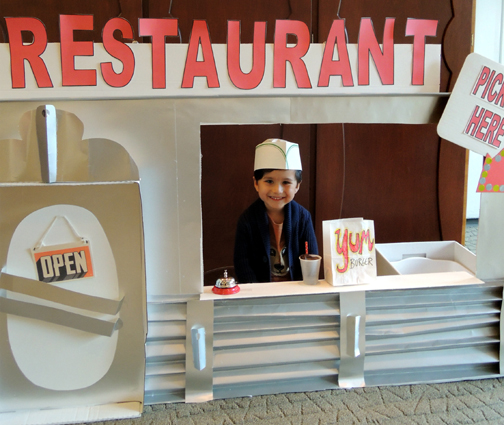
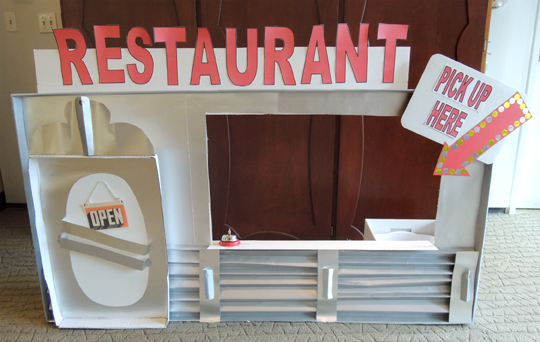 This diner is Marissa in all her awesomeness. The front is a recycled box lid (first used for this ice skating story time). The diner door is a recycled box lid. The whole thing is covered with silver metallic poster board. Just look at her fantastic metal corrugations on the front! The vintage “Open” sign on a string! The oval door with diagonal push bars! This has to be one of my favorite Marissa creations (after the pig marching band of course).
Here’s what the diner looks like from the back. In the box on the left you can see the crinkle fries loaded into the “fry basket.” We prepped the fries in advance, refilling the fry basket, as needed, during the matching game.
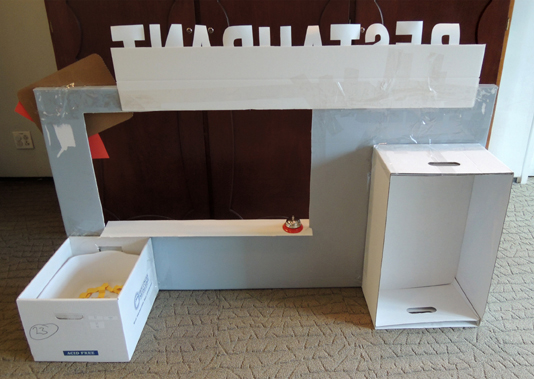 If you don’t have time to make a diner, no worries. Use a tabletop, small desk, or even an overturned box! However, I do recommend including a counter bell (in the past, I’ve borrowed the bell from the library’s circulation desk). Since our bell was going to get repeatedly slammed by kids, I taped it to the counter. You might want to do the same.
Here’s how to play the matching game. Kids gave their grown-ups (or siblings) the 3 customer cards. Then they sat behind the diner counter, food at the ready. One by one, the customers “walked” up to the counter.
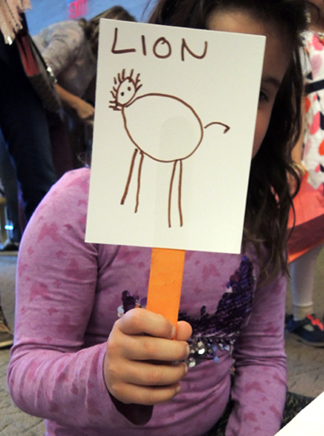 Kids matched the customer to the appropriate burger, took a drink order (we offered cola, lemonade, or orange pop), and grabbed a generous serving of crinkle fries.
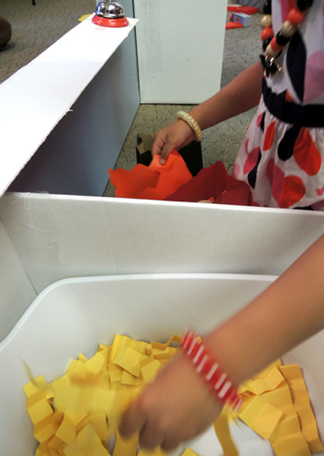 They bagged everything, briskly dinged the bell, and shouted “Order up!” Once that customer had left, it was on to the next customer until every creature had been matched to a burger. Did we have fun? Oh yeah! In fact, we left the diner up for 20 minutes after story time for repeat customers. There was lots of enthusiastic bell dinging and BIG smiles!
 Want to supersize that? Check out these giant burger relay races at our Cloudy with a Chance of Meatballs story time!
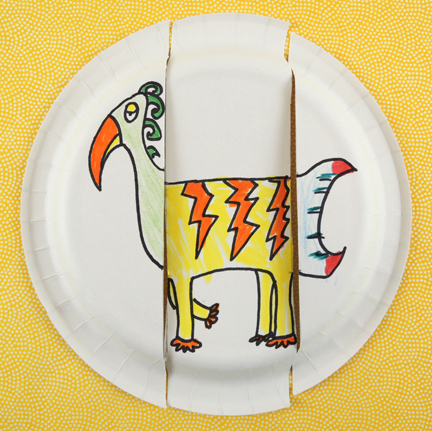
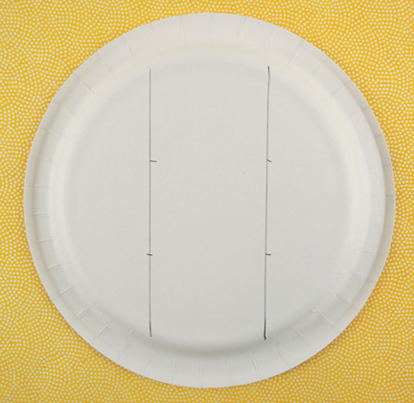 That’s ALL the prep you need! Now draw your creatures on the plates (we went fantastical instead of realistic). Make sure the necks, bodies, and tails start and stop along the notches:
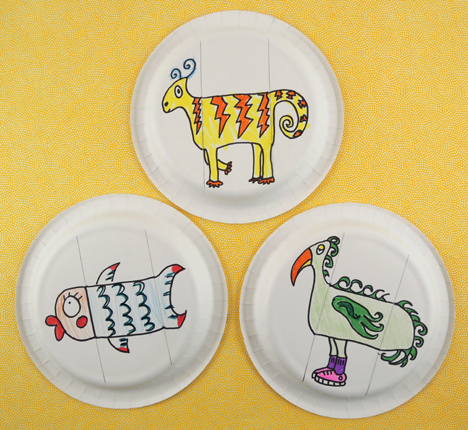 Cut the paper plate along the pencil lines, resulting in 3 separate pieces. Have the kids walk around the room with their pieces, mixing and matching with others. The results are very funny…
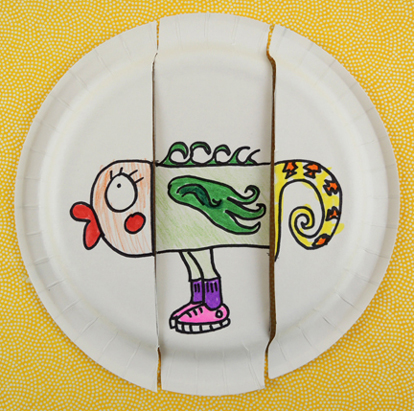 You might wonder why we used paper plates instead of index cards or pieces of paper. We found the elevation of the paper plates nice to draw on, and the workspace just tall and wide enough for many forms of creatures. Also, the raised edges of the paper plates make it easy for little hands to pick up, manipulate, and match the pieces.
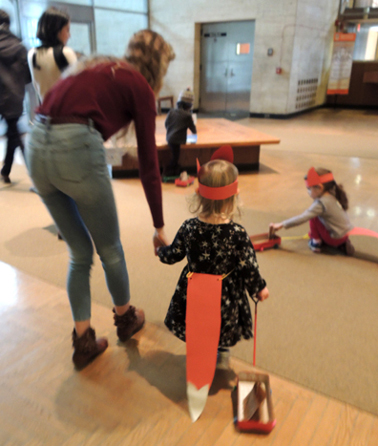
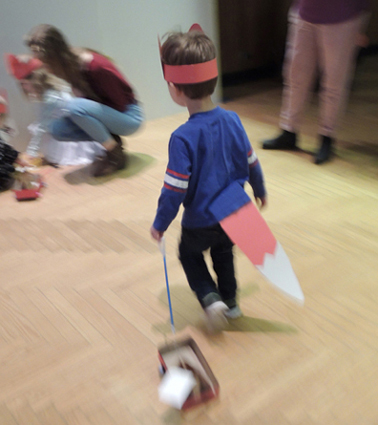 Roll out the red wagon…this little fox is going to market! We made tissue box wagons, grabbed our shopping lists, and headed to the market to play a vegetable matching game. Sporting fox ears and tails, naturally.
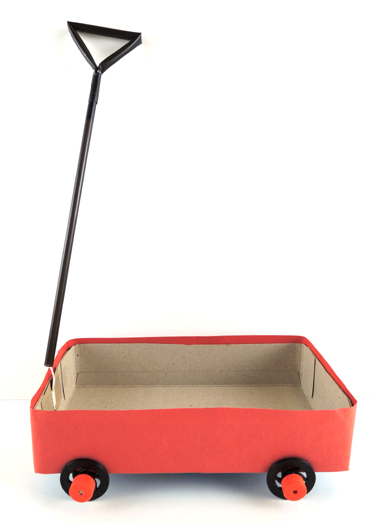 We’ll begin with the little red wagon! Cut a large tissue box down to 1.75″ inches tall, then wrap with red paper. You can go with our standard wheel assembly (instructions
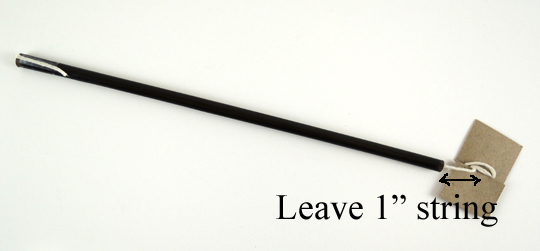
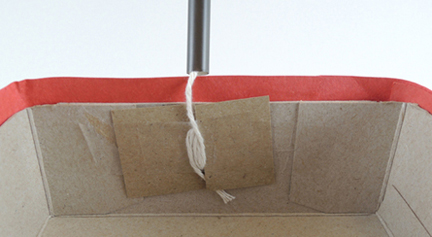
 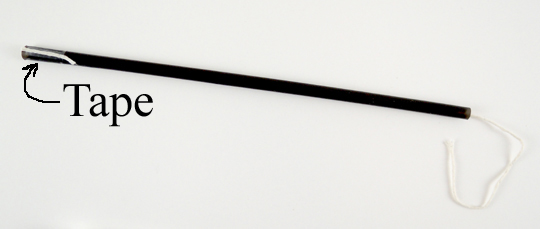 Next, cut two notches the center of a 1.25″ x 2″ piece of tagboard. This is the anchor for your wagon handle. Wrap the string around the notches in the tagboard, but don’t wrap all the string around it! Leave 1″ of string between the tagboard and the end of the straw. This will allow the handle to move left and right while you’re pulling your wagon.
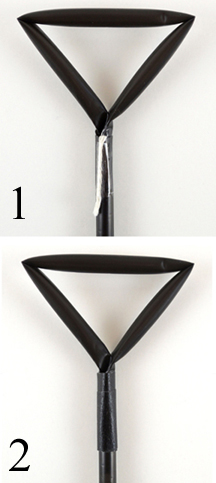
 Bend a second drinking straw into 3 sections, pinch the ends together to form a triangular grip on the handle, then tape the ends of the straw firmly together.
 Fold and slide the taped section of the handle into the open end of the first straw. Cover the taped string with colored masking tape if you like (I used black in the photo below).
 Here’s what a finished wagon handle looks like. A drinking straw handle, a 1″ gap of string, and a tagboard anchor wrapped with the remaining string.
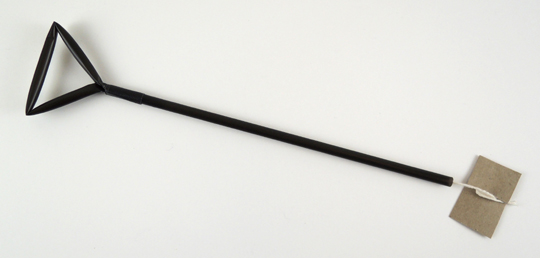 Tape the tagboard anchor to the front interior of the wagon. Done!
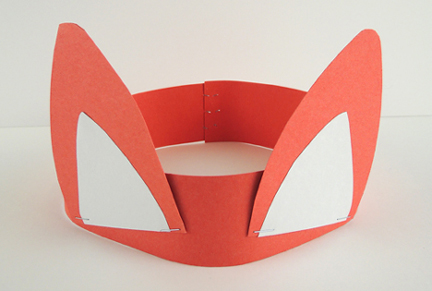
 To make your fox costume, circle a strip of red poster board around your head, then staple it. Cut a pair of fox ears from red poster board, and add white construction paper ear interiors. Staple the ears to the headband. We attached our ears close to the front of the headband, and tilted them upwards slightly. Somehow, that just looked more foxy.
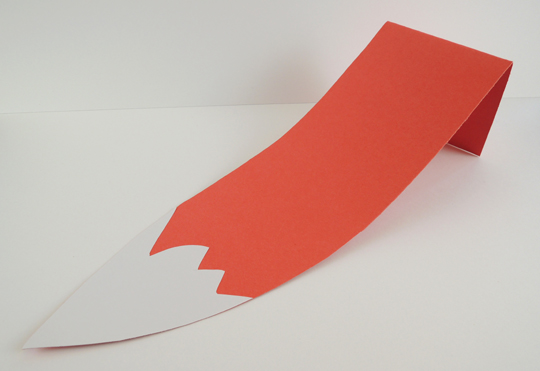
 Next, cut a 6″ x 22″ rectangle of red poster board into a fox tail shape. Glue a little brush of white construction paper on the end of the tail, and tab the top. The tab slides inside the waistband of your pants (if you’re wearing a dress, punch two holes in the top of the tail, thread string through them, and tie the string around your waist).
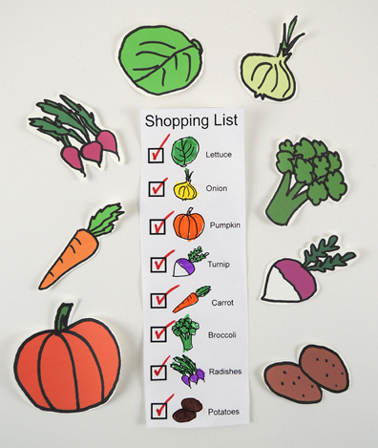
 Your wagon and costume are finished…now to market! The matching game is very simple. Print the market signs, then put each sign next to the corresponding veggies from the template. I used 8″ table card holders (which you first met in this
 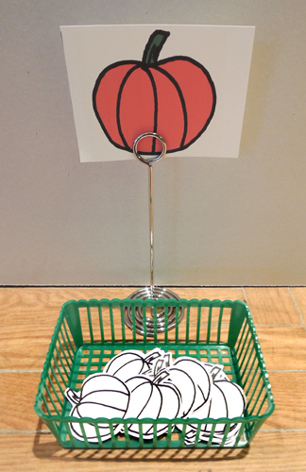 Then we gave each kid a shopping list. You’ll notice the lists are all slightly different. This was to avoid everyone rushing to the same area at once, like some sort of vegetable / woodland creature version of Black Friday. We also gave kids little shopping bags (basically, a brown paper lunch bag cut down to 4″). Following their lists, the kids located the matching sign, loaded the vegetable in their wagons, and checked it off their shopping lists.
 Once they had all their vegetables, they pulled everything back to the project area to color the vegetables and customize their paper bags!
 Get your piping hot hamburger, crispy crinkle fries, and ice cold soda served over the counter of this awesome 1950s diner! The cook is taking orders, and our fun matching game insures that your customers will get exactly what they like.
 This project consists of 3 paper bags, 3 sodas, 3 sets of fries, 3 burgers, and 3 “customer cards.” First, cut the paper bags down to 7″, then decorate the fronts with your restaurant’s logo. To make the soda, squish three, 9″ x 13″ pieces of tissue paper into 3 small plastic cups. Add a half of a drinking straw to each cup (our straws were 4′ long). For the fries, accordion fold 1″ x 3″ pieces of yellow construction paper. We’ll get to the burgers in just a moment.
 Now for the matching burger! Each burger consists of 6 pieces of construction paper: 2 brown buns, 1 slice of cheese, 1 lettuce leaf, 1 tan burger patty, and 1 tomato slice. Since you’re making 3 burgers, you’ll need 3 sets of those 6 pieces.
 To customize the 3 burger patties, draw what each creature eats on a patty. For example, one of our creatures is a crab. Among other things, crabs eat fish parts and algae. So we drew them on the burger patty (here’s a
  Use
Use  This diner is Marissa in all her awesomeness. The front is a recycled box lid (first used for this
  If you don’t have time to make a diner, no worries. Use a tabletop, small desk, or even an overturned box! However, I do recommend including a counter bell (in the past, I’ve borrowed the bell from the library’s circulation desk). Since our bell was going to get repeatedly slammed by kids, I taped it to the counter. You might want to do the same.
 Kids matched the customer to the appropriate burger, took a drink order (we offered cola, lemonade, or orange pop), and grabbed a generous serving of crinkle fries.
 They bagged everything, briskly dinged the bell, and shouted “Order up!” Once that customer had left, it was on to the next customer until every creature had been matched to a burger. Did we have fun? Oh yeah! In fact, we left the diner up for 20 minutes after story time for repeat customers. There was lots of enthusiastic bell dinging and BIG smiles!
 Want to supersize that? Check out these