
 Learn about the phases of the moon (and track them yourself!) using this awesome, 3D, double-sided, lunar calendar! Katie and I dubbed this “the story time project of the year.” Because STEAM power!
We read A Kite for Moon, written by Jane Yolen and Heidi E.Y. Stemple, and illustrated by Matt Phelan (Zonderkidz, 2019). A little boy on the beach spots the lonely, daytime moon and sends her a message on his kite. He promises to visit her someday. Years go by, and the little boy grows into a man who studies numbers, astronomy, and piloting. Eventually, he takes a rocket ship to space, where the moon has been watching and waiting for that promised visit.
You’ll need:
- 1 corrugated cardboard backdrop (we used a 10″ x 14″ cake pad)
- Dark blue and black construction paper
- 1 small box
- 1 toilet paper tube
- 1 star template, printed on 8.5″ x 11″ white card stock
- 1 phases of the moon stick images, printed on 8.5″ x 11″ white card stock
- 1 phases of the moon stick labels, printed on 8.5″ x 11″ paper
- 1 phases of the moon chart, printed on 8.5″ x 11″ paper
- 1 mini binder clip
- Scissors, tape, and glue for construction
- Hot glue
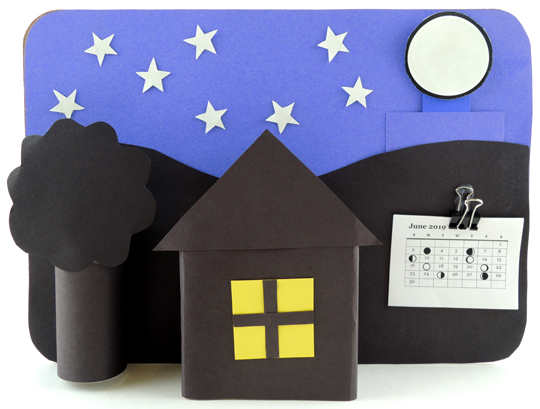
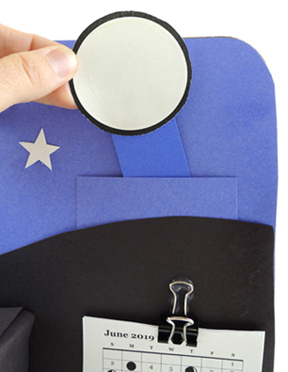
We’ll start with the front of the calendar. Use dark blue construction paper to create a sky on your corrugated cardboard backdrop. Glue or tape an 3.25″ x 3.75″ rectangular pocket to the right-hand side of the sky. Later, this will become your “moon stick pocket.”
 Next, use black construction paper, a toilet paper tube, and a small box to create mountains, a tree, and a house (we recommend adding a little yellow window to the house as well). The hot glue the tree and the house to the backdrop. Important! In order to get the calendar to stand up, the house needs to be attached in the center of the backdrop:
 To the right of the house is a small lunar phase calendar. Tape or hot glue a binder clip to the backdrop, then clip the calendar in place. I custom designed our calendar for June-December 2019, but seeing as time inexorably marches on, you can find a current calendar with a Google search. Add some white card stock stars to the sky, and you’re done with this side.
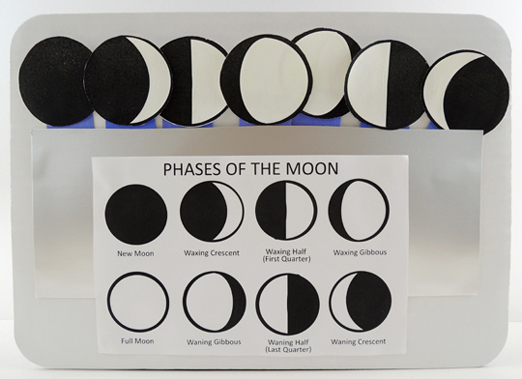 Above is the other side of the calendar. First, use construction paper or poster board to create a pocket (our pocket was 4.75″ x 12″ silver poster board), then tape or glue the phases of the moon chart template on top.
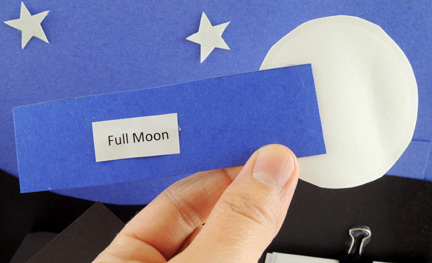
Finally, the phases of the moon sticks. Cut eight, 1.5″ x 4.5″ strips of dark blue construction paper (or, better yet, poster board), then glue or tape each phases of the moon stick image and a phases of the moon stick label to each strip like so:
 This was a great part of the story time project. Watching the kids methodically checking and matching the labels, to the chart, to the sticks was really sweet. And very science!
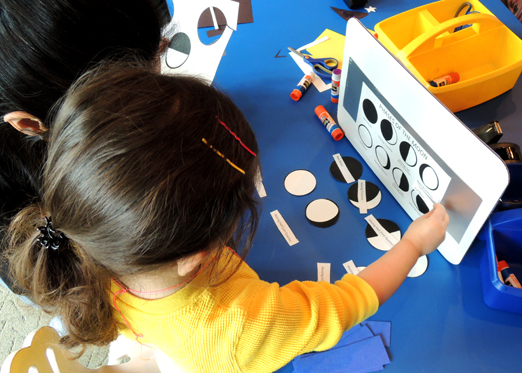 To use your new lunar calendar, match the date on the calendar to the appropriate phase of the moon. Identify the correct moon stick, then slide it into your night sky pocket. Keep checking the calendar to track the moon’s phases. Oh, and we also used glow-in-the-dark paint to fill in our stars and moon sticks. So this calendar glows at night!
 Katie is once again off on wild adventures. Remember that time she spent a year in
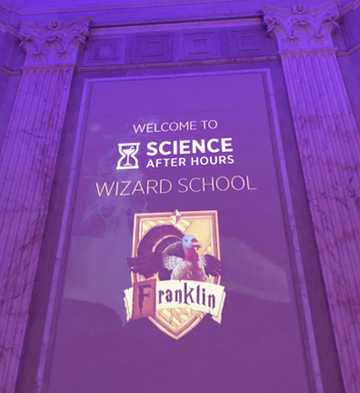
  The Franklin Institute is one of the oldest museums in the United States dedicated to science education and research, and it is absolutely one of my favorite places to take my son when we have a free day. Named after Benjamin Franklin, the Franklin Institute has four floors of amazing science exhibitions, a planetarium, IMAX theatre, and even a telescope observatory on the roof.
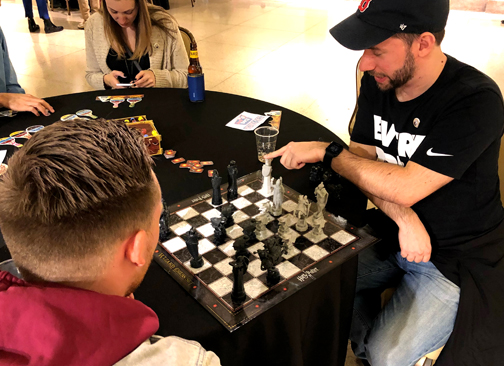 In the Giant Heart exhibit, I tested to see if I was a pure blood by pouring a glass of clear liquid into a second glass of clear liquid. If the mixture turned red, you were a pure blood. If it didn’t, you were a Muggle. The magic is a pH indicator, phenolphthalein, being mixed with water and reacting to sodium carbonate, which is present in the second glass. The sodium carbonate and phenolphthalein react and turn the liquid red. If one glass didn’t have the chemical, the liquid remained clear. My glass turned red – I’m a pure blood witch!
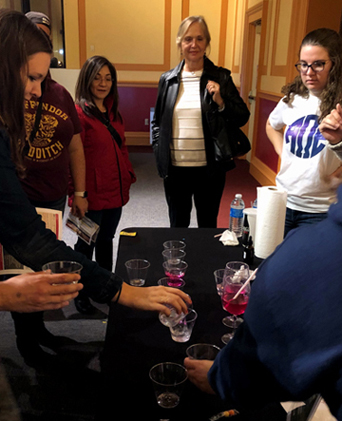 I made my way past a very long line of people waiting to make a magical amulet so I could watch part of the Raptores Maximus show. Mike Dupuy, a local falconer and educator, introduced several of his birds of prey. Including Mr. Big Owl, a Eurasian owl who had the most stunning orange eyes.
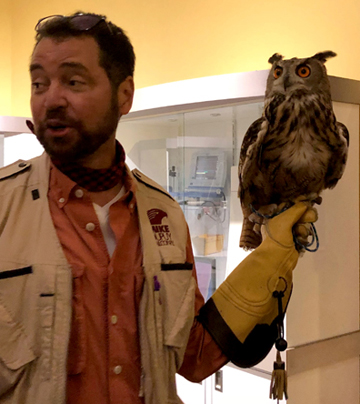 Next, I journeyed on to Pepper Hall, where I was greeted by 2 very long lines: 1) Make your own wand; and 2) Visit the Slimy Serpent, Critter, and Creature Magic Supply Shoppe. The Supply Shoppe was a tremendous display of potions ingredients and various critters you may discover as a student at Hogwarts, including snakes, spiders, frogs and even a jar of leeches. But I opted for wand making because I was curious to see how the Franklin Institute would handle a wand craft for well over a thousand people after our experience with our much smaller
  I tried to attend a presentation called The Absolutely True Fake Story of the Philosopher’s Stone. I should have used an Apparition spell to get me to the theater faster because the seats were full by the time I arrived. Not deterred, I walked through Platform 3.14 to see the Hogwarts Express (cleverly disguised as a Baldwin 60000 locomotive engine, which is on permanent display in the Train Factory exhibit).
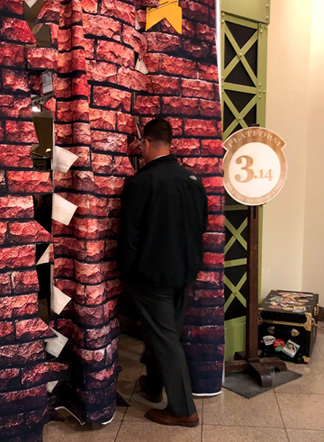 Many of the demonstration tables had student volunteers from nearby colleges, including Drexel University, Temple University, and the University of Pennsylvania. The students were enthusiastically full of scientific information – such as the possibility of real-life invisibility cloaks (i.e. lasers and thermal imaging cameras). They were ready to be peppered with questions from everyone. Including Voldemort.
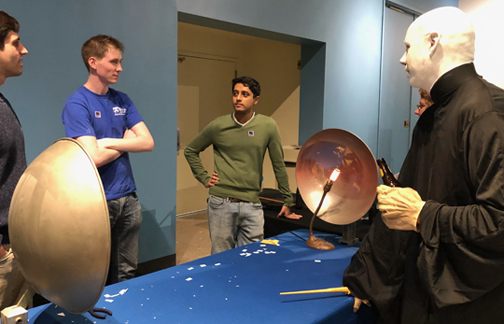 The OwlCapella group from Temple University was serenading those in the ticketing atrium who had paused to rest their feet or have a snack, and I got a good laugh when I noticed Harry Potter conducting, unbeknownst to the choir. Total Potterbomb.
 The grand finale was held in the Franklin Memorial Hall, in front of a giant statue of Benjamin Franklin. Everyone was asked to raise their newly made wands and chant the Incendio spell. The result was a mighty green fireball explosion, courtesy of about a dozen large balloons filled with hydrogen. Very cool.
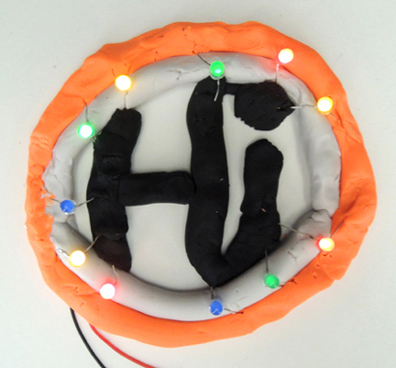 When it comes to crafting, the best way to send that project over the edge of coolness is to LIGHT IT UP! We’ve wired flannel boards with
 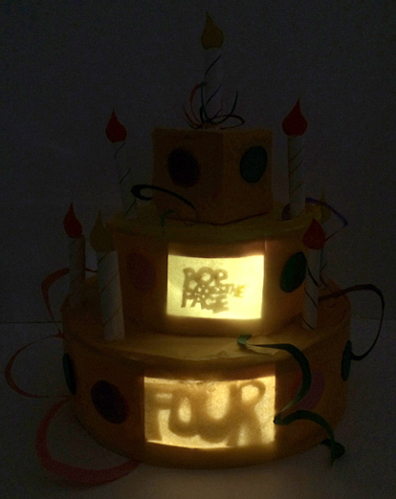 So when we spotted the Circuit Clay kit by Klutz we were excited. Ideally, the kit allows kids to do all sorts of electrical experimenting, with the added bonus of sculpting unique creations. But conductive clay? Would that even work? I must admit, we were a wee bit skeptical.
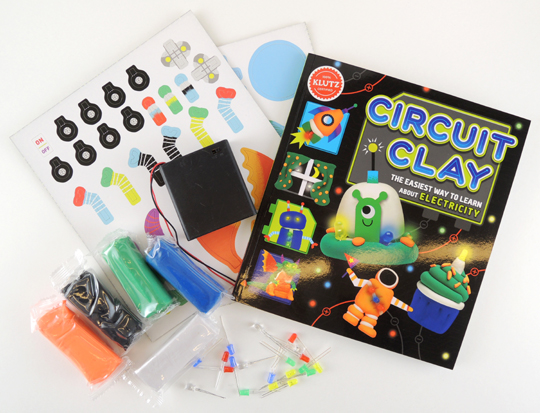 The Klutz kit retails for around $22 (ages 8 & up). It contains a 52-page instruction booklet, 4 packs of color conductive clay, 1 pack of white insulating clay, 20 color LEDs, a battery pack (4 AA batteries required), and 52 paper embellishments for your projects. Katie put the kit through its paces. Take it away Katie!
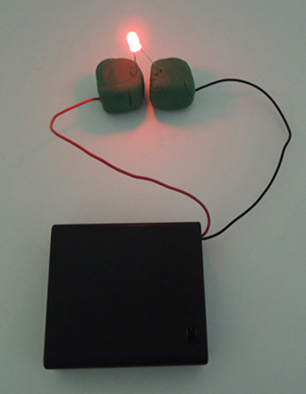 Feeling certain in my understanding of basic circuits, I moved ahead in the instruction book and created a Princeton University-inspired orange and black flower, complete with a little glowing bee and butterfly from the kit’s paper add-ons.
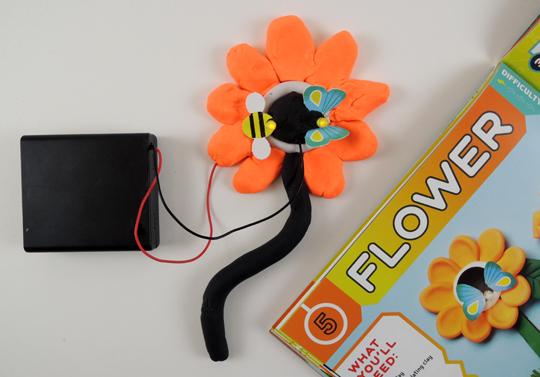 A note about the instruction book: it is an exceptionally well written and illustrated manual that provides easy to understand lessons for kids about electricity. Kudos to Klutz for using every inch of the book with colorful images and educational descriptions.
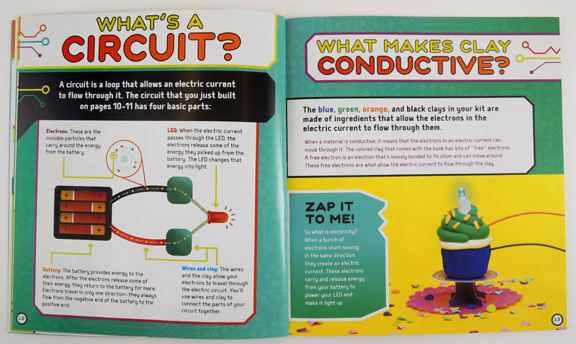 Riding a wave of confidence, I decided to crank it to 11 and make my own design with as many lights as possible. As I was forming the letters to say “Hi” and the circle around it, I had to remember to maintain the circuit between the conductive clay and the insulting clay. I will admit this was a little challenging, and I *may* have broken several bulbs putting it together. But eventually it worked! Here’s a photo of it in full darkness. Notice that the blue bulbs are much dimmer?
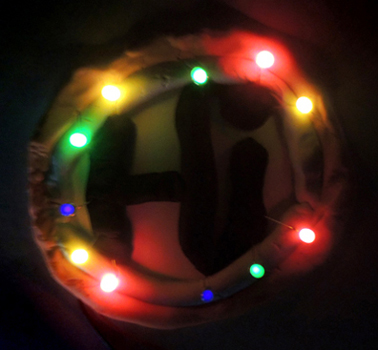 Now for the bad news. I found the clay was quick to crumble and shred, even fresh out of the package. It was sometimes tough to keep the LED bulb’s long wire legs fully inserted into the designs, and it was frustrating at times to figure out how to set up the different circuits. Finally, the book says to “keep your clay in a resealable plastic bag or container so it won’t dry out.” I did seal it in a Ziploc bag, but a couple weeks later, the clay was dry, flaky, and nearly impossible to manipulate.
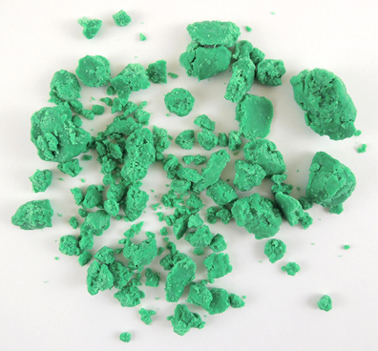 The Klutz Circuit Clay is definitely a clever way to teach kids about electricity without them accidentally getting hurt or shocking themselves. It’s an activity children with patience and strong reading skills can do on their own, but younger kids will definitely need assistance. The suggested age range may be a little low (ages 8 & up), but I’m not sure if kids older than 10 would find this experiment worth their time and attention.