 Crank up “Eye of the Tiger” and get PUMPED. Because the wrestling match is ON. Can your oatmeal container cow launch off the ropes and knock over “Big Red,” the biggest, meanest bull in the ring? A golden paper cup trophy awaits the victor!
We read Clancy the Courageous Cow by Lachie Hume (Greenwillow Books, 2006). Clancy is a Belted Galloway who was born without a belt. Because Clancy is different, he is alienated from the herd. Additionally, the Belted Galloways are caught in a vicious cycle with their neighbors, the Herefords. Every year, the Herefords win the big Cow Wrestling Contest, which earns them the right to graze on the richest pastures. This allows the Herefords to stay big and strong, and the Belted Galloways to remain small and weak. But Clancy, with his missing white belt, can sneak over to the Galloways’s field at night. He gets HUGE. He also meets Helga (a Hereford with no white spots). When it’s time for the annual Cow Wrestling Contest, Clancy wins! But as they Belted Galloways chase the Herefords from the field, Clancy and Helga speak up. They say it’s high time that cows put aside their differences and live peacefully together. And they do!
You’ll need:
- 1 small oatmeal container
- Brown, white, red, and black construction paper
- Brown, white, red, and/or black poster board
- A pair of wiggle eyes
- 1 large oatmeal container
- 1 cow wrestling ring (more on that later!)
- 1 gold paper cup
- 1 black paper cup
- 2 strips of gold metallic poster board (approximately 1″ x 4.5″)
- Scissors, glue and tape for construction
- Metallic markers for decorating
- Hot glue
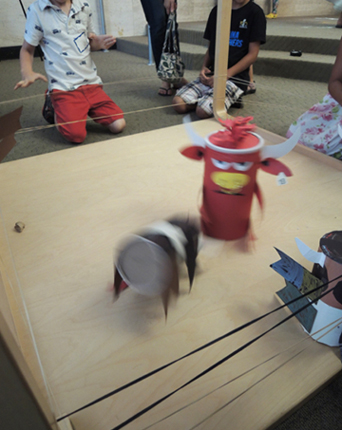
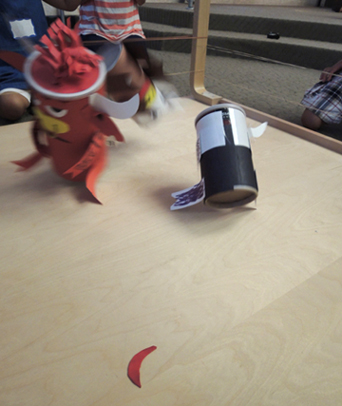
First, your cow. Use construction paper to wrap and decorate a small oatmeal container. In the book, Clancy and Helga have a baby named Clanga who is brown, white, and black. So that’s what we went for.
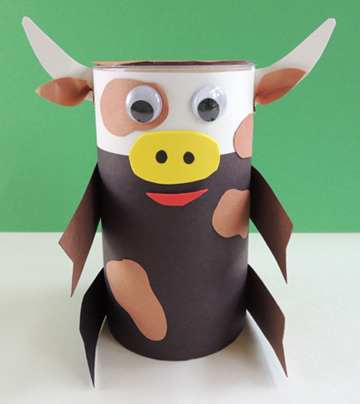 Since the cows are going to get pretty beat up in the ring, I recommend using poster board for the horns, arms, and legs. We attached these with hot glue. We also did a self-adhesive foam nose and mouth, and wiggle eyes (but you can just draw these on with markers).
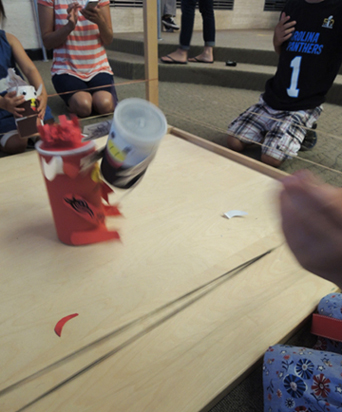
Your cow needs an massive opponent, so, in this corner, we have…Big Red! I made sure to use a large oatmeal container to accentuate the size ratio.
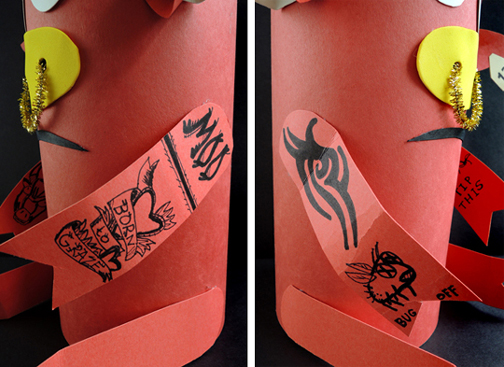
 Big Red is constructed the exact same way as the smaller cow except that he has a sparkle stem ring through his nose, an ear tag, a mohawk, and tattoos on his arms.
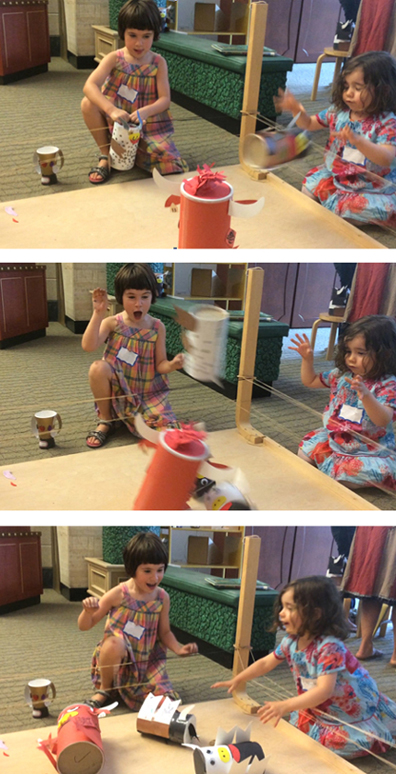
 Your cows are finished, now for the wrestling ring! The ring is basically an up-ended table with 8 rubber band ropes. Our table was 4′ x 4′. I strongly recommend using a table with fixed legs. Even a table with locking folding legs might not be able to withstand the pressure of cows being launched repeatedly from rubber bands. Here’s our table, in progress:
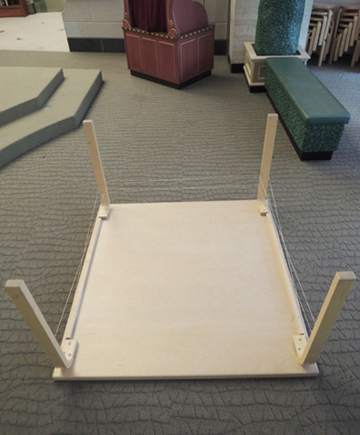 I had some huge 6″ rubber bands that I looped together to make the ropes, but smaller rubber bands will work too (it’ll just take a little more time to put them together). Make sure you have extra rubber bands on hand too, because we had a couple snap during the wrestling frenzy.
Once you have 8 rubber ropes, slip the first 4 ropes over the legs of the table, placing them about 6″ from the bottom of the table. The second layer of ropes should be about 9″ from the table top. To “wrestle,” pull your cow back on the rubber bands, then release it, slingshot style, towards Big Red. Here’s Marissa with the demo:
Did the kids have trouble operating the slingshot? Yes, at first some did (and we gave them the option of just throwing their cows into the ring). But after some practice and a little coaching, they learned fast. There were lots of excellent moves…
The “Classic Charge”
 “No Cow Left Behind”
 “More Cowbell Face Crunch”
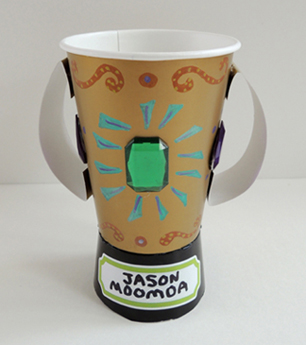
While the kids were wrestling, Marissa set up a trophy decorating area. To make a trophy, cut a black paper cup down to 1.5″. Flip it over, then hot glue a gold paper cup to the top of it. Add a pair of metallic poster board handles with tape or hot glue.
As kids finished in the wrestling ring, they came to the trophy area to celebrate their victories and decorate a trophy. We had metallic markers and plastic gemstones on hand. We also had sticker labels so kids could customize the trophies with their cow’s name.
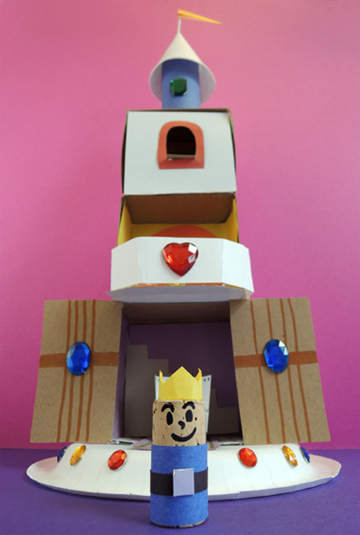 It might be a small, small world, but you can always dream big! Create a lavish, three-story castle with throne room, balcony, and bedroom with a view. And don’t forget His (or Her) Royal Tinyness, expertly fashioned from a wine cork.
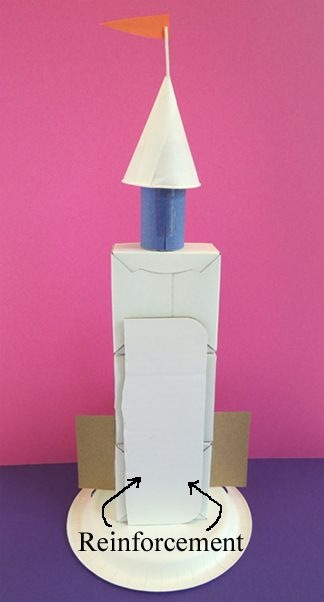
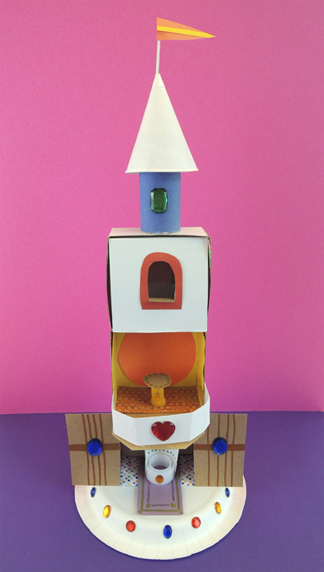 The base of our castle is a flipped over paper plate. Remove the lid and tabs from the first box, and hot glue it to the paper plate. Add a pair of castle doors if you’d like. Our doors were made out of
 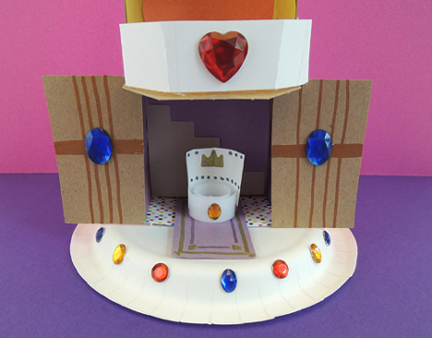 The second floor of the castle has a balcony. Cut the tabs off your box, but leave the lid intact. Fold the box’s lid outward to create the floor of your balcony, then cut the floor to your preferred shape (we went semi-octagonal).
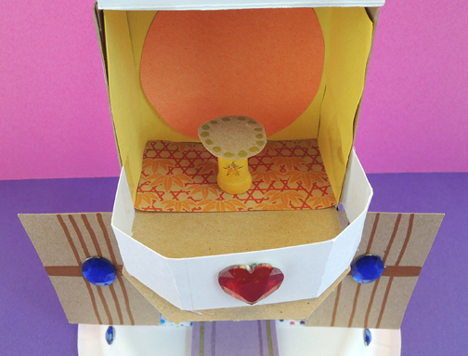 The third floor of the castle is the bedroom. It has a window, and the wall in which the window rests opens and shuts. First, cut the tabs off your box, but leave the lid intact. Next, use a box cutter to cut a window in the box’s lid (we cut all the windows in advance). Hot glue the third box to the second box. Here’s our window:
 Since the castle is tall and narrow, we decided it would be best to have the window wall open downward (as opposed to one side or the other – too tippy!). Below you can see how the wall folds down, revealing the interior of the bedroom and a paper baking cup bed.
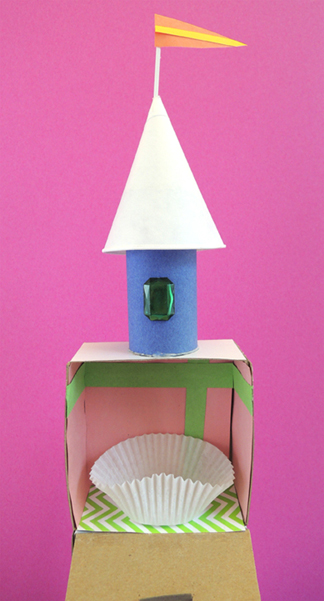
 You can decorate the castle rooms before you glue the boxes together, or you can decorate as you build. We offered construction paper, patterned paper, and plastic gemstones to our castle architects.
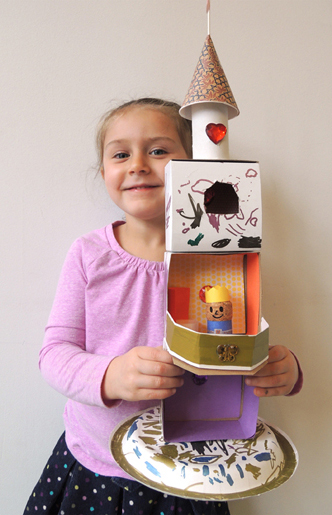 We also provided metallic markers, which produced some spectacular results. I love the gold-rimmed paper plate base in the photo above. And look at this alligator in the “moat!”
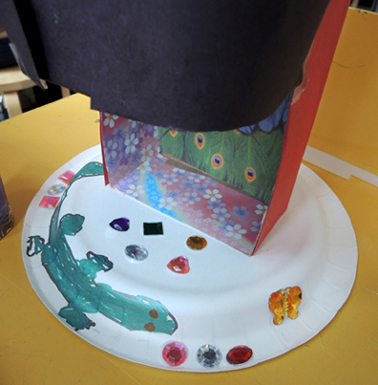
 The last thing your castle needs is a king or queen! Used permanent marker to draw a face on a wine or champagne cork, then hot glue a little paper crown to the top. Wrap the remainder of the cork in paper. Done!
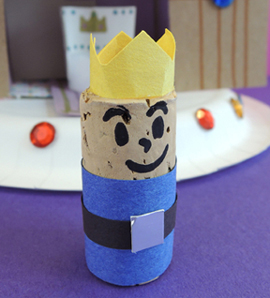
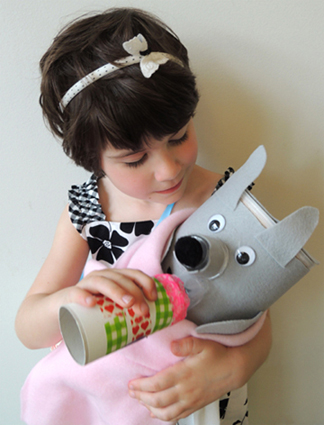
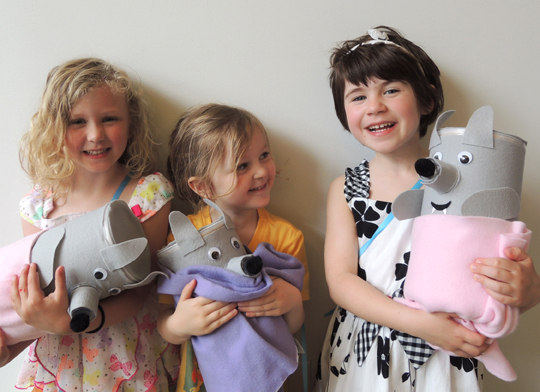 There’s a new arrival in the family, but this baby has fur, fangs, a propensity to howl at the moon, and a very wolfish grin! You’ll be fully prepared for parenthood, however, with a bottle, diapers, blanket, bunny snuggle toy, and customized diaper bag.
 One of the things that delighted the kids was that the baby wolves wore real diapers. I grabbed some Target brand newborn diapers (36 diapers cost $5.99).
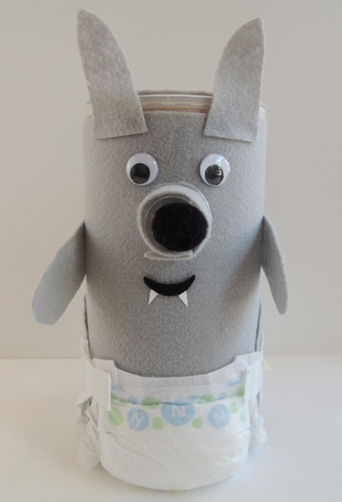 Your wolf is done, now for some accessories! Here’s the diaper bag we made. It was stuffed with an extra diaper, a baby bottle, a bunny snuggle toy, and a fleece baby blanket.
 To make the diaper bag, staple the sides of a manila folder together, then add some patterned tape to cover the staples. To make the strap, punch holes in the sides of the folder and knot a ribbon through each hole. Decorate the diaper bag with markers.
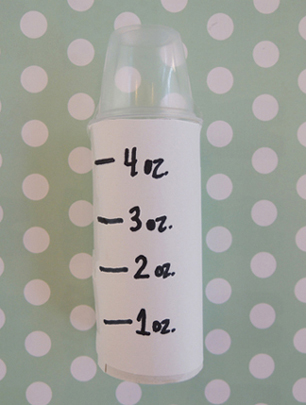 The bunny snuggle toy is on the
 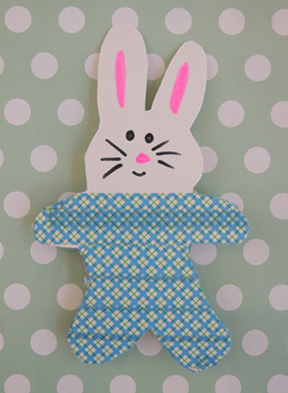 Once the kids were finished with the diaper bag and all its contents, they selected a fleece blanket for their baby (we offered pink, blue, and purple). Then everyone lined up and a “doctor” (played by a game 7 year-old) went to the “nursery” and delivered a baby wolf to each kid (“Congratulations! It’s a wolf!”). It was hilarious to watch kids get diapering pointers from their parents. Some kids settled down to give their wolves a quiet bottle feeding, others whipped their wolf’s diapers off and ran around howling. Different parenting styles at work. It’s all good.