Vikings and Dragon Riders! Don your horned helmets, grab your shields, and get ready for the ultimate How To Train Your Dragon theater experience, complete with real reptiles!
 After watching How to Train Your Dragon with my kids, I was delighted to learn that the movie was based on the book series by Cressida Cowell. When the Princeton Garden Theater (our local, non-profit movie theater) gamely agreed to a book-to-film outreach collaboration, How to Train Your Dragon was the first on my list.
Our program had three parts. Viking activities in the lobby, a live reptile show, and then the film itself. We’ll start with the lobby activities first. There were tables for making helmets and shields, a replica of a Viking game, and a local artist making custom sketches of the movie’s characters.
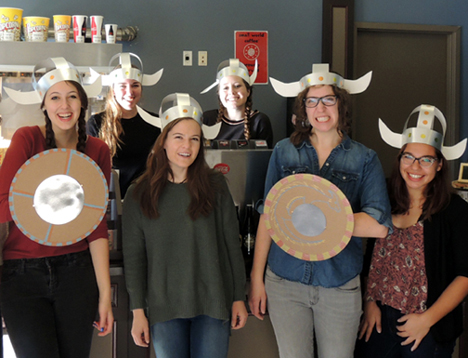
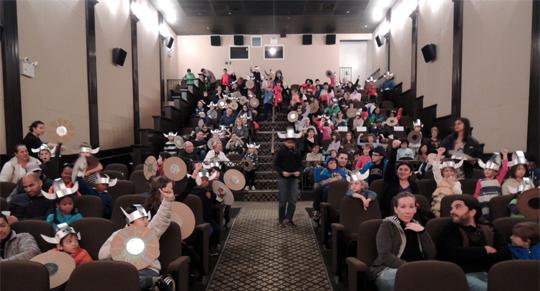
Viking helmets were a must, and we needed something quick and easy-to-assemble. Here’s the gang, sporting some seriously awesome headgear.
 You’ll need:
- A long strip of silver poster board (approximately 2.5″ x 24.5″)
- A short strip of silver poster board (approximately 2.5″ x 14″)
- White poster board for your Viking “horns”
- Stapler
- Metallic dot stickers (optional)
First, circle the long strip of silver poster board around your head (we purchased our poster board online from Blick Art Materials). Staple it. This is your hatband. Next, staple the short strip of poster board to the front and back of the hatband. Tab and staple a pair of white poster board horns to the sides of the hatband (here’s our horn template if you’d like it). Decorate the hatband with (optional) metallic dot stickers.
 It never hurts to thrown in a little history, so we included informational table signs at all the hands-on activity tables. Here’s the table sign for helmets. Next up…shields!

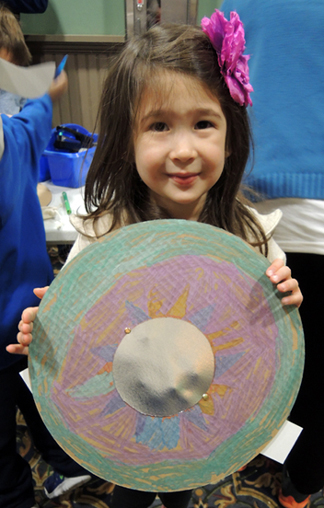
You’ll need:
- 1 silver poster board circle (approximately 5″ in diameter)
- 1 circle of corrugated cardboard (approximately 14″ in diameter)
- 2 strips of poster board (approximately 2.25″ x 11″)
- 2 brass fasteners
- Metallic markers
- Hole punch
- Stapler
Since we needed a slew of shields, we used cake circles and – believe it or not – the silver foil circles that fit onto take-out containers. Both were purchased at a local restaurant supply outlet. But you can cut a shield from any corrugated cardboard box, and the silver circle from silver poster board.
Hot glue a 5″ silver circle onto the center of a 14″ brown cardboard circle. Push the prongs of 2 brass fasteners through the cardboard shield (one on each side of the silver circle). Decorate the shield with metallic markers.
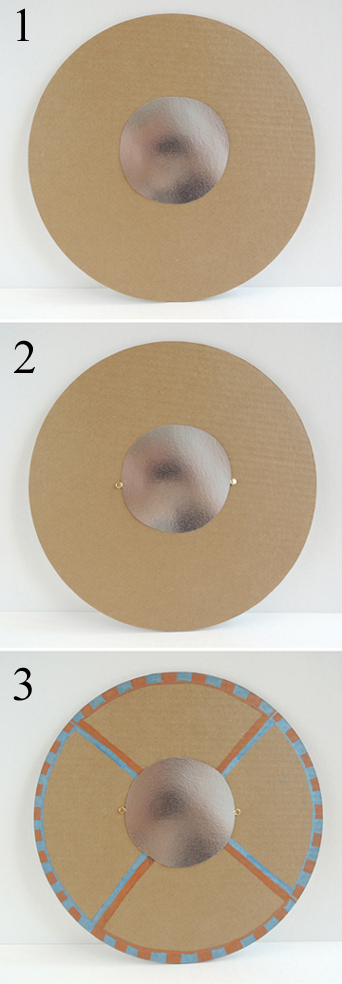 Next, loop 2 strips of poster board loosely around your forearm. Stapled them closed. Punch a hole in each loop, then thread the prongs of the brass fasteners through each hole. The back of your shield will now look like this:
 If you’re worried about scratched forearms, put tape over the prongs of the fasteners. Here’s the shield table sign. Did you know that metal knob in the center of a shield is called a “boss?” I did not know that.
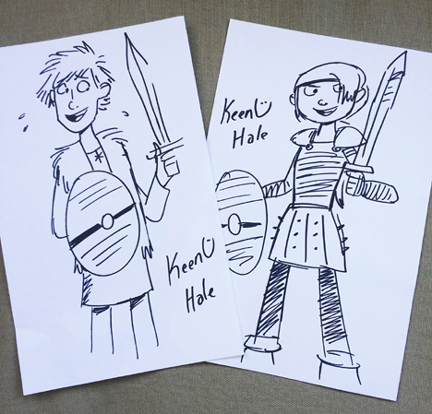
 Not far from the helmet and shield tables was the very talented Keenu Hale, a local artist who is the master of quick cartoon sketches. The kids kept him very busy drawing their favorite Dragon characters (they got to take the sketches home too)!
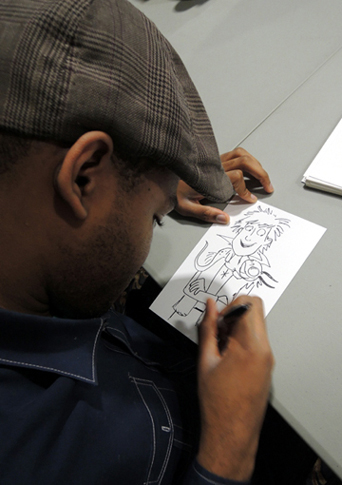
Keenu drew these in minutes. Wow.
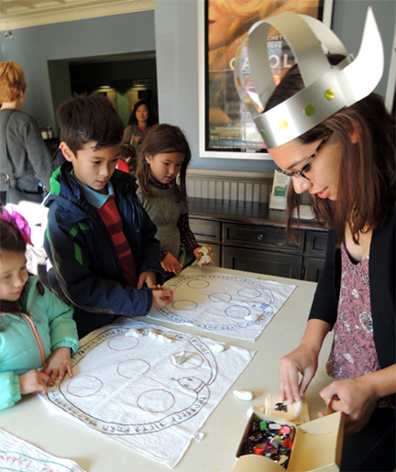
 The final activity table was a replica of a Viking game. It was WAY popular. Marissa found it in Hands On America Volume 1: Art Activities About Viking, Woodland Indians, and Early Colonists by Yvonne Y. Merrill (Kits Publishing, 2001). It’s a snap to put together.
You’ll need:
- 1 white bandanna
- Fabric or permanent markers
- Air dry clay
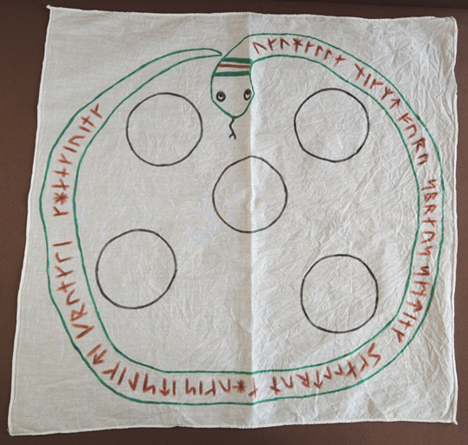
Use markers to draw the game board below on a white bandanna (I bought ours at Michaels Craft Store). The runes are optional, of course. Our runes spell out the names of the different types of dragons. Can you spot “Night Fury?”
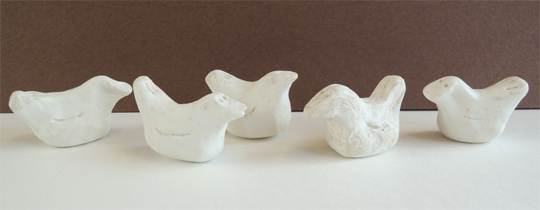
 The game pieces are little birds (about 2″ long), made with air dry clay.
 To play the game, toss the clay birds onto the game board.
You get 1 point if a bird lands upright anywhere on the board
You get 2 points if a bird lands in a circle
You get 3 points if a bird lands upright in a circle
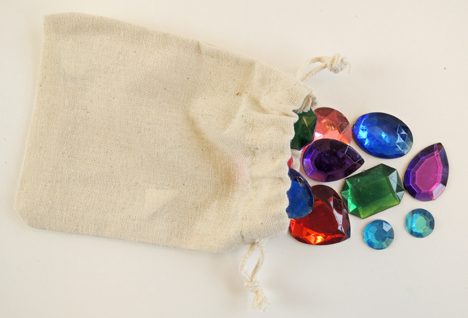
Here’s the game table sign, should you need it. We offered winners 2 prize choices. The first choice was a plastic gemstone. Each gemstone was worth 1 point. Win 6 points, and you got to select 6 gemstones! We provided 3″ x 4.5″ cotton drawstring bags to hold your riches (I bought my bags from Nashville Wraps).
 The other prize was a chance to win a cardboard Toothless standee (purchased on Amazon for $30). Kids automatically got a chance to win when they first entered the theater, but at the Viking game table, 1 point equaled 1 extra chance to win. So 3 points equaled 3 more chances to win. The kids really liked that!
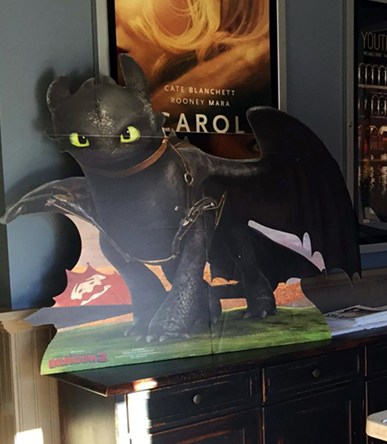
Image courtesy of the Princeton Garden Theater
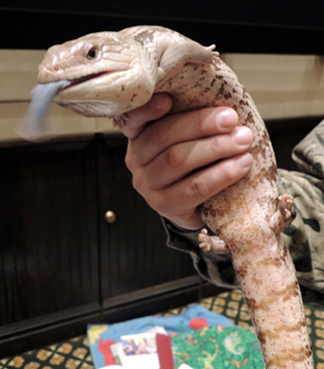
In addition to the hands-on activities, there was a reptile exhibit and live show by Enzo from The Lizard Guys. Enzo brought a terrific array of critters, and shared an astounding amount of knowledge with the kids and their parents.
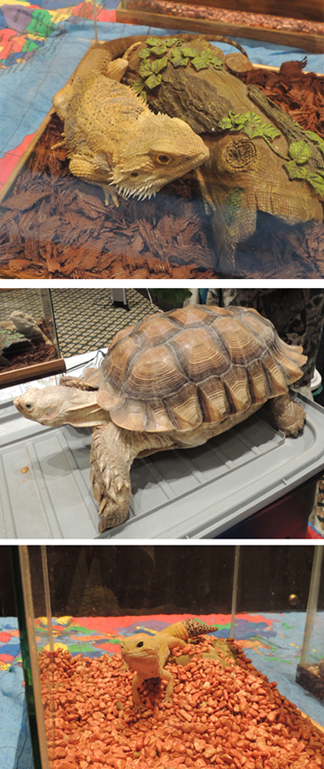
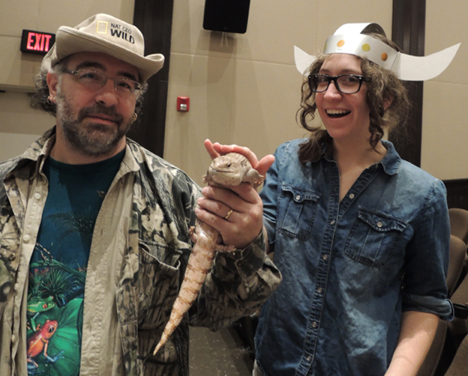
Here’s Marissa bonding with a blue-tongued skink. Soon, she will be a mighty Dragon Rider of Berk!
 Finally, it was time for the film. Having only seen it on my laptop, I can say I was completely blown away watching it on the big screen. The flying! The fire! The CLOUDS!
I’d like to express my extreme gratitude to the Princeton Garden Theater for collaborating with us on this program. They were up for anything, and didn’t bat an eye when I asked if we could take over the lobby with multiple craft projects and bring in live reptiles. In fact, their response was a very enthusiastic “YES!” Thanks so much guys!


 Enter the realm of mystery, magic, spells, sorcery, and…smoked paprika. That’s right. Never underestimate the POWER of roast chicory! First, we made herbal amulets. Then we votes with our noses. The burning question? Which spice smells most like dragon’s blood? There was some serious sniffing going on at To Be Continued, our weekly story time for 6-8 year-olds.
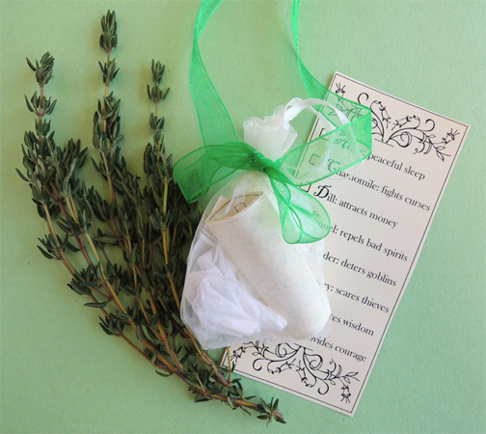 But there was an additional olfactory activity! In Charmed Life (and, in fact, all the books in the Chronicles of Chrestomanci series) dragon’s blood is one of the most powerful and dangerous substances in the known worlds. It’s described as having a powerful, distinct, and horrible odor, even when it’s dried into a powder.
 If you haven’t read Charmed Life, or anyone of the other books in the Chronicles of Chrestomani series, I can’t recommend them enough. I love how Diana Wynne Jones writes her characters and create her magic. I love her sense of humor and her amazing descriptions. The Pinhoe Egg is a book I re-read annually, because it’s like visiting family. Conrad’s Fate comes in a close second. It’s a bit like Downton Abbey…with magic!
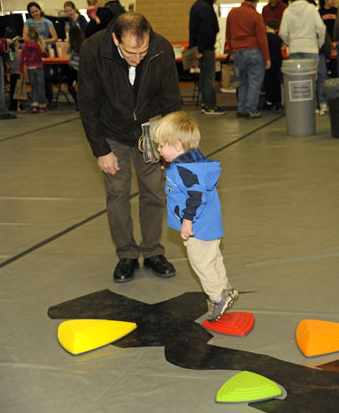 One, two, three, jump! Are you ready to meet our most popular toddler activity of all time? Ladies and gentleman, may I present…the Crevasse Challenge.
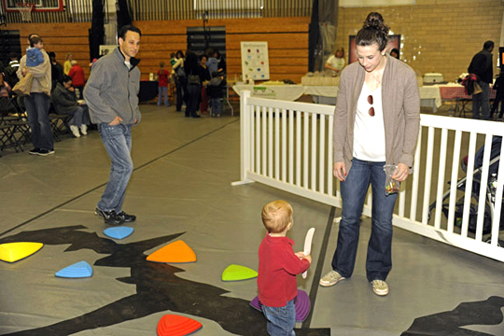
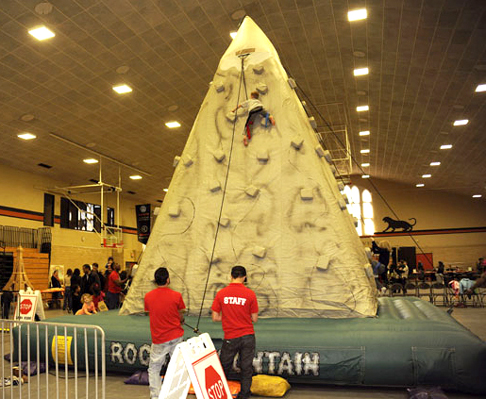 We needed something else. Something less vertical. Additionally, the climbing wall had age and height restrictions, so we wanted an activity everyone could try. So it needed to be adventurous, on the ground, with no age restrictions, and still rock related.
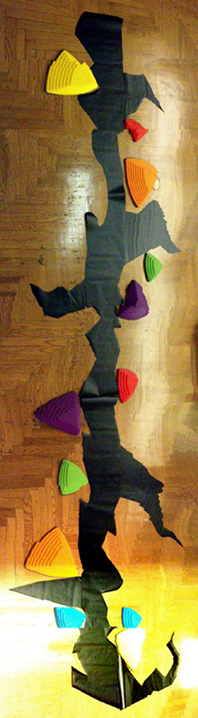
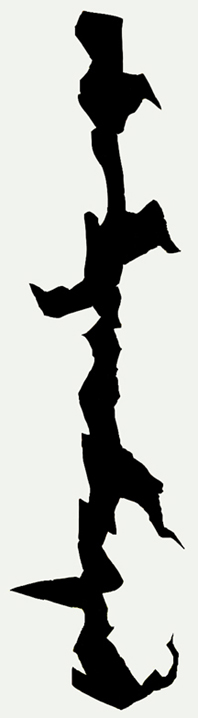 It’s important to mark where the different pieces of the crevasse fit together. That way, on the day of the event, you simply match the pieces, peel the backing off the contact paper, and stick everything in place. We used the matching lettering system below to pair the side cracks with the main crack (the letters were written on the backs of the pieces in permanent marker):
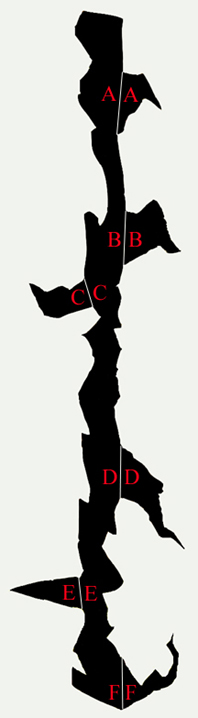 The crevasse is done. Are you ready to rock? I bought these “riverstones” from Discount School Supply. Not only are they colorful and sturdy, they have anti-slip bottoms. At $70 a set, they are a bit of a splurge (especially since we bought 2 sets). But I considered it an investment in quality and safety. After the event, we donated both sets to our local YMCA for further fun.
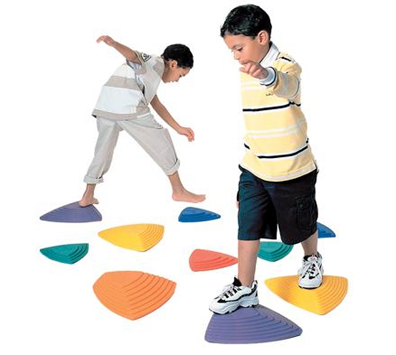
 The rules for the Crevasse Challenge were simple. Start on the first yellow rock and navigate the length of the crevasse until you land on the second yellow rock. If you fell off a rock, you had to start all over again (unless you were very young, and then you just climbed back up on the rock and tried again). If older kids wanted to increase the challenge, they had to complete the course only using the large rocks.
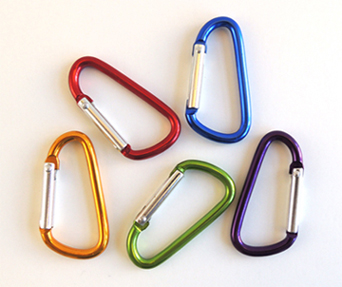 On event day, the Crevasse Challenge was hopping for five hours straight. Kids went nuts for it! The crevasse! The rocks! The jumping! The carabiners! The only challenge was keeping the course clear of kid collisions. But the YMCA folks were total pros, and we had no accidents.
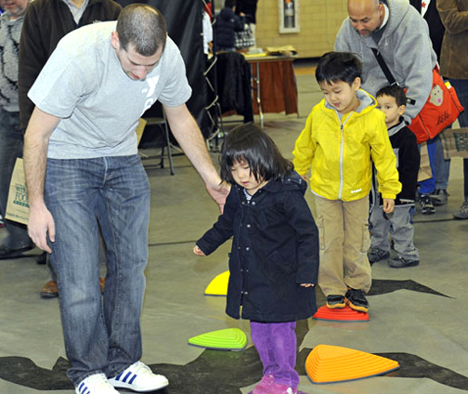 Big kids tried it, little kids tried it, grown-ups tried it, but the toddlers were they main players. They couldn’t get enough of it! My daughter, who was 2 at the time, spent 45 minutes hopping, jumping, running, and trying different rocks. And just look at this cute little guy!