Good Day, Sunshine Bread

Who doesn’t love the smell of fresh bread baking in the oven? And thanks to a truly adorable book and recipe, you can also get a little sunshine front and center! Let’s head to Katie’s test kitchen for a look!


It was a snowy day, when the New Jersey skies were dark and gray, that I rediscovered the book Sun Bread by Elisa Kleven (Dutton Children’s Books, 2001 – read here by Camp WildWoodz). In the story, the animals of the town have experienced a long hard winter. They are all ready for the seasons to change and for the sun to return. The local baker decides to mix together her own sunshine from the cozy comfort of her bakery. The end result is delicious hot sun bread, which she shares to the delight of the town and their joy awakens the sun from its winter sleep.

I was surprised that my copy of Sun Bread did not have the recipe, which apparently was not included in later printings of the book. After a quick online search, I was able to find the recipe, along with a few personal minor adaptations and suggestions, in a blog post written by Lisa at Story of a Kitchen.
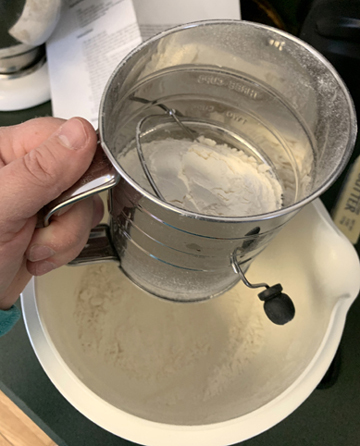
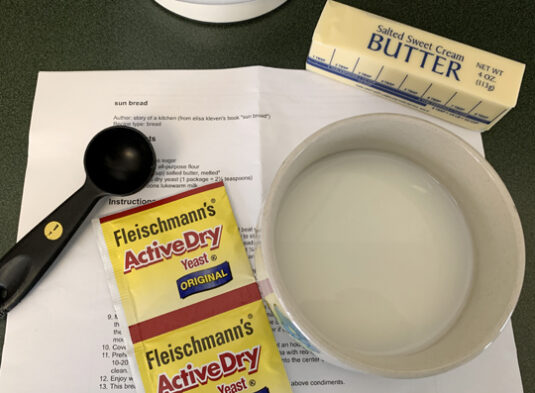
Bread is relatively easy to make. It just takes time, strong hands and a little patience to allow the yeast to work its magic. I had all of the ingredients in my pantry, so I got to work. I followed the instructions exactly as written by mixing everything together and kneading the dough, adding additional flour along the way.
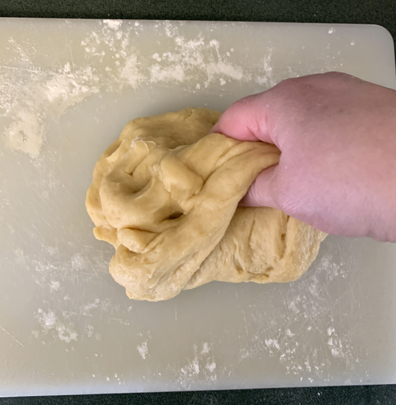
After letting the dough rest and rise for an hour, I deflated and kneaded the larger ball of dough for a second time. I cut the dough ball in half and started creating my sun face. I decided to make the corona of my sun into simple little swirls.
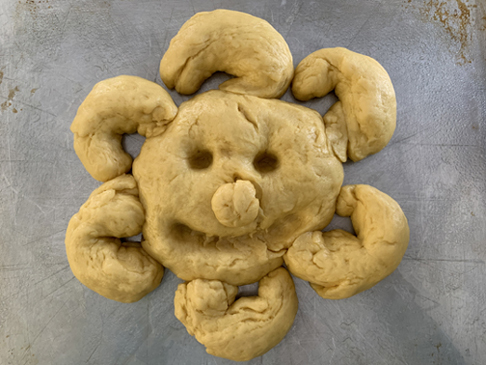
I left the doughy sun to rise for another hour and then slid it into the oven to bake. I checked the bread after 10 minutes and I’m glad I did because it was already a nice golden brown and perfectly cooked through.

It didn’t take long for my teenager to descend upon the kitchen and ask to try a slice of sun bread. It was absolutely delicious! We tried it plain, with butter, and with a variety of different jams. It didn’t matter what we used as a spread, it was wholesomely good. I wish I could tell you how sun bread tastes the next day, but it didn’t last that long. My family snacked on it throughout the day, and we finished the small amount that was left that evening as garlic bread with our spaghetti dinner.
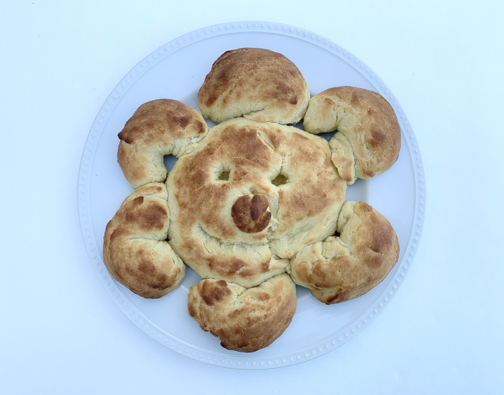
The sun bread recipe is ideal for parents to make with their children. It’s a super simple recipe to follow, you can be creative designing the sun face and corona, and the end result is scrumptious. And let’s be honest… any day is a good day to brighten your spirits with fresh sun bread!

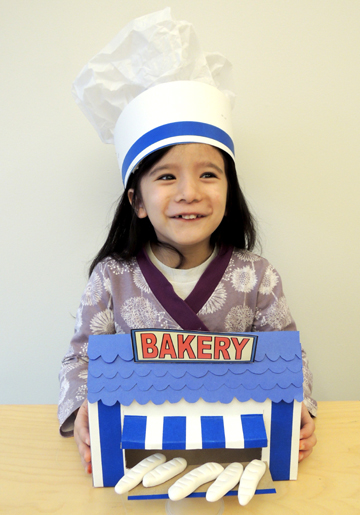
The Best Baguette Bakery

the best bagette bakery

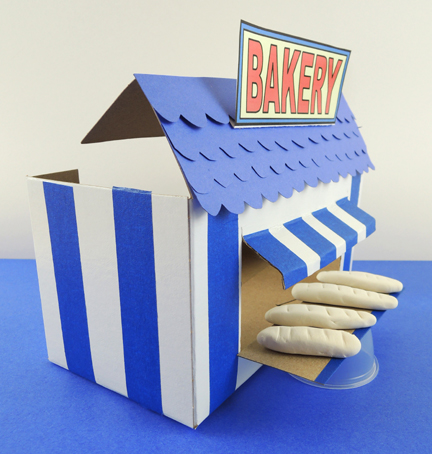
Bake a bounty of beautiful baguettes at this fantastic little bakery. Poofy baker’s hat optional, but it does add that professional touch, yes?

We read Nanette’s Baguette by Mo Willems (Hyperion, 2016). Little Nanette has a big job. She must journey to the bakery – all by herself – buy a baguette, and bring in home. Everything goes well, despite a few distractions (friends Suzette, Bret, and Mr. Barnett with his pet, Antoinette). But the baguette looks so tasty. It’s warm. It smells so good…Nanette takes a bite, then another, then another. Oh no! It’s gone! A tearful Nanette reports to her mother, but this problem is easily solved. They can go and buy another one, together. And eat it!

You’ll need:

  • 1 large box
  • A box cutter
  • A selection of construction paper
  • 1 bakery sign template, printed on 8.5″ x 11″ card stock
  • 1 paper or plastic sample cup
  • Modeling clay
  • Scissors, glue and tape for construction
  • Markers for decorating

side view of bakery

We used a 4.5” X 4.5” x 9” craft box for our bakery (but a large tissue box works too!). Trim and fold the box’s lid to form a peaked roof. Then use a box cutter to create a rectangular window for the bakery. If you’d like an awning, cut just three sides of the rectangular window, then bend the resulting flap upwards to create the awning.

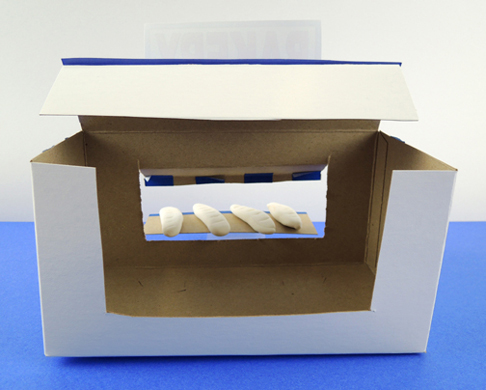
Decorate the bakery with construction paper and markers. We offered color masking tape as well. Color and cut a bakery sign from the template, then attach to your roof. Finally, cut a rectangle out of the back of the bakery…

back of bakeryAnd use the resulting cardboard to make a countertop for your bakery. Hot glue it to a cut-down paper cup or plastic sample cup, then place the counter outside your bakery window. Use modeling clay (we used air dry Model Magic) to fashion some little baguettes.
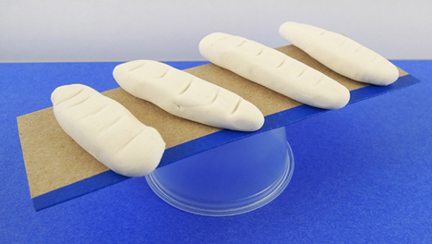
baguette counterThe final touch is a baker’s hat, and you will find the supply list and instructions for it here!
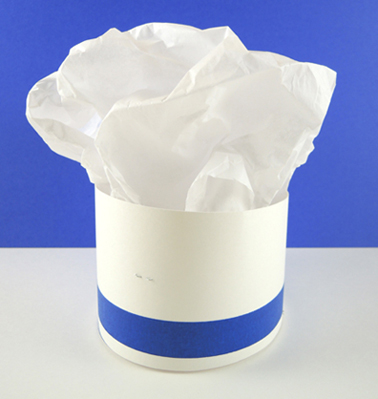
bakers hat

Breakfast is Served

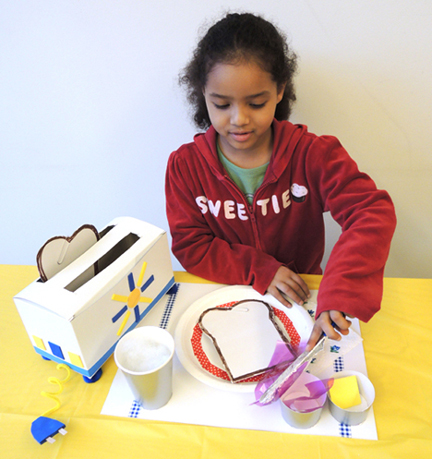
breakfast is servedStart your day out right with some toasted bread, butter, jam, and a delicious beverage. Thanks to your magic magnetic knife, preparing breakfast has never been easier (especially when there are hidden paperclips in your essential ingredients)!

magic knifeWe read Hooray for Bread, written by Allan Ahlberg and illustrated by Bruce Ingman (Candlewick, 2013). One morning, a lovely loaf of bread is born. The story follows the loaf of bread as it progresses, slice by slice, throughout the day. Breakfast for the baker’s wife, a sandwich for the baker’s boy, a snack for the ducks in the park, afternoon tea, and so on until the last crumb serves as a meal for a mouse. Hooray hooray for bread!

You’ll need:

  • 1 “toaster” box (mine was 4 ½” X 4 ½” x 9”)
  • A box cutter
  • 2 rectangles of white poster board for bread slices (mine were 5″ x 6.5″)
  • 2 jumbo paperclips (approximately 2″)
  • 1 wooden coffee stirrer
  • 1 pipe cleaner
  • 2 rectangles of self-adhesive foam (approximately 1.5″ x 2″)
  • A selection of color masking tape
  • A selection of self-adhesive foam shapes
  • 4 small pom-poms (mine were 1″ in diameter)
  • 1 large rectangle of white poster board for “place mat” (mine was 11″ x 15″)
  • A selection of patterned tape
  • 1 paper plate
  • 1 square of white paper towel (mine was  5.5″ x 5.5″)
  • 3 paper cups
  • 1 jumbo craft stick (mine was 8″ long)
  • 1 button magnet (mine was 3/4″)
  • 1 piece of aluminum foil (approximately 2.75″ x 5.5″)
  • 2 squares of yellow self-adhesive foam for “butter” (approximately 1.5″ x 1.5″)
  • 2 rectangles of purple cellophane for “jam” (approximately 3″ x 4.5″)
  • 2 small paperclips (approximately 1.5″)
  • Scissors and tape for construction
  • Markers for decorating
  • Hot glue

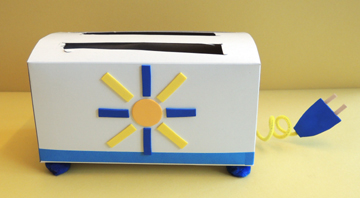
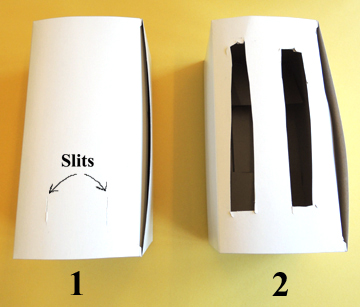
toasterBegin with the toaster! Use the box cutter to cut two slits in the top of the box. Then use scissors to enlarge the slits into rectangular toaster slots.

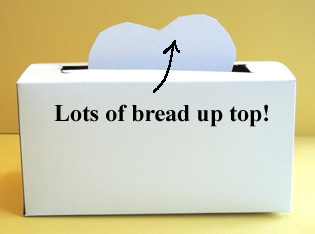
toaster slitsNext, cut bread shapes from the 2 pieces of white poster board. Make sure the top of the bread extends well past the top of the toaster. Otherwise, your bread will fall into the toaster and you’ll have to constantly fish it out (and even with a fake toaster, I hate to see kids thrusting anything that looks like a knife into anything that looks like a toaster)!

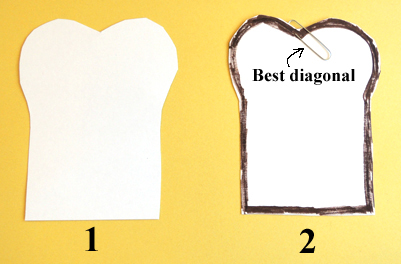
bread up topUse markers to draw crusts on your bread, and then slide a jumbo paperclip diagonally on each slice (this will create a nice, semi-horizontal surface for the magnet to attach to).

bread steps To create the toaster cord and plug, break both ends off a wooden coffee stirrer (each piece should be about 1.5″ long). Then, peel the backing off a rectangle of self-adhesive foam. Press the coffee stirrer pieces AND the pipe cleaner onto the sticky backing (making sure the smooth ends of the coffee stirrer are sticking out) like so:

plug Peel the backing off the second rectangle of self-adhesive foam and press it firmly on top of the first rectangle. Use scissors to cut the rectangles into a plug shape.
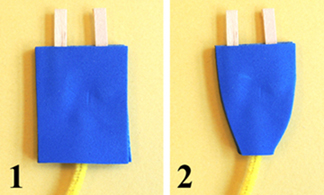
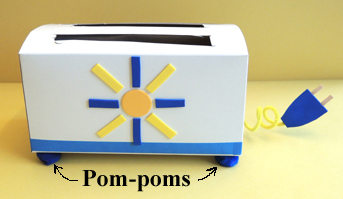
finished plugCurl the pipe cleaner “cord” around a marker to make it spiral, then tape it to one end of the box. Decorate your toaster with color masking tape and self-adhesive foam shapes. Finish by hot gluing four pom-poms on the bottom of the toaster for “feet!”

finished toasterYour toaster is complete – time to set the table!

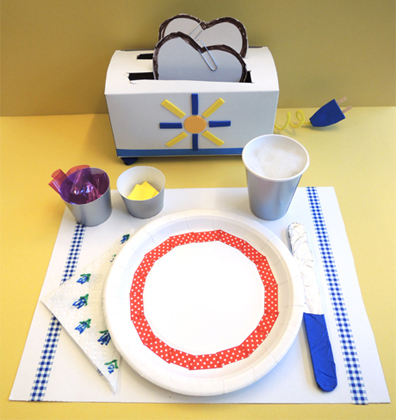
breakfastUse markers and patterned tape to decorate your place mat, plate, and napkin. Two of the paper cups will hold your butter and jam, so you’ll need shorten these cups with scissors (my butter cup was approximately 1.5″ tall, and my jam cup was 1.75″ tall).

I hot glued the plate, napkin, and the two shortened cups to the place mat to make it easier to carry. I left the “beverage” cup and the knife unglued (and filled the beverage cup with polyester fill “milk” or “soy milk”).

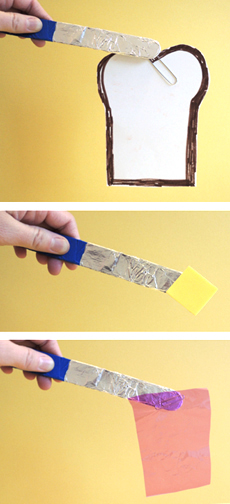
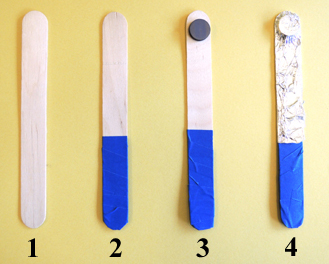
To make the magic knife, wrap the bottom of a jumbo craft stick with color masking tape. Then hot glue a button magnet to the top of the craft stick (I did this step in advance to save time). Wrap the upper section of the stick with aluminum foil.

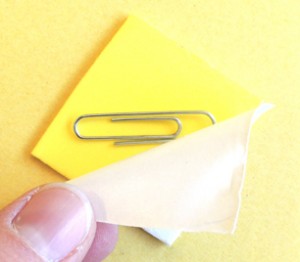
knife steps The final step is to prepare your butter and jam for the magic knife! Peel the backing off the yellow self-adhesive foam square, but don’t pull it all the way off! When you’re about halfway peeled, press the small paperclip onto the sticky back of the adhesive.

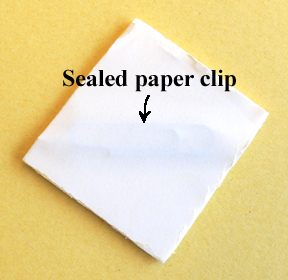
butterThen re-attach the backing to the foam square, sealing the paperclip in.

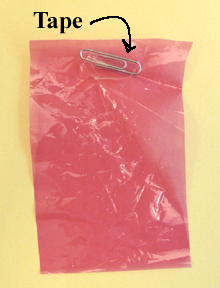
sealed paperclipTo create jam, simply tape a small paperclip to the purple cellophane.

jamReady for breakfast? Place the butter and jam in their cups, then use the magic knife to fetch the bread from the toaster, carry it to the plate, and load on the toppings!