 While I certainly do my fair share of fiction-focused programs, I consider non-fiction programs to be (dare I say it?) just as much fun. And for today’s adventure in non-fiction, we’re talking science!
We’ve offered some interesting science programs in the past. Take, for example, the Chemistry of Magic, in which we demonstrated the real science behind seemingly magical reactions. Or this Rube Goldberg engineering program. Or even this humble preschool story time that featured the life stages of a butterfly. This week, to get a healthy dose of vitamin “S,” I dropped in on my friends at scienceSeeds.

Team scienceSeeds: John, Michal, and Lindsay
ScienceSeeds is a local science enrichment center for grades K-8 . It was founded in 2008 by Michal Melamede. While raising her children, she noticed a lack of hands-on, age-appropriate, science and engineering opportunities. So Michal decided to establish a business that would encourage curiosity, exploration, discovery, and scientific thinking.
Visiting scienceSeeds is always fun. Especially when they let me play with their toys! Here are a few of their current favorites. Perhaps one or two will inspire a little science at your next program?
JOHN’S FABULOUS CANDELABRA
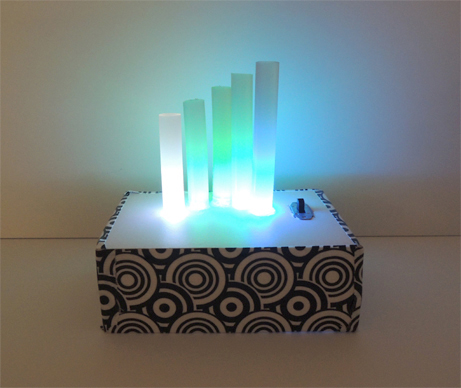 I have to start with this one because I’m such a hot glue devotee. This is an LED lamp with hot glue stick shades! It was designed by John to demonstrate circuits, fiber optics and light behavior. He used a hot glue gun to hollow out the bottom of 5 hot glue sticks, and then rigged up a series of little LED bulbs on a simple circuit. Everything was attached to a foam core base, and then the base was wrapped with decorative duct tape. I love it.
HYDRAULIC BUTTERFLY
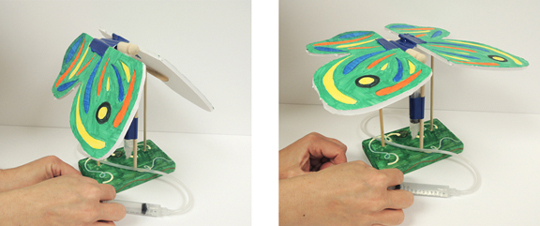 This is another project designed by scienceSeeds staff to teach hydraulics. Using two water-filled syringes and tubing, the butterfly lifts its wings up and down. The syringes are from a medical supply company, the tubing is from a science catalog, the base is wood, the wings are made from foam board, and the butterfly’s body is a clothespin. A little duct tape here and there and you’re ready to go. They also have versions with an owl, a bat, and a dump truck!
FOAM BOARD AUTOMATAUN
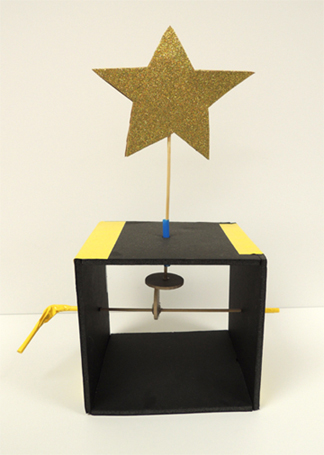 One final project from scienceSeeds’ workshop! This one demonstrates how simple machines and mechanisms work. Turn the crank and the movement of the wooden gears and rods causes the star to spin. The base is made from foam board, the sticks are bamboo skewers, and the gears are little wooden circles purchased from Michael’s craft store. A little hot glue and duct tape seals the deal. And just look at this sweet double gear version!
 Mark my words…I’m GOING to find a way to work a foam board automataun into a story time project. It shall be done. Oh yes, it shall.
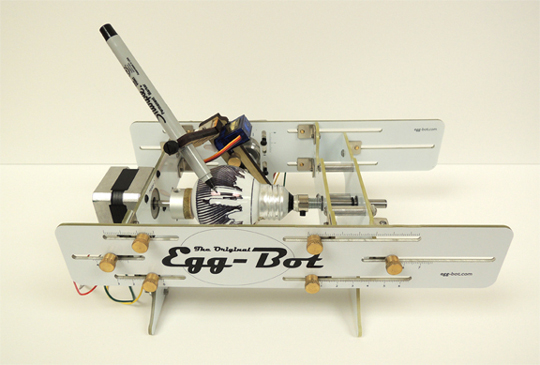
THE EGGBOT
This is a recent acquisition at the workshop. It’s the EggBot, an art robot that can draw on round surfaces like eggs, light bulbs, ping pong balls, ornaments, etc. It hooks up to your computer and, with some lovely freeware, will take a design or image and put it right on your object! scienceSeeds is using it to teach CNC and automated design. Here are a couple test subjects…
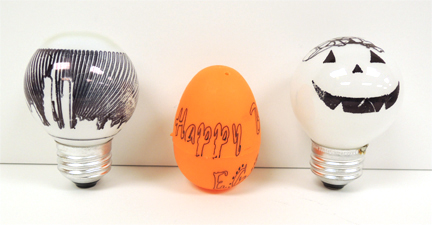 Alas, an EggBot kit like the one above retails for $219, so it’s well out of my budget. The company that sells it is called Evil Mad Science LLC. Hah hah hah! Minions not included.
CONFETTI VACUUM CLEANER
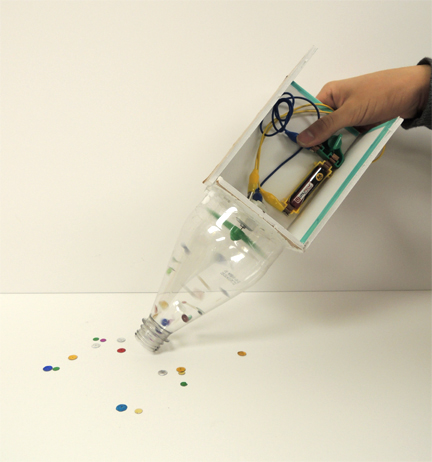 This is a modification of a cardboard kit the staff tested. They found that a 1 liter bottle and plastic propeller worked much better than a cardboard tube and propeller. The foam board base holds a simple circuit that connects to a motor. As the motor spins the propeller, it creates a wind tunnel in the bottle that sucks up pieces of confetti. It’s the perfect way to teach engineering and air flow. It’s wildly popular with the kids too.
THE 3-DOODLER
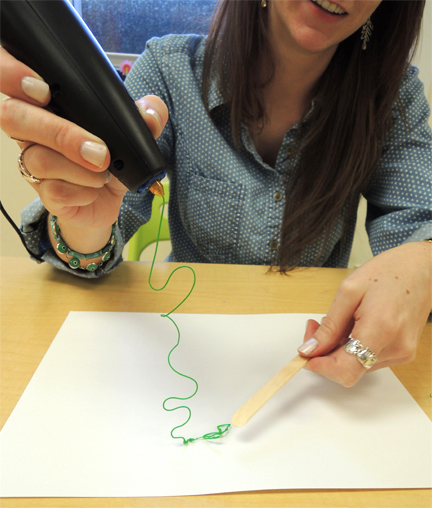 It might be a little hard to see this in the photo, but this device lets you do 3-dimentional drawings! That thin green line you see isn’t drooping down from the tip of the doodler. It’s rising up from the piece of paper and standing on its own! You insert little plastic sticks of various colors into one end of the “pen.” The plastic emerges in liquid form out the other end, but quickly hardens. With some practice, you can “draw” amazing 3D creations like these:
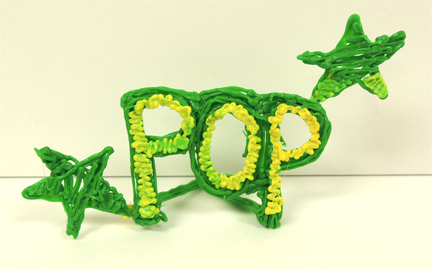
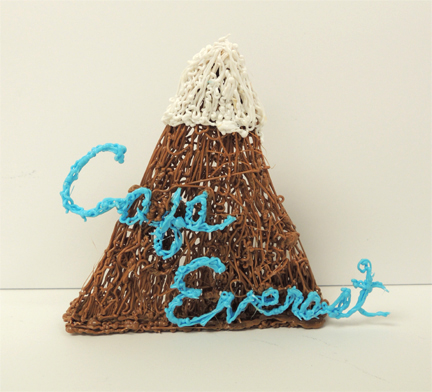
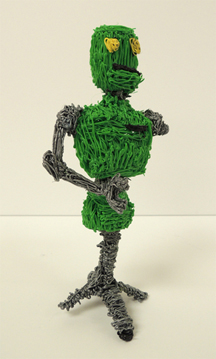 scienceSeeds likes to use the 3-Doodler for their 3D modeling workshops, sometimes in conjunction with their 3D printer. A 3-Doodler pen retails for about $100, and additional plastic sticks are approximately $10 for 25. I noticed that the pen makes a loud whirring noise while being operated (a little louder than an electric toothbrush). The staff also mentioned that after extended periods of use, you can smell burning plastic. The smell bothers some kids. But those things aside, it’s a cool little drawing tool.
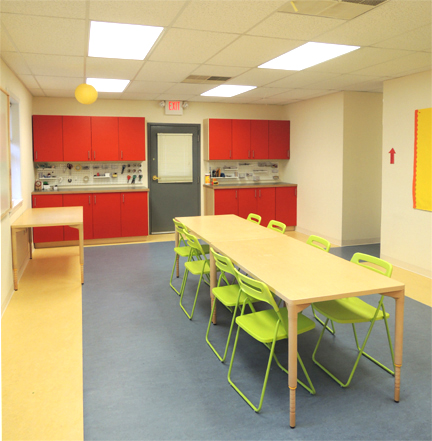
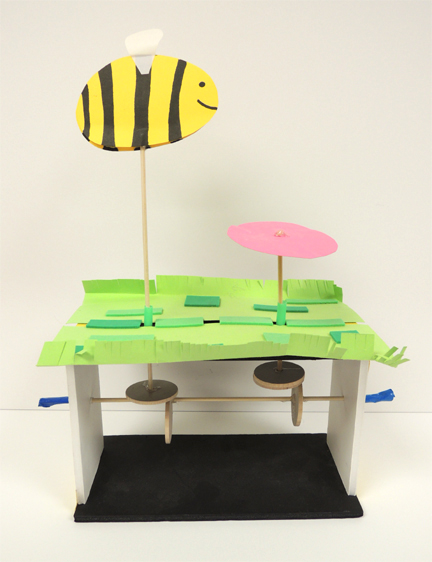
I’ll leave you with a photo of scienceSeeds’ classroom space. Look at the cheerful red cabinets! The under-the-counter adjustable storage! The cool green chairs! Now imagine it packed full of kids creating, discovering, building, and innovating. Fantastic.