 Some of you may recall this post, in which I visited my friends at scienceSeeds and reported on all the cool science toys they are currently playing with. There was one toy, however, that I didn’t include because I wanted to do a special post on it later.
The time has come for that post.
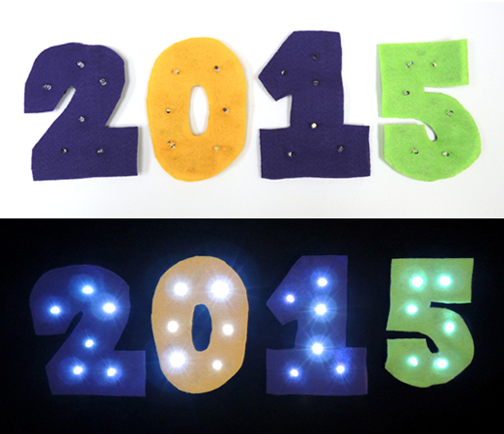
Get ready to usher your story time flannel board into 2015…may I introduce…the brilliant…the amazing…the mesmerizing…conductive thread! Yes, this thread conducts electricity, which means that your flannel can be rigged with lights!
You’ll need:
- 1-2 pieces of felt (i.e. flannel)
- 1 sewing needle
- A length of conductive thread
- 1 coin cell battery holder
- LEDs (3mm or 5mm size are recommended)
- 1 coin cell battery
- Scissors
- Hot glue (optional)
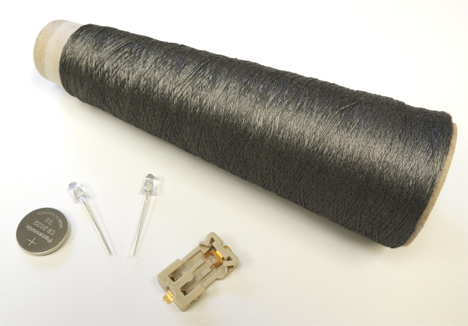
The good news is that all the electrical components listed above will cost you less than $10. A 30 foot bobbin of the thread is $2.95, and the LEDs are between 20¢-50¢ each. A battery holder is about $1.95, and the coin cell batteries, which can be purchased just about any retail store, are between $1-3 dollars (the one you see in the image below is size CR 2032). scienceSeeds buys most of their supplies from SparkFun Electronics, an online company.
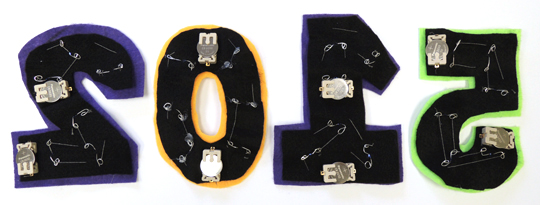
 Since we were using lots of LEDs, Lindsay, our scienceSeeds flannel artist, decided to do 2 layers of flannel. The black “background” layer held the thread and the batteries, and a colorful top layer hid the stitching. The results were colorful, tidy, and sturdy. Here’s what the back of our flannel numbers looks like:
 First, use the conductive thread to sew a coin cell battery holder to a piece of felt. It’s important that the battery holder is tightly connected to the felt. Lindsay recommends hot gluing the battery holder to the felt first, and then stitching the holder’s connections to the felt with the thread.
Next, push the legs of an LED through the felt. Curl the legs into circles using a small pair of scissors, jewelry pliers, or needle nose pliers.Then stitch the legs to the felt with the thread.
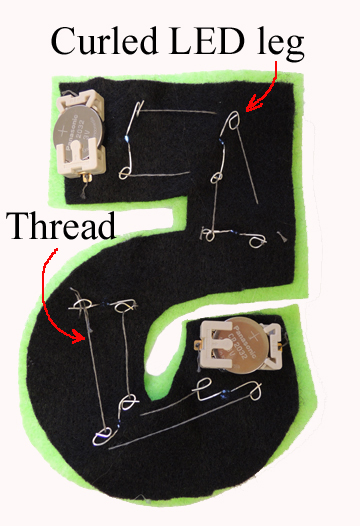 Because you’re making a circuit, it’s essential to connect negative to negative and positive to positive. Therefore, the same thread that is connected to the negative post of the battery holder needs to be connected to the negative LED leg. Likewise, the same thread that is connected to the positive post of the battery holder needs to be connected to the positive LED leg.
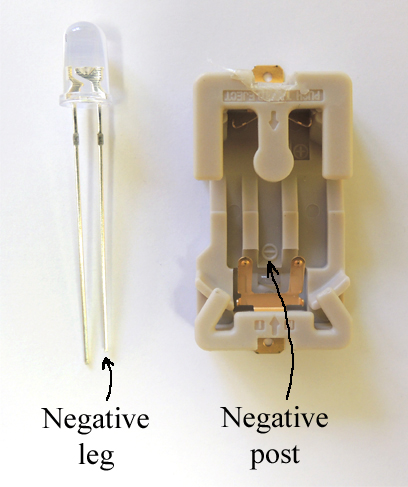
Worried you won’t be able to rig things up correctly? Worry no more. The battery holder’s negative post is clearly marked, and the negative leg of an LED is always the shorter of the two.
 You can just connect one LED, or you connect a train of them. One important thing to note: if you’re using just one LED, the battery tends to heat up (as opposed to multiple LEDs in a strand, which share the power load). If you’re using just one LED, you might consider adding a resistor (i.e. an electrical component that limits the flow of a current through a circuit). Many LEDs already come with resistors.
When everything is connected, slip a coin cell battery into the battery holder. Your LEDs will activate, and your flannel board will glow! We discovered that the weight of our LEDs, battery holders, and coin batteries made our flannel numbers drop off the flannel board (Viva Las Vegas!). But the problem was quickly solved with a bit of Velcro.
 You could also move beyond flannel boards! Here are a few projects from the scienceSeeds workshop. A handsome owl puppet with glowing eyes…
 A Halloween treat bag with color-changing LEDs! Oooo!
 A truly marvelous super hero mask.
 In addition to conducting electricity, the thread can also be used decoratively. You can see it here, adding some silver highlights to the mask.
 OK…you have the tools and the know-how. Cue up Pachelbel’s Canon in D, go forth, and illuminate!
Many thanks to scienceSeeds for rigging up the fantastic 2015 flannel!

