
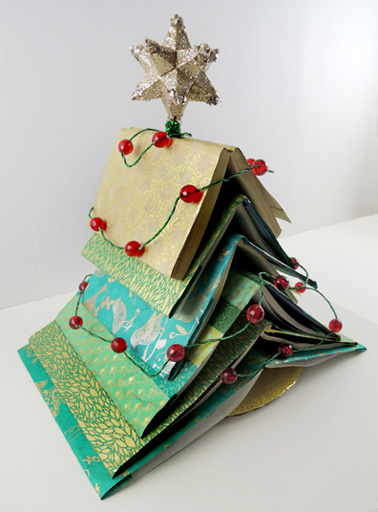
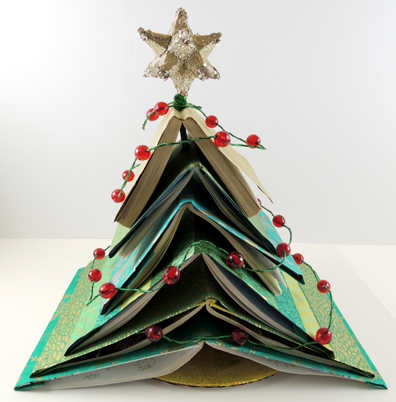
Reuse, repurpose, and redecorate this holiday season! Katie crafted this clever little book tree using 6 recycled books, wrapping paper, a cake support rod, and a bit of drill work. The results? Fa-bu-lous!
You’ll need:
- 5-6 books
- Mod Podge
- 1 foam paint brush
- Green wrapping paper
- 1 cake support rod
- 1 corrugated cardboard base
- An electric drill for construction
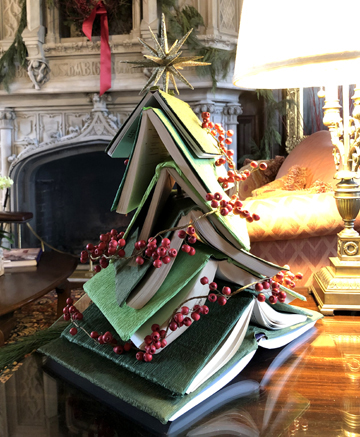
Katie was inspired to do this project when she spotted this beautiful book tree at Drumthwacket last year. Drumthwacket is the official residence of the Governor of New Jersey, where Katie proudly serves as a docent for their historical tours. Every December, local gardening groups deck the halls, and this little tree stole her heart. She was determined to craft one of her own.
 Let me start by saying that Katie selected six OLD books for this project…retired editions that had torn pages, faded covers, and ripped bindings. Because otherwise we would have been cringing during the first step of the project…drilling holes in the spines of the books! Katie used the largest drill bit in the set – a 5/16″ bit to be exact – to drill holes in the center of the books’ spines.
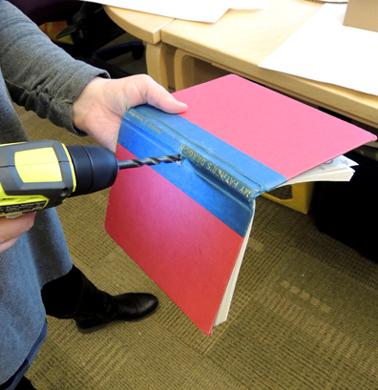 Next, she used a bottle of Mod Podge and a foam paint brush to glue wrapping paper onto the covers of the books. We went all schmancy and bought our wrapping paper from Paper Source.
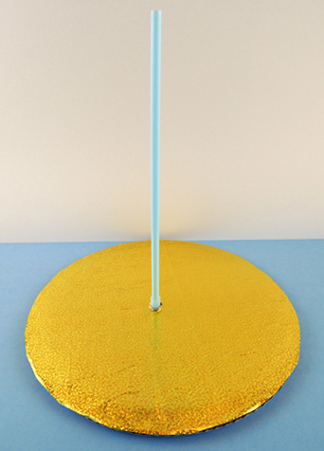
 While the book covers were drying, Katie construct the tree base. She glued together two, 12″ cake pads, then glued wrapping paper on the top circle. She again drilled a hole in the center of the base, then threaded a cake support rod upwards, through the hole.
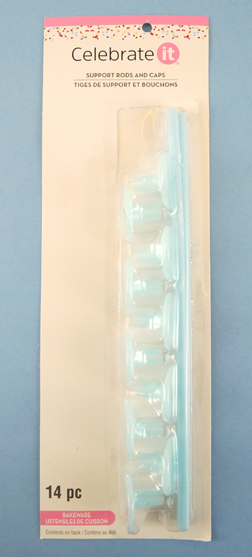
If you are like me and have NEVER heard of cake support rods until today, they are metal or plastic rods and bases used to build multi-tier cakes (think wedding cakes or elaborate Kardashian baby showers). Katie found her rods in the cake decorating section of Michael’s craft store. The rods a package of fourteen, 12″ rods costs around $8.
 Annnnd here’s the finished base, ready to support some books!
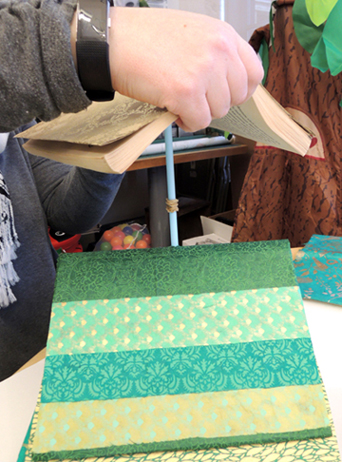
 Since the initial holes Katie drilled in the books were covered with wrapping paper, she carefully re-drilled them. Then she threaded the books onto the support rod. Almost immediately, she noticed a problem. The books sagged down the smooth rod and flattening out! Katie quickly fixed the problem by wrapping rubber bands around the rod to brace each book.
 When the books were stacked, Katie added a star to the top. This was a cheap ornament with a sparkle stem wrapped around the ornament’s loop. The sparkle stem was threaded inside the cake support rod, then the star/rod connection was reinforced by a second sparkle stem. Add a strand of lights and you are done!
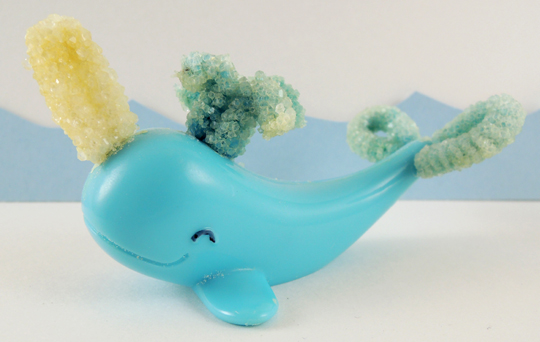
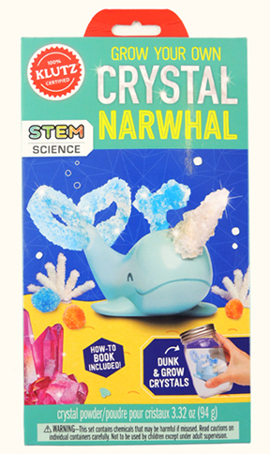 The kit provides the basic pieces to get started. Namely an instructional booklet, 2 pipe cleaners, crystal powder, a plastic narwhal figurine, and a little paper backdrop to pose the finished product on.
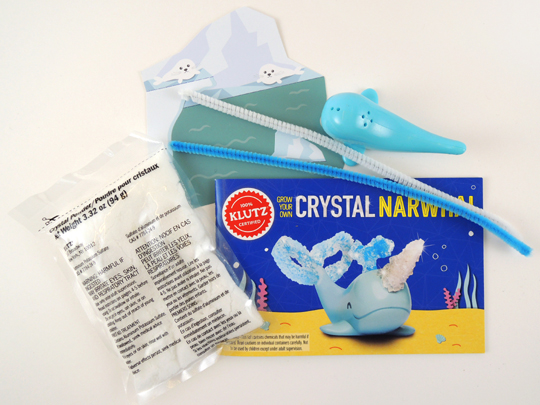 However, you will have to fill in some gaps with items you may or may not have already at home: 2 heatproof glass jars with lids (I used old jelly jars, but Bell jars would totally work), measuring cups and spoons, a plastic plate, and a pot holder or trivet. Most importantly, you need to use distilled water to make the crystal growing solutions. I bought a gallon of distilled water at the grocery store for 99 cents.
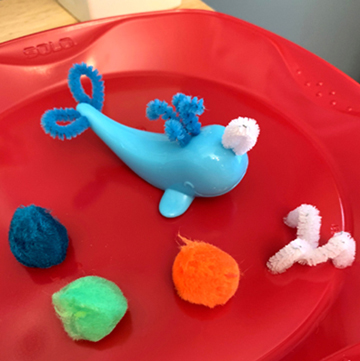 Next, you make a crystal “growing solution” and let the narwhal soak in the solution for 4-8 hours. If you made the solution correctly, crystals will grow on the pipe cleaners. Let the narwhal dry overnight, then do a second round of soaking in the growing solution. If your experiment worked, you finish with a beautiful narwhal with a crystal tusk, water spout and tail!
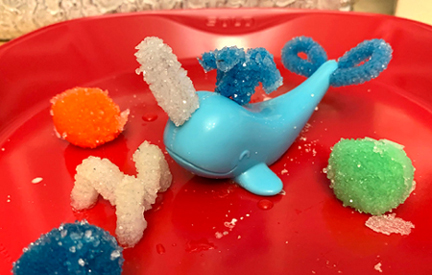 One suggestion…I had to get a bit creative with my glass jar because there wasn’t enough growing solution liquid to fully cover my narwhal. I simply rolled up a dish towel and rested my jar at an angle so the pipe cleaners were submerged.
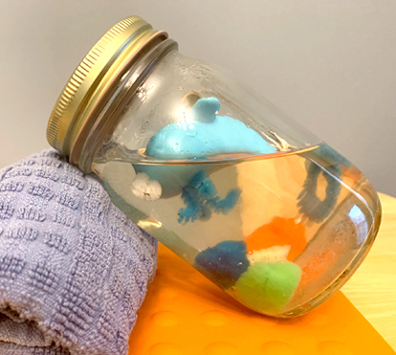 Another suggestion is using something other than your fingers to remove the narwhal from the liquid after it is done soaking. I used a wood skewer, but you can also use a plastic spoon or tongs. In fact, every time I handled the narwhal or any of the experiment materials, I thoroughly washed my hands to remove residual crystal powder (which is aluminum potassium sulfate, or alum).
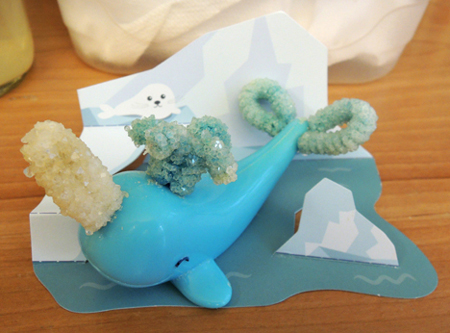 It took me 4 days to finish the project. But I allowed extra soaking time for the pom-pom “icebergs” to grow bigger crystals, so technically you can wrap up the experiment in 3 days. There is a great deal of adult supervision to complete this kit. I fully agree with the suggested age range of 8 and older with adult assistance. There is no way a child should work with stove tops, microwaves, boiling water, and chemicals without an adult present.
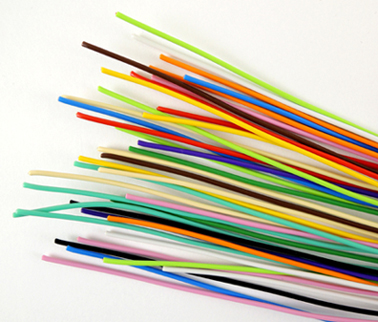 I also like Twisteez because, unlike craft stems and
  And it’s not just for kiddie art projects! In researching this post, I learned that Twisteez was invented by 2 artists – Harold and Kiki Rabinowitz – 55 years ago. Together, with their 6 children, it has bloomed into a family-owned business. They have an
 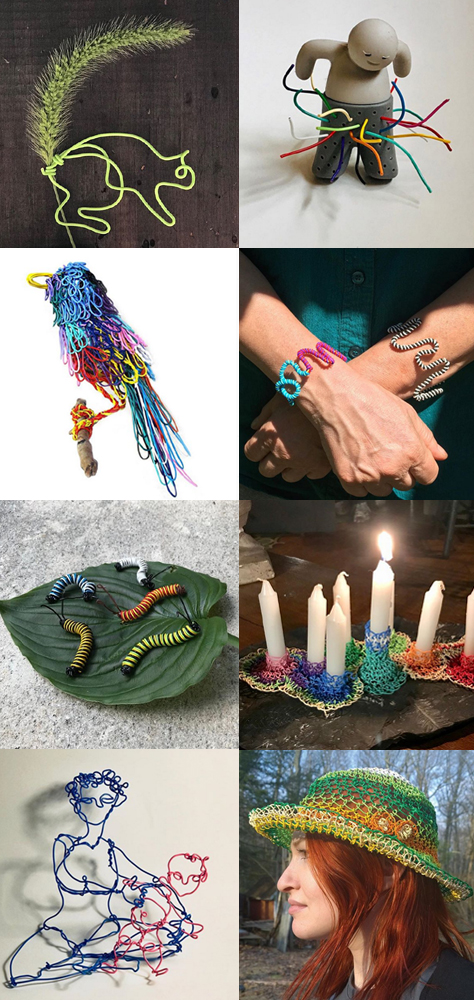 Twisteez wire is, however, a bit more expensive then the aforementioned pipe cleaners and sparkle stems. It comes in 30″ long strands, bundled together in packs of 50 ($10-$13) and 200 ($35-$42). You can also get 60″ long bundles of 50 for around $23-$30.