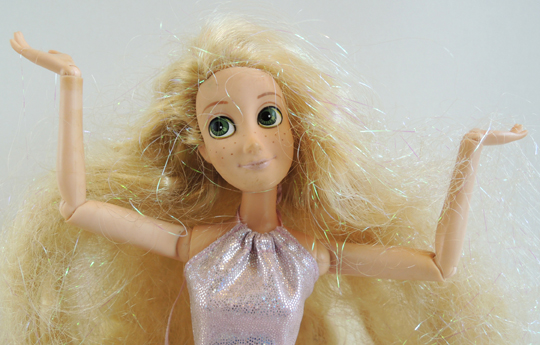
 Rapunzel! Rapunzel! Let down your hair…GAAAAAAAAAAAH!
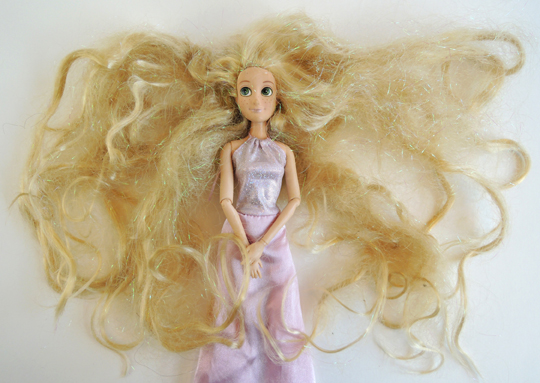 Whoa! What is this snarled, knotted, mess? Sigh. Our children’s dolls come out of the box looking so perfect. But somehow, over the course of a few weeks, their hair slowly begins to revert to a feral state. Eventually, a severe scissor intervention is required. But is a dramatic haircut really necessary? Or is there a magic recipe for working out those knots? We decided to tackle six of the Internet’s most popular methods for getting Rapunzel’s hair a little less, well…Tangled.
Our six testing methods can be further subdivided into 2 categories: 1) Detangling; and 2) Curling. We mixed and matched a bunch of different detangling and curling techniques, and then used the best results to attempt to sort out the Rapunzel doll.
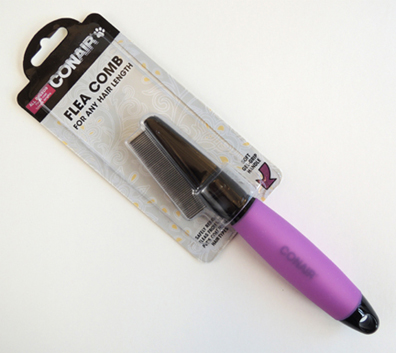
But before we get started, a quick word about an essential piece of equipment – a comb. As you will soon see, plastic combs DO NOT work. They’re just not strong enough to hold up to the knots. The best thing to use is a flea comb from your local pet store. A flea comb has very fine, very strong, and very compact teeth that work very well.
 To find testing subjects, I went to the local thrift store. There, I found plenty of dolls who were having bad hair days, including Rapunzel. Then it was on to research and supply acquisition. For detangling, we decided to try spray-on detangler, fabric softener, regular hair conditioner, and white vinegar. For curling, we tried drinking straws, bubble tea straws, and markers. With these supplies in hand, Marissa headed to the staff lounge’s sink for a somewhat brutal spa day with the dolls. Take it away Marissa!
METHOD #1: SPRAY DETANGLER
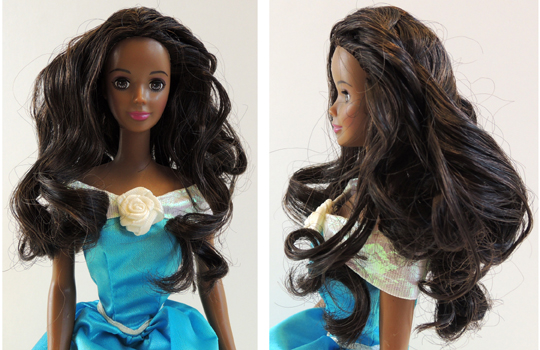
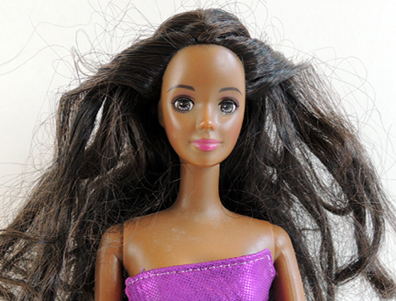 First, I thoroughly covered the doll’s hair with spray detangler (purchased from the baby care section of Target). Then, I used a plastic comb to work on the knots, brushing from the bottom of her hair and working my way up. My first piece of advice – make sure you hold the doll’s head tightly. Otherwise, it could pop right off! My second piece of advice – don’t use a plastic comb. It doesn’t work. In fact, I broke a tooth off mine and had to dig through the mess of her hair to find it. Phew! Eventually, I laid the doll’s hair flat on the counter and really tore into it with the comb. The knots came out, but so did chunks of her hair!
Now that the hair was detangled and rinsed, it was time to curl it. I curled sections of the hair around plastic drinking straws, which I pinched shut and secured with rubber bands.
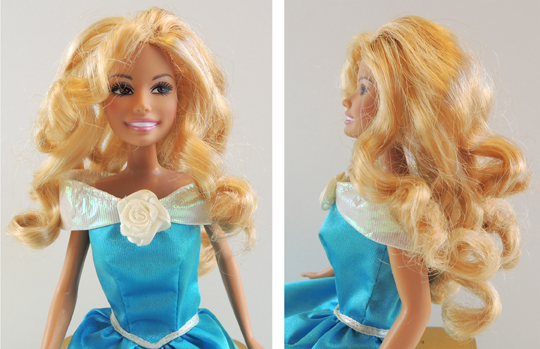
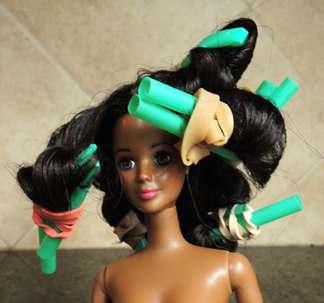 I had read that dunking the hair in hot water would lock in the curl, so I dunked the doll’s hair. Note! Be careful when you remove the doll from the water, because hot water gets into the straws and can dribble out, giving you a nasty burn. I let the hair air dry with the straw curlers in it. And…the results were great! Smooth, untangled hair with lots of soft curls.
METHOD #2: FABRIC SOFTENER
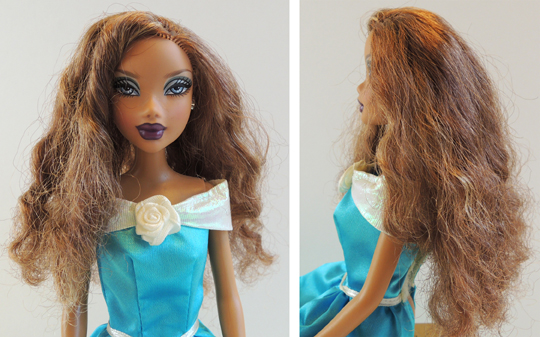
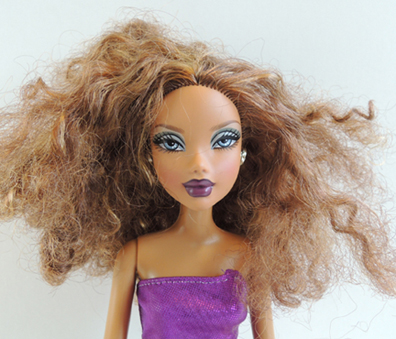 I’ll start by saying that this doll’s hair was SUPER knotted. I didn’t think I was going to get any of the tangles out! I filled a plastic cup halfway with warm water and added a tablespoon of fabric softener (Mrs. Meyer’s Natural). Then I soaked the doll’s head in the mix for a minute or two, swirling her around to make sure her hair was completely soaked. This time I used the flea comb. It was much better than the plastic comb, but her knots were still pretty crazy. So I dunked her head in fabric softener again. It was much easier to comb after that! Finally, the knots were out, and her hair was thoroughly rinsed. Unfortunately, the doll lost a significant portion of her hair during testing, leaving parts of her scalp visible. She also lost an earring. Huh.
METHOD #3: HAIR CONDITIONER
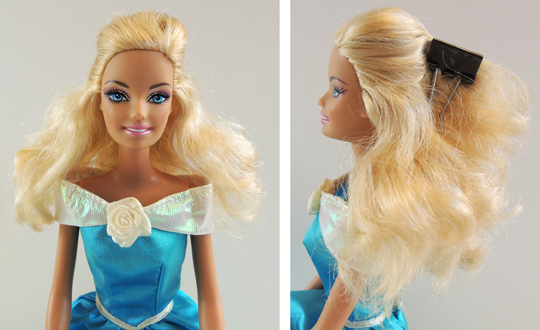
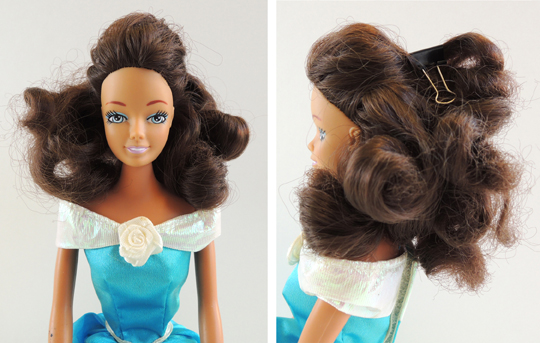
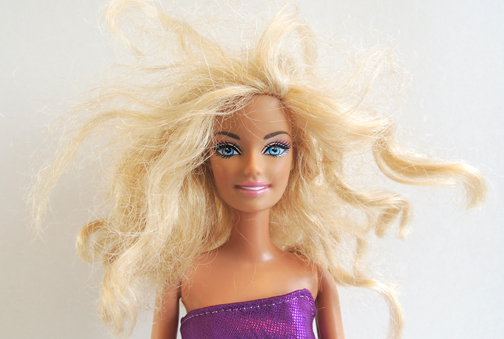 I rinsed the doll’s hair under warm water, then added regular hair conditioner (Alba Botanica’s Hawaiian Coconut to be exact). Using a quarter-sized amount, I massaged it evenly through her hair. Then I started combing with the flea comb. It worked well, but pretty soon the conditioner and the loose hair make a kind of paste, which was really gross. I was happy when I finally got to rinse it out. Interestingly, this doll did not experience as much hair loss as the previous 2 dolls. Maybe it was because her hair was much shorter? In the end, her hair turned out puffy and soft. Maybe a little too puffy. It necessitated a binder clip in the back to get the wave under control for her reveal photo.
METHOD #4: WHITE VINEGAR
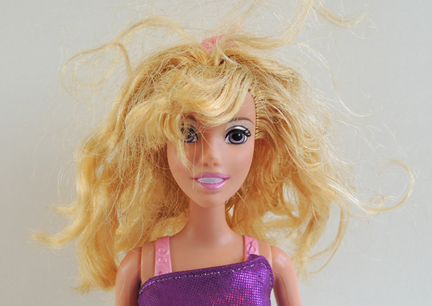 This doll had greasy hair (ewwww!). I’m thinking a previous owner had put some product in it which left it quite unpleasant to touch. I thought she was the prime candidate for a white vinegar treatment. Hoping to dislodge some of the goop, I let her hair sit in very hot water for a few minutes. Then I used the flea comb to get the knots out.
I mixed 1 part vinegar to 1 part water and dunked her hair in it for a few minutes. Then I rinsed her hair (which successfully remove the vinegar smell), and set the doll aside to dry. Well, it didn’t work. Her hair was still greasy. In fact, it seemed greasier then before! Maybe dish soap would have been better?
METHOD #5: DRY COMBING
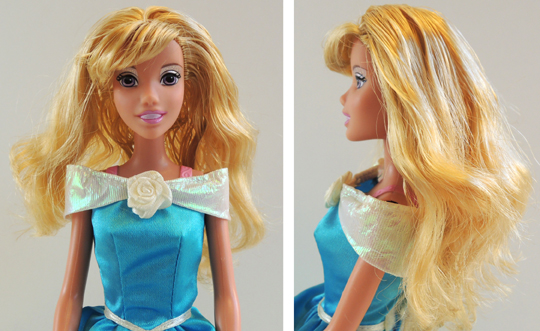
 I decided to not use any product on this doll’s hair. I just dry combed it with the flea comb. It was a bit challenging. If you use this method, I recommend laying the hair flat on the counter and working from bottom to top. Once the tangles were out, I decided to curl it using fatter bubble tea straws. Like the doll in Method #1, I rolled a section of the hair around the straws, then pinched the straws shut with rubber bands. Next came the hot water dunk. Then I wondered – would the curl stay in if her hair was wet?
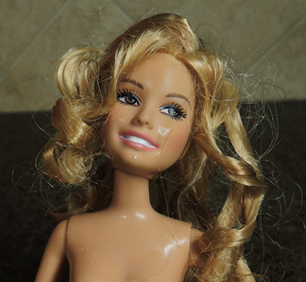 Yes, it worked! Even soaking wet, the hair was curled. It held its curl while drying too!
METHOD #6: MARKERS vs. STRAWS
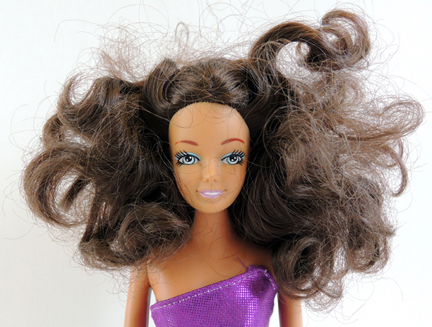 The curl results from Method #1 and Method #5 got me wondering about the radius of the curlers and the sort of curl it produced. So for my final doll, I decided to do a side-by-side comparison. For the wide curls, I decided to try something firmer than bubble tea straws. This time, I used fat Crayola markers.
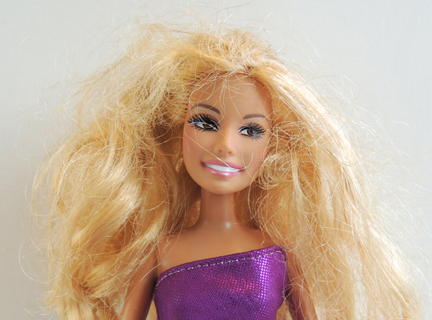
First, I dry combed her hair with a flea comb. Then I wrapped one half of her hair with markers, and the other half with drinking straws secured with rubber bands. I knew that dunking in hot water locks in the curl, but what about NOT dunking it? I skipped the hot water dunk and just left the markers and straws in to set overnight. It worked! The markers made big bouncy curls. The straws made smaller, tighter curls.
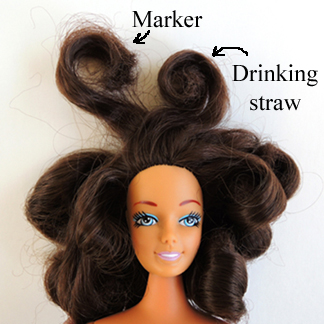 She definitely had lots of body to her hair, so we brought out the binder clip once again.
AND NOW, THE GRAND FINALE…RAPUNZEL!

If I thought I had dealt with knotted hair before, it was NOTHING compared to Rapunzel’s mess. To further complicate things, her hair was interlaced with sparkly tinsel. After testing six different methods, I decided to go with spray detangler. It worked really well for doll #1, and I could also spot spray the really big snarls. It took 3 people 2 days and several hours to get the tangles out. Rapunzel lost a ton of hair in the process.
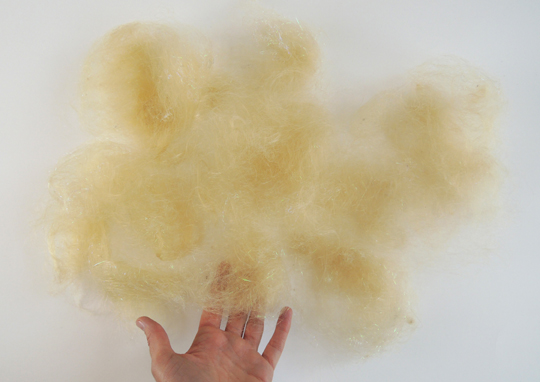 Since her hair was 15″ long, I decided to use markers to curl it (I also read good things about using wooden dowels, but didn’t have any on hand). That resulted in some pretty bulky curlers, so I secured them with pieces of twine. Here’s her big reveal…
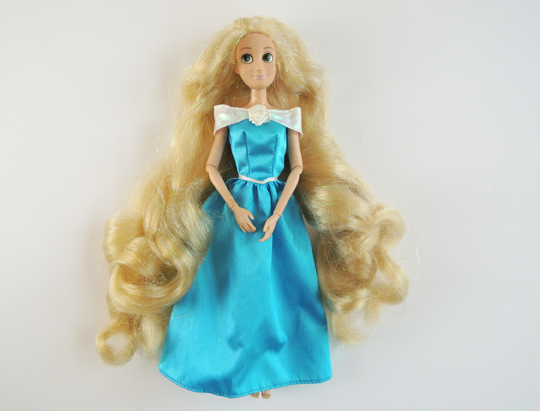 TA-DAH! You know, I think she looks pretty good! Sure, she lost a lot of hair, but there’s still enough left to climb a tower!
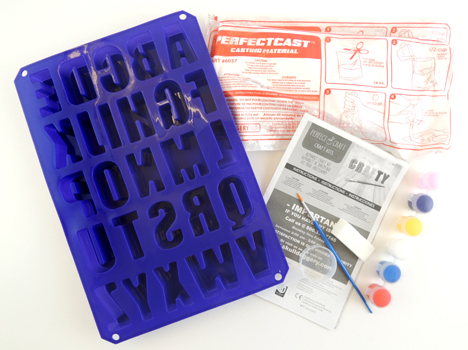
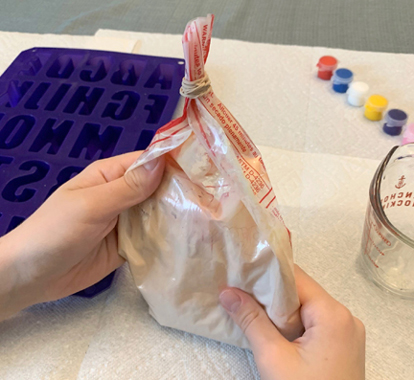
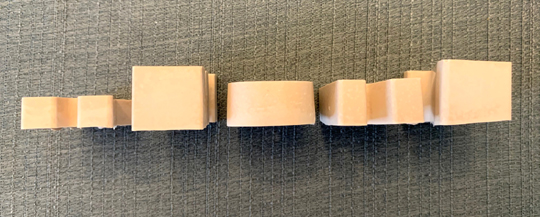
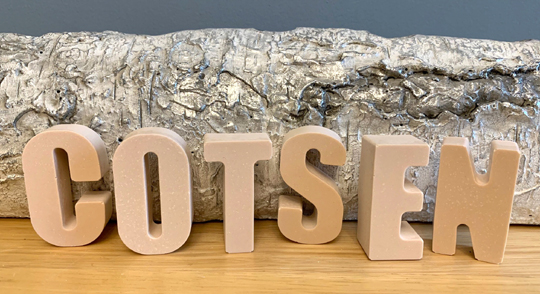
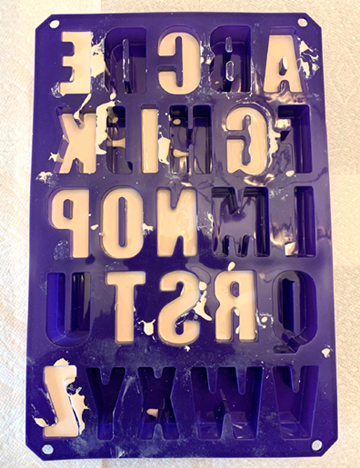 One entire bag of casting mixture allowed us to make 13 letters, but be careful! The instructions suggest you fill the letter mold about ¾ full. However, due to the fast pour of the mixture, we sometimes overfilled. As you can see, the final letters E and Z were quite thick!


 Rapunzel! Rapunzel! Let down your hair…GAAAAAAAAAAAH!
 Whoa! What is this snarled, knotted, mess? Sigh. Our children’s dolls come out of the box looking so perfect. But somehow, over the course of a few weeks, their hair slowly begins to revert to a feral state. Eventually, a severe scissor intervention is required. But is a dramatic haircut really necessary? Or is there a magic recipe for working out those knots? We decided to tackle six of the Internet’s most popular methods for getting Rapunzel’s hair a little less, well…Tangled.
 To find testing subjects, I went to the local thrift store. There, I found plenty of dolls who were having bad hair days, including Rapunzel. Then it was on to research and supply acquisition. For detangling, we decided to try spray-on detangler, fabric softener, regular hair conditioner, and white vinegar. For curling, we tried drinking straws,
  First, I thoroughly covered the doll’s hair with spray detangler (purchased from the baby care section of Target). Then, I used a plastic comb to work on the knots, brushing from the bottom of her hair and working my way up. My first piece of advice – make sure you hold the doll’s head tightly. Otherwise, it could pop right off! My second piece of advice – don’t use a plastic comb. It doesn’t work. In fact, I broke a tooth off mine and had to dig through the mess of her hair to find it. Phew! Eventually, I laid the doll’s hair flat on the counter and really tore into it with the comb. The knots came out, but so did chunks of her hair!
 I had read that dunking the hair in hot water would lock in the curl, so I dunked the doll’s hair. Note! Be careful when you remove the doll from the water, because hot water gets into the straws and can dribble out, giving you a nasty burn. I let the hair air dry with the straw curlers in it. And…the results were great! Smooth, untangled hair with lots of soft curls.
 I’ll start by saying that this doll’s hair was SUPER knotted. I didn’t think I was going to get any of the tangles out! I filled a plastic cup halfway with warm water and added a tablespoon of fabric softener (Mrs. Meyer’s Natural). Then I soaked the doll’s head in the mix for a minute or two, swirling her around to make sure her hair was completely soaked. This time I used the flea comb. It was much better than the plastic comb, but her knots were still pretty crazy. So I dunked her head in fabric softener again. It was much easier to comb after that! Finally, the knots were out, and her hair was thoroughly rinsed. Unfortunately, the doll lost a significant portion of her hair during testing, leaving parts of her scalp visible. She also lost an earring. Huh.
 I rinsed the doll’s hair under warm water, then added regular hair conditioner (Alba Botanica’s Hawaiian Coconut to be exact). Using a quarter-sized amount, I massaged it evenly through her hair. Then I started combing with the flea comb. It worked well, but pretty soon the conditioner and the loose hair make a kind of paste, which was really gross. I was happy when I finally got to rinse it out. Interestingly, this doll did not experience as much hair loss as the previous 2 dolls. Maybe it was because her hair was much shorter? In the end, her hair turned out puffy and soft. Maybe a little too puffy. It necessitated a binder clip in the back to get the wave under control for her reveal photo.
 This doll had greasy hair (ewwww!). I’m thinking a previous owner had put some product in it which left it quite unpleasant to touch. I thought she was the prime candidate for a white vinegar treatment. Hoping to dislodge some of the goop, I let her hair sit in very hot water for a few minutes. Then I used the flea comb to get the knots out.
 I decided to not use any product on this doll’s hair. I just dry combed it with the flea comb. It was a bit challenging. If you use this method, I recommend laying the hair flat on the counter and working from bottom to top. Once the tangles were out, I decided to curl it using fatter
  Yes, it worked! Even soaking wet, the hair was curled. It held its curl while drying too!
 The curl results from Method #1 and Method #5 got me wondering about the radius of the curlers and the sort of curl it produced. So for my final doll, I decided to do a side-by-side comparison. For the wide curls, I decided to try something firmer than bubble tea straws. This time, I used fat Crayola markers.
 She definitely had lots of body to her hair, so we brought out the binder clip once again.
 Since her hair was 15″ long, I decided to use markers to curl it (I also read good things about using
  TA-DAH! You know, I think she looks pretty good! Sure, she lost a lot of hair, but there’s still enough left to climb a tower!