
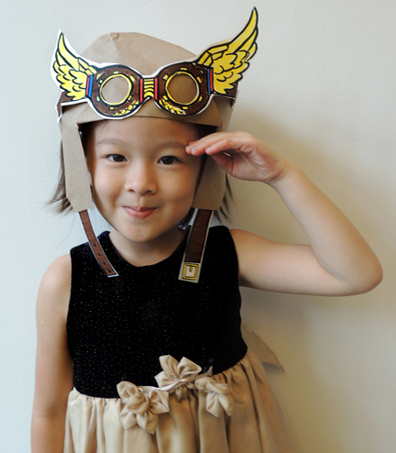
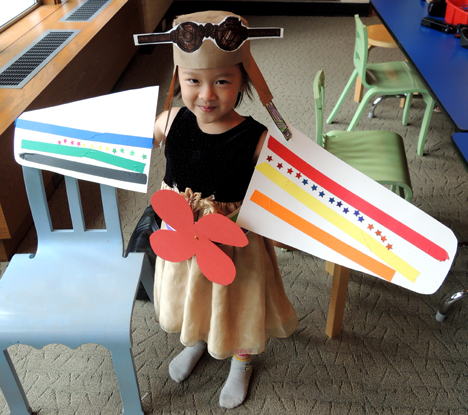
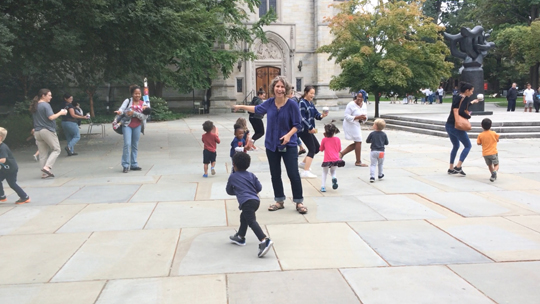
We’re zooming into the wild blue yonder with this amazing aviator hat AND a pair of custom airplane wings and propeller belt. The sky is the limit!
 We read Pilot Pups, written by Michelle Meadows, and illustrated by Dan Andreasen (Simon & Schuster, 2008). Join a pair of enthusiastic stuffed dogs as they fly through the house in a toy plane. Dodging mountaintops (Dad’s head), encountering fog (tea kettle), and careening past the creek (kitchen sink), and returning to the bed before anyone notices their daring adventures.
You’ll need:
- Brown packing paper
- Poster board
- 1 aviator hat goggle template, printed on 8.5″ x 11″ paper
- 1 aviator hat buckle template, printed on 8.5″ x 11″ paper
- Hole punch
- Ribbon
- Stapler and scissors for construction
- Markers for decorating
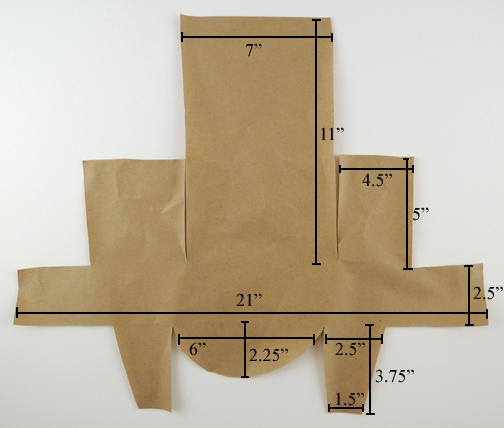
It took a little tweaking, but I finally came up with a single piece aviator hat template that works. Here’s what the template looks like with its various dimensions:
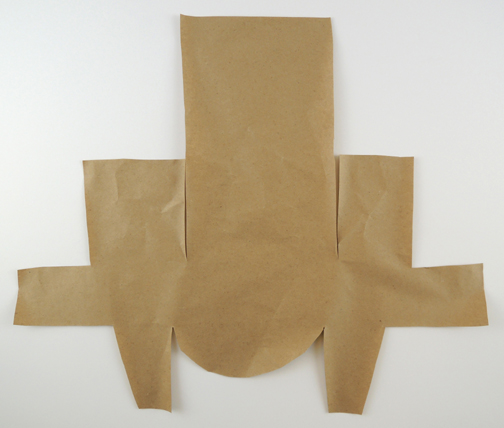
And here’s an unmarked shot of it, so you can clearly see its shape:
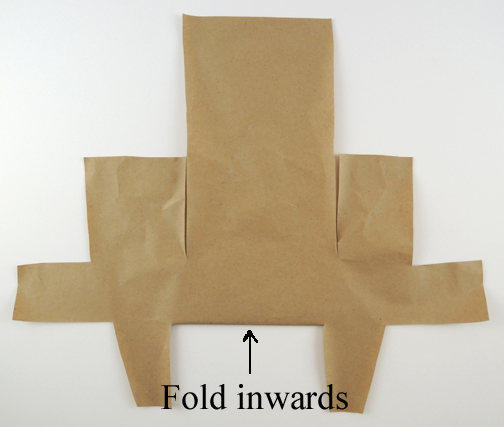
 First, fold the rounded part of the template upwards and inwards, so it tucks under the back of the template. Later, this will be the bill of your aviator hat.
 Hold the template to your forehead and curve the long ends around your head. Secure the ends together with staples. This is the headband of your hat (and, if the template band doesn’t go all the way around your head, just add a little extender piece in the back).
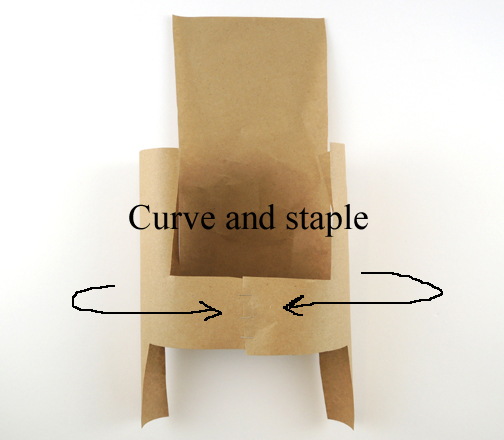 Next, fold the right and left flaps over the top of your head. Secure them together with staples. Note: you want the flaps to form a bit of a “dome” over your head, not fit super tight on top of your skull.
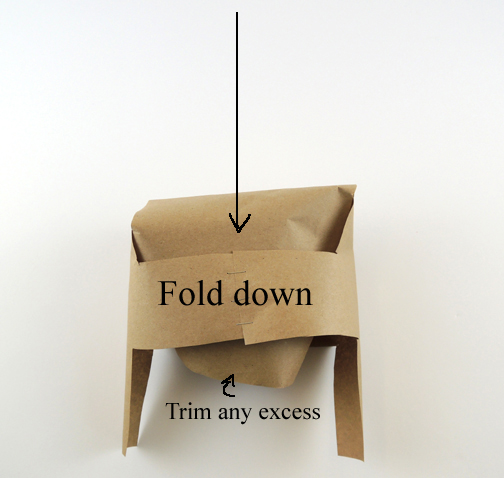
 Fold the the center flap down over the top of your head, gently tucking it into the back of the hat brim. Trim off any excess flap sticking out from under the brim.
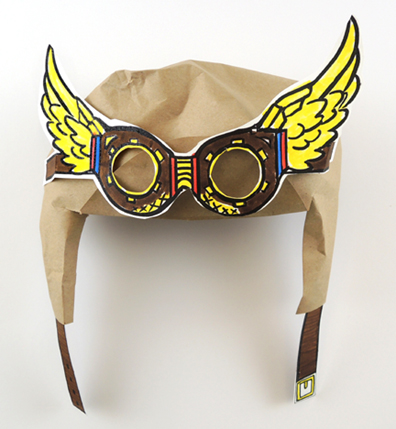
Turn the hat over and squish and round the edges of the center flap to make the hat look more rounded. Decorate the goggles (yay steampunk story time!) and buckles from the template, then attach them to the hat like so:
 That’s your hat, now for the rest of the costume! The wings are super simple. We cut pairs of 9.5″ x 16″ wings from white poster board, which the kids decorated with markers, color masking tape, and star stickers. Add poster board wrist and shoulder loops to the undersides of the wings. You can see the placement of the loops in the photo below (most kids chose to grasp the wrist loops in their fists while “flying”):
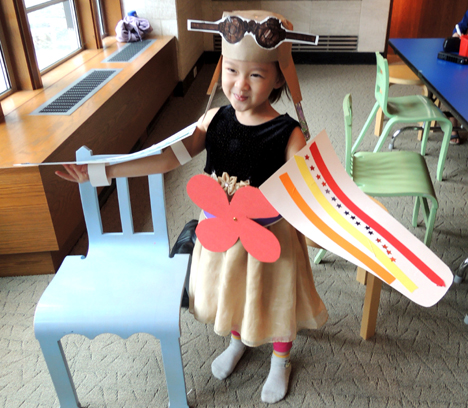 The propeller belt is a strip of poster board with holes punched in each end. Wrap the belt around your waist and secure it in place with a snippet of ribbon (decorate with markers and color masking tape of you like to) threaded through the belt holes. You can simply attach a poster board propeller to the front, or you can make it spin by using a brass fastener.
You’re ready to soar!
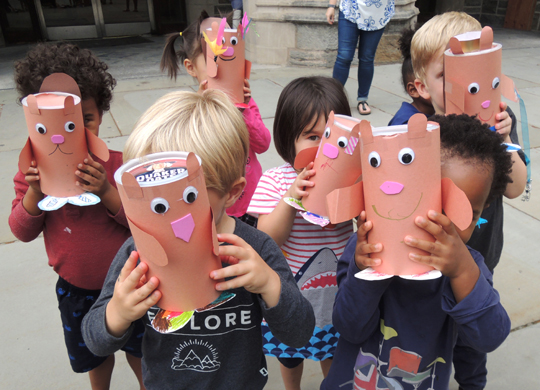
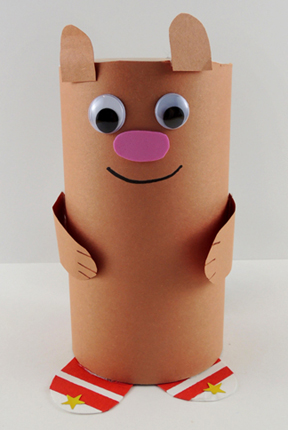
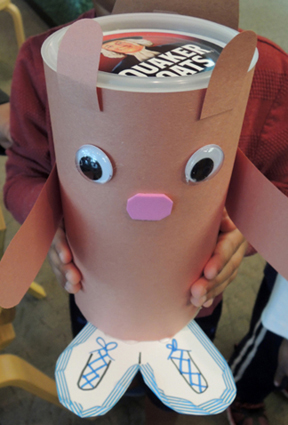 Next, the acorn! This is a packing tape core. Our cores were 3.5″ tall, which is slightly taller then your average core (we get them through our
 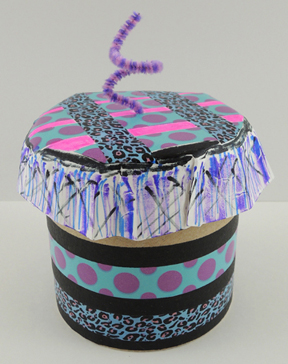 You might have noticed the acorn looks a little…unusual. That’s because kids were instructed to make the acorn as enticing as possible. Which means going crazy with ,
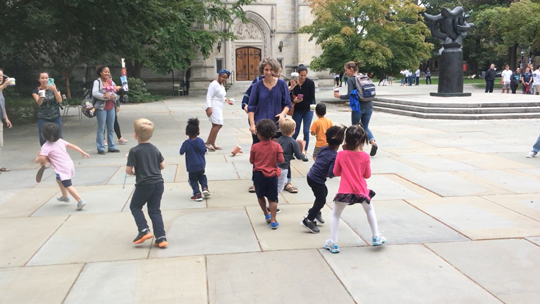
 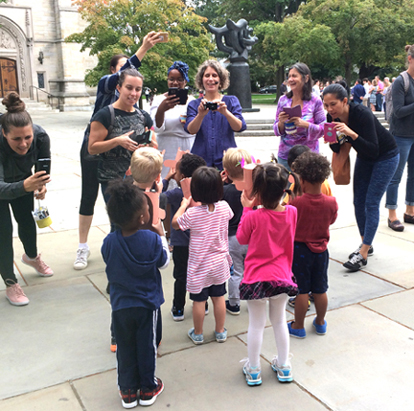 We asked the kids to line up. The grown ups, acorns in hand, got a little head start. Then on the shout of “Go!” the kids chased after their respective acorns!
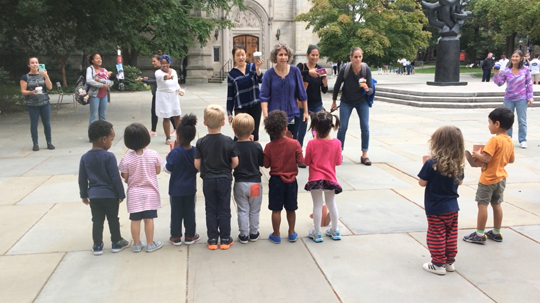
 A lighthouse shines in the darkness, allowing your little boat to safely navigate our story time waters – which look surprisingly like blue contact paper. Huh. Who knew the ocean came in long, rectangular sheets?
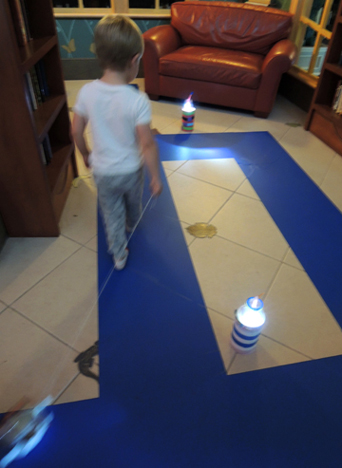
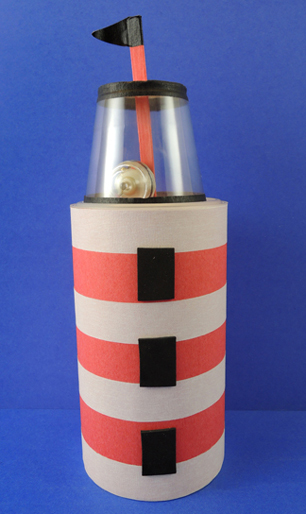 The most important part of this lighthouse is the light! You can put an LED votive or a mini glow stick in there and be done. But we wanted two things: 1) The top of the lighthouse to rotate; and 2) The light inside to “spotlight” like a real lighthouse. So I grabbed a bunch of submersible LED lights from the floral section of Michaels Craft (bring a 40% off coupon, because these are pricey at $20 for 12).
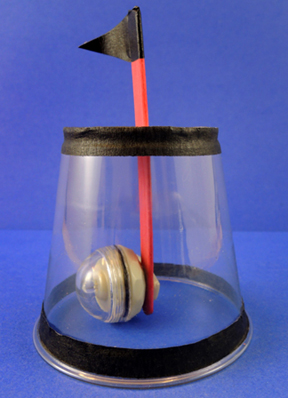 First, wedge one end of a 4.5″ craft stick into the clip on the back of the LED light. Next, cut a slit in the top of a soft plastic cocktail cup. Thread the free end of the craft stick up through the slit in the cup. Finish by adding a masking tape or construction paper flag to the top of the craft stick.
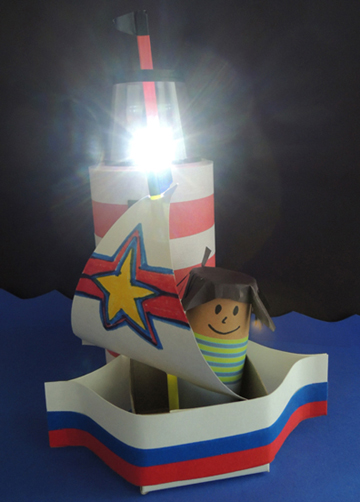
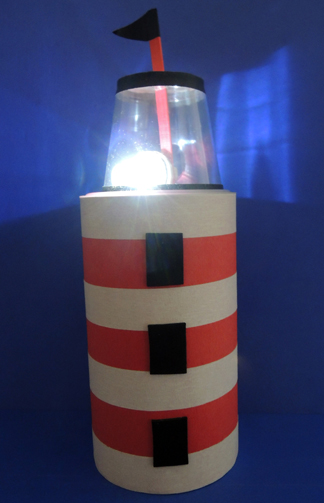 Next up, the sailboat! Cut the top and/or lid off a small box, then hot glue 2 poster board strips on each side of the box. Pinch and hot glue the free ends of the poster board together in the front and back to create a boat shape. Tape a string to the top front of the boat (if you tape the string to the bottom, the boat will keep capsizing).
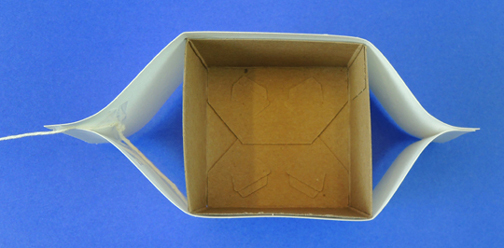 Next, use scissors to enlarge the hole of a foam bead. You want the hole large enough to hold a drinking straw. Hot glue the foam bead to the front of the boat. Note how the foam bead is not centered in the boat – it’s glued a little ways towards the front:
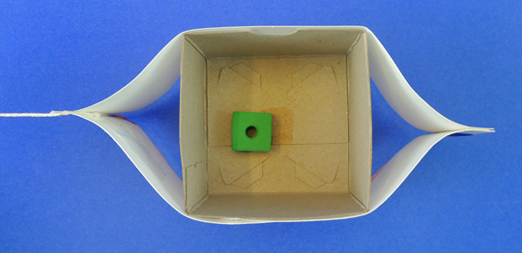 Why is the foam bead slightly forwards in the boat? So you can fit your toilet paper tube person behind the sail of the boat (though if you use a slightly larger box, this might not be an issue).
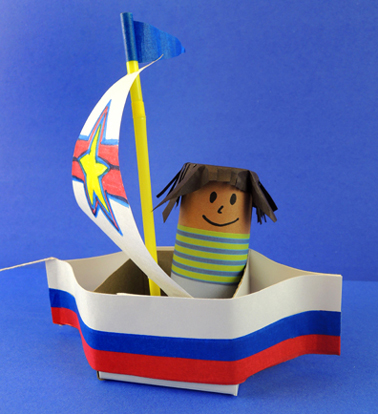 To finish the boat, use a hole punch to create holes in the top and bottom of a triangle of white construction paper. Decorate the sail with markers, then thread it through a drinking straw. Insert the bottom of the straw into the foam bead (we also recommend a masking tape or construction paper flag to the top of the mast to keep the sail from popping off). Use construction paper and markers to decorate the boat and a toilet tube person.
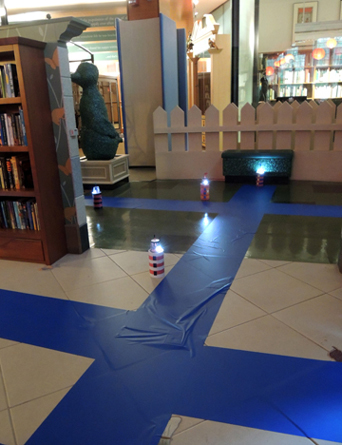 The kids pulled their boats along the pathway, which was lit by beautiful little lighthouses…