
 A trio of birds has invaded your kitchen, intent on repeatedly interrupting your bonding with a baked good. Can you get the birds out of the kitchen and still take the cake?
We read Marigold Bakes a Cake by Mike Malbrough (Philomel Books, 2017). On Monday, Marigold the cat ALWAYS bakes. With no distractions, Marigold measures and mixes the ingredients just so. Everything is going well…until birds start unexpectedly visiting his kitchen. This drives uber-organized Marigold more and more crazy until he finally loses it in a total feline frenzy. Can the birds and Marigold reach a cake-appreciating middle ground? Hilariously, as it turns out, they cannot.
This project was designed for a little girl who has been coming to Tiger Tales for 3 years! Marigold Bakes a Cake was the (totally awesome) book she selected for her final visit with us. Diana, this one’s for you!
You’ll need:
- 1 small tissue box
- 1 small paper plate
- 1 paper cup
- 3 toilet paper tubes
- Construction paper
- 1 cardboard box kitchen (more on this later!)
- Scissors, tape, and glue for construction
- Markers for decorating
- Hot glue
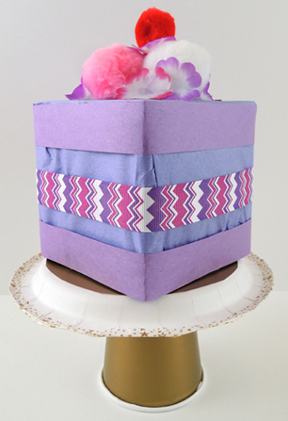
First, the cake! This was a small tissue box decorated with construction paper and marker. We also added pom-poms, fabric flowers, and ribbons for more texture. The cake stand is a small paper plate flipped over, and hot glued to a similarly flipped paper cup. We used patterned tape to decorate the cake stand, but markers work great too!
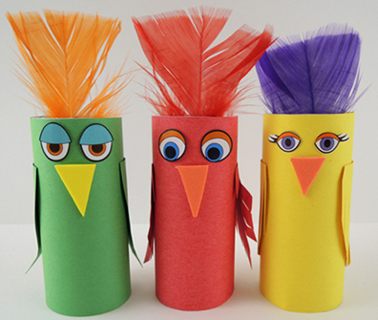
 To make the birds, wrap 3 toilet paper tubes with construction paper and add paper wings. Optional: self-adhesive foam beaks, eye stickers, and feather crests. Or, just use markers to add features to your birds.
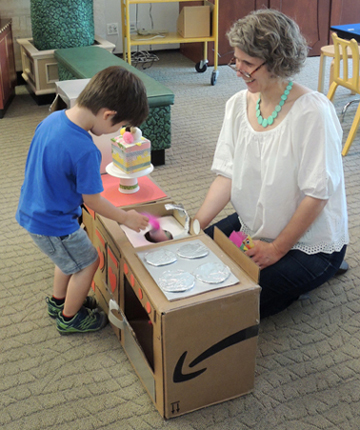
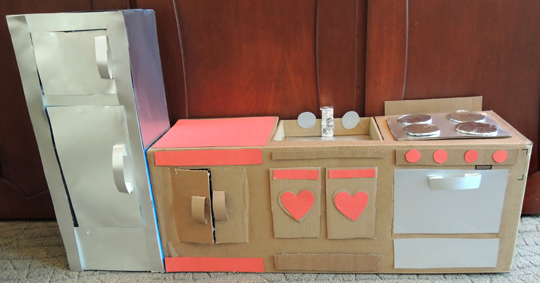
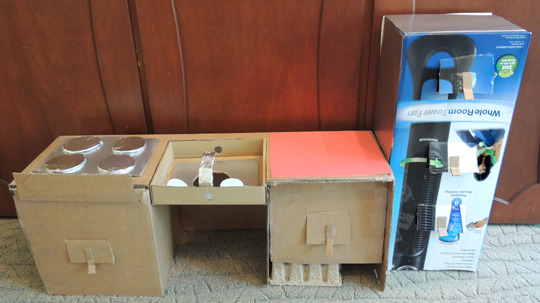
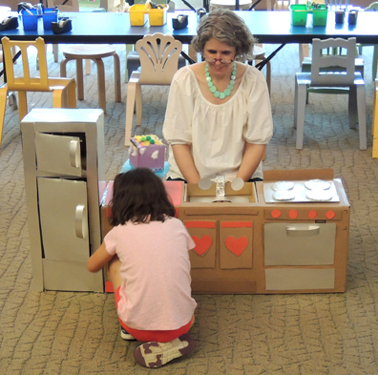
 Once you have your cake, cake stand, and birds, it’s time to play the kitchen game! Katie and I used a bunch of recycled boxes to build a kitchen with a fridge, counter, sink, range, and oven.
 Cut into the back of the set were little trap doors. The trap doors (and the hole in the sink) allowed me to sneak the toilet paper tube birds into the kitchen.
 Ready to play the kitchen game? First, kids handed me their birds and placed their cakes on the counter. Then, they took 10 steps back to the starting line. I would hide 1 bird in the kitchen and shout “The bird’s in the freezer!” The kid would race forward, find the bird, and run back to the starting line. We repeated this, using different kitchen locations, until all 3 birds were captured. The prize was their cake!
 If you don’t have time to construct a kitchen, simply tape images of kitchen elements onto boxes. Then drop the birds into the boxes for the kids to locate.
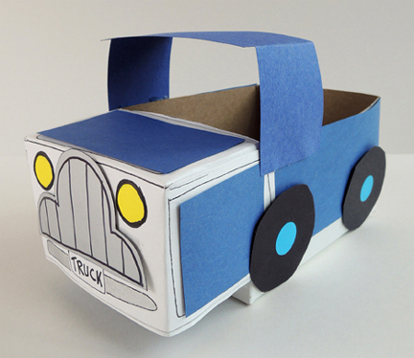 The truck for this project is a duplicate from our “Ultimate Road Trip” post (you’ll find the instructions
 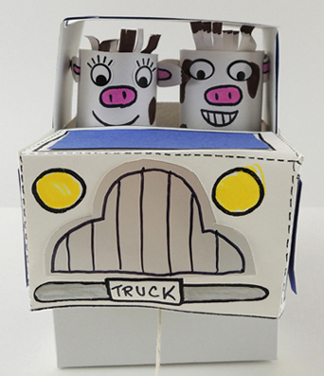 To make the seat, cut a toilet paper tube in half. Fold a rectangle of poster board in two, then hot glue the toilet paper tube “legs” to the bottom of the poster board seat. Secure the completed seat to the inside of your truck with hot glue. Here’s a shot of the front seat from the back of the truck:
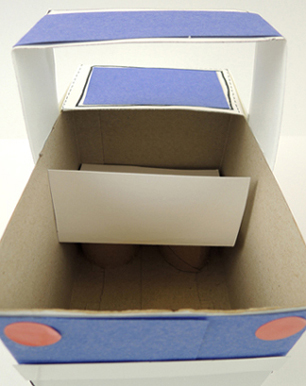 The cows are simply toilet paper tubes, wrapped in white construction paper, with construction paper ears and hair tufts. Decorate with markers. We used
 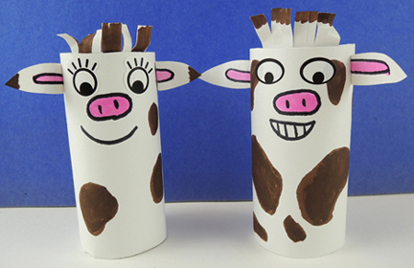 Once the truck and cows are done, it’s time to hit the road! We crafted a New Jersey road adventure, which we will share below. A simplified version of this could be print outs of buildings, billboards, and road signs. Or heck, just draw some directional arrows on Post It notes! Our journey begins at the “Welcome to New Jersey” sign…
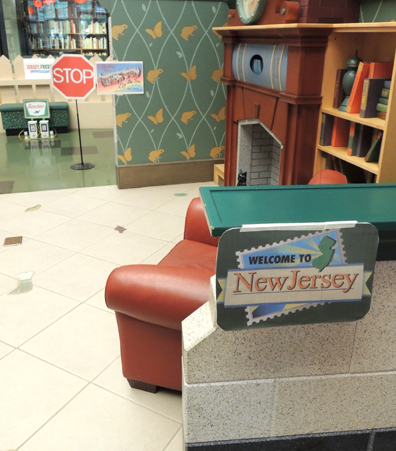 See that cute little gas station in the background? Here’s a close up of it. Katie crafted the nozzles out of
 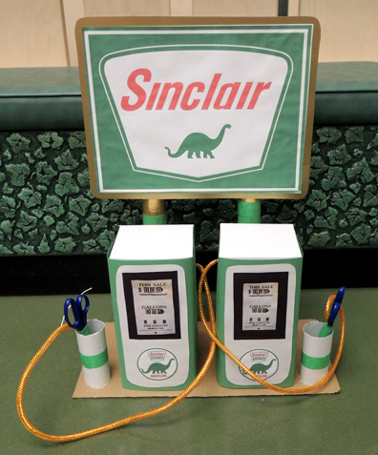 You might also want to stop at Shake Shack for a little treat. These were cotton ball shakes in little sample cups served with a snippet of paper straw. The stand was run by a volunteer older kid.
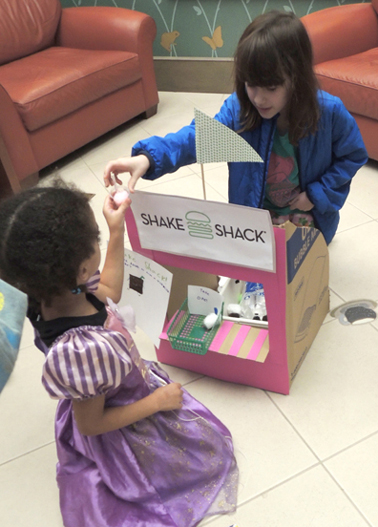 Round the corner, more billboards…
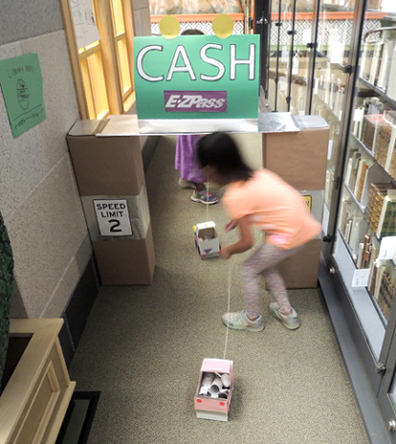
 And one more turn takes you to Katie’s amazingly crafted EZ Pass toll booth!
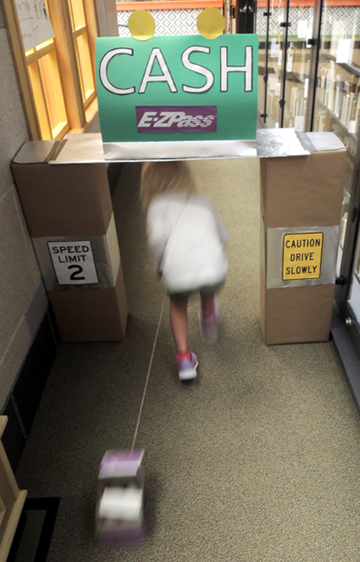 Then it’s just a quick jump onto the NJ Turnpike to begin the loop anew!
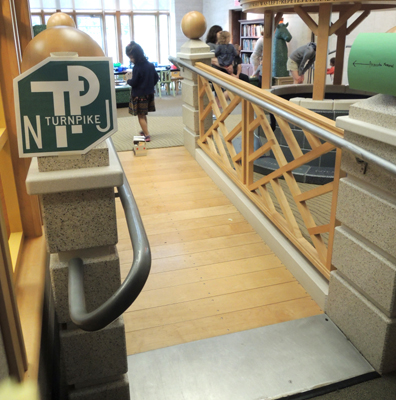 But keep an eye on your speedometer, because there was a cop on the premises to catch cows over the speed limit! This was another older kid volunteer. We had a police hat ready, some ready-to-fill
 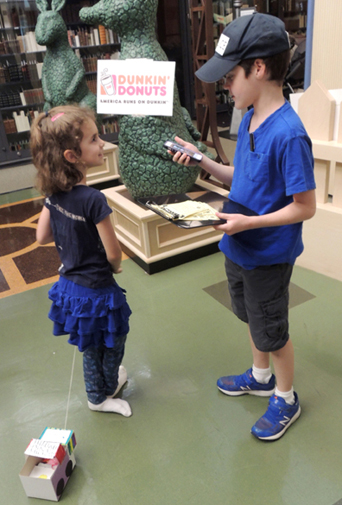 This kid played his part to the hilt, and his speeding tickets were hilarious! There was one speeding ticket for $9,000. And some double tickets. I must admit, I gave out a couple tickets too.
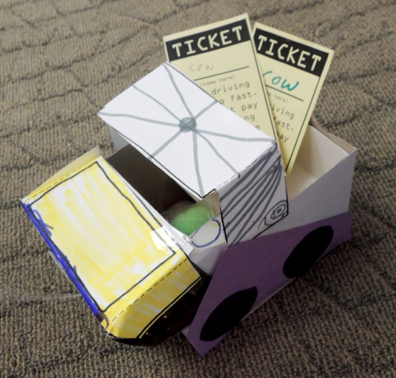 By the way…Katie you still owe me $1000 for your story time speeding ticket. Just sayin’.
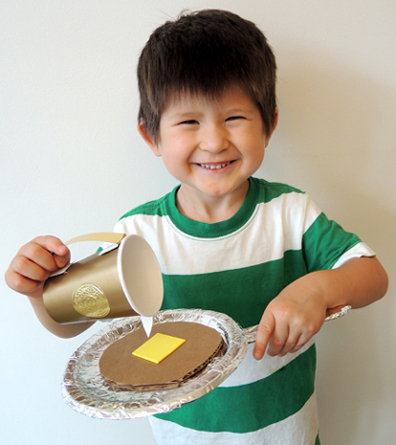
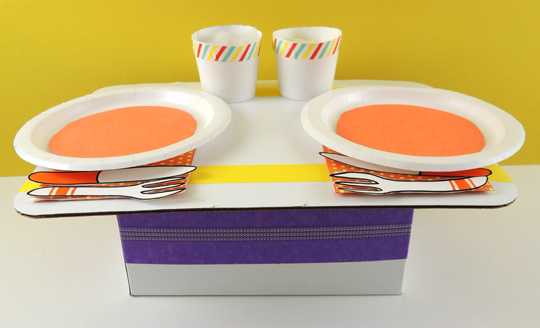 Set the tabletop with 2 small paper plates, 2 paper cups cut down to 2.25″, and the knifes and forks from the template. Optional: adding cotton ball “liquids” inside the cups, paper napkins, and decorating everything with construction paper,
 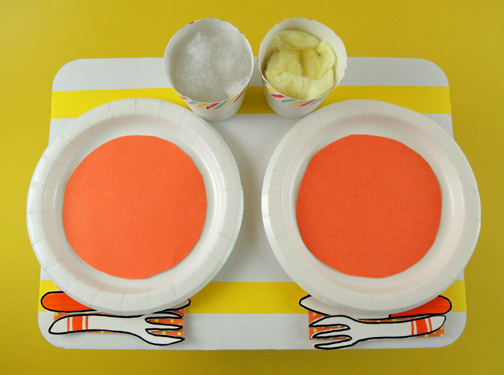 We recommend NOT attaching anything directly to the tabletop. Later, when you’re playing your race game, it’s much funnier when things go flying off the table!
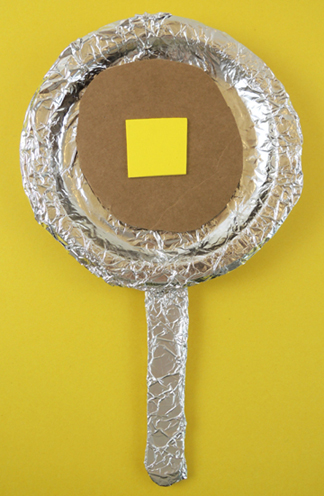 Finally, the golden syrup pitcher trophy! This is a paper cup. We added a gold
 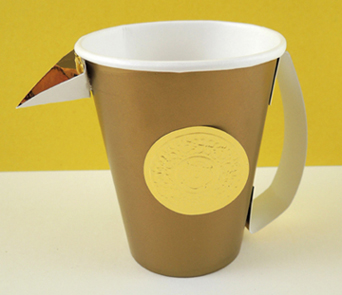 To play the race game, set the table, then have the two players sit some distance on opposite ends. On “Go!” both players must attempt to toss their pancakes to the plates. Keep tossing until a pancake lands on a plate. First one to the plate wins the trophy!