 Interesting fact about Sean Rubin. In high school, he showed his artwork to Brian Jacques and landed himself a Redwall illustration gig. Another interesting fact? Sean is a self-taught artist who majored in Art and Archeology at Princeton University. One final fact. Sean is obviously, wildly and without-a-doubt talented, and I am delighted to announce his debut children’s book/graphic novel, Bolivar (Archaia, 2017).
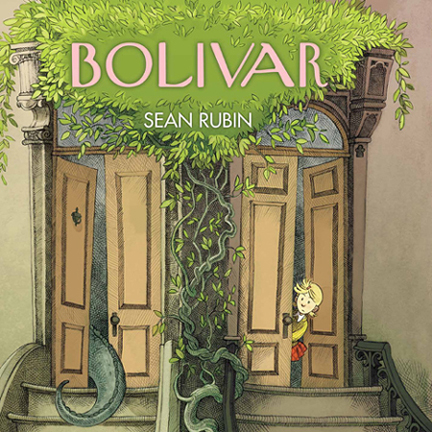
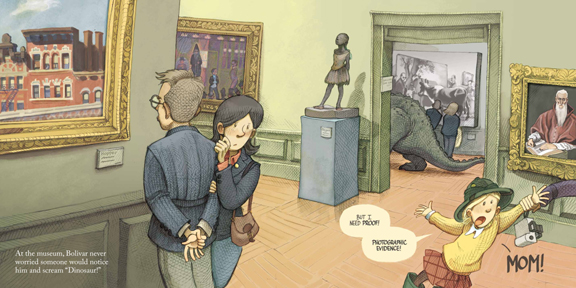
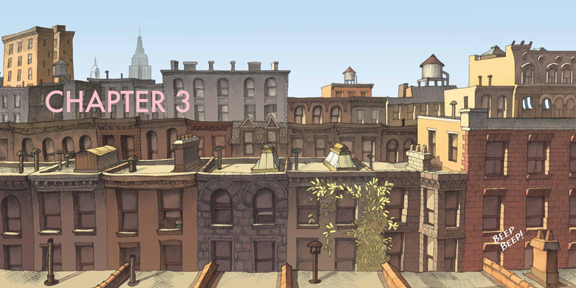
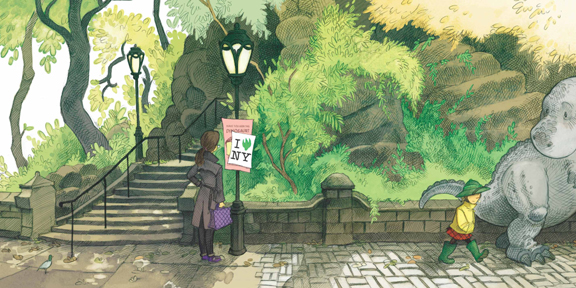
Bolivar, the last of the dinosaurs, wants a peaceful, low-profile life. And where better to NOT get noticed than crowded, chaotic, bustling New York City?
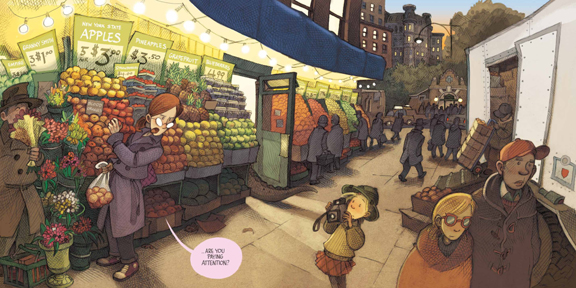
 There is one person, however, who does notice Bolivar – a little girl named Sybil who is doggedly determined to obtain photographic evidence of her prehistoric neighbor.
 Is Bolivar is a picture book with chapters? A graphic novel with picture book narration? Whatever it is, it totally works, manifesting itself as the perfect book for young readers transitioning into reading on their own while also exploring the joys of the comic book format.
Bolivar was released this month, and I chatted with Sean about his fantastic debut.
Bolivar was 5 years in the making. How would you describe those five years…in five words?
Drawing, moving, marriage, two kids!
Tell us about the inspiration for the story.
When I was a kid, I came to own a grey plastic dinosaur that my cousin, the photographer Edward Addeo, named Bolivar. Uncle Eddie has a wonderful sense of humor, so he used to send Bolivar on all sorts of wild adventures over the years—like the time the dinosaur somehow became mayor of New York City.
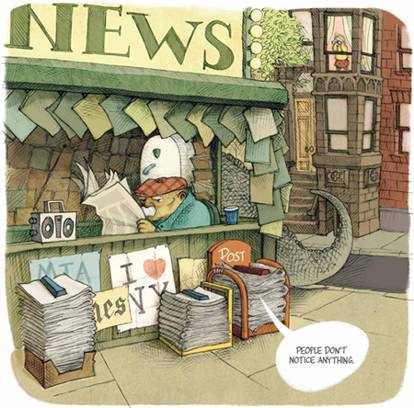
 I thought that was a funny idea, so I started writing a book about it. However, I soon realized that if there was a dinosaur in New York City, no one would actually notice it… at least not for a while.
The image of a dinosaur roaming around Manhattan, while everybody else goes about their business, was too good to pass up. Soon, certain questions about Bolivar began to arise. What did he like to eat? Where did he spend his time? What kind of music did he listen to? And, if someone did finally notice him, what would happen? In many ways, the book is an attempt to answer those questions.
 In her review of your book, Betsy Bird at A Fuse #8 Production blog mentioned how she could genuinely feel New York City in your illustrations, right down to the requisite color orange of the plastic subway seat. Can you tell us about your relationship with New York and how you approached drawing it for the book?
Well, those orange seats appear on the 1 train, also known as the Seventh Avenue and Broadway Local. I have spent many, many hours on that subway line!
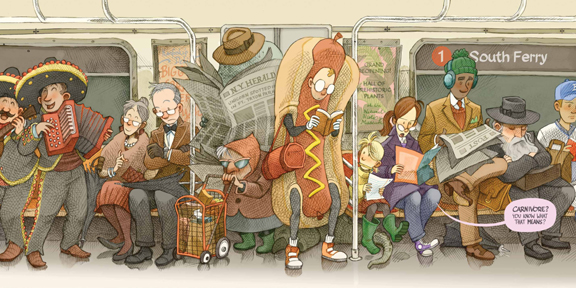 I was born in Brooklyn, and I spent most of my childhood there and on Long Island, which is right next door. After I finished college, I wound up back in the city, this time on Manhattan’s Upper West Side. I love New York. Being a New Yorker is an important part of my self-identity, and there’s no telling how many hours I’ve spent exploring the city, usually on foot.
 Although I started writing and drawing the book when I lived in New York, much of Bolivar was completed after I moved to Virginia in 2015. As a result, when I sat down to draw, I used a lot of photography and old observational drawings for references. Soon, I realized that I wasn’t drawing Manhattan as it is today. The city is always changing, people come and go, stores open and close, and buildings are built and torn down—so who’s to say which version of New York is the most authentic or accurate?
 My references began mixing with my memories, especially my memories of New York when I was a kid. In the end, I think most of the book is actually drawn from these memories. As most of the book is also from a kid’s point of view, I think this actually helped me empathize with Sybil’s perspective.
 Betsy also mentioned that this is “a strange kind of graphic novel/picture book/bedtime novel hybrid,” which might cause some people to have trouble classifying it. How did this hybridization come together?
Bolivar began its creative life as an idea for a 1200-word picture book. As I began pitching the book to potential publishers, I learned that, at least at that time, 800 words was the preferred length for a picture book. I tried, but I couldn’t shave those 400 words and keep the feel of the story. I then decided to do something totally different—I made the book much longer. The original 1200 words of the picture book became the narrative text, and the added material became dialog and comics panels.
 Personally and creatively, the book really took off when I began listening to what the characters had to say. It’s incredible for me to remember that, in the first draft of this book, Sybil was in one scene and said maybe three lines, and her mother didn’t speak at all. I think Bolivar is still mostly a picture book, it’s just a picture book with five chapters, and the characters have succeeded in talking over the author on nearly every page.
When writing the story, was it difficult to bounce between a classic picture book narrative and graphic novel speech bubbles?
Sometimes. It could be a challenge to really combine the two approaches in a meaningful way, as opposed to having large sections that were just comics panels and speech bubbles, and then other sections that were just one or two-page illustrations with narrative text. I’m especially happy with the parts of the book where the two approaches seem to blend most naturally, the second chapter being one example.
 The biggest blessing, and curse, of bouncing between narrative text and panels with dialog balloons involves pacing. In many ways, the panels force you to pick up the pace of your reading. At the same time, they slow down how quickly you’re turning pages. I think the reader will spend more time on a two-page spread that contains a number of panels, and less time on a two-page spread with one, large, open illustration. Ironically, the panel spreads feel faster and the open spreads feel slower. I had to take that into account when establishing the flow of the story.
Your drawings are so intricate, and the detail is fantastic, from the signs on the buildings to objects sitting inside random windows. Can you tell us one of your favorite Easter eggs in the book?
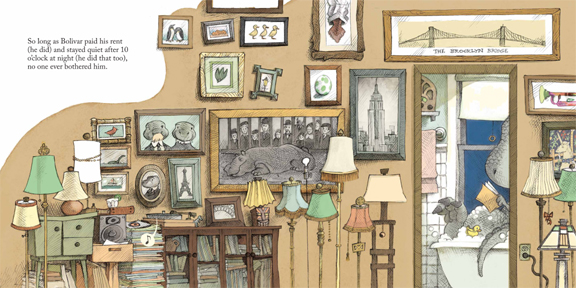
Thanks, Dana—I include those details because they’re fun to draw! Many Easter eggs are included for the benefit of my extended family, who have always been Bolivar’s biggest fans. Of these, my favorite is probably the portrait of Bolivar’s parents, which you can see on the wall in his apartment. It’s based on a photograph of my great-great grandparents, who emigrated from Sicily.
 Of course we both have a connection to Princeton University, so I should probably mention that there are number of Princeton references, too. My favorite of these is definitely the Tigers football helmet in the classroom toward the end of the book.
What are you up to next, Sean?
I’ll actually be illustrating a book written by another author, which should be a refreshing change of pace. Especially because the illustrations for this one are due in a few short months. I can’t say too much yet, but this time, we’re headed to the moon!
I also don’t think this is the last we’ve seen of Bolivar and Sybil, but what they’ll do next, only time will tell.
Images courtesy of Sean Rubin
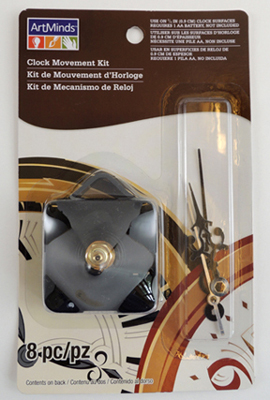 At $8.50 a pop, they can get pricey, especially if you’re doing this project with multiple kids. However, you can find them for a couple bucks cheaper on Amazon. The important thing to keep in mind is the length of the motor’s shaft (i.e. the part that the clock hands slide on to). The shafts can range anywhere from .25″ to 1″. For this project, you want to aim for the shorter shafts. Otherwise, your clock hands will stick pretty far out of your cardboard clock base. Also pay attention to the lengths of the clock hands. You don’t want them to extend past the body of your clock.
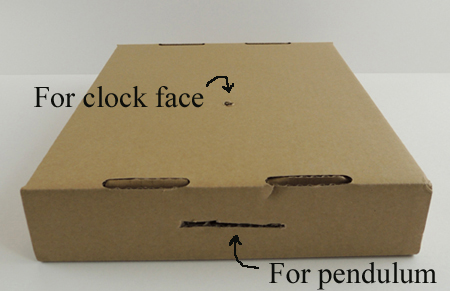 Next, place a piece of tagboard and a circle of white card stock over the hole, then redrill the hole. The circle is your clock face, and the tagboard piece elevates the clock face a little bit.
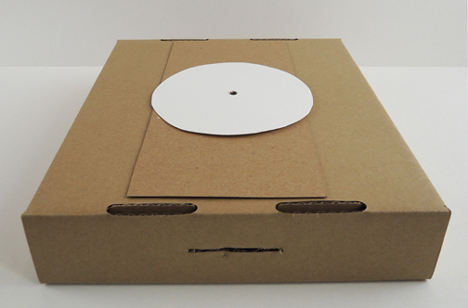 Before you glue the tagboard and the clock face to the lid, however, you’ll want to use markers to add numbers and decoration to your clock face. Check out these awesome clock faces. The smiling kitty!
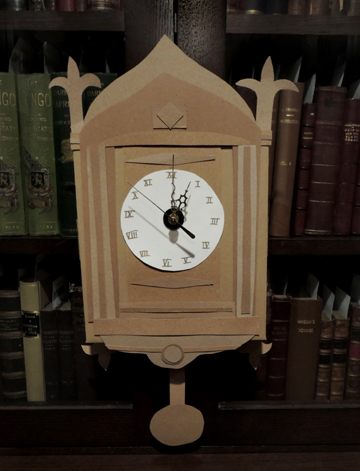
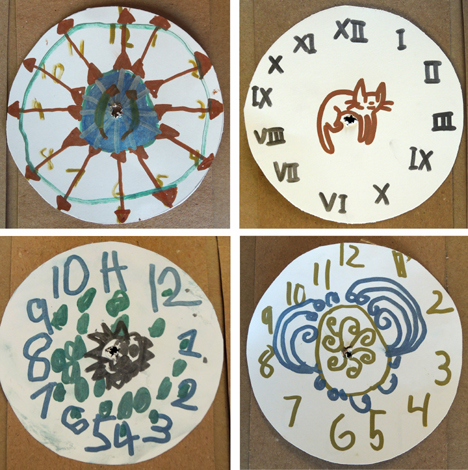 When your clock face is finished, glue it to your clock. Then start adding a bunch of tagboard flourishes. We cut a bunch of different shapes and styles of flourishes, and let the kids decide what they wanted to use on their clocks. The more layers and texture, the better it looks.
 You can also use markers to decorate the clock. We offered Crayola metallic markers, and the results were fantastic.
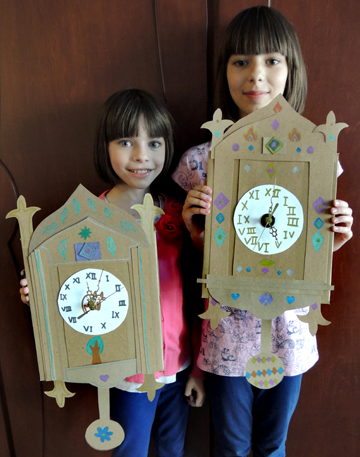 When all the decorating is done, install the clock movement. Just follow the instructions on the packaging, add a battery (a single AA), and you’re done!
 Tap the pendulum to watch it swing back and forth. Eventually, it winds down and comes to a stop, but while it’s swinging, the illusion of a working clock is quite real!
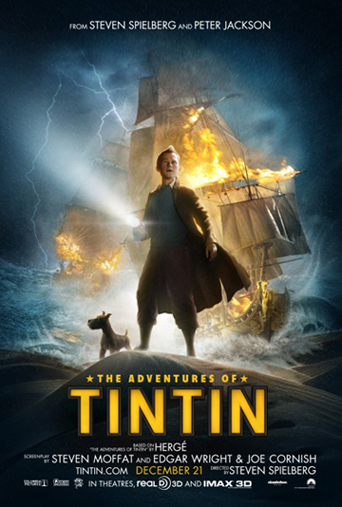
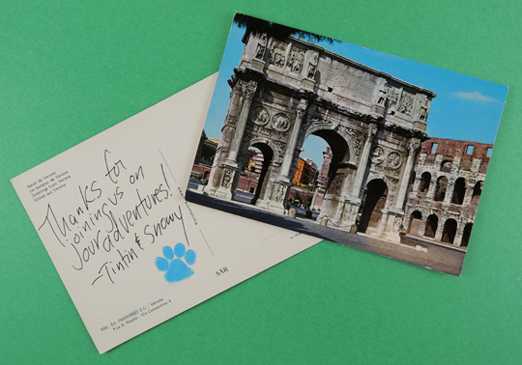
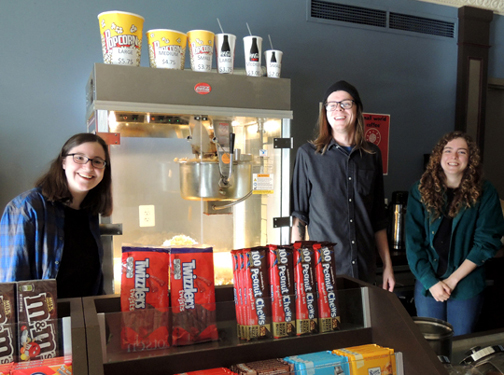 Families entering the theater were greeted by a table covered with postcards (I found a pack of 92 vintage postcards at the thrift store for for $4 woot!) and a big world map.
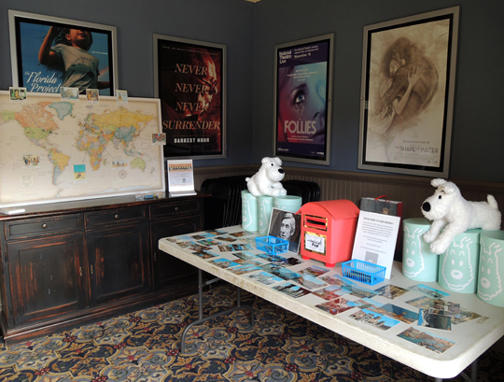 Kids were invited to select a postcard and write their name and address on it. Then, they put the postcard in the red mailbox for a chance to win a stuffed animal of Snowy, Tintin’s faithful canine companion. Katie modeled the mailbox after the ones she saw in Brussels (birthplace of Tintin!). Isn’t it awesome? It has pom-pom feet!
 Next to the postcard table was a big map (50″ x 32″) mounted on foam board:
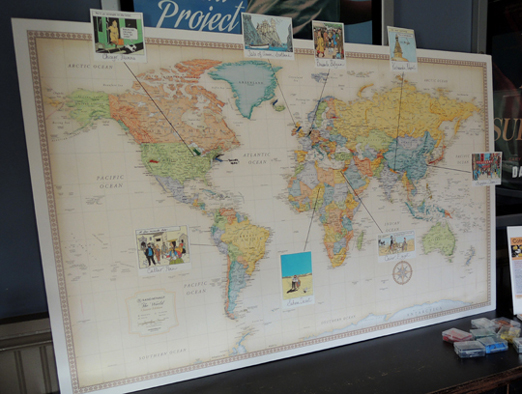 Katie selected some cool Tintin location images from the various volumes and attached them to the map. A line and a flag showed the actual location on the map.
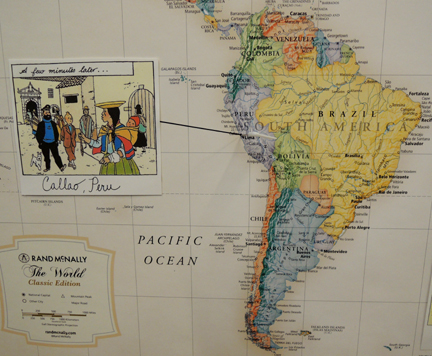 During the event, kids were invited to add pushpin flags on locations they had traveled to. As it turns out, our crowd was pretty well traveled! Iceland, Australia, India, Thailand, Costa Rica, China, Hawaii, South Korea, Europe…
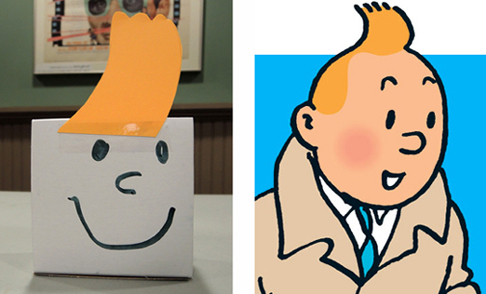
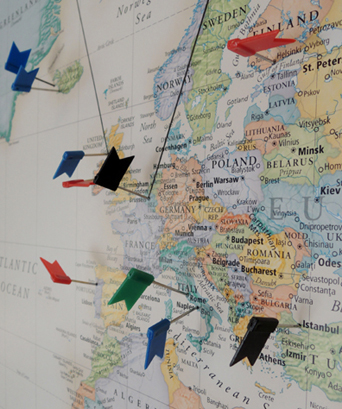 Around the corner from the postcard and map table were 2 additional activities: A Tintin head band with the iconic hair flip, and a pull-along box Snowy. The box Snowy was a 2″ x 4″ x 4″
 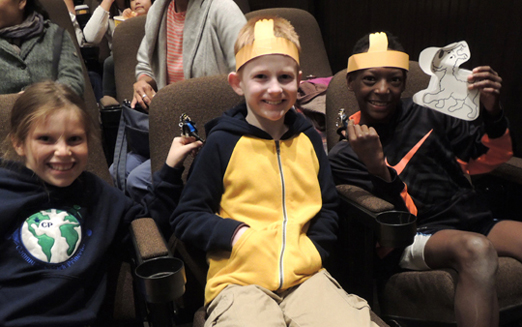 Notice the little Captain Haddock key chains they’re holding up? Those were part of a trivia contest we were running. Our Tintin expert had a couple key chains on hand to give to kids who correctly guessed Snowy’s original name in the comics (which were first published in French).
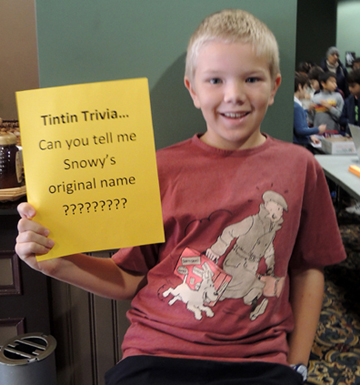 In honor of Snowy, we also had a very, very special performance. A live dog show provided by
  Bill Berloni is a Tony-Award winner with decades of experience training animals. In fact, he trained the very first Sandy for the original production of Annie. He and his apprentice, Andy, brought 3 dogs – Marti, who plays Sandy in Annie (and this was the Sandy from the 2014 movie!), Nessa, who plays Toto in The Wizard of Oz, and Bowdie, who plays Winn-Dixie in Because of Winn-Dixie. Above is Bowdie. Below is Marti, waiting with Andy to go on stage:
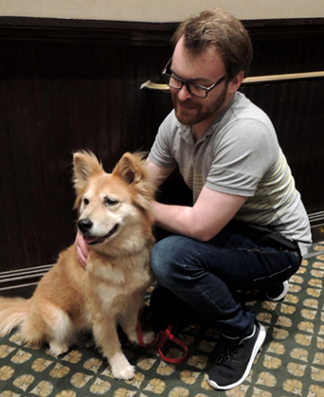 And here’s Nessa, the cutest, most enthusiastic Toto ever, racing down the aisle:
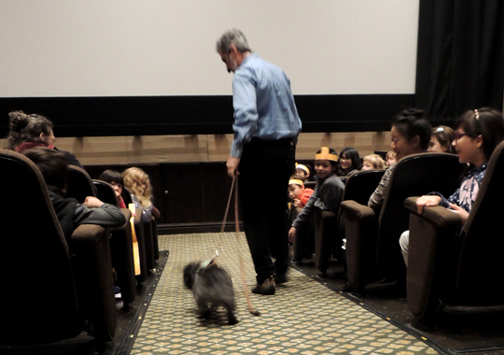 Bill shared a little of his history, his training techniques, and the rescue stories of each of the dogs. There were plenty of demonstrations too, both on and off the leash. The thing that shone through the most however? How happy the dogs are, how much they love working with Bill, and what a tremendous advocate he is for rescue animals. He’s truly amazing. He’s also an author! After the event, he gave me a copy of his heart-warming book, Broadway Tails: Heartfelt Stories of Rescue Dogs Who Became Showbiz Superstars (Lyons Press, 2008), which has a foreword by Bernadette Peters.