
 Lose a tooth? No problem! Our magnetic Tooth Finder 2000 will locate your missing teeth in a jiffy! We also added a little alphabetical deduction game to the mix, as well as a magnetic tooth fairy wand variation.
We recommend reading Cousin Ruth’s Tooth, written by Amy MacDonald, and illustrated by Marjorie Priceman (Houghton Mifflin, 1996). Cousin Ruth’s tooth has gone missing, and the entire Fister clan is on high alert. Uncles, aunts, cousins, grandparent, siblings, and various pets embark on a energetic search through the house, yard, and eventually, the town. In the meantime, cousin Ruth solves her own problem – a new tooth has appeared where the old one used to be!
You’ll need:
- 1 small box (ours was 2″ x 4″ x 4″)
- 1 mini button magnet (ours was .5″ in diameter)
- Tin foil
- String or mesh tubing
- 1 drinking straw
- White card stock
- Paper clips
- Pen
- Tape
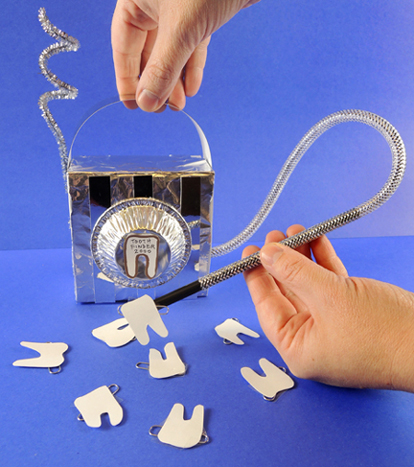
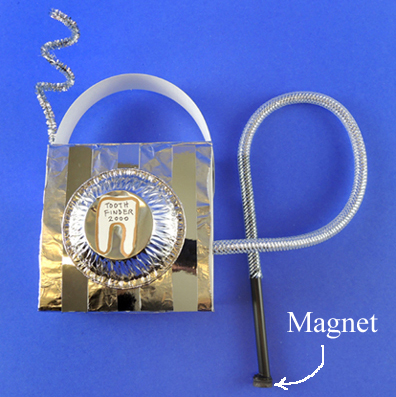
To make a “Tooth-Finder 2000,” cover a small box with tin foil, then add any other shiny stuff you have on hand (we used silver mirror board and a mini aluminum pie tin). Make a card stock handle for the machine, and a sparkle stem antennae if desired. The machine’s “hose” is a piece of mesh tubing, but a simple piece of string works too! The “wand” for picking up teeth is a half a drinking straw with a mini button magnet taped or hot glued to one end. The other end of the straw is inserted into the mesh tubing.
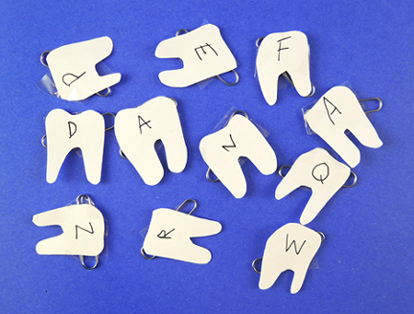
 Cut several teeth from card stock, then tape paperclips to the back. Wave the machine’s wand over the tooth, and it will magnetically connect! We came up with a spelling game as well. To play, write different letters on the teeth, then see if kids can can pick out a particular word or their name from the pile.
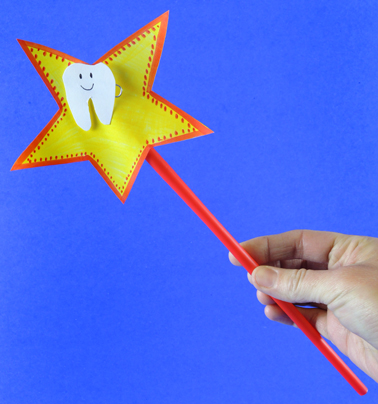
 If you’d like to skip the tooth finding machine and go even simpler, cut a star out of card stock, decorate it with markers, then tape it to a drinking straw. Tape or hot glue a mini button magnet to the back of the star and you have your very own magnetic tooth fairy wand!
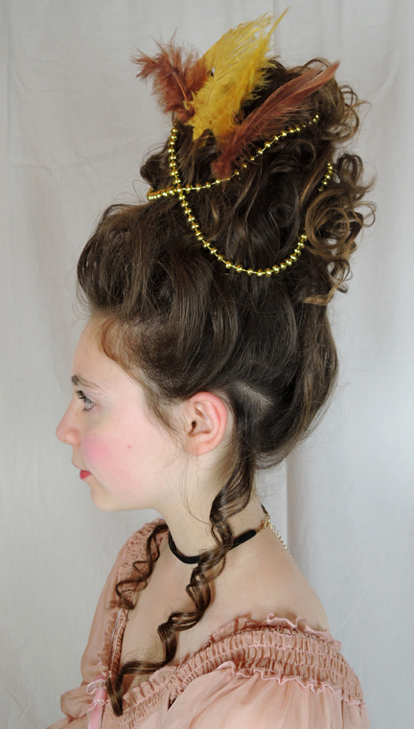
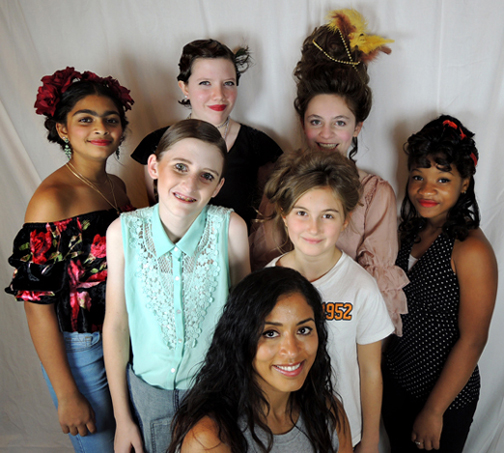
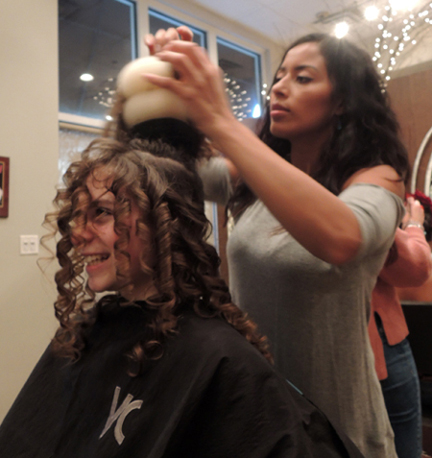 VC Salon, you are amazing. Last week, 5 stylists donated their time and significant skills to give 6 girls totally historic makeovers. And we don’t mean “historic” as in slang for “awesome” (even though the results were awesome). We mean historic as let’s-go-back-in-history-and-do-a-Marie-Antoinette-updo historic.
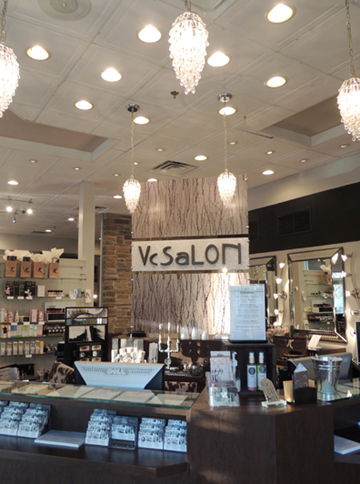
 The collaboration was lead by stylist Delia Salguero. We provided her with the models and pages of historic photos, and Delia recruited the stylists. The stylists then selected the model, the hairdo, and also put together costumes and accessories for the photo shoot.
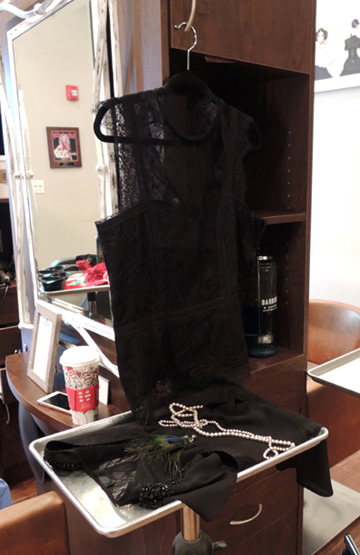 The models were volunteers Cotsen Critix, our children’s literary society. You might recognize one of the faces below. Yes, that’s Hope, our blog’s
 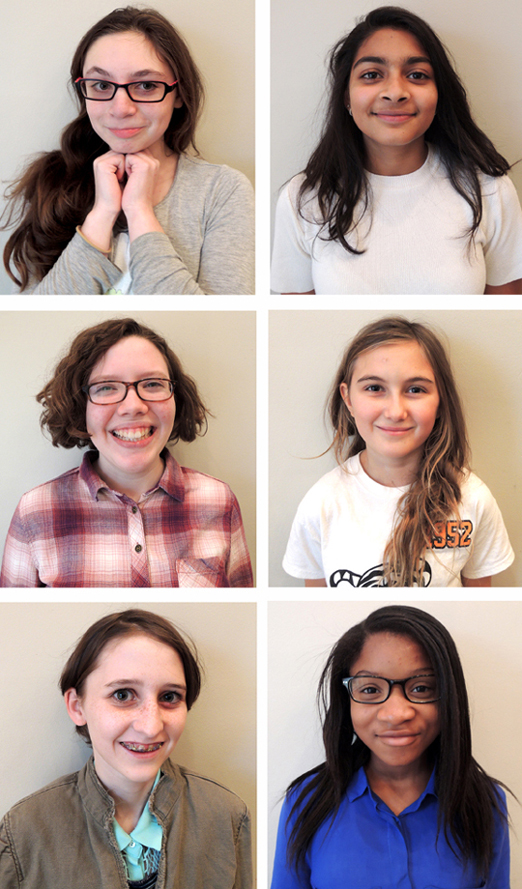 Along with the costumes and the hair came makeup, including one wicked pair of fake eyelashes. So…are you ready to see some historic makeovers?


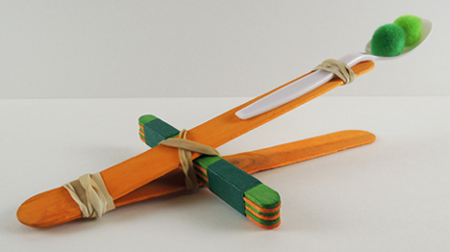
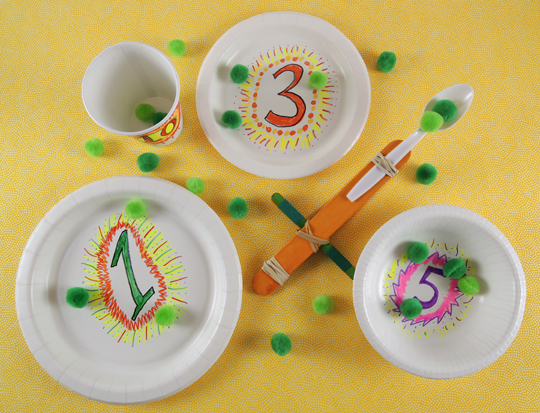 It’s dinner time and the peas are flying! Can your land the pom-pom peas on the plates, bowls, and cups? Bust out your pea catapult and get ready to do some physics and math!
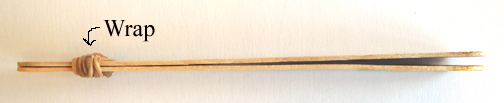
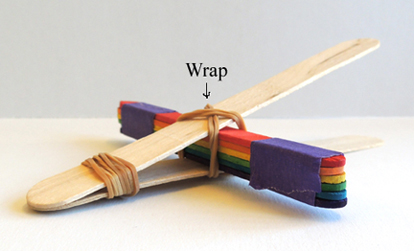
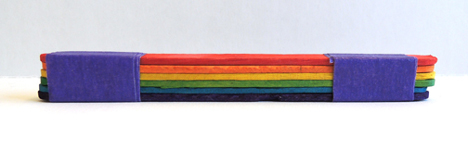 Wedge the stack of 6 craft sticks in between the jumbo crafts sticks like so:
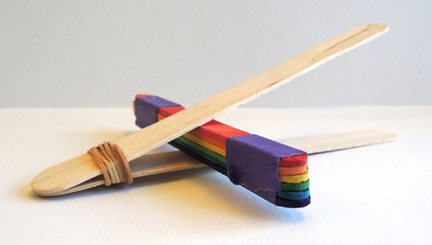
 Now for your targets! Use markers to decorate paper plates, bowls, and cups. Make sure to assign a numerical value to each item.
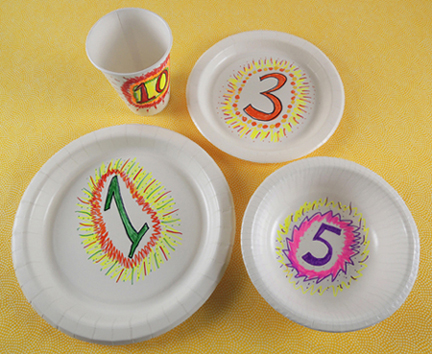 Ready to play? Set your table, load up your catapult, and launch some peas! Use your math skills to tally points, and play around with physics as you adjust your spoon and your catapult to achieve maximum results.