 The minute I picked up Dusk by Uri Shulevitz, I knew we had to create a city full of color and light at our story time. It’s a simple project with truly magical results.
We read Dusk by Uri Shulevitz (Farrar, Straus and Giroux, 2013). A boy, his grandfather, and their dog go for a wintertime walk. As the sky fades to dusk, the lights in the city go on one by one. People stroll and shop, and windows glow in a city that is light as day. This book is set during the holiday season, and includes Christmas, Hanukkah, and Kwanzaa imagery (without mentioning any of them outright). The gorgeous illustrations and lyrical text pull you right into the story. I wanted to capture that beauty and ambiance in our story time project.
You’ll need:
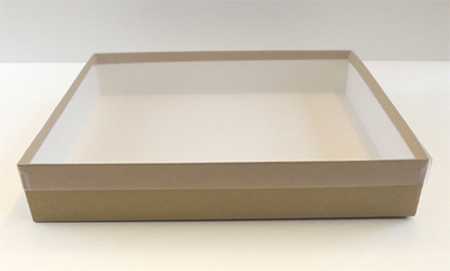
- 1 box with a clear lid
- A piece of tagboard or brown poster board (big enough to cover the box’s lid)
- A box cutter
- A selection of cellophane
- A selection of tissue paper
- Glow sticks
- Scissors and tape for construction
- Markers for decorating
Admittedly, this project can get pricey. Especially the glow sticks (more on those later). It also requires a box with a clear lid or window. I bought my boxes online from Nashville Wraps (they’re “clear lid display boxes” that measure 2″ x 8.75″ x 11.25″). They cost $32.50 for 20, and that doesn’t include the cost of shipping. But just look at the nice, big, clear lid on that box!
 If you’re looking for a cheaper option, you might consider a sheet cake or pie box at your local supermarket or bakery. So long as the box has a window on one side, you’re good.
On to the project! Use scissors to cut a city skyline out of tagboard or brown poster board (we tried black paper, but brown turned out to be a much mellower color). Use a box cutter to add windows, shutters, doors, and doorways. We added a couple of elongated rectangles and triangles as well.
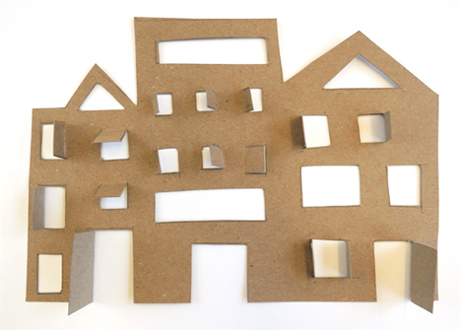 Use markers to decorate the exterior of your city (Crayola metallic markers look especially fantastic). Tape pieces of cellophane and/or tissue paper behind some (or all) of the windows and doors. If you’d like, use dark brown paper to add silhouettes in the windows and doorways.
 And now, we come to the priciest part of this project. Glow sticks. Our 11.25″ boxes illuminated best with six, 4″ sticks inside them. I bought my sticks at Party City (a pack of 25 costs $10). So I spent $40 on glow sticks. Dang. Daaaang. You could definitely make do with fewer sticks and a smaller box to reduce the cost.
By the way, not all glow sticks colors have the same intensity. White, for example, is very weak (and actually light purple, not white). Yellow is strong, orange and red are somewhat in the medium range. For our project, we used yellow, red, orange, and white.
Activate your glow sticks, arrange them in your box, and secure them in place with tape.
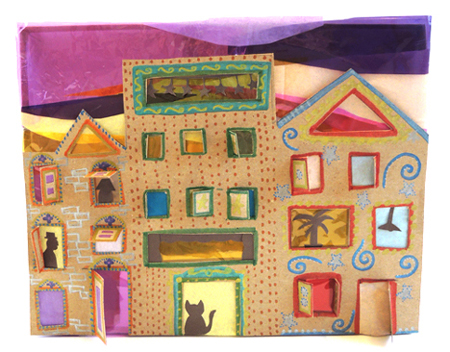
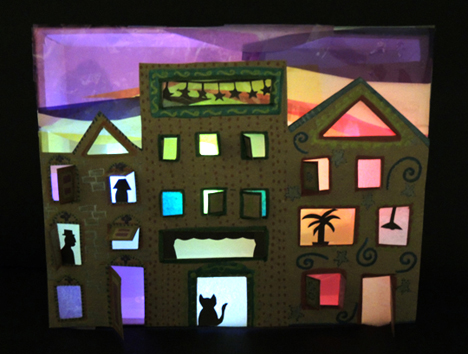
 Put the lid back on the box, and use pieces of tissue paper, cellophane, and tape to create “dusk” on the box lid. When you’re done with the sky, tape the city onto the box lid. Below, you can see my finished box with its dusk-filled sky:
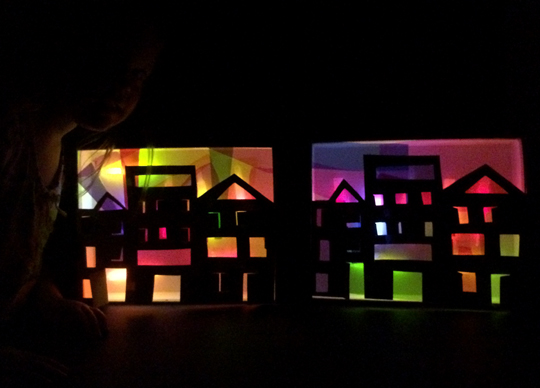
 And here’s what it looked like in a darkened room!
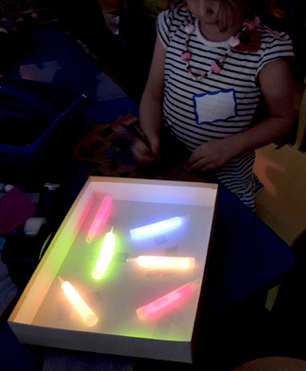
 For the “dusk designing” portion of the program, I turned most of the gallery lights off. There was a big gasp as kids discovered that they had their own personal light tables to work on.
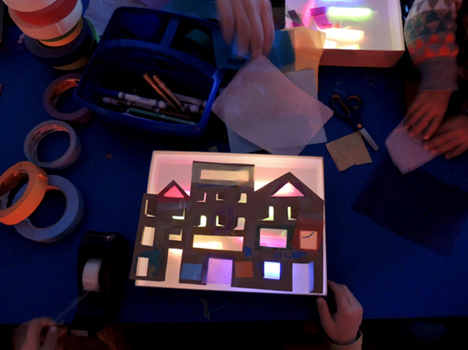 Eagerly, kids experimented with different cellophane and tissue arrangements, developing the perfect little dusk. I set up a small table in a closet so they could see the full effect of their illuminated cities when they were finished. Just look at these gorgeous glowing cities!
Later, when the glow sticks have faded, you can remove the box lid and place your city on a bright windowsill. Instant suncatcher!