 Storms can be very scary, but this story time project lets YOU be in charge of the clouds, rain, and lightning!
We read Stormy Night by Salina Yoon (Bloomsbury, 2015). A storm is booming, and Bear can’t sleep – and neither can his stuffed bunny Floppy, his Mama, or his Papa! But a sweet song, kiss on the nose, a tickle on the ear, and good book can do wonders, and the family rides the storm out together.
You’ll need:
- 2 corrugated cardboard rectangles
- A box cutter
- 2 strips of poster board
- 2 paper towel tubes
- Construction paper
- 1 small box
- 4 jumbo craft sticks
- Scissors, tape and glue for construction
- Markers for decorating
- Hot glue
This theater is divided into two pieces: the back and the front, which are later hot glued together to create a free-standing theater. Here’s the back piece…
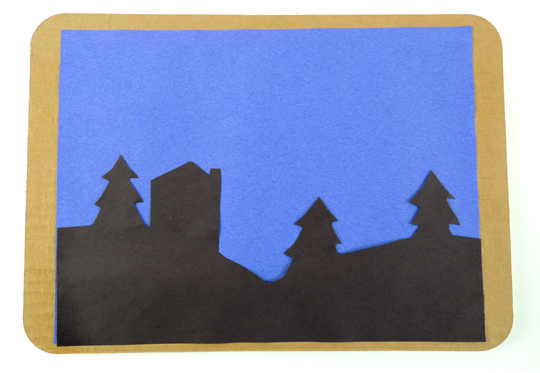 First, glue a piece of blue construction paper to a corrugated cardboard rectangle (we used 9.75″ x 13.75″ cake pads). Next, cut a silhouettes from black construction paper and glue it down as well. Definitely make sure to glue these down tight, so the edges don’t snag on your puppets later. Here’s the front piece…
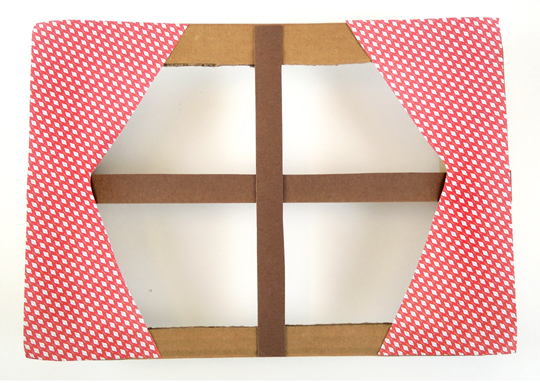 Use a box cutter to cake a window in the second corrugated cardboard rectangle. Then glue or tape 2 strips of poster board to the front of the window (definitely use poster board, construction paper is a little too saggy). Add a pair of optional window curtains. Then flip the front piece over…
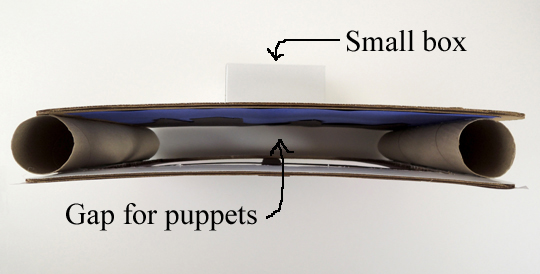
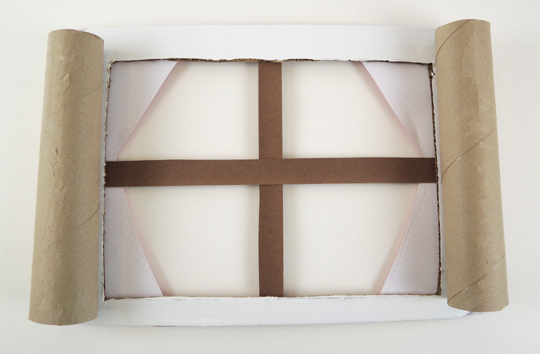 Shorten 2 paper towel tubes so they fit inside the sides of the window, then hot glue them firmly in place (we reinforced the connection with tape as well). Hot glue the tubes to the back piece of the theater. Now there is a gap between the front and back of the theater. This is where you drop your stick puppets! We also hot glued a small box to the very back of the theater to keep it more steady (our box was white, sorry, it’s a little hard to see in the photo!).
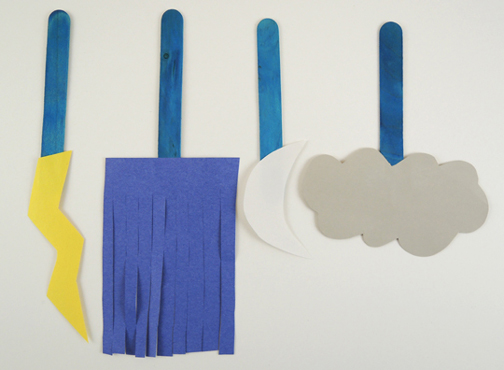
 To make the stick puppets, cut a lightning bolt, fringe of rain, crescent moon, and storm cloud from construction paper, then glue or tape them to the bottom of a jumbo craft stick (ours were 8″ long).
 To operate the theater, simply drop the puppets into the gap and narrate the story as storm clouds move in, rain comes, lightning strikes, and the skies finally clear to reveal the moon!
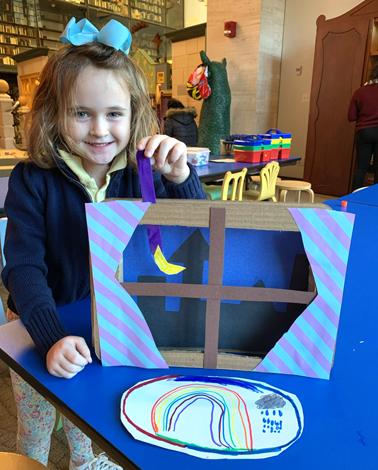
We also gave kids the option of creating cozy rugs with markers and ovals of white construction paper. Love the rainbow and storm cloud in the one above!

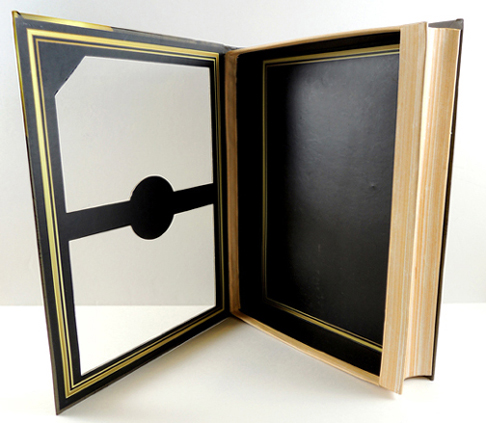 Today, we present a Book Art Challenge! We get plenty of interesting items donated through our library recycling program…like this this big, 11″ x 14″ box that previously held “Teas of the World.”
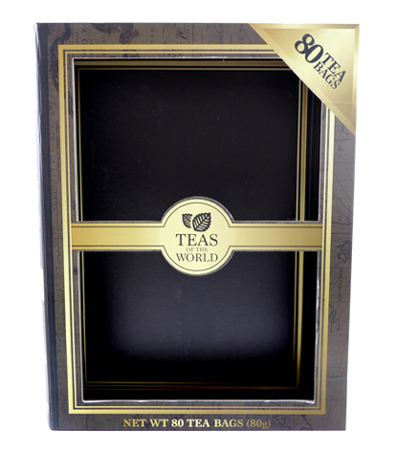 Since the box was designed to look and open like a book, we thought it would be the perfect candidate for our first Book Art Challenge. Namely turn the book into art. So here’s what I turned the box into…
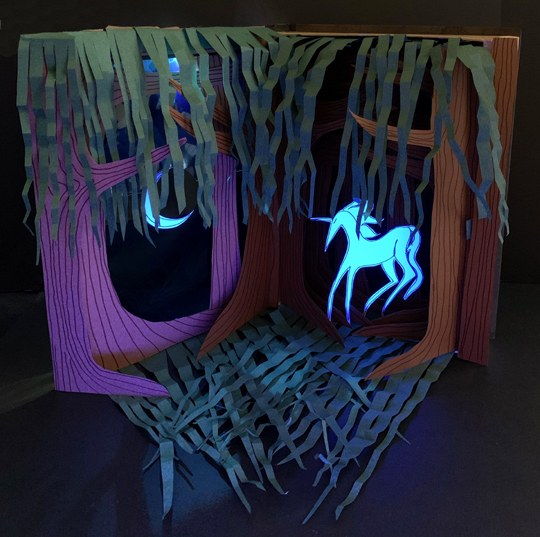 It’s poster board, blue cellophane, card stock, and construction paper illuminated with a black light and my iPhone’s flashlight. It’s a little hard to see, but the woods actually layers backwards into the box.
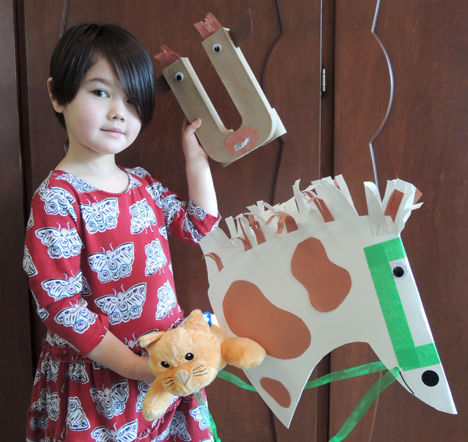 There’s trouble at the ranch…the letters are getting mixed up and causing a word ruckus! Grab your lariat, jump up on that cow pony (with your stuffed kitty, Kiki), and let’s wrangle the alphabet ya’ll!
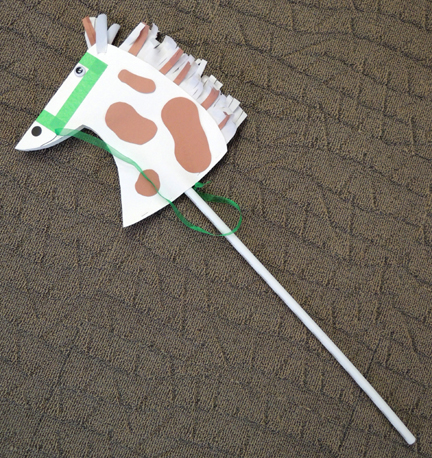
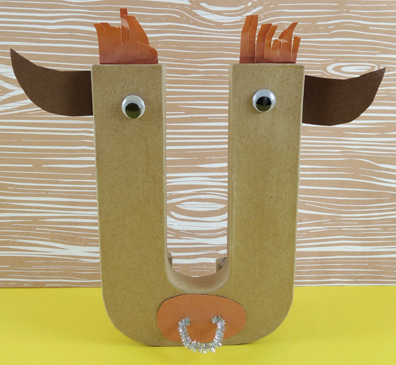 You might recognize the paper mâché letters from the activity we did at our
 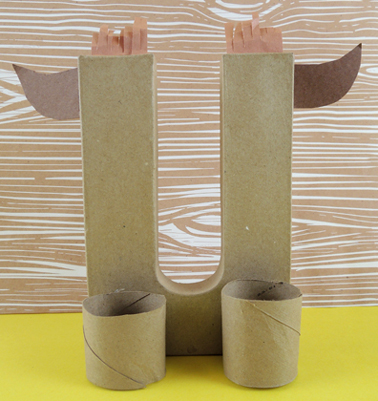 The final piece of the project is the lariat, and this is very easy. Staple a 1.5″ x 28″ strip of poster board in a circle. Make the circle as wide as possible and definitely using staples, as it gives the lariat some heft when you’re tossing it. Punch a hole in the circle, then knot some yarn through it. Done!
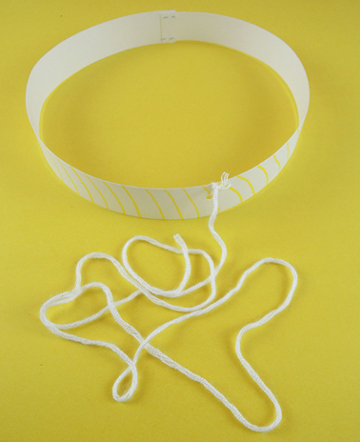 To wrangle, place your cow letter on the floor, swing up on your stick horse, circle the lariat, then drop it over the letter! Yelling “YEEHAW!” optional.