Saddle Up and Read

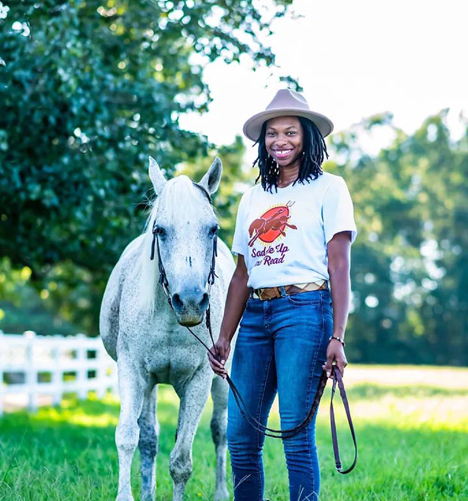
caitlin gooch saddle up and readIn the beautiful fields of North Carolina, you will find some very well-read horses.

They are part of Saddle Up and Read, a non-profit organization founded by Caitlin Gooch. In 2017, Caitlin noticed the low literacy rates in North Carolina and how they disproportionately affected children of color. Concerned, she reached out to her local library and proposed an incentive. If kids checked out 3 or more books, they could spend a day at her father’s horse farm and share a book with an equine friend!

The response, of course, was unbridled enthusiasm. Caitlin’s idea bloomed into a full-scale operation that has earned national recognition as a program of excellence, both on the farm and in the community. Recently, I caught up with Caitlin to learn more about her amazing organization.


Can you take up through a typical day on your farm?

A day on the farm is never the same. My husband and I have four daughters so I plan things around what we can do. Typically I get myself and my children ready for the day. Once that is squared away, I’m either running errands like checking the mail, going to the bank, checking my emails or picking up books. At the farm I am not solely responsible for cleaning out stalls but I will if I need to. I wash water buckets, pick up trash, and check the water troughs in the pastures. Next, I spend time grooming my horses. Sometimes in their stall or out in the round pen. If I am expecting kids to visit, I lay out everything we need. Books, activities, tack and horse treats.
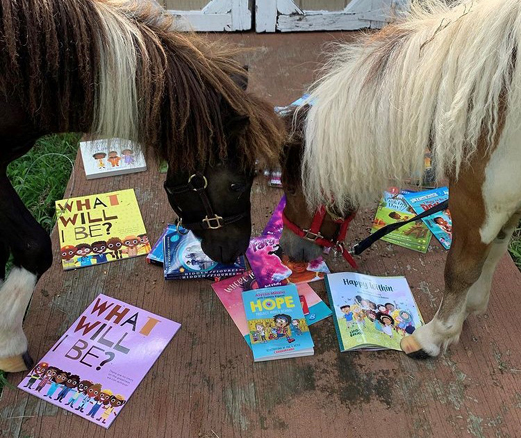
What came first, your connection to books? Or to horses?

Oh! This is a great question. Based on my memory alone (without asking my mom lol) I believe it was my connection to books. I was an early reader. Reading books was something I could do independently. Unlike with horses, kids have to be supervised. We have always had horses but I don’t really remember how often I was at the farm as a kid. I know when I was 6 years old I asked my dad if I could move my bed into the horse stall.
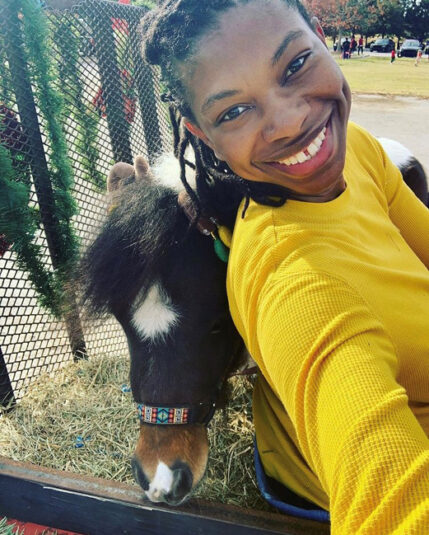

.What are the names of your horses and ponies?

I have 6 horses and 1 miniature horse. Their names are Barbee, Ardent, Ruth, Khaya, BLM Rare Doc Leo, Rainbow and my mini’s name is Man Man. My childhood horse, GOAT just passed away last year. I miss her so much. She was a huge part of Saddle Up and Read.

Tell us a little bit about the readers who come to your programs!

The sweetest and funniest kids you could ever meet! Most of the readers are of elementary age. More so 3rd to 5th grade. They love to lend a helping hand around the farm. As long as horses are involved, they are for it. We have a very diverse crowd of readers. Majority of the readers are Black and Hispanic, need encouragement to read or practice reading, or they love to read. The programs are open to all children but we do emphasize on children of color because statistically they have lower reading scores.

You are building a library of books featuring Black equestrians. What are your current favorites?

Yes I am! I started collecting these books around the same time I started Saddle Up and Read. Two of my favorites are Let Er’ Buck! George Fletcher the Peoples Champion and Black Cowboy Wild Horses. From my collection I have created a coloring book series called Color & Learn. The first volume is out now. It is titled Black Equestrian Coloring Book Volume 1: The Trail Blazers. It is available on my website and Amazon.

Can you tell us about one of your favorite moments in this program, big or small?

Wow, I have so many. I wish I had a running list of all the people to thank for supporting Saddle Up and Read. Not just the celebrities like Oprah, LeVar Burton and Soledad O’Brien, but everyone who has taken the time to show love. The power of social media has helped us get a truck, a horse trailer, over 2,000 books, and so many donations.
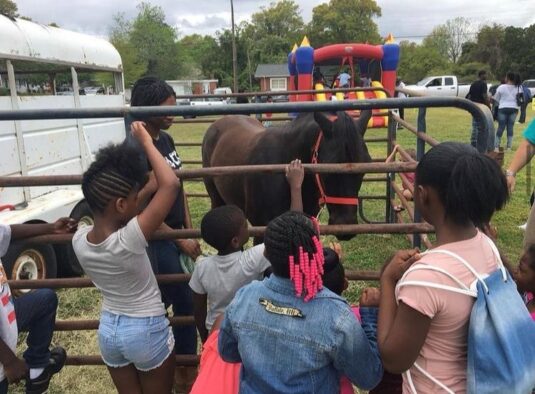
Picking a favorite moment is hard but I’ll say at the end of any event we have, there is always one child who doesn’t want to leave. Sometimes they are crying, “No, I want to stay here.” It makes me both happy and sad. Happy because it means they are having a great time. But sad because I wish they could stay as long as they need to LOL.


All images courtesy of Caitlin Gooch, Saddle Up and Read. And if you want to see some serious adorableness, check out their Instagram!

Hey U!

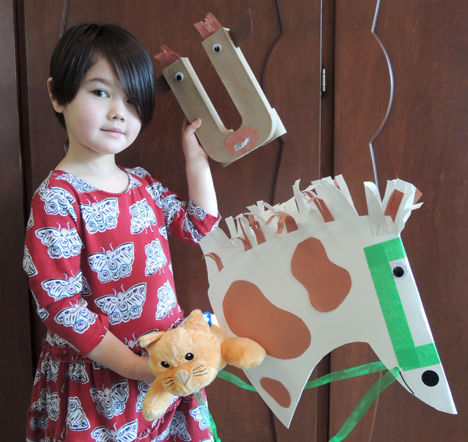
hey uThere’s trouble at the ranch…the letters are getting mixed up and causing a word ruckus! Grab your lariat, jump up on that cow pony (with your stuffed kitty, Kiki), and let’s wrangle the alphabet ya’ll!
We read Lexie the Word Wrangler, written by Rebecca Van Slyke, and illustrated by Jessie Hartland (Nancy Paulsen Books, 2017). Lexi is a word wrangler, taking little words and roping them together into bigger words. But lately, some pretty strange things have been happening at the ranch. Someone is stealing words, putting them in different places, and switching things around. The final straw comes when Lexie goes to sleep under the S-T-A-R-S and finds herself under the R-A-T-S. Looks like she’s got a word rustler to catch, but maybe, just maybe…they can be friends?

You’ll need:

  • A stick horse (more on this below)
  • A paper mâché or card stock letter (more on this below too!)
  • 1 toilet paper tube
  • A long strip of poster board
  • Yarn
  • Hole punch, stapler, scissors, and tape for construction
  • Markers for decorating
  • Hot glue

cowboy stick horse

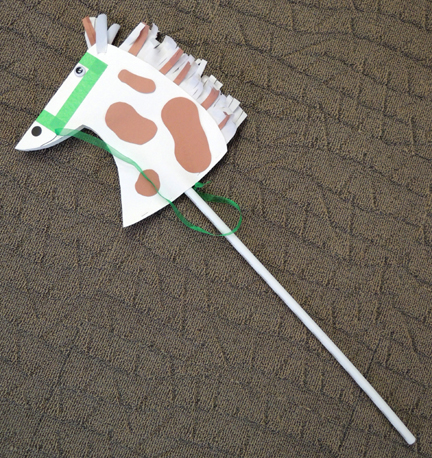
We made our standard story time stick horse for this project…you will find the instructions for it here, in our Show Jumping post. Our only modification was to add some construction paper spots. Our cow letters were also recycled from another project…

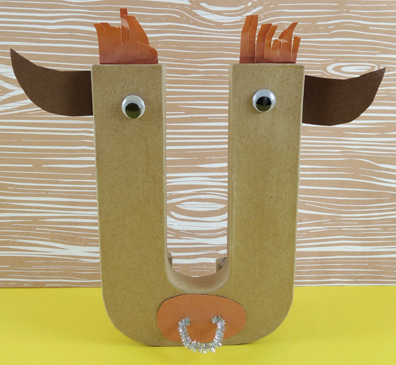
front of cow uYou might recognize the paper mâché letters from the activity we did at our grand gallery reopening. We added paper horns, hair fringes, wiggle eyes, and a sparkle stem nose ring to our cow letters, but you can just go with markers if you like!
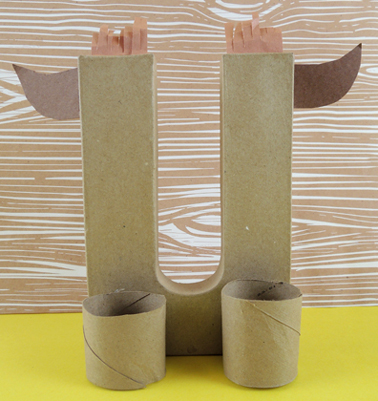
The 8″ letter you see above was purchased online from Consumer Crafts. At $2 each they can be a little pricey, so our alternative is to print the card stock vowel template from our Fishing for Vowels post. In order to stand the letters upright, hot glue pieces of toilet paper tube to the back.

back of cow uThe final piece of the project is the lariat, and this is very easy. Staple a 1.5″ x 28″ strip of poster board in a circle. Make the circle as wide as possible and definitely using staples, as it gives the lariat some heft when you’re tossing it. Punch a hole in the circle, then knot some yarn through it. Done!
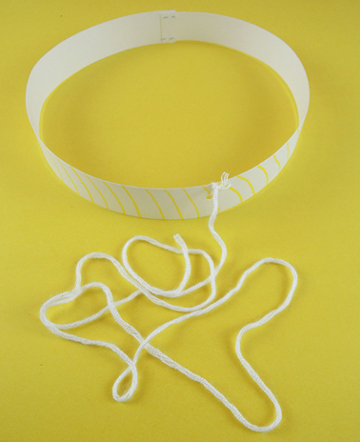
lariatTo wrangle, place your cow letter on the floor, swing up on your stick horse, circle the lariat, then drop it over the letter! Yelling “YEEHAW!” optional.

Saddle Up, Partner!

saddle up partner

Ya’ll ready to mosey? Deck yourself out in a big ‘ol hat and boots, then ride into the sunset with your faithful horse backpack!

We read Are you a Horse? by Andy Rash (Arthur A. Levine Books, 2009). It’s Roy’s birthday and his buds give him an awesome present…a saddle! Now Roy just needs to find a horse. Thus begins his epic journey of asking every single living (and even not living) thing if it’s a horse. From cacti to sloths, Roy strikes out until…he meets a creature who fits the description exactly. Roy finally gets to enjoy that horseback ride, but as the hilarious final page reveals, it’s not quite what the reader expects!

You’ll need:

  • 1 large tissue box
  • Poster board
  • A selection of construction paper
  • Scissors, tape, and glue for construction
  • Markers for decorating

We’ll start with the hat! Trace a cowboy hat on poster board, making sure to leave the brim extra wide, as you’ll need to cut a slit in it later. Our hats were 9.75″ tall and 16.75″ long. The kids decorated them with markers, construction paper, and self-adhesive foam. To wear the hat, cut a slit in the brim that’s wide enough to slide onto your head:

cowboy hatNow for the boots! Trace the cowboy boot template on poster board, then decorate. Again, we offered markers and self-adhesive foam, but the champion of this rodeo was rickrack ribbon. It looked awesome.

cowboy bootTo wear the boot, attach a strip of poster board to the back of the boot, then loop it around your ankle and secure with tape.

cowboy boot ankle loopFinally, the horse backpack! It’s the same as the robot backpack we made here. Cut four, 1.5″ slits in a box, then use scissors to slightly enlarge the slits (it makes it easier to slide the straps through in the next step):

backpack box slits

Thread two, 1″ x 28″ poster board straps through the slits like so:

backpack straps

Curl the straps over your shoulders, adjust them, and secure with staples. Put pieces of masking tape over the staples (thus avoiding staple scratches or clothing snags). You can tie an (optional) piece of string, ribbon, or yarn around both straps to keep them from sliding off your shoulders if you like.

strap steps

Finally, decorate your box like a horse! Katie crafted the head and legs with with poster board, then used markers, self-adhesive foam, and construction paper to make this prancing pinto…

horse backpackWhen your project is done, suit up, saddle up, and riiiiiide partner!

Show Jumping!

show jumpingSaddle up! Today, we’re jumping stick horses over fences at the ultimate story time horse show! When a slew of horse show ribbons were donated to my library, I knew exactly what we had to do. Design a 6-fence course and jump our little hearts out. Scroll to the bottom of the post to see this pair on course, completing a clear round!

We read Scamper and the Horse Show, written by Jessie Haas and illustrated by Margot Apple (Greenwillow Books, 2004). Sisters Anna and Molly are excited about tomorrow’s horse show. But Scamper the pony isn’t too thrilled about being caught and bathed. He arrives at the show with a few brown and green stains, but there’s no time to worry about that – the classes are starting! Unfortunately, during Costume Class, a sudden rainstorm soaks the show grounds. Scamper’s costume (an American flag) leaks all over his grey coat. He’s now a multi-colored mess. But when the judge arrives, she sees a handsome rainbow pony displaying all the colors of horse show ribbons – purple, green, pink, white, yellow, red, and…finally…a blue ribbon for first place!

We made stick horses, affixed good luck charms to our “riding helmets,” and then jumped a course. Waiting at the finish line was a real horse show ribbon to take home!

blue ribbonYou’ll need:

  • A 10″ x 22″ piece of poster board for horse head (we offered brown, white, or black)
  • 1 horse head template, printed on 11″ x 17″ paper
  • A 9″ x 12″ piece of construction paper for mane (we offered brown, white, or black)
  • 2 long strips of poster board (approximately 0.5″ x 6.75″)
  • 2 short strips of poster board (approximately 0.5″ x 4″)
  • A 32.5″ length of PVC pipe
  • Packing tape
  • 2 large wiggle eyes
  • Hole punch
  • A 29.5″ piece of ribbon
  • 1 baseball cap
  • 1 good luck token template, printed on 8.5″ x 11″ white card stock
  • 1 horse show ribbon
  • 1 set of stadium jumps (more on these later!)
  • Scissors, stapler, glue, and tape for construction
  • Markers for decorating
  • Hot glue

horse headWe’ll start with your steed! Fold a large, 10″ x 22″ piece of poster board in half. Next, print and cut the horse head template. Lay the template on top of the folded poster board – the horse’s nose should be flush against the fold in the poster board. Cut the head along the template.

horse head step 1Does this horse head looks familiar to you? That’s because it’s very similar to the stick ponies from this post. These horse heads are smaller (and the sticks shorter) because I wanted to avoid trip hazards while kids were jumping fences. The construction, however, is exactly the same. So I’m going to reuse the instructional photos from the past post here.

Use scrap pieces from the folded poster board to cut a pair of ears. Color the insides with marker, then staple them at the bottom.

earsStaple or hot glue the ears on each side of the horse’s head (you can attach them to the outside of the head, as seen below, or the inside the head):

forelock 1To create the mane, cut a 9″ X 12″ piece of construction paper in half lengthwise, and fringe the 2 pieces. Cut two, 3″ pieces of fringe off the ends and set those aside (you’ll use them for the horse’s forelock later). Now use hot glue, glue, or tape to secure 1 mane piece to the right side of the horse’s head. Repeat this same step on the left side.

maneTo create a forelock, make a 1.5″ cut down the fold of the head, directly between the ears.

forelock 2Slide a 3″ piece of fridge into the cut and secure it to the interior of the horse’s head with hot glue, glue, or tape. Repeat the same step on the other side. Trim (or curl) the forelock and mane if needed.

forelock 3Punch a hole on each side of the horse’s mouth. This is where the reins will thread through later.

reinsTime to decorate! Hot glue 2 wiggle eyes to the head and draw the nostrils and mouth with markers. To make a bridle, decorate 4 poster board strips with markers. The longest strips go down the sides of the horse’s head. The short strips fold across the horse’s forehead and nose. You can attach them with tape or hot glue. Here’s what a finished head looks like:

bridle detailsNext, unfold the head. Lay a piece of PVC pipe on one side of the head, making sure that the end of the pipe is approximately 1.5″ away from the fold. Use packing tape (not regular tape) to attach the pipe to the neck. Use at least 4 pieces of packing tape to make it really secure.

attaching stickRefold the head and put a few staples into the base of the head, around the pipe.

close up of stick staplesThread a piece of ribbon through the punched holes, and tie it behind the horse’s head! You’re done!

horse headWe needed to keep the kids busy while we set up the show jumping course, so we handed out black baseball cap “riding helmets” (which I purchased from Oriental Trading Company) and good luck token templates to color. To attach the token, simply fold it along the dotted line, slide it through the back strap of the cap, and staple both sides together.

token on hatGood luck tokens securely attached. Hard hats on tightly, horses and riders gathered outside the library, where their show jumping course awaited!

stadium jumpsKatie and I constructed these out of various boxes, wrapping paper tubes, tissue paper, poster board, and colored masking tape. I’ll admit, we went a little crazy. Yup, this one definitely ranks up there with the haunted dollhouse in terms of effort and mess. But just look at that topiary water jump folks! Beautiful! At the end of the program, we had a drawing and 6 lucky kids got to take home a jump.

A few practical matters. We kept the height of the jumps very low. The tallest jump (the brick wall) was only 10″ high. The jumps were made out of light material so they would fall over easily if hit (and not stub any toes). Happily, we had no falls and everyone (even the most timid 3-year-old) made it over the jumps with no problem. I had grand plans for an intricate jumping course. But in the end, good sense (i.e. Katie) prevailed and I set the jumps up in an easy-to-follow horseshoe.

On the show grounds, the riders lined up in single file at the starting cones. At the sound of a bell, each rider took a turn jumping the course. When he/she passed the finish cones, he/she got to choose a ribbon. The kids were THRILLED.

horse show ribbons While there were plenty of ribbons to chose from, we made sure to hold one super fancy ribbon back for the last kid riding the course. And now, how about seeing a rider in action?

The black jacket the little girl is wearing is a ring-bearer’s tux. Katie’s son wore it when he was 4 and a half. The lacy stock tie is from a “Colonial Gentleman” costume I wore for a history program. Who knew these items would later become the perfect riding ensemble?