 Of everything in the Harry Potter universe, I must admit I find the wands most fascinating. Not just because they play an integral part of spell casting – they also reflect the unique personalities of their owners. Additionally, shouting in Latin is so much more exciting when waving a wand. We tried to capture a little of that magic at Wand Works, our Harry Potter event.
 Originally, the event was just going to be about wands, wand making, and wand testing. But then I started thinking about the other ways students prepare for Hogwarts. So we brought book bags, text books, and owls into the mix. And, while I’ve recreated an assortment of Hogwarts classes over the years (check out this boggart from Defense Against the Dark Arts), I’ve never managed to do Muggle Studies. We had to do something on Muggle Studies!
Here’s how our event worked. As kids entered the library, they were greeted by a table full of these awesome book bags:
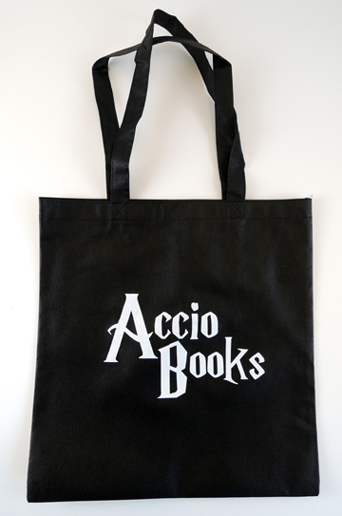 That beautiful Accio Books logo was designed by Polly Carlson. You can find it here, on her truly clever blog Pieces by Polly. She was kind enough to give us permission to use it for the event. Also at the table were a slew of Crayola metallic markers for bag customization:
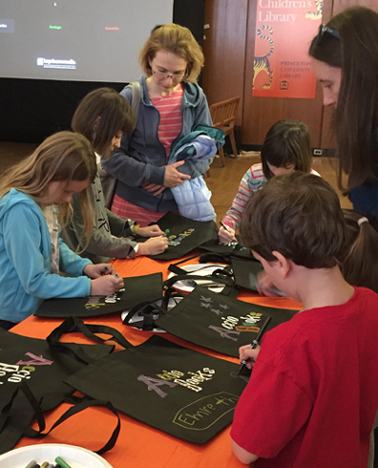 Those are 13.5″ x 14.5″ polypropylene totes from 4Imprint. Specifically, it’s the “Value Polypropylene Tote (item #103873). We tested a couple of polypropylene bags for this project, and 4Imprint’s held the Crayola metallic markers ink beautifully (it smeared on the others). Also, 4Imprint had the best prices and customer service, flat out.
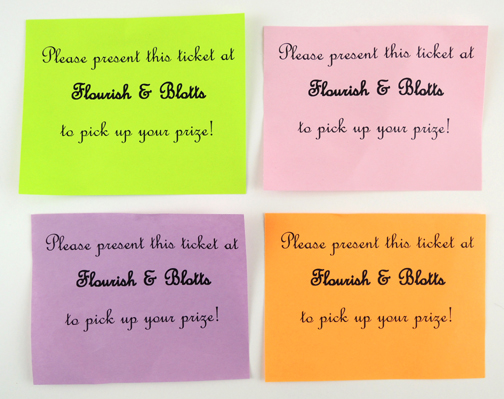
Tucked inside each and every event bag was a color ticket, which lead the lucky witch or wizard to my favorite fictitious bookstore of all time:
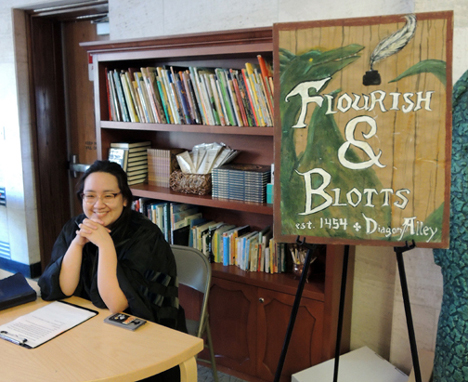
 Here’s our Flourish & Blotts, staffed by Princeton junior Gabrielle Chen (she’s also the artist behind that fantastic sign)!
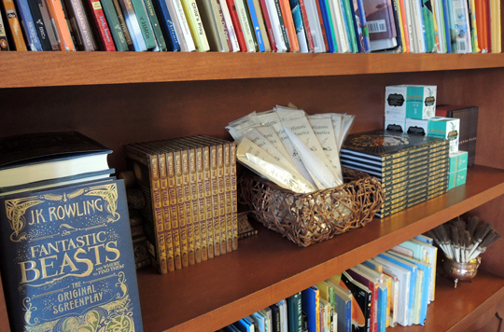
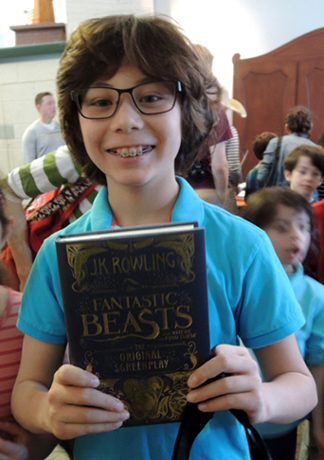
 Behind Gabrielle was a shelf stocked with copies of The Tales of Beedle the Bard, Quidditch Through the Ages, Hogwarts: A Cinematic Yearbook, and the Fantastic Beasts and Where to Find Them screenplay (alas, we missed the release of the text book version of Fantastic Beasts by mere weeks). There were also real quill pens with powdered ink packets, and some adorable Harry Potter Magical Creatures coloring kits.
 The tickets were color-coded with items on the shelves. Hand in your ticket, and receive the matching item! Just in case you’re wondering, we did sort and distribute the event bags by estimated age of the child. This was to insure that a 4 year-old received a Harry Potter coloring kit, not a copy of Fantastic Beasts.
Did you notice the little cauldron with the brooms sticking out of it in the above photo? Since we couldn’t buy books, quills, and coloring kits for everyone, the little brooms were the prize most frequently received by kids of all ages. But they are way cool because they are actually customized broom pens!
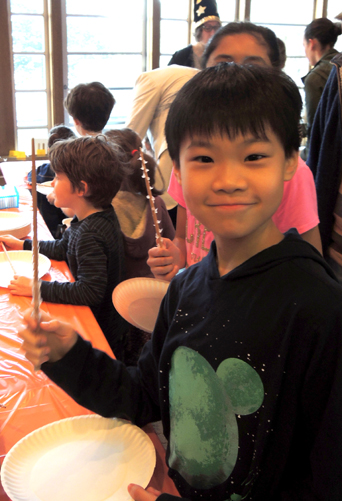
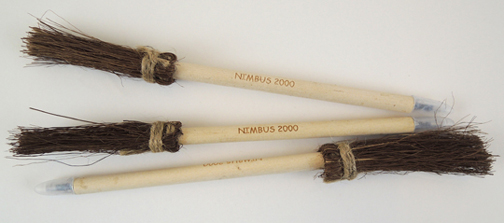 These are “Personalized Witch’s Broom Pens” from Oriental Trading Company ($12 a dozen). For no extra fee, you can customize them with 1 line of text up to 16 characters in length. We went with “Nimbus 2000.” Everyone LOVED them! In fact, the whole table was a lot of fun. It was terrific to see kids, holding books (or quills, or coloring kits, or broom pens) with big grins on their faces.
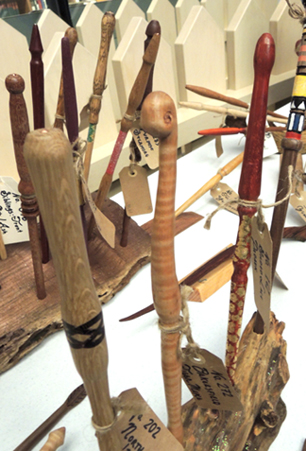
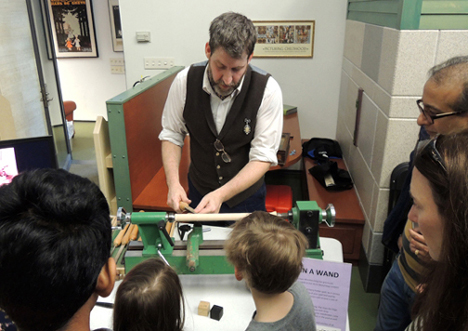
 Elsewhere on the event floor was real-life wandmaker Lane O’Neil from Gray Magic Woodworking. You previously met Lane in this post. In person, his wands are even more beautiful, fantastic, and magical. His table was so swarmed. I couldn’t even get near it for the first hour of the event!
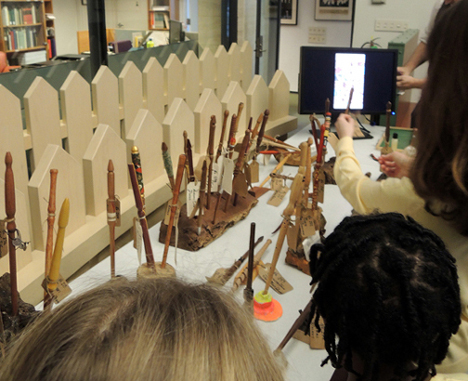 Lane also displayed his lathe, tools, different types of wood, and wands in different stages of completion. He did demonstrations, showed slides, and answered questions throughout the entire event.
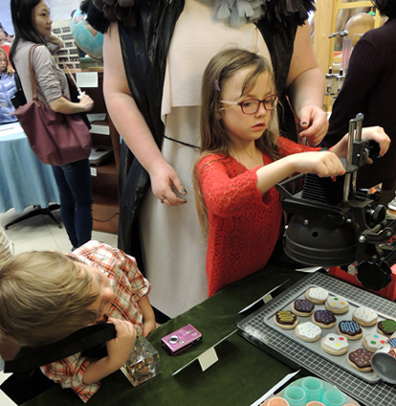
 Not far from Lane was our Muggle Artifact exhibit, curated by Princeton University sophomore Téa Wimer. The exhibit consisted of 45 Muggle objects complete with informative exhibit labels. Below, two attendees ponder a Cookie Slicer (which, amazingly, looks just like an old school photo enlarger).
 And here, two scholars consider a World Checker. Nearby is a rather puzzling object on a pedestal. Kids could write guesses as to what the Muggles use the object for. The full exhibit, as well as an interview with Curator Téa Wimer, is now online!
 Owls are another must for Hogwarts students, so we had a table where kids could make these awesome and super simple wrist owls.
 And now we come to the main event – THE WANDS. After much searching and testing, we settled on wands made from cooking chopsticks, hot glue, and paint. They are, in fact, very much like the wands our kid tester made for her DIY Harry Potter party.
But there were problems. While these types of wands are wonderful in small batches, we needed hundreds. The event was recommended for kids ages 5-11. Would someone poke their eye out? Hot glue is used to create the texture of the wand. Would someone burn their fingers? The wands require paint. Would they dry sufficiently? And – how messy was this all going to get?
Turns out, we solved all these problems, and everything went beautifully.
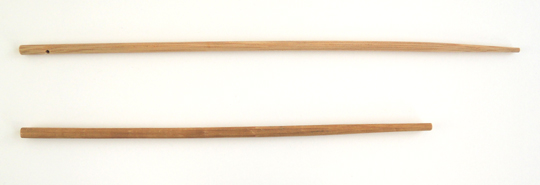
First, we bought 2 kinds of cooking chopsticks on Amazon. 13″ pointy ones (4 pairs cost $7.40) and 10.5″ blunt ones (10 pairs cost $11). If you’d like to know the exact brands we used, e-mail me for the links.
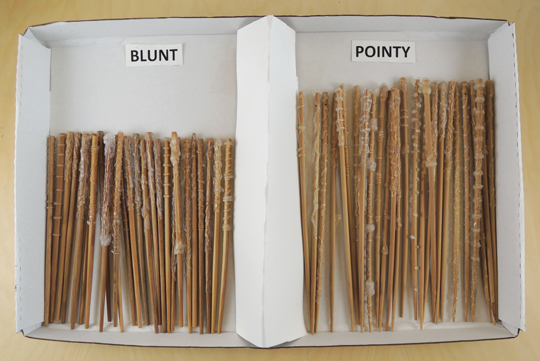
 For the event, we made trays out of box lids, separating the wands into blunt and pointy sections. This was primarily for the benefit of parents and caretakers. The pointy chopsticks were definitely the most popular, but we also had many adults who were very grateful for the blunt wands. There was even some quietly-switch-from-pointy-to-blunt-while-the-kid-is-distracted going on.
 Next came the hot glue. While we would have loved for kids to make their own hot glue designs at the event, we knew that just wasn’t possible on a large scale. So we hot glued all the wands in advance. It took us a couple months of chipping away here and there, but in the end we had hundreds of wands, and no two were alike.
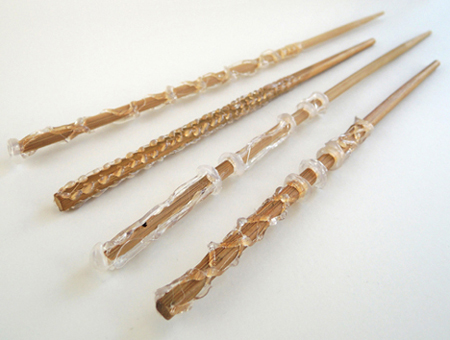 Next, the paint! After testing a number of different paints, we settled on Michaels Craft’s in-store brand, CraftSmart. We used their satin acrylic paint because it was water-based, non-toxic, fast-drying, and there were lots of different shades of brown. The regular acrylic paint was too dull, but the satin left a really nice finish on the wand.
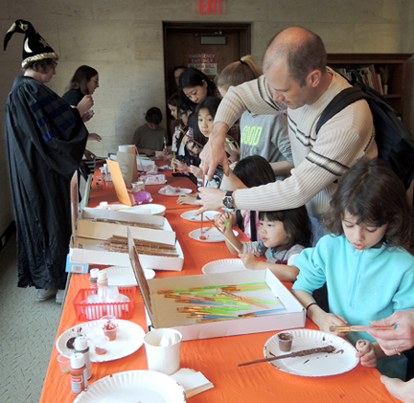
 At the event, kids selected the wand they liked from the tray, and then picked the paint color they wanted. To make the color selection easier, we made several paint choice panels out of cake pads and jumbo craft sticks. The numbers below the paint samples corresponded to the name of the colors (which were written on the back of the panel for the table staff).
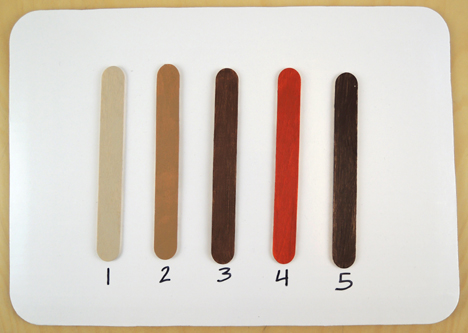 From left to right, the CraftSmart satin acrylic paint colors are khaki, golden brown, brown, burnt orange, and espresso. Burnt orange and espresso were definitely the most popular. But all the colors looked fantastic.
You need very little paint per wand. To keep the mess down and conserve paint, we gave each kid a 1.25oz plastic cup with a little bit of paint inside it, a paint brush, and a paper plate to work on. When the kid finished, his/her paint cup and brush could be used with another kid.
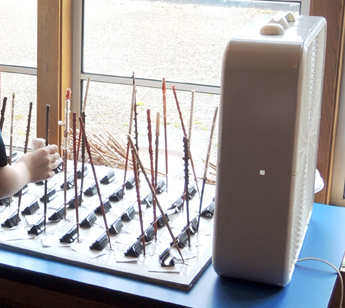
 This paint was extremely fast drying on the wood, even with multiple coats. The hot glue, however, was another story. In order to dry the wands faster, we put together a wand-drying chamber out of a piece of cardboard, jumbo binder clips held down with packing tape, and 2 box fans running on low.
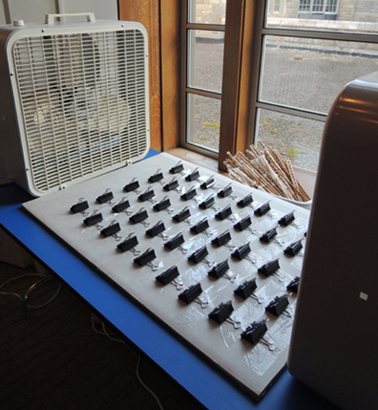 Below you can see the wand drying chamber in action, with the wands inserted in the clips. At the event, kids wrote their names on little bits of paper, which were clipped with the corresponding wands. Depending on how many coats of paint were on the wand, it typically took 5 – 10 minutes for a wand to dry in the chamber (15 if there was a LOT of paint).
 To be clear – the wand drying chamber was tucked behind the event tables, away from the crowds. Only event staff had access to it for obvious reasons. However, if I was to do this event again, I would definitely add a designated “Wand Pick-Up Area” to make things run even more smoothly.
FINALLY, we had an activity that I only dared dream of, but Princeton University junior José M Rico made a reality. A virtual, interactive, wand-testing classroom. It was AMAZING. here’s a photo of Katie casting one mean Bombarda spell.
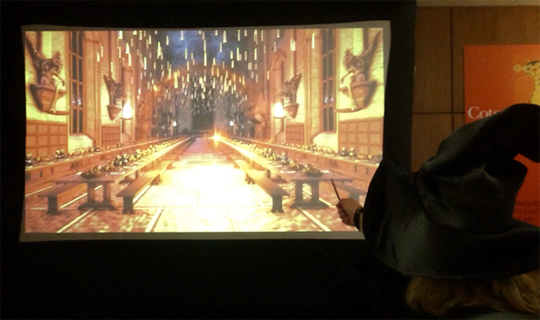 All the details of the game, as well as video and a free download, can be found here!
I’d like to thank everyone who made this event possible. Thank you Polly Carlson for graciously letting us use your Accio Wand design, student artist Gabrielle Chen for painting the awesome Flourish & Blotts sign, and Lane O’Neil for bringing his talent and wands to the event. A hearty round of applause to our incredibly creative Muggle Artifacts Curator Téa Wimer. Further applause to our wildly talented game designer Jose Rico, as well as artist Jeremy Gonclaves, who allowed us to his 3D game background.
A big shout out to our extensive team of wand hot gluers, Andrea Immel for swooping in to help at our owl table, and all the Princeton University students who volunteered their time to help at the event. Many, many thanks!

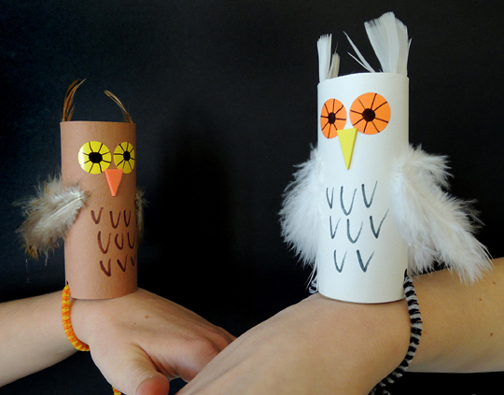 Cats might make you sneeze and toads are rather old-fashioned. What you really need…is an owl! This project (which is derived from these wrist parakeets) is designed to be simple, inexpensive, and a snap to assemble at large-scale events with minimal staffing. The owls were a huge hit at a Harry Potter event we did in 2007, and again in 2017 at Wand Works.
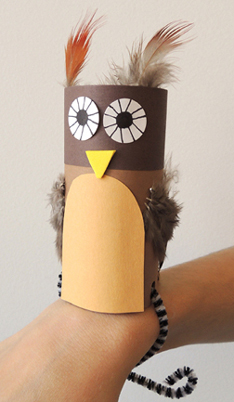 But we simplified things further and just used markers to draw outlines of feathers on the owl’s chest. Finish by punching 2 holes on the bottom of the tube. Thread a pipe cleaner through the holes, then fasten the owl to your wrist. You’re ready for Hogwarts!
 Roll out the red wagon…this little fox is going to market! We made tissue box wagons, grabbed our shopping lists, and headed to the market to play a vegetable matching game. Sporting fox ears and tails, naturally.
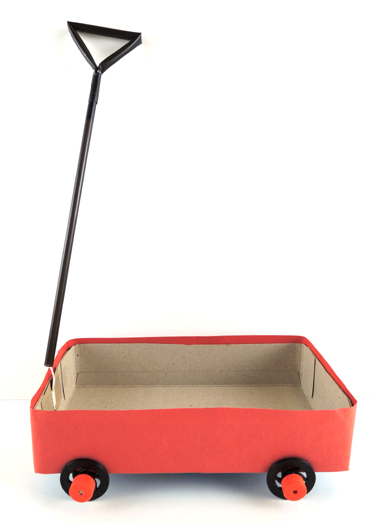 We’ll begin with the little red wagon! Cut a large tissue box down to 1.75″ inches tall, then wrap with red paper. You can go with our standard wheel assembly (instructions
 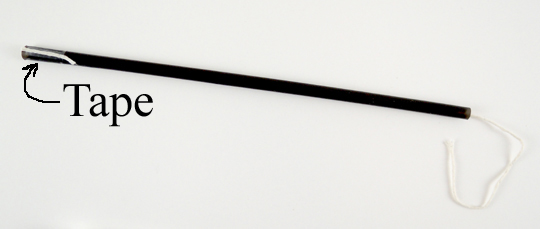 Next, cut two notches the center of a 1.25″ x 2″ piece of tagboard. This is the anchor for your wagon handle. Wrap the string around the notches in the tagboard, but don’t wrap all the string around it! Leave 1″ of string between the tagboard and the end of the straw. This will allow the handle to move left and right while you’re pulling your wagon.
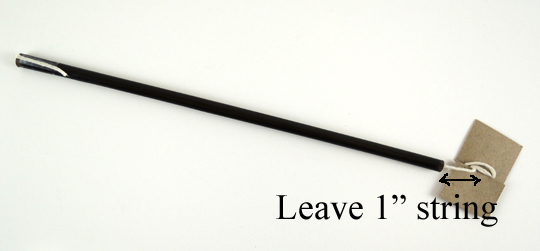 Bend a second drinking straw into 3 sections, pinch the ends together to form a triangular grip on the handle, then tape the ends of the straw firmly together.
 Fold and slide the taped section of the handle into the open end of the first straw. Cover the taped string with colored masking tape if you like (I used black in the photo below).
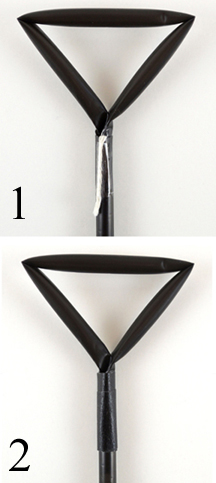 Here’s what a finished wagon handle looks like. A drinking straw handle, a 1″ gap of string, and a tagboard anchor wrapped with the remaining string.
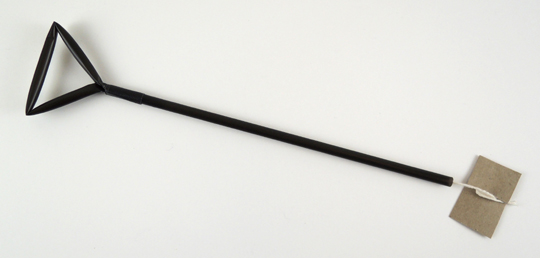 Tape the tagboard anchor to the front interior of the wagon. Done!
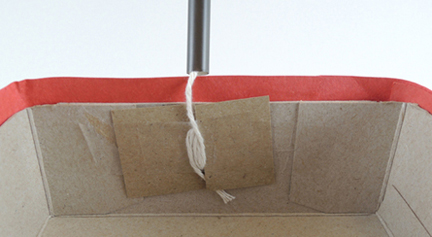 To make your fox costume, circle a strip of red poster board around your head, then staple it. Cut a pair of fox ears from red poster board, and add white construction paper ear interiors. Staple the ears to the headband. We attached our ears close to the front of the headband, and tilted them upwards slightly. Somehow, that just looked more foxy.
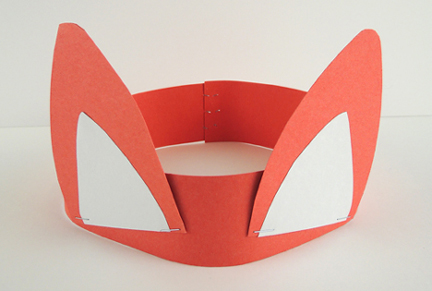 Next, cut a 6″ x 22″ rectangle of red poster board into a fox tail shape. Glue a little brush of white construction paper on the end of the tail, and tab the top. The tab slides inside the waistband of your pants (if you’re wearing a dress, punch two holes in the top of the tail, thread string through them, and tie the string around your waist).
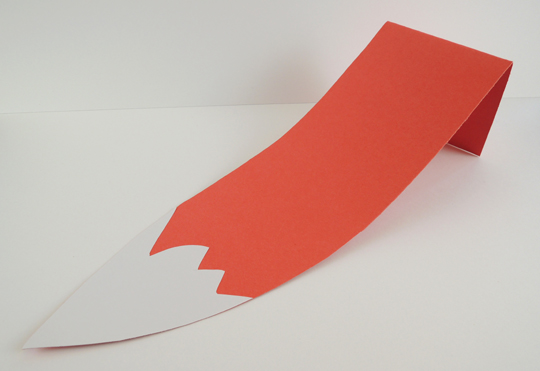 Your wagon and costume are finished…now to market! The matching game is very simple. Print the market signs, then put each sign next to the corresponding veggies from the template. I used 8″ table card holders (which you first met in this
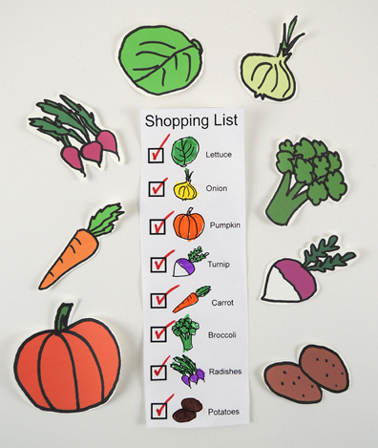
 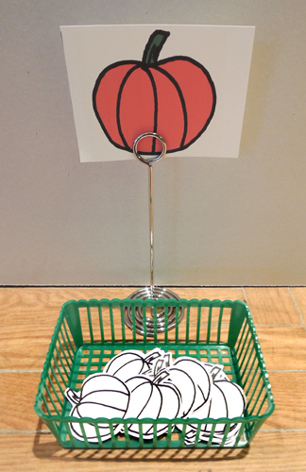 Then we gave each kid a shopping list. You’ll notice the lists are all slightly different. This was to avoid everyone rushing to the same area at once, like some sort of vegetable / woodland creature version of Black Friday. We also gave kids little shopping bags (basically, a brown paper lunch bag cut down to 4″). Following their lists, the kids located the matching sign, loaded the vegetable in their wagons, and checked it off their shopping lists.
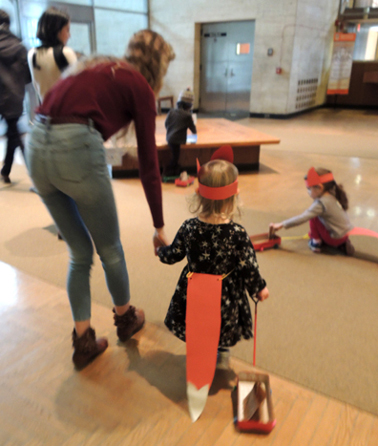 Once they had all their vegetables, they pulled everything back to the project area to color the vegetables and customize their paper bags!