
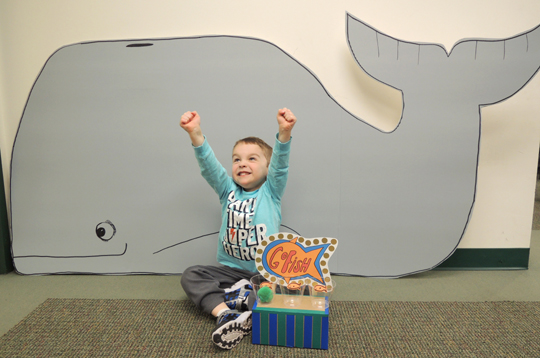
Yes, it’s a simple carnival goldfish booth. Except that our prizes are considerably larger…!
We read I Won a What? written by Audrey Vernick, and illustrated by Robert Neubecker (Alfred A. Knopf, 2016). When a little boy’s parents promise he can keep anything he wins at a goldfish booth, he is thrilled. Especially when he wins a whale named Nuncio! Soon it’s wheelbarrows full of lunch, high spirited swims in the ocean, and rather complicated and unpleasant swimming pool maintenance. Mom and Dad have just about had enough, until Nuncio demonstrates his fantastic lifting skills and stupendous car washing abilities. It’s a touching story of a boy and his whale…especially the very last page of the book!
You’ll need:
- 1 box (we used a 4.5” X 4.5” x 9” box – a large tissue box works too)
- A selection of color masking tape
- 3 clear plastic cups
- 2 large craft sticks (ours were 6″ long)
- 1 Go Fish sign template printed on 8.5″ x 11″ card stock
- 1 jumbo pom-pom
- Scissors and tape for construction
- Markers for decorating
- Hot glue
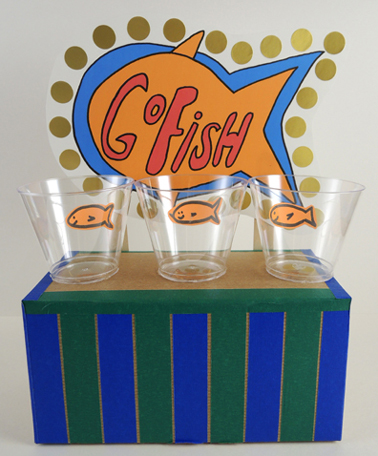
The goldfish booth is very easy to make! Decorate a box with color tape and/or markers. Hot glue 3 clear plastic cups to the top (we went with wide-mouth cocktail cups). You can draw your goldfish on orange construction paper and glue them to the insides of the cups, or you can do what we did, and use old orange mailing labels from the office supply closet.
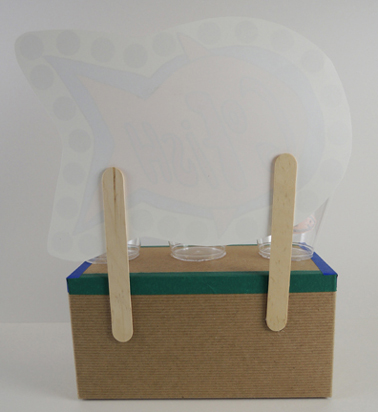
Cut and color the booth sign from the template. We left an extra border around the sign’s edge and added metallic gold dot stickers “lights.” Mount the booth sign to a pair of craft sticks attached to the back of the box.
 The “ball” for the game was a jumbo pom-pom, but ping pong balls or crumbled paper works too! To play the game, toss the ball into the cup. But what do you win? A WHALE!
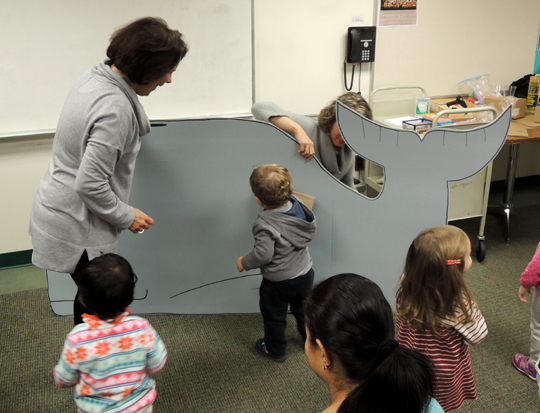 We snagged a big flat of grey cardboard from library recycling, and Katie turned it into a fantastic whale. Like the book, kids were expected to take care of the whale. They took it on a little walk, wiped it clean with a cloth, and scooped its poop (i.e. brown jumbo pom-poms)! This part of the program was great for building physical skills – balancing, circular hand motions, scooping. Check out this pro at work:
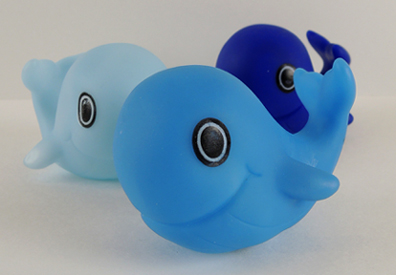
After the kids successfully demonstrated their whale watching abilities, they took home a 3″ plastic whale (ours are “Lil Sailor Whale Squirt Toys” from Oriental Trading Company, $6.50 a dozen).
 If you’re wondering why our story time area doesn’t look quite the same as usual, wonder no more. This was a guest story time at the Mary Jacobs Memorial Library in Rocky Hill, New Jersey! They graciously offered to serve as a pop up story time location while our library is under renovation. The Mary Jacobs Library has a full roster of children’s programs, fantastic (and highly artistic) staff, and one of my favorite children’s rooms of all times.
Thanks for letting us come to your library and have some fun Mary Jacobs!

 To make your illuminated underpants, cut underpants shapes from white card stock, then decorate with markers. Tape the underpants to the string lights, and let them glow!
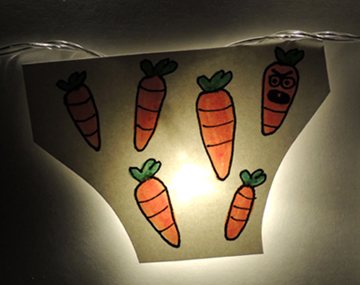
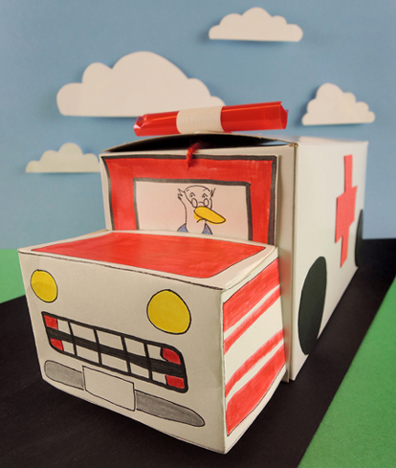
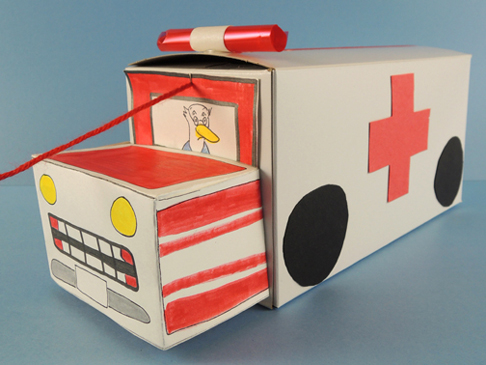 We’ll start with the ambulance! It’s basically a box on a pull string…but look at Katie’s awesome light on the roof! That’s a rectangle of cellophane wrapped around a snippet of red bubble tea straw. Wrap a piece of masking tape or white construction paper around the middle, and hot glue it to the roof. Add a construction paper windshield, wheels, and red crosses for the sides (or draw them on with markers).
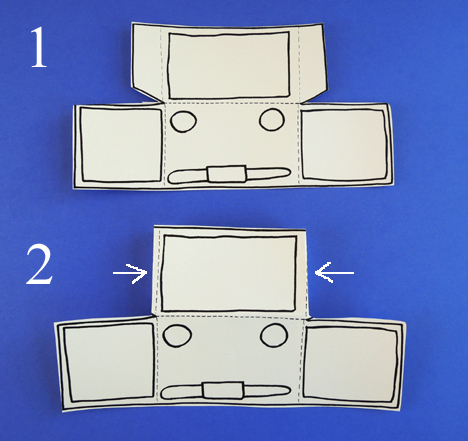 Next, fold the 2 panels on either side of the truck’s headlights.
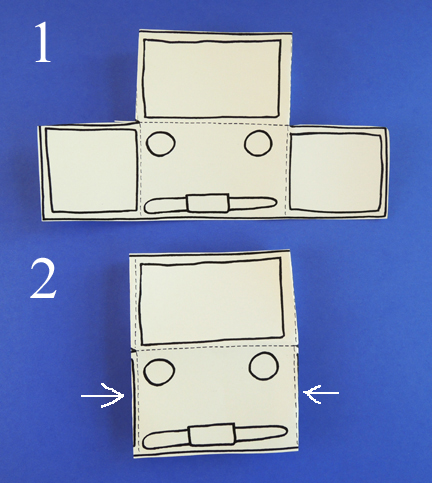 Finally, fold the hood down to meet the side panels, and secure it with tape.
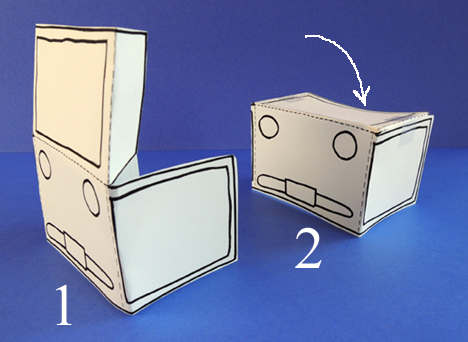 Tape it to the front of the box (use markers to color it before you fold it, or after). Finish the ambulance by attaching a yarn pull string to the front. Up next is all your medical equipment, which gets conveniently stored in your ambulance box.
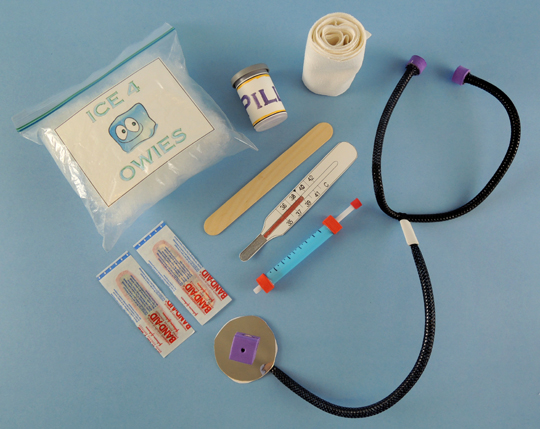 Most of the items in the kit are quick to assemble. The ice pack is
 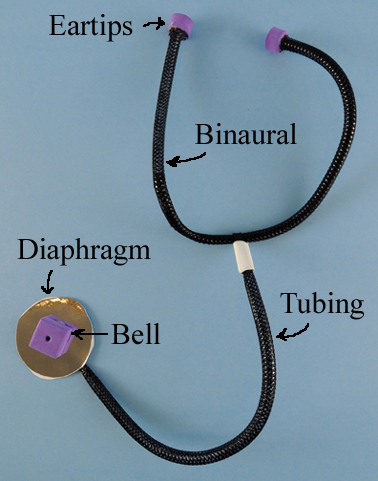 The stethoscope is basically constructed out of of two, 15″ pieces of black
 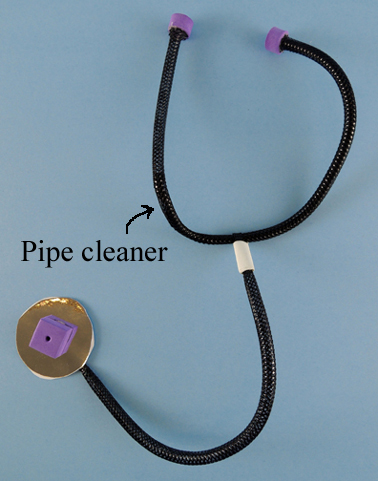 Hot glue 2
 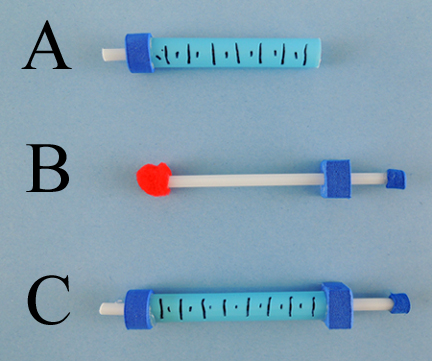 To make the syringe, you’re going to need a 2.75″ piece of bubble tea straw, a 4.25″ piece of
 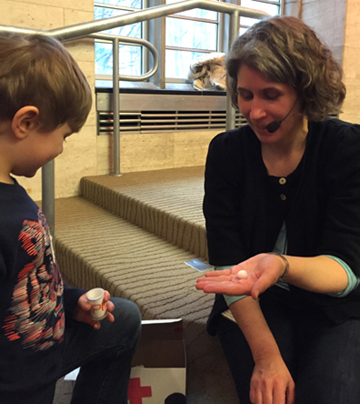 Lots of bandaging…
 And LOTS of shots…
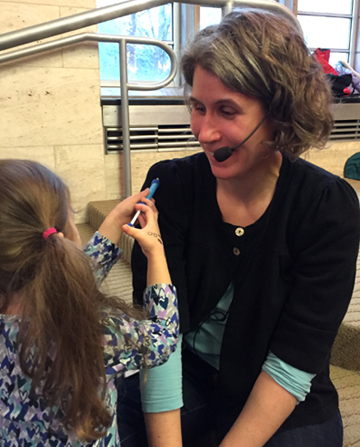 At one point, six kids were crowding around me, administering shots. I was a very, very, healthy person by the end of story time.