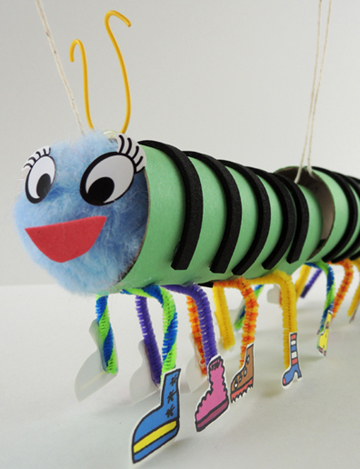
 Sneakers, boots, bunny slippers, and galoshes. When you have 100 legs, you’re going to need a LOT of shoes. Good thing we have just the shoe store for you and your centipede marionette!
We read Centipede’s 100 Shoes by Tony Ross (Henry Holt, 2002). When little centipede stubs his toes, his mom tries to kiss it better…but exactly which toe is it? To avoid future stubbed toe incidents, little centipede and his mom head off to the shoe store. However, 100 shoes means 100 socks, 100 laces, 100 times putting shoes on, and 100 times taking shoes off. It’s just too much. So clever little centipede decides to forgo foot gear all together, distributing his shoes to friends with fewer leg hassles.
You’ll need:
- 3 toilet paper tubes
- Construction paper
- 4 pipe cleaners
- 1 centipede shoe template, printed on 8.5″ x 11″ card stock
- A length of curling ribbon (approximately 13″)
- A length of string (ours was approximately 4 ft)
- 1 wooden dowel
- Masking tape
- 1 jumbo pom-pom
- 1 set of eye stickers
- 1 snippet of twisteez wire or pipe cleaner
- Scissors and tape for construction
- Markers for decorating
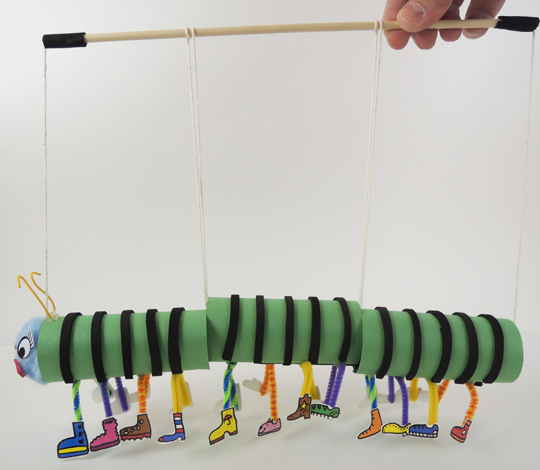
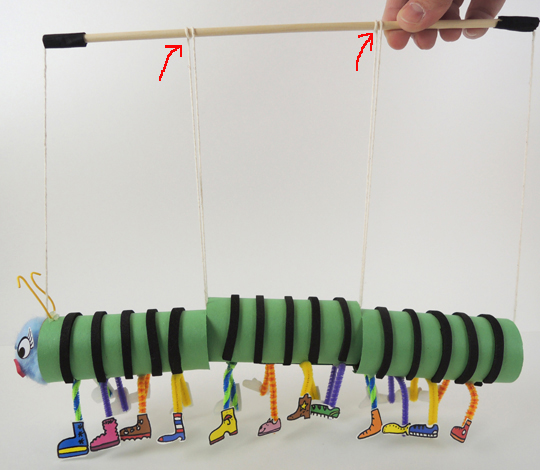
First, wrap 3 toilet paper tubes with construction paper. Use markers to add rings to the centipede’s body or bits of self-adhesive foam. Cut 4 pipe cleaners into 3rds, bend each piece into a U shape. At this point, you can add the shoes from the template to the ends of the legs, or your can do what we did and visit the centipede shoe store (which appears a little later in this post). Use tape to attach the legs to the undersides of the tubes.
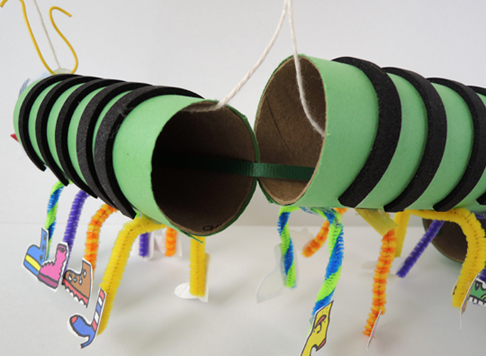
Next, thread a 4″ piece of curling ribbon through the three tubes. Use tape to anchor the ribbon to the ends of the 1st and 3rd tube. This curling ribbon “spine” keeps the 3 tube segments of the marionette together, but also allows the centipede to be wiggly. You can see the green curling ribbon spine in the photo below:
 Katie came up with fantastic, easy method for stringing the marionette. Tie a 4 ft string to the end of a wooden dowel. Thread the string through the first tube, then loop it up and around the wooden dowel. Repeat this threading and looping through the second and third tubes, then tie the end of the string around the back end of the wooden dowel. Wrap the ends of the dowel in masking tape so the string doesn’t slide off. You can see the string loops in the photo below:
 Last but not least, your centipede’s face. You don’t want to put the face on BEFORE you thread the marionette string, because the pom-pom will be blocking the end of the tube! the face is a jumbo pom-pom (which we hot glued in place), eye stickers, a self-adhesive foam smile, and twisteez wire antennae.
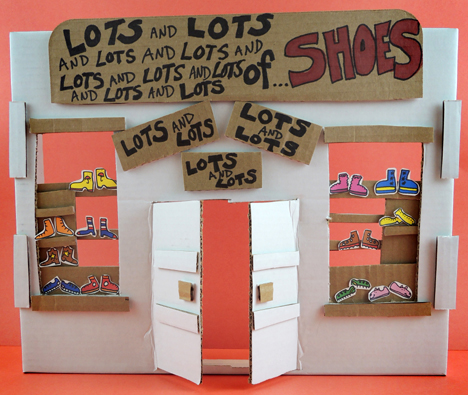
Earlier, I mentioned that you can put the centipede’s shoes on when first create the pipe cleaner legs. But we delayed that step so the kids could take their marionettes shopping at the Lots and Lots of Shoes store, which I created using a box lid!
 The kids walked over with their centipedes, and I slid the shoe templates through the front door of the shop.
 The shoes were then colored, cut, and taped the centipede’s legs. Admittedly, this marionette can be a little floppy while it’s getting its shoes attached. Which brings me to this clever technique a parent came up with:
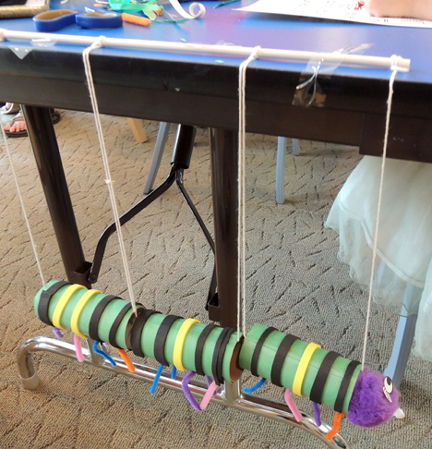 Tape the dowel to the table, and you are free to attach the shoes on a dangling marionette with minimal flopping. ABSOLUTELY BRILLIANT!
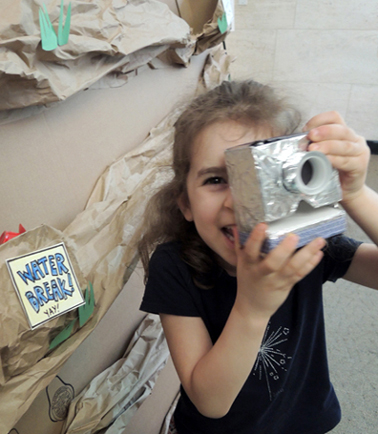
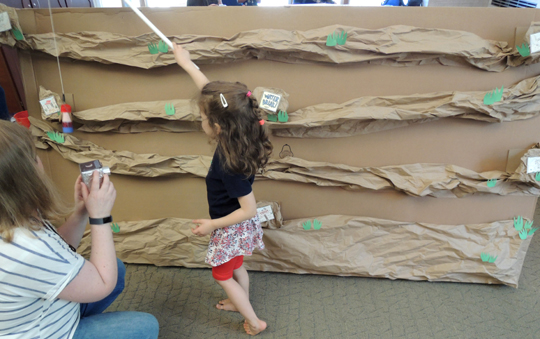
 Next up, the hiker! We encouraged kids to use construction paper and patterned paper to make mini versions of themselves. Since you should never hike without a hat, we had the kids fashion one out of trimmed 3.5oz plastic cups with construction paper brims.
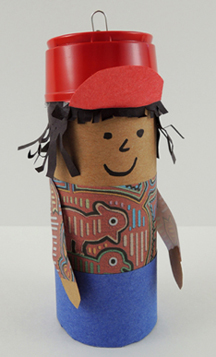 Notice the little paper clip sticking out the back of the hat? If you’re going to play the canyon game, you’ll need to tape a small paperclip to the back of the hat. And speaking of the canyon game, here it is…
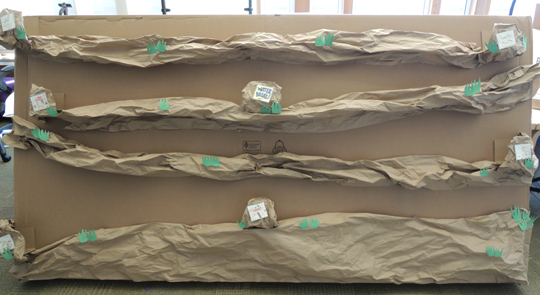 This is a huge flat box we wrestled out of the recycling pile. I hot glued crumpled brown packing paper to create a hiking trail back and forth across the box. I also hot glued little “rest stop” boxes along the pathway. This is a rest stop in the middle of the path:
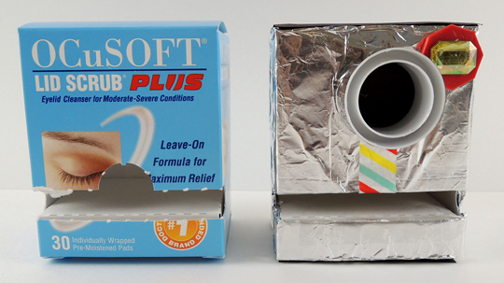
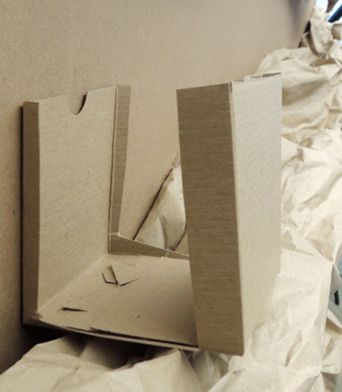 Later, I covered the rest stops with paper, and added photos from the template to signal that this was a “photo op.” Here’s the photo op at the very end of the trail.
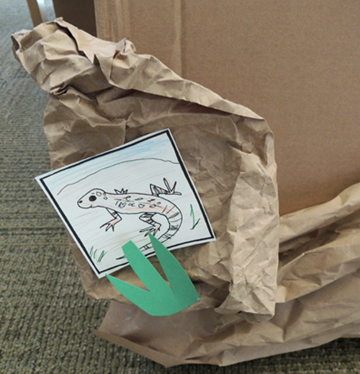 We fashioned a fishing pole out of PVC pipe, and attached a paper clip to the end of the string. To play the canyon game, hook your tp tube person onto the fishing pole, and walk him/her up the canyon path, taking time to pause at the rest stops and snap a photo with your camera. We also had a “water break” station and gave kids a little sample cup of water.
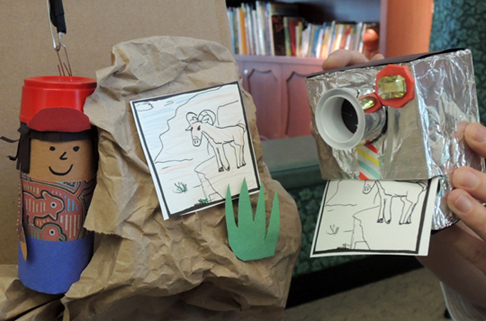 When you’re done hiking, you can color in your photos! Oh, you’ll notice the template has one blank photo. That’s so you can draw whatever photo you’d like. We recommend a well-deserved canyon selfie!
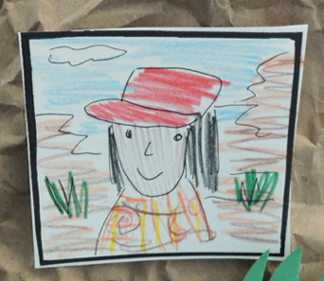
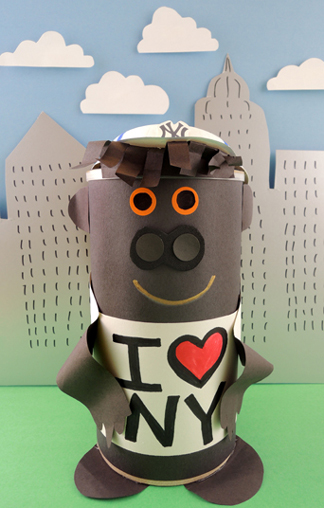
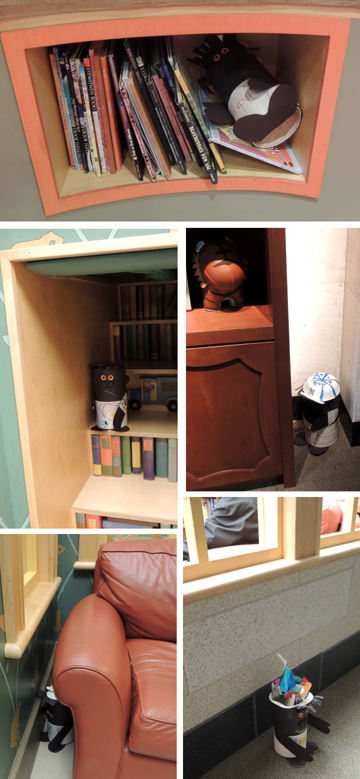
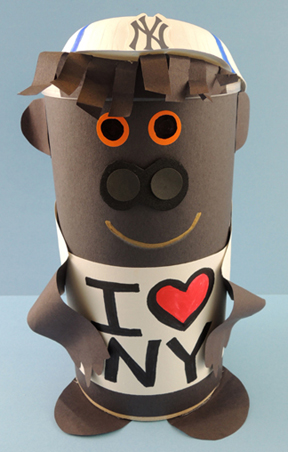 The baseball cap is a trimmed paper bowl with a card stock (or construction paper) brim. We recommend using hot glue to attach the hat and the feet to the oatmeal container.
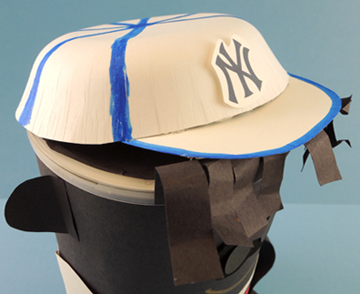 The baseball hat is just one optional for headgear of course. We basically gave the kids a bowl, a strip of white construction paper “shirt” and the
 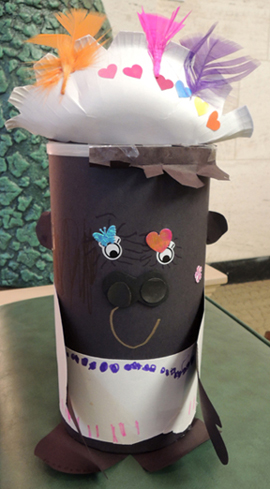 When everyone was done decorating, we played a game of Hot/Cold Hide-and-Seek. Kids hid their apes around our