
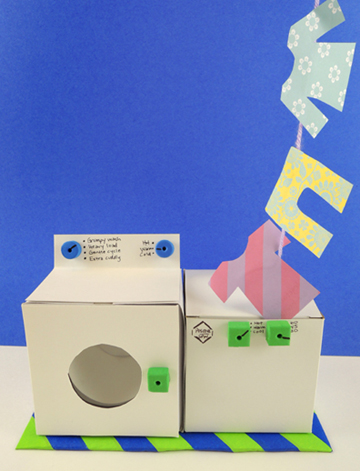
Everyone has a grumpy and un-positive load of laundry from time to time. But a suds and spin in our optimistic washer and dryer will DEFINITELY help!
We read Grumpy Pants by Claire Messer (Albert Whitman & Company, 2016). Penguin is in a flat out grumpy mood, and stomping his feet and shucking his rain gear doesn’t help. But a nice bath, cozy pajamas, hot cocoa, favorite book, and grumpy pants on a positive spin cycle? Ahhhhh…THAT did the trick.
The cool thing about our little story time washer is that it really spins your laundry…
You’ll need:
- 2 small boxes with lids.
- 1 corrugated cardboard base
- 1 paper cup
- 1 brass fastener
- A box cutter
- A selection of patterned paper
- 1 piece of yarn (ours was 29″ long)
- Scissors, glue and tape for construction
- Markers for decorating
- Hot glue
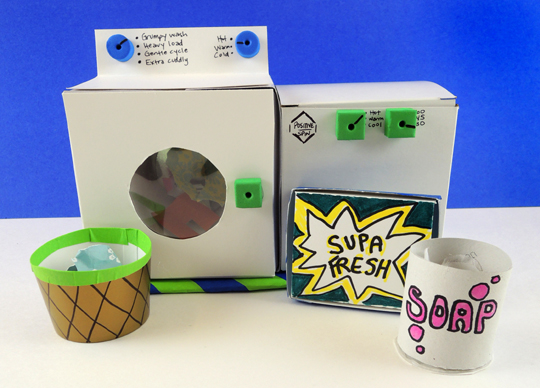
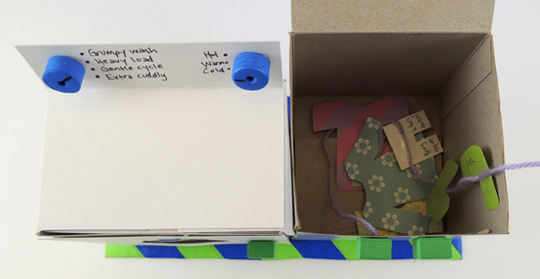
The washer and dryer are two small boxes with lids.The washer opens from the front, the dryer opens from the top. Both are hot glued to a corrugated cardboard base.
 We added a white poster board instrument button panel to the top of the washer, foam bead buttons and dials, and decorated our base with color masking tape, but that’s all optional, of course.
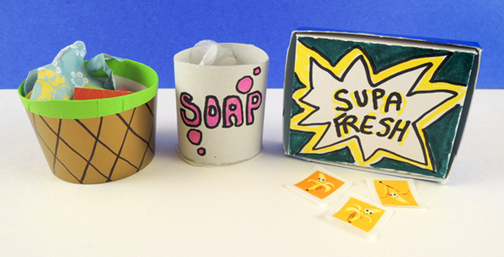
Also optional are a little paper cup laundry basket, a toilet paper tube soap container, and a tiny box of fabric softener sheets (which were banana scratch and sniff stickers)!
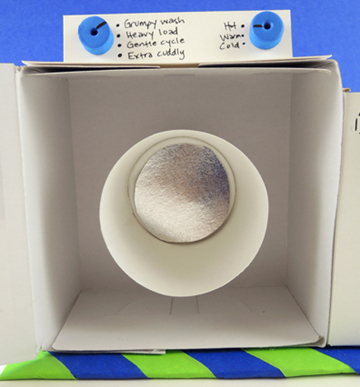
 The turning mechanism for your washer is a paper cup inside the box (we cut ours down to 2.25″). The cup pivots on a brass fastener. It’s important to get a tight connection, so we hot glued a circle of silver mirror board over the head of the brass fastener to strengthen it (white poster board works too):
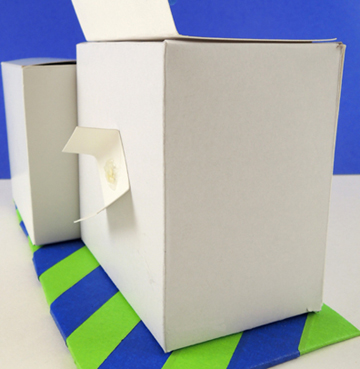
On the back of the washer, we doubled tabbed a piece of poster board to make it easier for the kids to grasp and turn (and again, we reinforced the connection with hot glue):
Your washer and dryer are ready. Now for the laundry! Our laundry was 2 matched sets of patterned paper….a wrinkly “dirty” set, and a “clean” flat set.
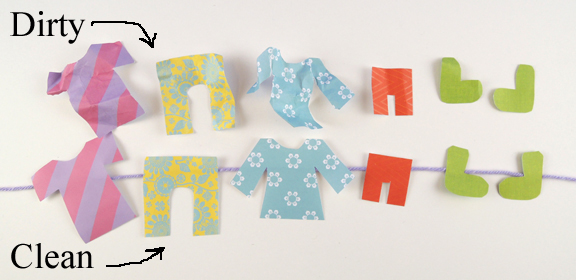
Did you notice that the clean clothes are taped to a yarn clothesline? We taped the other end of the line inside the dryer…
 So you can drop your wrinkly dirty clothes into the dryer and magically pull the flat clean clothes out!
The final part of the project? In keeping with the beautiful self-care message of the book, we asked kids to write grumpy things on the backs of the dirty clothes, and then the solutions on the backs of the clean ones!

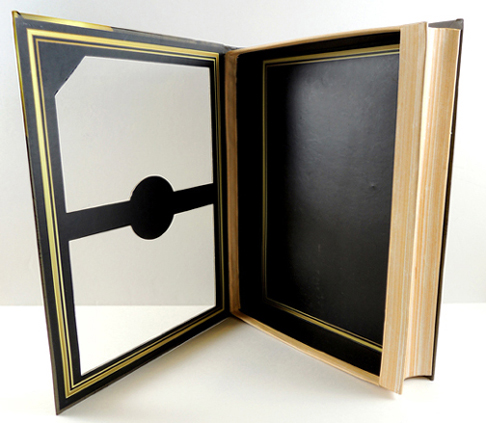 Today, we present a Book Art Challenge! We get plenty of interesting items donated through our library
  Since the box was designed to look and open like a book, we thought it would be the perfect candidate for our first Book Art Challenge. Namely turn the book into art. So here’s what I turned the box into…
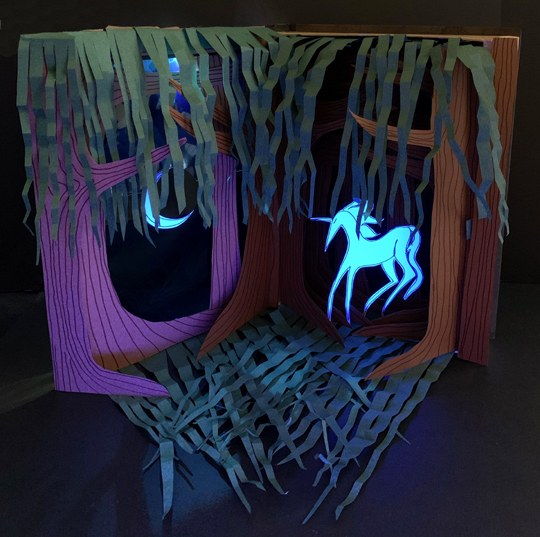 It’s poster board, blue cellophane, card stock, and construction paper illuminated with a black light and my iPhone’s flashlight. It’s a little hard to see, but the woods actually layers backwards into the box.
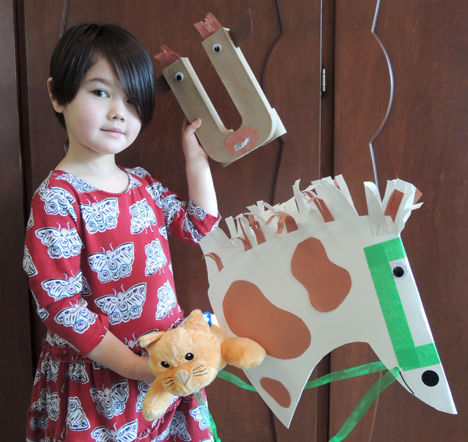 There’s trouble at the ranch…the letters are getting mixed up and causing a word ruckus! Grab your lariat, jump up on that cow pony (with your stuffed kitty, Kiki), and let’s wrangle the alphabet ya’ll!
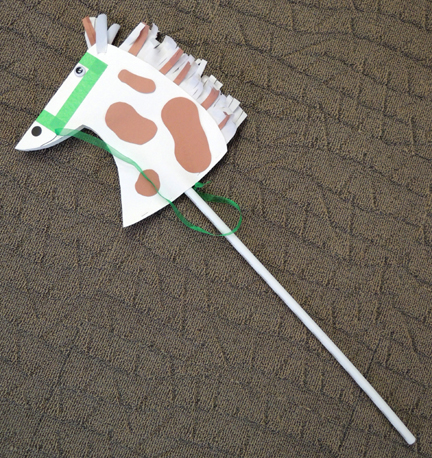
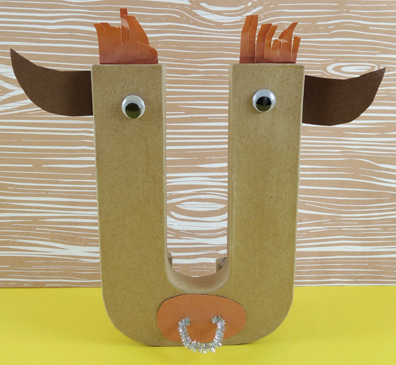 You might recognize the paper mâché letters from the activity we did at our
 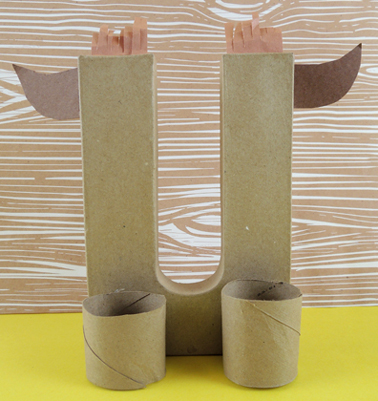 The final piece of the project is the lariat, and this is very easy. Staple a 1.5″ x 28″ strip of poster board in a circle. Make the circle as wide as possible and definitely using staples, as it gives the lariat some heft when you’re tossing it. Punch a hole in the circle, then knot some yarn through it. Done!
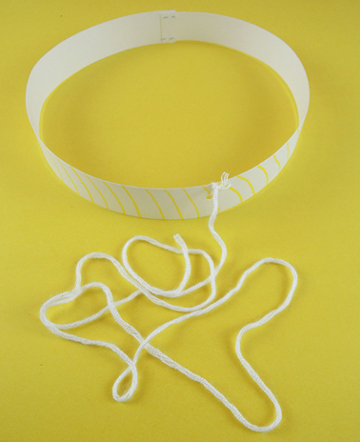 To wrangle, place your cow letter on the floor, swing up on your stick horse, circle the lariat, then drop it over the letter! Yelling “YEEHAW!” optional.