 Fall weather is here, kids are back in school, and that means…school picture day! We put a fun twist on class photos when we invited awesome author and illustrator Mary Lundquist to our library. Check out her interview at the end of the post!
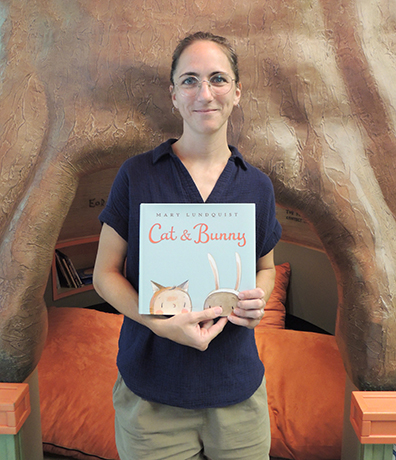
We read Cat & Bunny by Mary Lundquist (Balzer + Bray, 2015). Cat and Bunny are inseparable friends who do everything together. But when Quail asks to join the fun, Cat is unsure about sharing. So she runs away. Alone, she wonders what to do. A kitten arrives and play is well underway when Giraffe asks to join. This time, Cat barely hesitates, answering with a cheerful “Of course!” Soon, all the friends are playing together, including a joyfully reunited Cat and Bunny.
You’ll need:
- 1 piece of cardboard or poster board
- Construction paper
- Scissors and tape for construction
- Markers for decorating
We loved the book’s themes of sharing and togetherness, so we devised a card sharing activity and paired it with a customized class photo display!
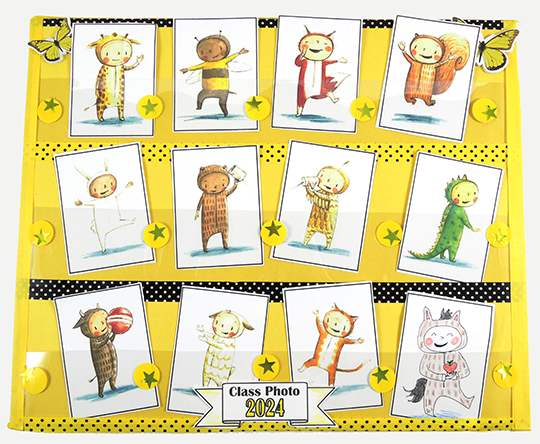
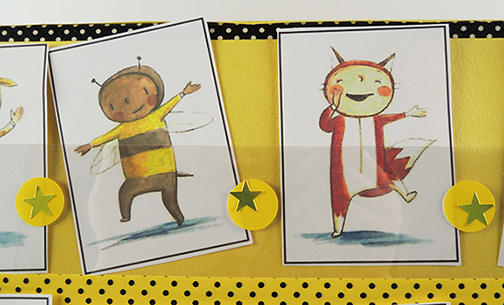
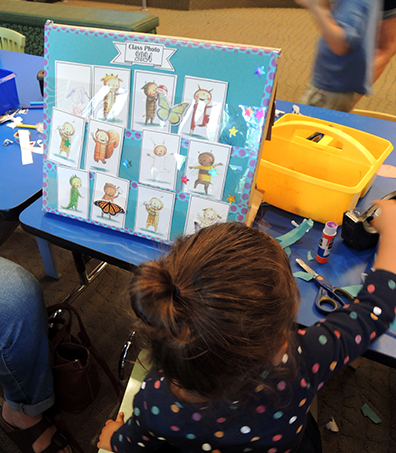
First, the class photo display. The base of our display was a flat 12″ x 15″ cardboard box (we scored a bunch of them through this initiative). The front was decorated with construction paper (we also offered patterned tape as well as star, butterfly, and dot stickers). The pockets that held the “classmate cards” were strips of clear archival mylar. Below you can see a close up of a mylar pocket with the cards tucked inside:
 The back of our boxes had flaps, so we hot glued a strategically-placed jumbo craft stick to the top flap, which allowed the class photo display to be propped up like an easel.
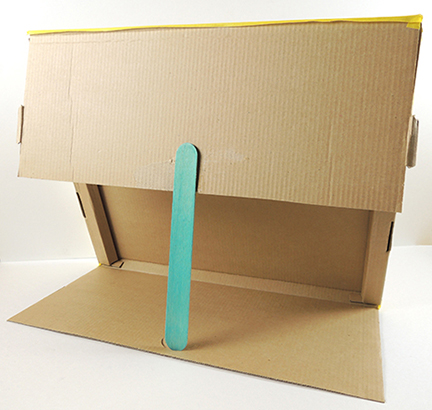 This project also works with a flat piece of cardboard or poster board and simple construction paper pockets. It’s super easy to modify!
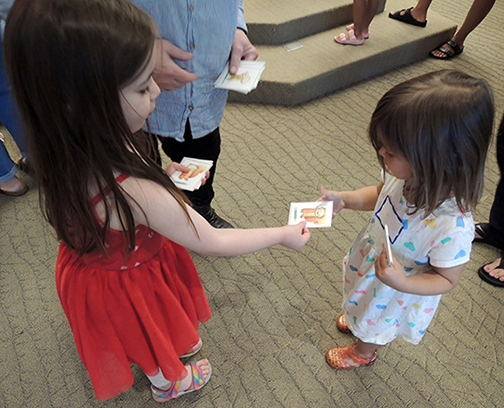
 Once kids had finished their class photo display boards, we had everyone gather on the gallery floor. Next, we distributed packs of cards containing the characters in the book. One kid had a pack of just cats, another had just bunnies, another had just foxes…you get the idea. When we said “Go!” the kids (and their caregivers) mingled, trading cards back and forth until they had a complete deck of all eleven unique characters.
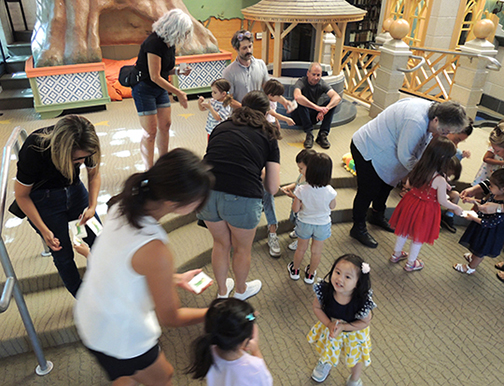 As you can imagine, trading was brisk, and involved a lot of saying hi, talking, sharing, keeping track of your cards. It was so friendly, and so sweet.
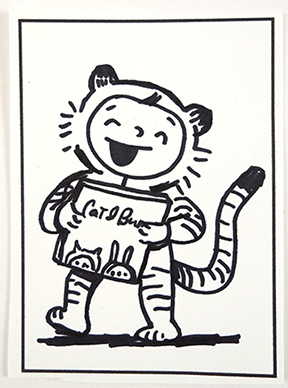
 There was one extra special bonus! Each deck had a blank card, so kids could draw themselves on the card as part of the class photo. OR…even BETTER…Mary Lundquist could draw you as one of her characters! Look at this Princeton tiger!
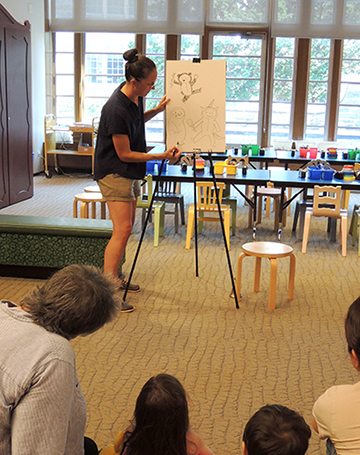
 Mary was so fantastic to have at our library! Not only did she give a fabulous read aloud of Cat & Bunny, she did a free draw portion where kids voted on a new book character and she demonstrated how she illustrates!
 Later, I caught up with Mary to ask her a few questions about her delightful work…
You have lived a LOT of places…California, Vermont, North Carolina, Maine, Cape Cod, and THREE different cities in the UK! How do these places manifest in your art?
The many places I have lived are certainly an influence on my art. Each place has its own architecture, fashion, flora and fauna and even weather! These have all made its way into my mind as I walk or drive or ride my bike through the places I have lived. I noticed it first when we moved from the UK to California because I began adding more vibrant colors into my palette. Lots of light blues and pinks, too. Colors I normally wouldn’t reach for suddenly felt natural. California has bright sun and vibrant colors, Vermont and Maine are very green with lots of old wooden houses and barns. England is not as colorful but there is a lot of lush countryside and the cities, towns and villages have beautiful old brick and stone buildings. I can look at my work and remember where I was when each piece was made!
In the story, Bunny is very outgoing, but Cat needs a little more time to say yes to new things. Are you more of a Bunny, a Cat, or neither?
This is a great question! The answer is that I am both. I wrote the story based on a strong memory from when I was about 4 or 5 and I had a best friend who I saw all the time. We watched The Princess Bride and played He Man and Shera! But when we got to kindergarten he started playing more with other boys than with me and I felt confused and hurt by the change. I was like Cat then. And just like Cat, I found new friends! I have always really loved having a best friend but I as I got older I became more outgoing and befriended new people much easier. It’s an important skill, especially when you move as often as I have. So I guess I started out like Cat but have grown to become more like them both.
In addition to writing two children’s picture books, you have illustrated books for other authors as well. What’s your process for bringing another artist’s characters to life?
I love illustrating for other authors because the collaboration inspires me to create work I wouldn’t have done otherwise. When I get a manuscript I first read it over slowly several times and just let the imagery come to me. Sometimes I see details of characters or scenes in my mind or sometimes more vague ideas of an image. I really get to know the story. Then I grab my sketchbook and begin drawing out the images as I read through the text. After I have drawn many different versions of characters and scenes there are always ones that stand out to me as the stronger ones. I draw a lot, many more ideas than what is ultimately in the final art. My sketches end up adding things which aren’t in the text but feel like a part of the story to me, maybe a gift is being given or there’s a campfire. Good writing leaves room for an illustrator (and reader!) to fill things in and my job is to imagine what that is and put it into pictures.
Do you have any new books or projects in the works?
Yes! I have just started working on a new picture book for a publisher but it’s too soon to share the details quite yet. I’m also writing two books of my own and hope to get them published in the future. Like many other places I’ve called home, Princeton has been inspiring to me (and I’ve made some great friends!). One of the books I’m writing takes place here and I hope to bring out the unique character of this interesting and beautiful town!
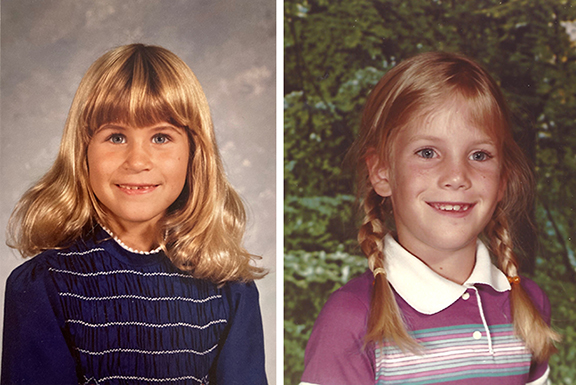
We’ll conclude this blog post in the spirit of which it began…autumn, back to school, and school photos. Can you guess who is who in these super fab library celeb photos???

 It’s beautiful, botanical, and inspiring…find your little light in the darkness with this lovely garden box illuminated with shimmering votive candles!
 While this was a quiet and simple project, it was incredibly cozy and the kids absolutely loved it. Our story time can sometimes get a little raucous, so this sweet and mellow project was a delightful change of pace.
 It’s a special week for hoots and haunts, so we’re delving into the blog archive to deliver our most ghostly posties for your Halloween celebrations!
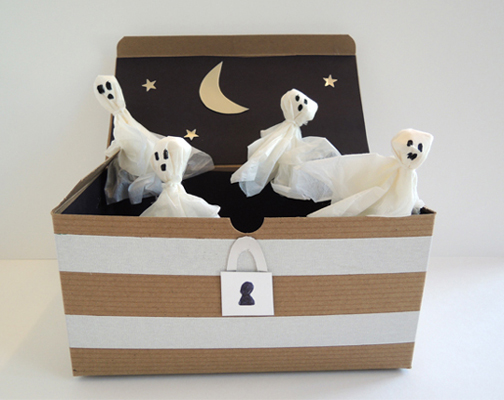
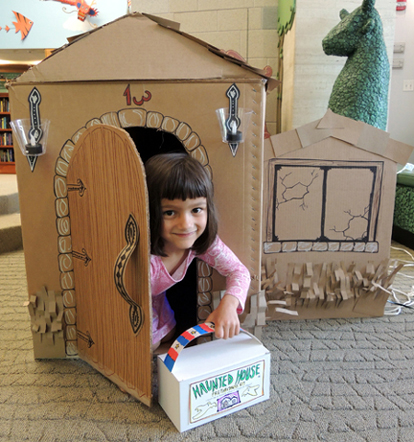 Moving on to a different house, different haunting, we read Ghosts in the House (Square Fish reprint edition, 2010). After crafting a classic ghost chest, kids had to locate multiple phantoms spirited away in our elaborate
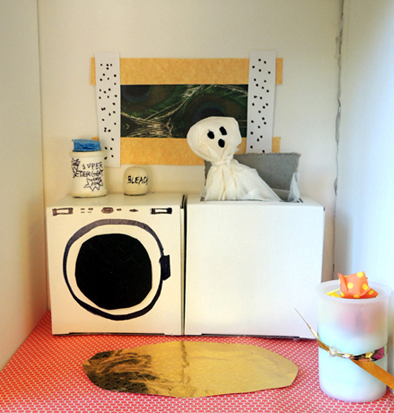
 For simpler – but no less spooky – apparitions try this
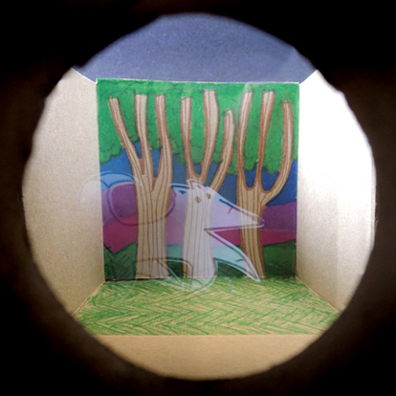
  And speaking of optical illusions, we dug through Cotsen’s special collections and discovered a really cool book from 1864. Spectropia allows the reader to experience the scientific concept of afterimages. The post contains
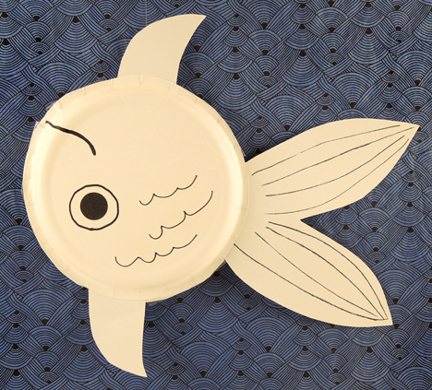
  We’ll conclude our Halloween post with a ghostly guppy. We read Goldfish Ghost (Roaring Brook Press, 2017) and crafted this simple paper plate goldfish marionette that of course hangs upside down. It was quite a hit at story time!