
Bacon, eggs, and donuts anyone? Or how about a glass of freshly squeezed orange juice? This little diner set features a compact countertop, fully-stocked kitchen, and mini Post-It Note pad for taking orders!
We read Every Friday by Dan Yaccarino (Henry Holt, 2007). Every Friday morning, rain or shine, a boy and his Dad navigate the city and have breakfast at their favorite diner. Pancakes, coffee, smiles…see you next Friday guys!
You’ll need:
- 1 rectangle of corrugated cardboard (we used a 9.5″ x 14″ cake pad)
- 1 large box (we used a 4.5” X 4.5” x 9” box – a tissue box works too)
- 1 box cutter
- 1 strip of white poster board
- 2 craft sticks (ours were 4.5″ long)
- 1 diner breakfast template printed on 8.5″ x 11″ white card stock
- 3 plastic sample cups
- 1 plastic cocktail cup
- 1 medium pom-pom
- 4 cotton balls
- 1 drinking straw
- 1 mini Post-It Note pad
- 1 pencil
- Scissors and tape for construction
- Markers for decorating
- Hot glue
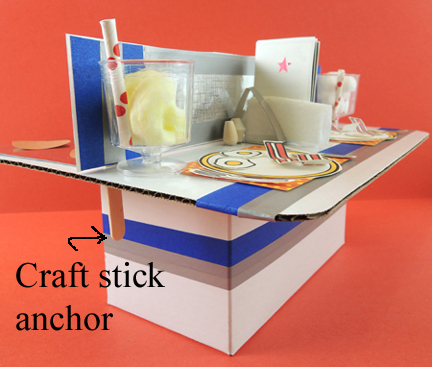
Begin by hot gluing the corrugated cardboard rectangle on top of the box. This is your “countertop,” which divides into 2 sections: dining area and kitchen. To divide your countertop, tape a craft stick to each end of a strip of white poster board (our strip was 2.5″ x 14″) . Use the box cutter to make a slit in each end of the countertop, then slide the craft sticks into the slits to anchor the divider in place:
 If you like, you can use color masking tape and embossed foil paper to fancy up your divider and countertop. Here’s the dining area…
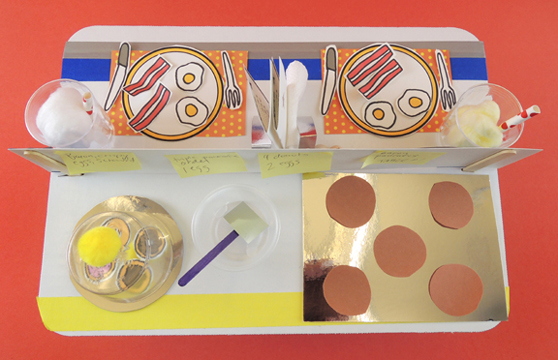
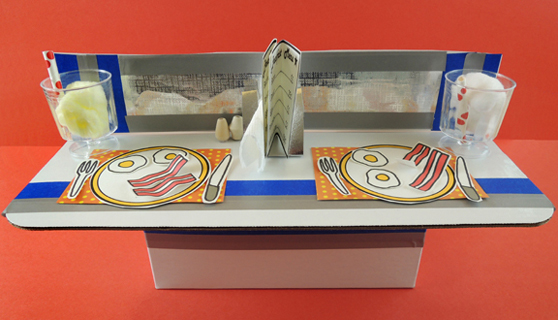 The plates, utensils, food, and menus are on the template. We used patterned paper for the place mats, fancy plastic shot glasses (with bits of drinking straw and cotton ball “milk” and “juice”), and wooden beads for the salt & pepper shakers. We even included some snippets of paper towels for the napkins, AND made a napkin holders:
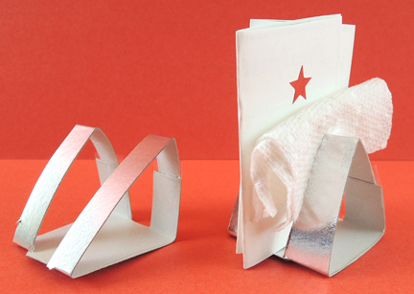 Basically, these are triangles of silver mirror board with the center cut out to accommodate menus and napkins. On the other side of the diner is the kitchen:
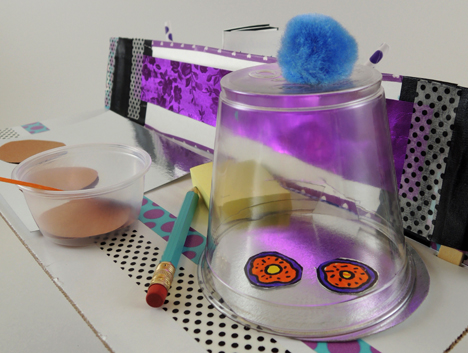
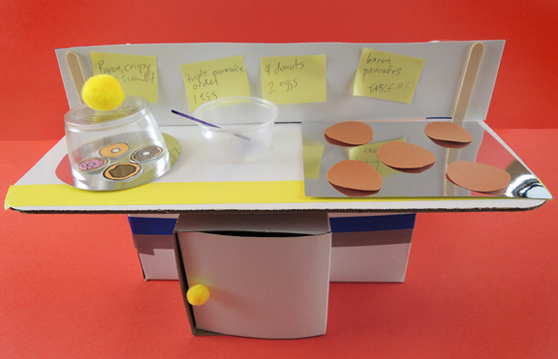 The donut dome is a plastic cocktail cup that has been cut down to 1.5″ and has a small pom-pom hot glued on top. There’s mirror board plate underneath it, and a mirror board griddle as well. There’s also a plastic sample cup mixing bowl with spatula (that’s a bit of silver mirror board taped to a mini craft stick). The pancakes are construction paper. Oh, and we included a fridge made out of a little box, but that’s totally optional.
The set isn’t complete without a mini Post-It Note pad to take orders, and a golf pencil. The Post-It notes stick right up on the kitchen wall! Here’s a bird’s eye view of the finished diner.
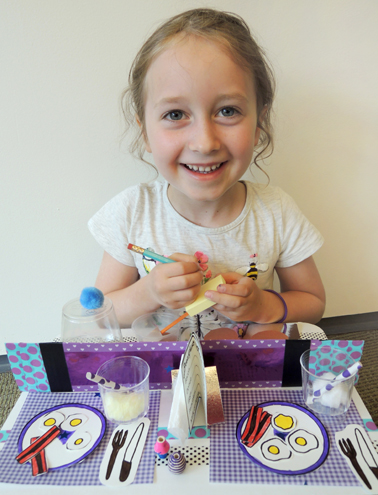
 Miniature food sets are REALLY popular at story time. Sometimes, I hear about kids who are still playing with their sets months – sometimes years! – after story time (specifically our ice cream truck, sushi set, donut shop, and crêpe cart). The kids put a lot of love into creating and customizing their sets, but every once in a while, one set will blow us away. Like this one…
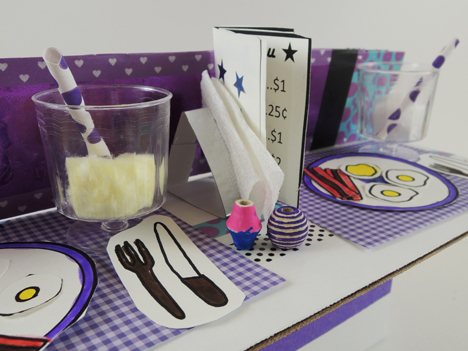 Look at the gorgeous purple decor! The carefully detailed salt and pepper shakers! The purple stripes on the bacon!
 Which are only surpassed by the purple donuts. And then the black polka dots! LOVE.
 As many of you know, this spring, the fifth and final Penderwicks book was released. When the books began, Batty was a mere 4 years-old. Now she’s in college and the Penderwick family has expanded quite a bit!
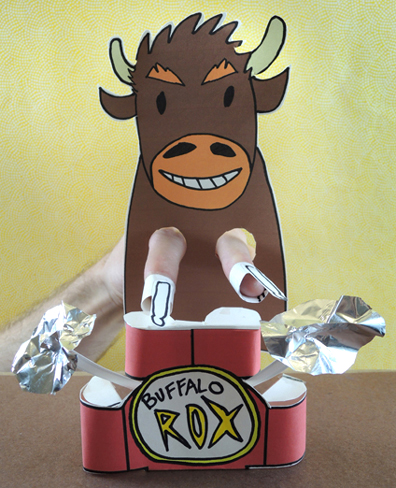
 Decorate it with markers, and don’t forget to write the name of your band inside the circle of the bass drum! When you’re done coloring, flip the drum set template over:
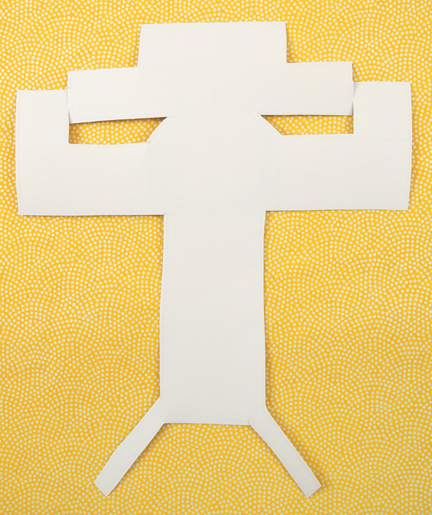 Roll the lower drums inwards, and tape them to the back of the set.
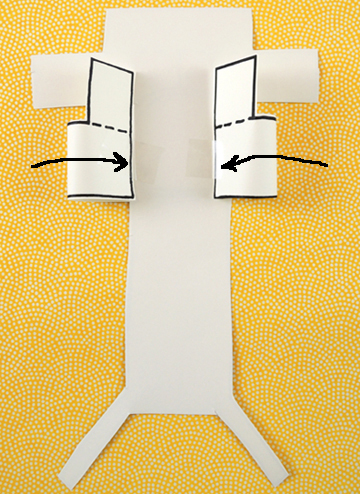 Next, fold the tabs downward along the dotted lines. These are your drum heads. Use scissors to shape them to the tops of your drums, then secure them with tape.
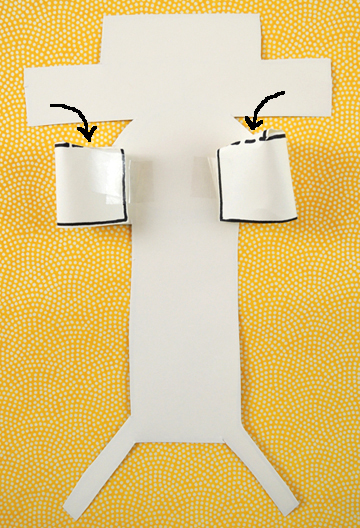 Repeat the same process with the upper drums.
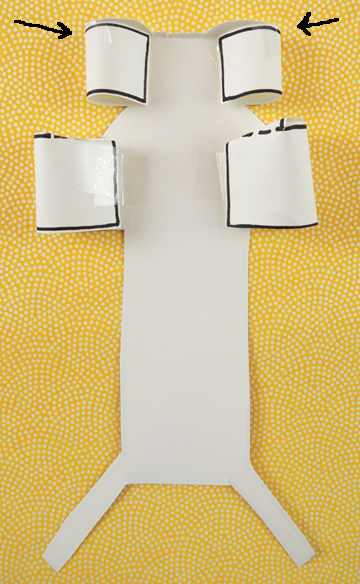 Now fold the long base of the drum set upwards, tucking the cymbal stands between the lower and upper drums.
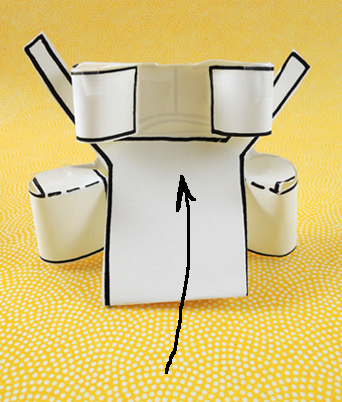 Turn the set around, and stick small
 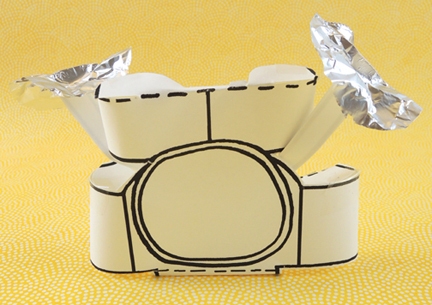 Use scrap paper from your template to fashion a pair of drum sticks and finger loops. Tape the sticks to the finger loops, and slide them over your fingers.
 Finally, your buffalo drummer! Cut and color the buffalo finger puppet from the template (or use the full color version