
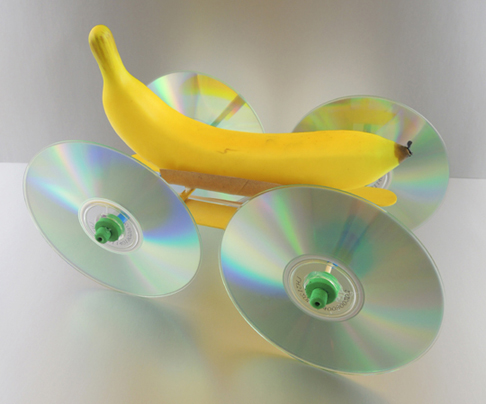
 This banana’s going mobile, thanks to its CD wheels and rubber band engine! And why did we rig this fruit to roll? Four words: fusion, bananas, trolls, and technology. This feat of engineering was was constructed at To Be Continued, our chapter book story time for kids ages 6-8!
We read The Train to Impossible Places: A Cursed Delivery written by P.G. Bell, and illustrated by Matt Sharack (Feiwel and Friends, 2018). When strange noises wake Suzy Smith, she discovers an enormous, unusual-looking train in her kitchen. Suzy quickly (and voluntarily) gets caught in a fast-paced adventure in The Union of Impossible Places, a collection of unusual and fantastical worlds that can be traversed by the Impossible Postal Express train. Unfortunately, Suzy’s first package delivery goes horribly wrong when the package speaks, begging not to be delivered. This doesn’t make the package’s recipient, a powerful sorceress named Lady Crepuscula, very happy. Soon more then a few people are chasing Suzy and her friends as the true nature of the package, and what it means for future of the Impossible Places, is revealed.
In the book, the steam train is built, and primarily staffed by, trolls. And “troll technology” is the awesomely hodge podge way trolls build things. The train is also fueled by fusion bananas, which crackle with blue electricity and are a mite explosive (they also, incidentally, turn your hair blonde). We wanted the kids to experience of troll technology while also putting a banana in motion!
You’ll need:
- 2 jumbo craft sticks (ours were 8″ long)
- 2 mini craft sticks (ours were 3″ long)
- 1 toilet paper tube
- 1 drinking straw
- 1 bamboo skewer pieces, each 5.75″ long
- 1 brass fastener
- 1 rubber band
- 4 CDs
- 8 foam beads
- 1 banana
- Hot glue
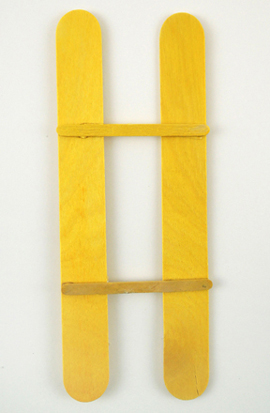
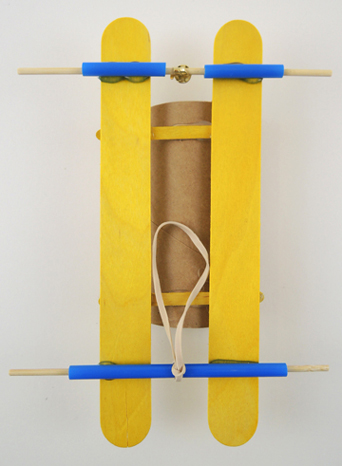
This project was inspired by a banana car designed by YouTuber GrandadIsAnOldMan. However, we modified ours to fit the materials we had on hand. Begin by hot gluing 2 mini craft sticks across 2 jumbo craft sticks like so:
 Next, cut a toilet paper tube in half, then hot glue it on top of the mini craft sticks:
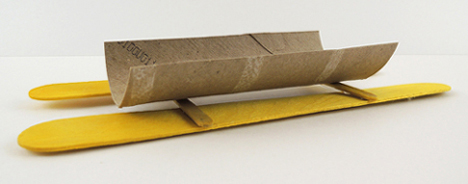
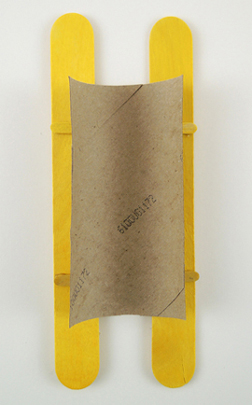 This creates your “banana saddle,” which keeps the bottom of your banana from interfering with the rubber band motor. Here’s a side view of the finished saddle:
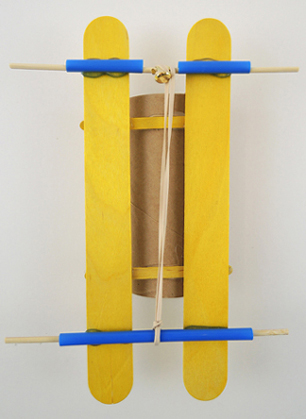
 To create the rubber band motor, tightly wrap a brass fastener around the center of a 5.75″ piece of bamboo skewer. You want to prongs to be nice and tight, but make sure there’s still a little room under the head of the brass fastener for the rubber band.
 Cut a drinking straw into 3 pieces (two 1.5″ pieces, and one 3.75″ piece). Thread the 2 smaller pieces on either side of the bamboo skewer with the brass fastener. Then thread the larger straw piece onto the other bamboo skewer. Hot glue the straws directly to the jumbo craft sticks, then loop a rubber band onto the center of the longer straw. The underside of your car should now look like this:
 Later, you will wrap the rubber band around the head of the brass fastener, then wind the wheel and the axle to tighten the rubber band and prime the banana car’s “motor”:
 The car’s wheels are surplus CDs we obtained via donation from various University departments. We pushed a foam bead through the holes of each CDs, then hot glued them for extra security. Slide the wheels onto the ends of the bamboo skewers, then hot glue another foam bead to the outside of each wheel.
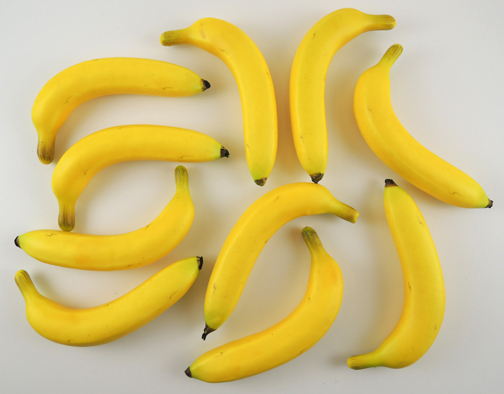
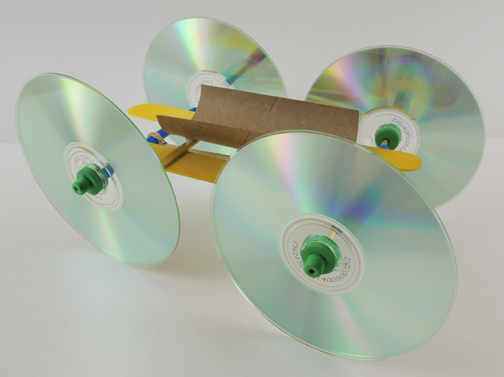 The car is ready to go…all you need is a banana! We actually went with FAKE bananas for this project (Amazon: 6 cost $11). Firstly, fake bananas don’t ripen inconveniently. Secondly, fake bananas are lighter, which meant that the cars would roll a little further.
And roll that banana car did! Wind the rubber band up and let it go…
We also tested this car with a real banana, which was much heavier. As predicted, the car didn’t roll as far. But you might be able to remedy that with a thicker rubber band. Or visit the original source of the project on YouTube: GrandadIsAnOldMan for some helpful hints. And hey! It’s engineering! Trial and error are part of the fun!
Many thanks to Princeton University’s Rockefeller College and Office of the Registrar for recycling their surplus CDs for this project!
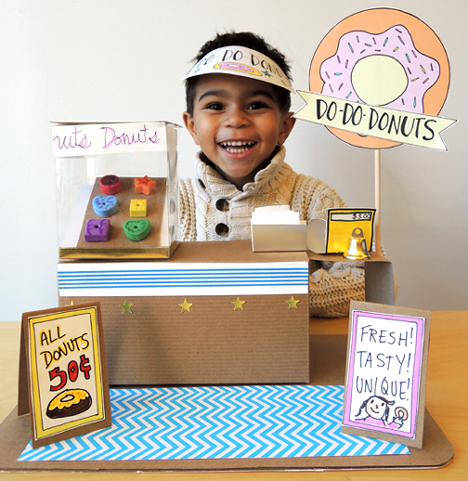 We couldn’t let this holiday pass without mention! Donuts are the life blood in our office (as is espresso, cupcakes, and whatever chocolate Katie brings back from her travels to
  If you’re looking for something a little simpler, we highly recommend Marissa’s felted
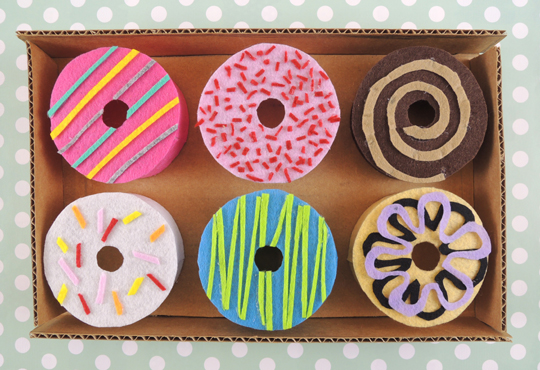
 OF COURSE we had to conclude this post by traipsing down to House of Cupcakes (winner of Cupcake Wars!) to enjoy a couple of their fresh, house-made donuts.
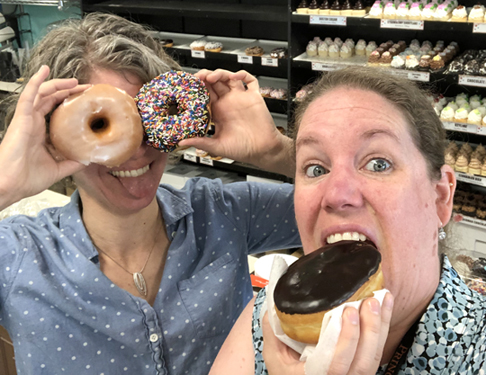
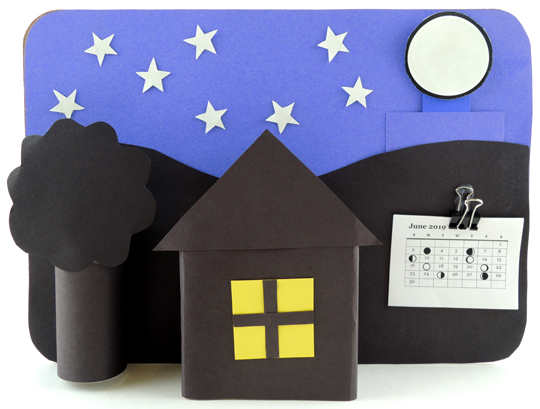 Learn about the phases of the moon (and track them yourself!) using this awesome, 3D, double-sided, lunar calendar! Katie and I dubbed this “the story time project of the year.” Because STEAM power!
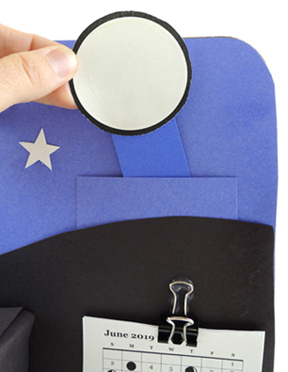 Next, use black construction paper, a toilet paper tube, and a small box to create mountains, a tree, and a house (we recommend adding a little yellow window to the house as well). The hot glue the tree and the house to the backdrop. Important! In order to get the calendar to stand up, the house needs to be attached in the center of the backdrop:
 To the right of the house is a small lunar phase calendar. Tape or hot glue a binder clip to the backdrop, then clip the calendar in place. I custom designed our calendar for June-December 2019, but seeing as time inexorably marches on, you can find a current calendar with a Google search. Add some white card stock
 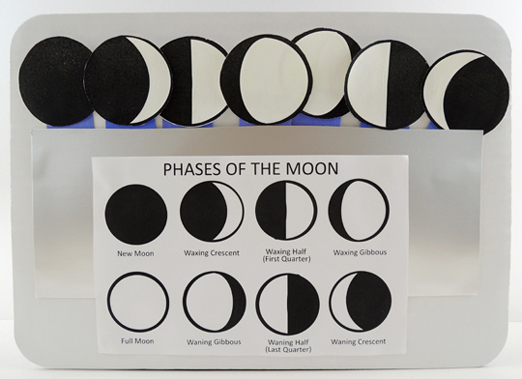 Above is the other side of the calendar. First, use construction paper or poster board to create a pocket (our pocket was 4.75″ x 12″ silver poster board), then tape or glue the
 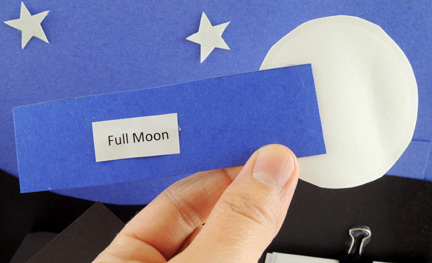 This was a great part of the story time project. Watching the kids methodically checking and matching the labels, to the chart, to the sticks was really sweet. And very science!
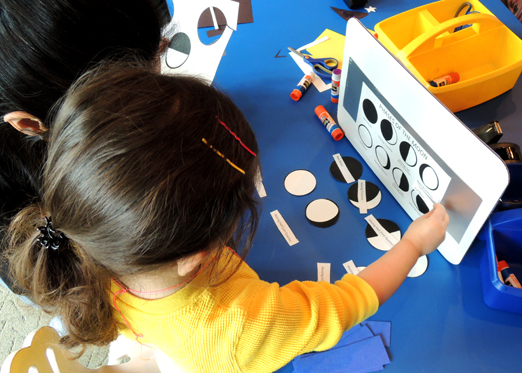 To use your new lunar calendar, match the date on the calendar to the appropriate phase of the moon. Identify the correct moon stick, then slide it into your night sky pocket. Keep checking the calendar to track the moon’s phases. Oh, and we also used glow-in-the-dark paint to fill in our stars and moon sticks. So this calendar glows at night!