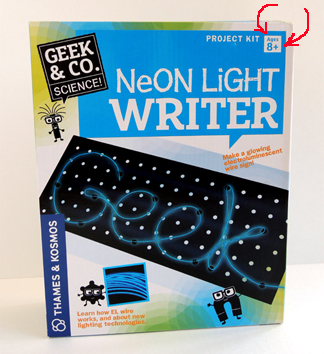
 Time for another post from our kid tester, Hope! Today she will be reviewing the Neon Light Writer by Thames & Kosmos. It’s intended for kids ages 8 and up, and retails for about $20.
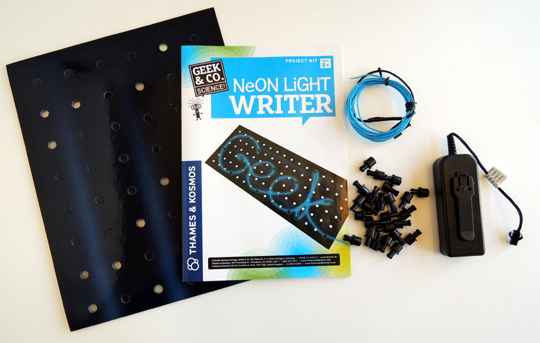
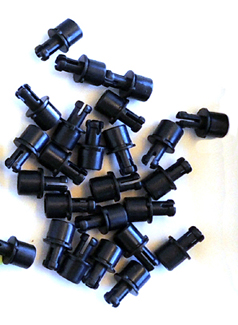
Hello, Readers!! Upon opening the box for the Neon Light Writer, I was surprised to discover that what looked like a chic pegboard on the front of the box was really just black, 20” x 8” piece of cardboard with holes punched in it! I fished for the other items in the box and found a coil of wire, a plastic battery holder attached to the wire that had a little switch on it, a collection of 25 black plastic pegs, and a manual. I opened up the manual and saw the “Kit Contents” list. Double checking to make sure I had everything I needed, I turned the page.
 After reading the handy dandy instructions, I learned that the concept of the project was to insert the plastic pegs in the pegboard in a certain pattern, then thread the wire through the pegs to spell out a word. Cool! was my immediate thought.
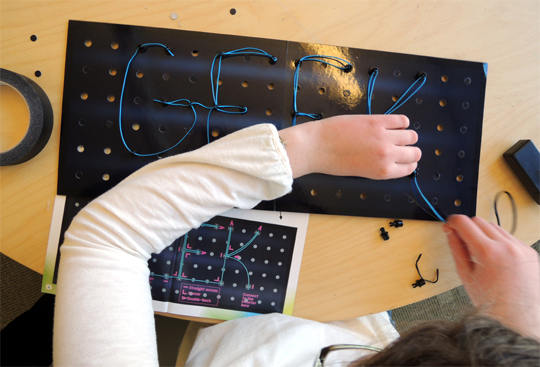
I decided to follow the instructions and try my hand at writing the word “GEEK” as a first attempt. As I put the pegs into the cardboard, I noticed that the peg holes were a little small for the pegs. The manual said that the sign is supposed to hang from nails, though there was no kind of hanging device mounted on the back, or any nails included within the rest of the kit.
Maybe because the nails were supposed to be inside the peg holes the holes were small? It’s also a possibility that the holes were small so the pegs didn’t fall out while the sign was hanging up. It was annoying because small holes meant that the pegs had to be forced into the board. Since the pegboard was flimsy cardboard, I was afraid I would rip it.
When I was finally through painstakingly pressing in pegs, I unwound the little bundle of wire and started threading it through the pegs, which had little notches in them.
 If I thought putting the pegs in was bad, then this was a pain in the tush! The wire was flexible, but moderately thick compared to the size of the peg notches. In some places, it was necessary to double the wire over because of the shape of the letters. This made it even harder to thread through the peg notches. Another challenge was that the wire would bunch up between each peg if I didn’t keep it pulled taut as I threaded it through. If I tried to straighten it after I had put it through a peg, the peg would come out of the board. This was frustrating, as pegs popped out of the board quite a few times!
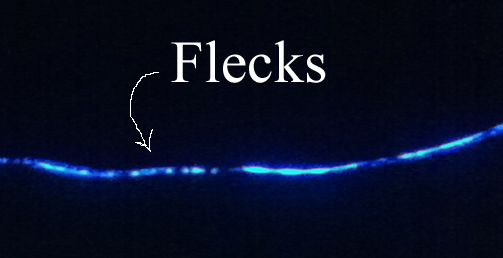
 When it was finally finished, I turned on the little battery holder box button. The light was faint inside the bright room, so I moved to a darker room to test the magic. There we were, Katie, Dr. Dana, and I, cramped in the gallery’s storage closet, better known as “The Black Hole.” As I clicked the button the wire became illuminated with neon blue light. I said, “EPIC!! It actually works!!!” In the dark, we noticed that the blue light was sort of flecked, in a way that made it look like the wire was malfunctioning or something (more on the fleckiness later).
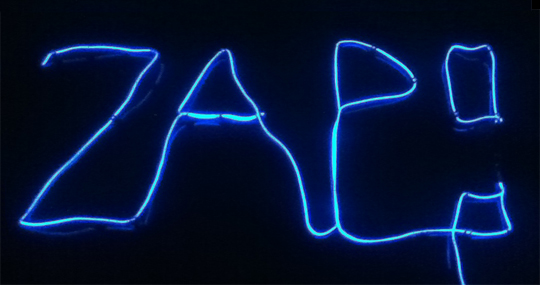
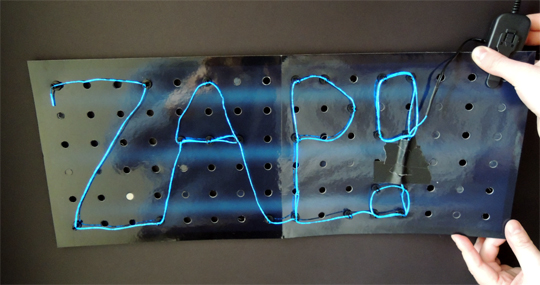
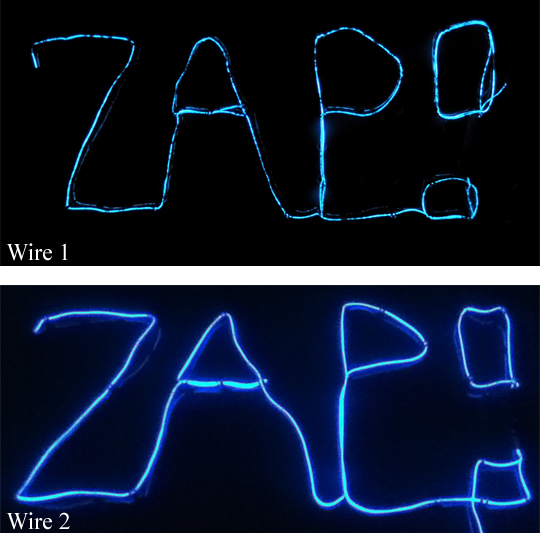
 Next, I decided to make a word of my own (“Zap!”). Instead of using paper, tape, and marker as suggested, I used the letter chart in the manual. The chart was super helpful. The letter chart showed the pegboard as a diagram, and showed you where to place pegs for each letter in the alphabet. Here’s the finished word:
 We went back into “The Black Hole,” and there were still flecks in the wire. We checked the manual (and the box) and discovered that the wire was real EL wire (Electroluminescent wire)! The manual listed the different components of EL wire (copper core, phosphor, copper wire, PVC plastic sleeve, colored outer PVC plastic sleeve, AC power source) and how it works. I thought it was very considerate to include all of the cool bonus information! That was definitely one of the best parts about the product.
Though I was excited to know I was using real EL wire, the manual didn’t “shed any light” on the whole fleckiness issue.
So, a few days later, I decided to call the company, Thames & Kosmos, and find out what was up. I talked to a very kind man, named John. He asked me to describe my issue. I informed him about the flecks in the wire. He told me that that was NOT natural! He even offered to send me a replacement wire! Great customer service! Hats off to John! He asked for my email, name, and address so he could inform me of any problems with shipping.
He told me it should arrive in 2-3 days, so I started waiting for the wire. I waited. And waited, and waited. And it wasn’t there a week and a half later! So I called John’s personal extension. I was told that the wire wasn’t in stock when they went to ship it, so they had to wait for a new order to come in. They were evidently shipping it that day. They should have emailed me! I thought.
Finally(!), the wire arrived three days later! I set up the new wire and clicked it on. Voila! A wire with no flecks, a stream of fluorescent (haha, phosphorescent!) blue! The new wire was beautiful. It was a feast for the eyes compared to the old flecky wire!
 All in all, this product was pretty fun, but it has its faults.
First, the directions called for extra items I didn’t actually use. Two sheets of white paper, markers, and tape. Those items were to help you write your word and place the pegs in their proper places on the board for the wire, but they were not necessary. Unless you wanted to write in cursive, or some other kind of script, you could use one of the handy letter guides inside the manual.
Also, the instructions called for black tape to cover the part of the wire between the letters. I don’t know about you, but I don’t own any black tape. Thankfully, Dr. Dana had some black masking tape handy.
The company’s customer service was excellent! However, I felt that I should have received an email about the delay of my replacement wire. That left me a bit frustrated.
Additionally, the cardboard was pretty flimsy. I mean, who wants to pay $20 for a piece of cardboard that’s supposed to be a pegboard!? The box calls the cardboard a “pegboard,” so I was expecting a sturdier base for the project. And why would you want to buy a product, not knowing how many extra materials you would need? (I checked the outside of the box for the product, but it mentions only two of the six other things you need!)
Oh, and this brings me to another pet peeve about products and books: the recommended age.
 The recommended age for this product is 8+. Considering the frustration I had at age 12 signals to me that maybe the product should either A) note that adult assistance is needed, or B) it should be recommended for ages 10+.
This product was a lot of fun, and I really enjoyed how it actually lit up! I was really skeptical about that! I loved how you could use the switch on the battery box to change the light mode to “Fast Blinking” or “Slow Blinking.” It was definitely a project I would recommend for science lovers or engineers-to-be!
THE SCORE
Pros: Fun, cool that it actually lit up, educational information in manual, great customer service/friendly and helpful staff, lovely new replacement wire.
Cons: Frustrating at times, wire hard to use, pegboard a bit low quality, no email about shipping delay.
GRAND STAR TOTAL: 4 STARS OUT OF 5!
Though this product had some faults, most products do. Overall, it was a super fun little project that could double as a science lesson!

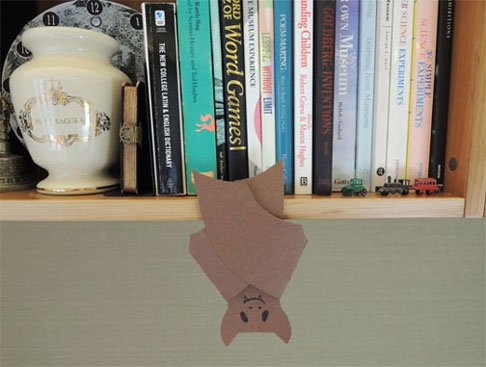 This terrific poster board bat can hang just about anywhere, thanks to its paper clip foot. The bat is a little science lesson too – open its wings and discover a mini exhibition of bat information!
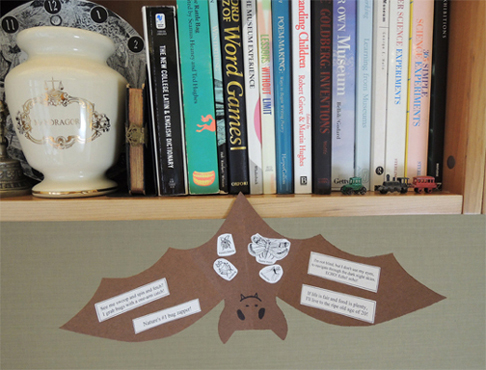 You’ll need:
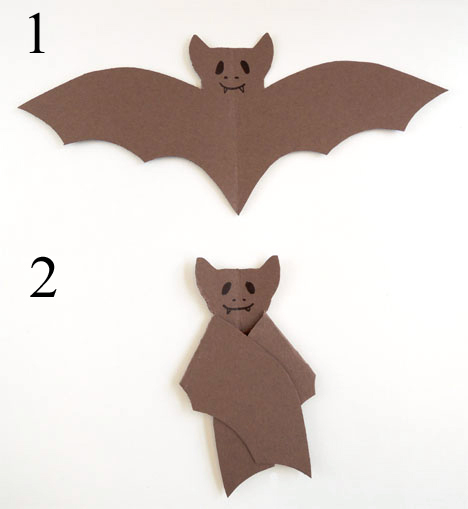 Unfold the wings and glue bat facts and bugs to the bat’s body. Two important things to remember: 1) Since the bat hangs upside down, you’ll want to attach the facts and bugs upside down as well; and 2) Keep the things you are gluing out of the creases in the wings. Otherwise, your bat’s wings will not fold as nicely.
 Tape 1/2 of the paper clip to the back of your bat, right at the very bottom:
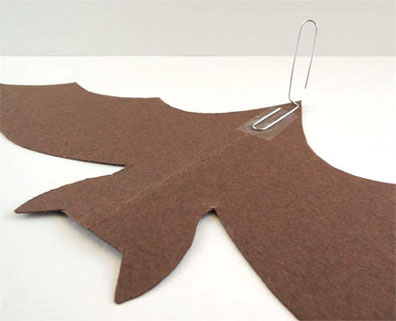 OK, your bat is ready to hang! Place the free end of the paperclip onto a shelf or tabletop. If you’d like to hang the bat on your shirt, on a nail, or on a garland with other bats, adjust the paperclip accordingly.
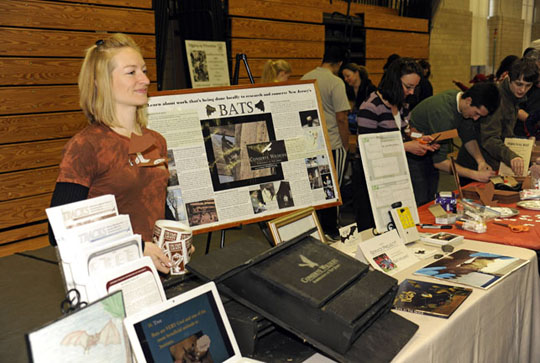 That’s MacKenzie Hall in the above photo. She’s a researcher, conservationist, wildlife educator, and author of the fabulous rhyming bat facts. This month, along with two other women, she won the Conserve Wildlife’s Foundation’s “Women and Wildlife” Inspiration Award. You go MacKenzie!