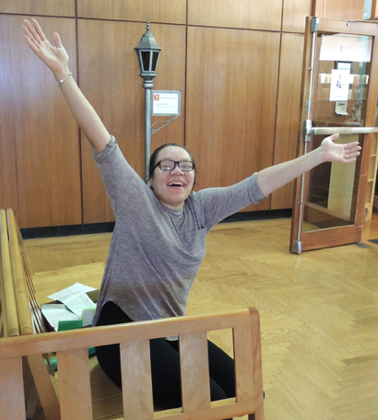
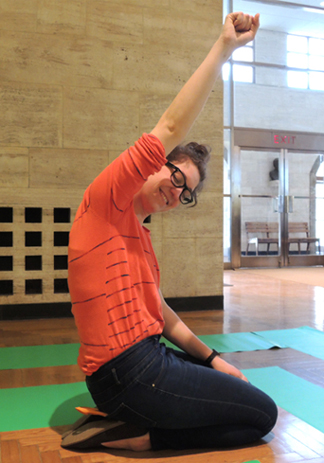
 Today, we offer an exclusive first look at something big on our horizon. This month, my library is hosting a major math event. It’s called A Day at Digitopolis (named, of course, after the famed city in The Phantom Tollbooth). Today, you’re going to get a sneak peek at one of the activities – a giant 16′ x 16′ floor maze. But this is no ordinary maze! You have to get from start to finish without taking a single right-hand turn. Want to build one of your own? Read on!
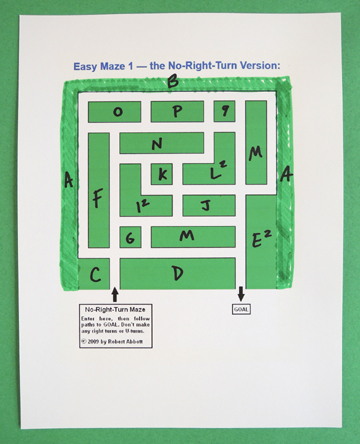
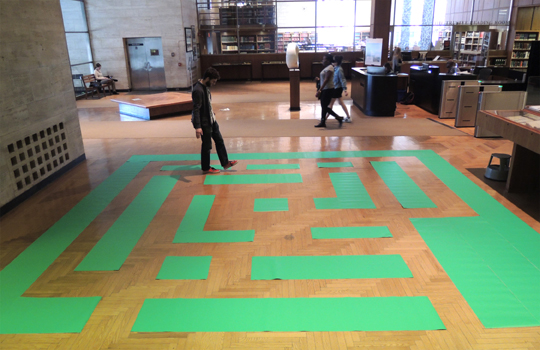
I first encountered this puzzle at the Manhattan Museum of Math (home of the famous square-wheeled trike!). Their version, however, is a no left-hand turn maze that’s digitally projected on a big section of their exhibit floor. A floor projection wasn’t an option for us, nor was a vinyl mat, nor cardboard. The answer? $30 worth of green contact paper and a maze design by Robert Abott.
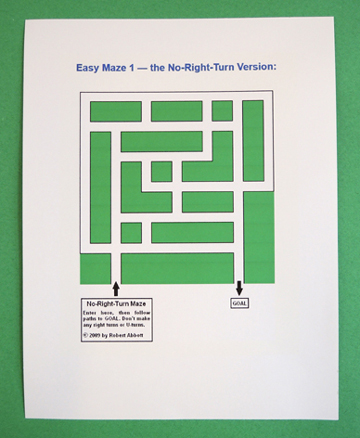
©2009 by Robert Abbott
I did have to make a couple tweaks to Robert’s original maze. In his version, there are a couple of sections where the path goes right to the edge of the maze (specifically, on the left, right, and top sides). I added a border of green boxes to keep the pathway entirely enclosed.
 Once I finalized the maze design and decided that it was going to be 16′ x 16′, I had to calculate how much contact paper we needed. The rolls I found on Amazon were a standard width of 18″, so I just had to determine the length. I work best with models, so I crafted a little maze, in which 1″ = 1 foot.
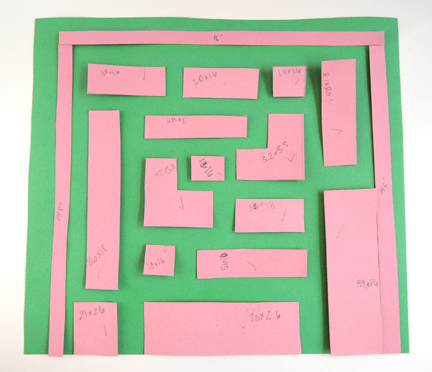 Once I added up the lengths of all the pink pieces, I had a rough estimate of how much contact paper we would need (112.25′). I ordered two, 75′ rolls, which left plenty of extra paper for mistakes. The task of actually building the maze fell on Marissa and Casandra Monroe. Casandra is a Princeton University student and super math whiz!
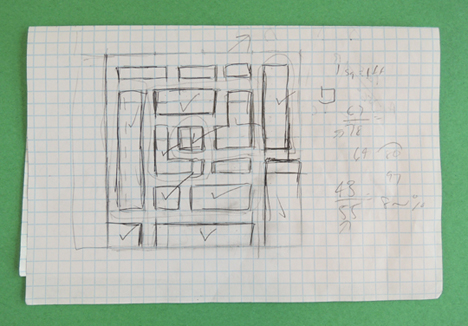
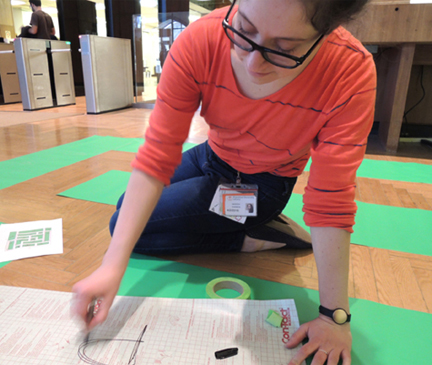
 Casandra sketched the maze on graph paper, in which 1 square = 1 square foot. Then she drew a 16 x 16 square and sketched the various pieces inside it. To make the calculations nice and simple, she made path through the maze 1′ wide.
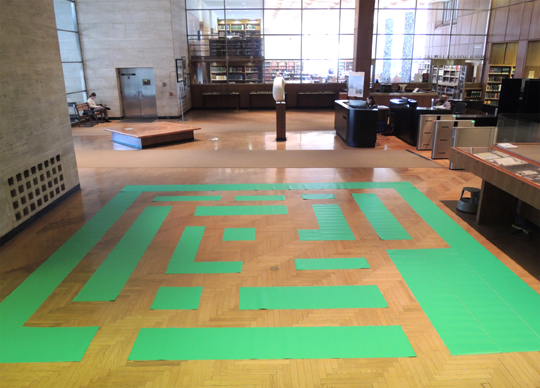
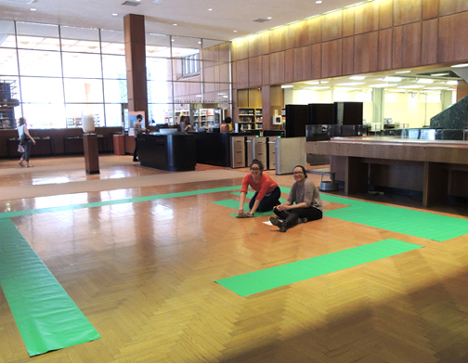
 Then, Marissa and Casandra headed to the library’s cavernous main lobby and started building. They laid down the outer walls of the maze first:
 And then cut and placed the internal pieces of the maze.
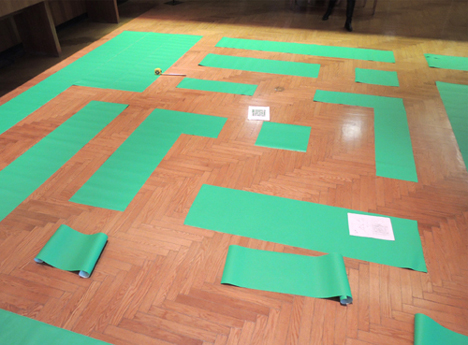 While they were filling in the pieces, they used a measuring tape to keep the path as close to 1′ as possible (even though there were some areas where the path was wider).
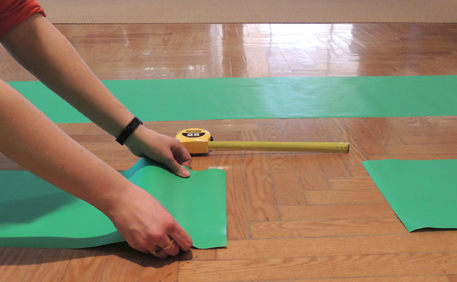 Marissa and Casandra kept the backing on the contact paper. But to keep the pieces from curling up, they used masking tape loops to temporarily adhere it to the floor.
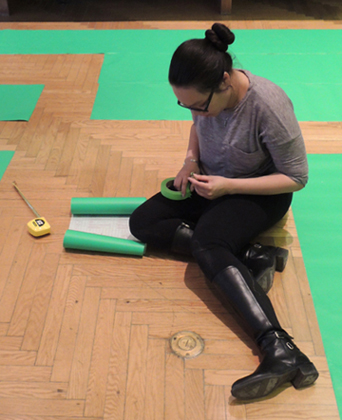 They also used permanent marker to label the backs of all the pieces and match them to a diagram of the maze.
 The morning of the event, we’ll be able to glance at the diagram, check the backs of the pieces, and peel and stick the maze quickly (we’ll have a measuring tape on hand to remeasure the pathways too).
 All in all, the maze took about 3 hours to put together. Cue “Eye of the Tiger!”
 Three important things: 1) Don’t forget to mark the start and finish of your maze (we’re using extra pieces of contact paper with “start” and “finish” written on them in permanent marker); 2) At the event, make sure to have the solution posted somewhere nearby (or available as a handheld map); and 3) Test the maze!
Ian, our faithful maze tester, went through the maze and soon discovered that one of the green blocks was, if fact, making a necessary turn impossible. So Marissa and Casandra adjusted it, and sent Ian through again. No problems after that!
 The real test, of course, will be at the event. There might be some last minute tweaks or unforeseen problems when crowds of kids are introduced into the equation. This isn’t the first time I’ve used contact paper to make large-scale event activities. Check out our most popular toddler activity ever, right here.
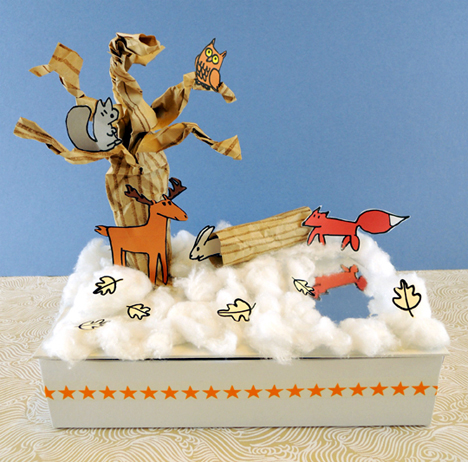 It’s a diorama, a keepsake box, a mini exhibit, AND a lesson in ecology! Open the lid of this winter landscape and you’ll find the creatures that hibernate, burrow underground, and tunnel underneath the snow, complete with an information card!
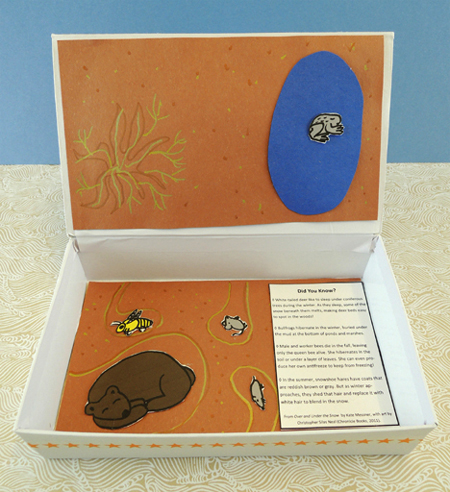 We read Over and Under the Snow, written by Kate Messner, and illustrated by Christopher Silas Neal (Chronicle Books, 2011). A father and child ski over the deep snow in the woods. Even though it’s a world of white, signs of life are everywhere – squirrel, owl, deer, snowshoe hare, and fox. But under the snow is yet another world. Shrews and voles run in tunnels. Bullfrogs burrow in the mud, bears hibernate, and a queen bee sleeps, waiting for the first signs of spring. The book ends with the child in a cozy bed, dreaming of nature. An absolutely beautiful book, with gorgeous, bold illustrations set against snowy white.
 Roll the paper into a tube and secure it with tape. Cut 4 tabs in the bottom of the tube (each tab should be about 1.5″ long). Fold the tabs outwards. Later, you’ll use these tabs to attach the tree to the box lid:
 Cut 5-6 tabs in the opposite end of the tube (these tabs are much longer, about 5″). Fold them out gently, then twist them to create the branches of your tree.
 Hot glue (or tape) the tree to the lid of the box. If you’d like to add a log to your landscape, use a brown marker to draw horizontal lines on a 3.75″ x 4.5″ rectangle of brown wrapping paper. Crinkle the paper, then roll the paper into a tube and secure it with tape. The final length of the log should be 3.75″. Set the finished log aside for a moment.
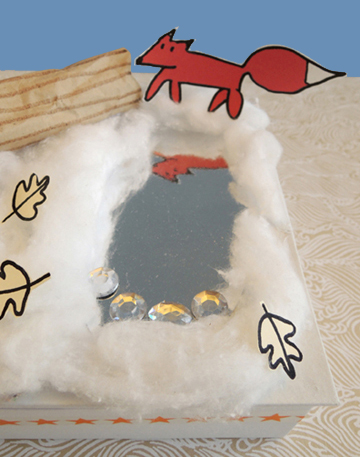 Your winter landscape is complete! Well, maybe not quite complete…
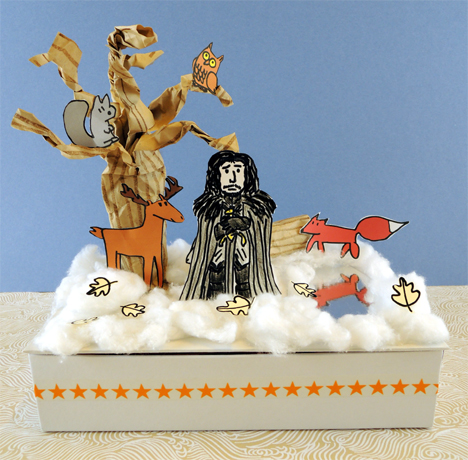 Bet you a
 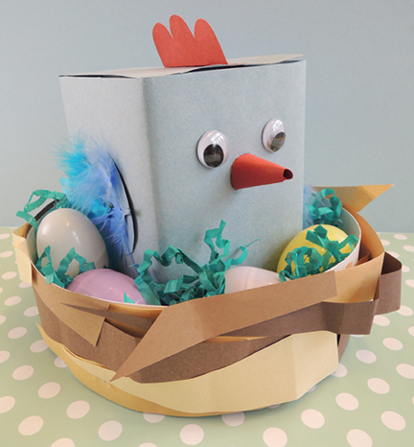 Seeing blue chickens? Do not adjust your monitor. Cerulean poultry are a perfectly normal story time occurrence.
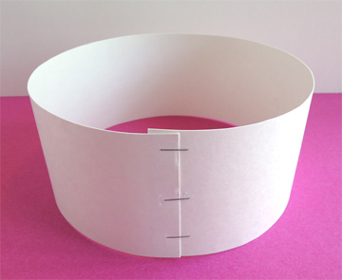 Slide the paper plate back inside the circle, pushing it all the way to the bottom.
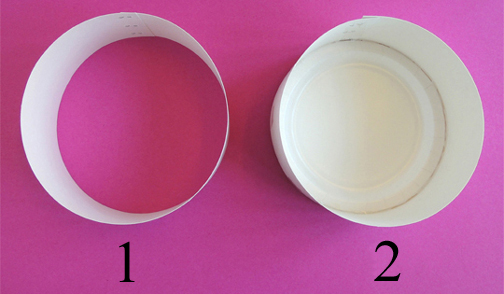 Now flip the “nest” over and use tape to reinforce the connection between the plate and the circle. I used at least 4 pieces of tape:
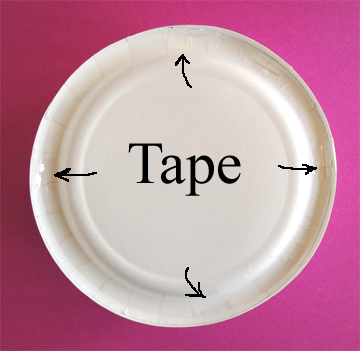 I also reinforced the inside connection with a ring of hot glue.
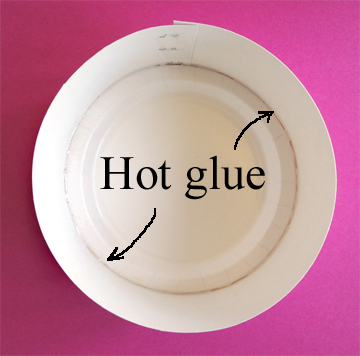 Finally, decorate your nest with uneven and crinkled strips of brown construction paper. Attach the strips to the nest with tape and/or glue.
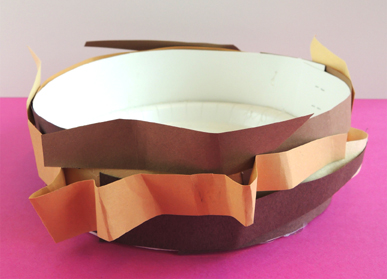 Set the nest aside, it’s time for the chicken!
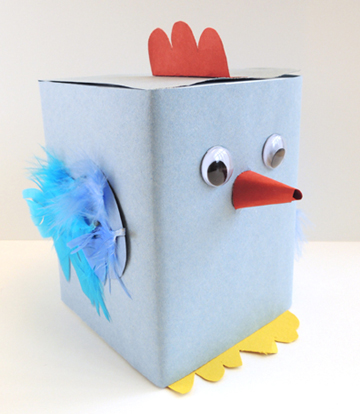 Wrap a box with blue construction paper. Glue a pair of yellow paper feet on the bottom, and blue paper wings on either side. Make a red paper cone beak, and hot glue it to the front of the box. Add a pair of wiggle eyes, or simply draw the eyes on with markers. Glue or tape feathers to the wings (add tail feathers to the rear if desired). Use red paper to make a comb for your chicken’s head. Then tab it and glue or tape it to the top of the box.
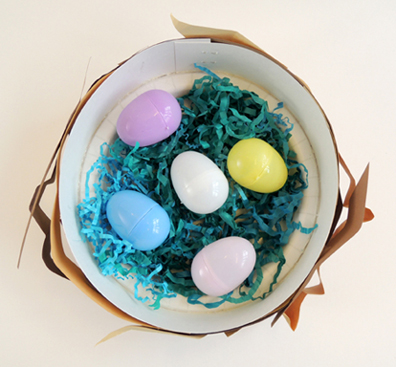
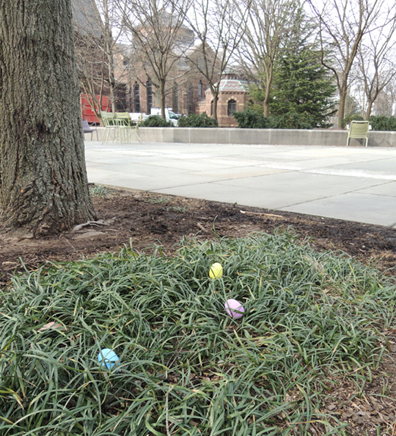
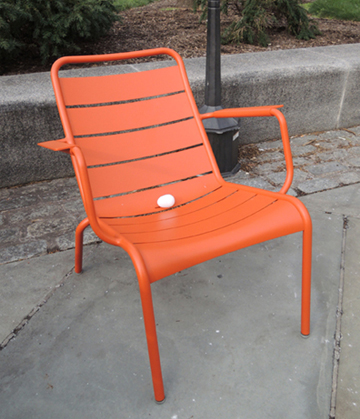
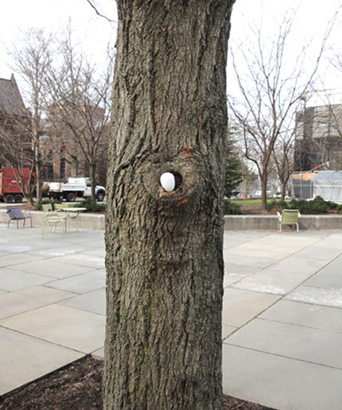
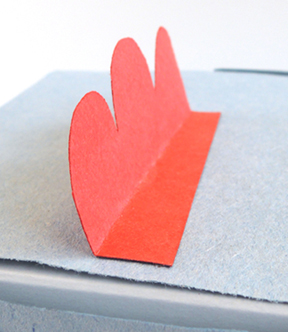 When the chickens were done, we headed outside to the library’s plaza, where we had hidden a bunch of plastic eggs. We told the kids they needed to find 5 eggs each, then shouted “1-2-3 Go!” To insure success, we tried to make the hiding places fairly obvious (and even held a few back to drop right in front of the kids while they were hunting):
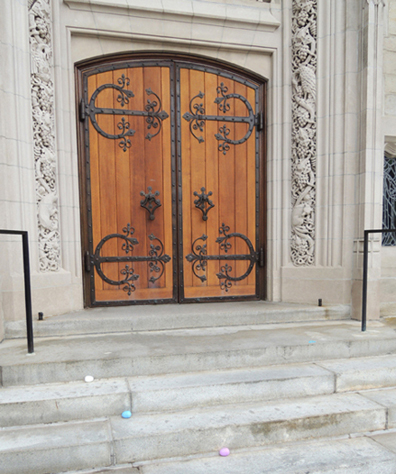 You might recognize that ornate door from