 Theoretically speaking, what WOULD happen if a llama created a black hole with his overzealous cake consumption? Would the world survive?
We read Llama Destroys the World, written by Jonathan Stutzman, and illustrated by Heather Fox (Henry Holt and Company, 2019). On Monday, Llama stuffs himself on cake, setting up a chain reaction that creates a black hole (cake consumption > dancing pants don’t fit > pants rip > cosmic vibration > black hole). And hilariously, Llama does destroy the world. However! Everything comes out the other side of the black hole totally fine! The world is restored…and then Llama sees PIE…
This book. THIS BOOK! So funny, so unexpected. It absolutely had everyone in stitches and it was a joyous read aloud. From the illustrations of the pop-eyed llama, to his exclamations of “I am Llama!” this book is a classic.
You’ll need:
- Small box
- 6 toilet paper tubes
- Brown and white construction paper
- Scissors and tape for construction
- Markers for decorating
- Hot glue
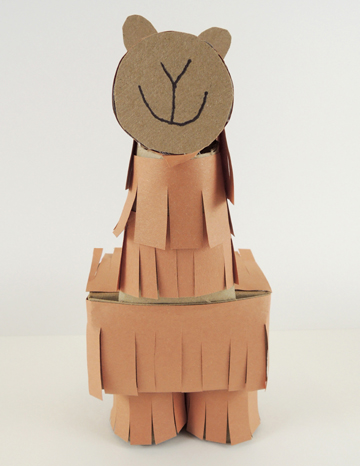
So, here is our llama project, decked out in awesome groovy polka-dot dance pants!
 First, wrap 4 toilet paper tubes with constructions paper…2 with brown paper fringes, 2 with plain white. Next, cut the bottom off a small box (like a square tissue box). Then set the box on top of the legs (we hot glued the legs in place, too). The rest of the box gets decorated with brown construction paper fringes and white construction paper “pants.”
And don’t forget to decorate those pants with markers!
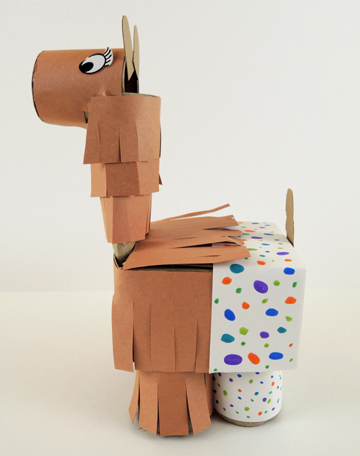
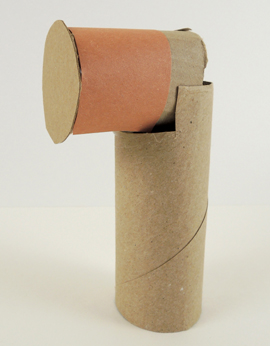
The llama’s neck and head are toilet paper tubes. As you can see in the below photo, we hot glued a 2.25″ snippet of toilet paper tube onto a full-sized toilet paper tube that was notched at the top. We added a small circle of cardboard to finish off the muzzle, and wrapped it with a bit of brown construction paper.
 Now wrap the neck with brown construction paper fringes, pinch the bottom of the neck, and slide it into the front of the box (if you’re using a tissue box, you’ll need to cut a slit in the box). Use spare cardboard to make llama ears and a tail, add some eyes, and you’re done!
 We decided to take the project one step further by introducing a black hole activity (and yup, crafting a black hole was a first in my long history of story times!). First, we had kids make pies and cakes using a paper cup, tin foil, and a paper baking cup.
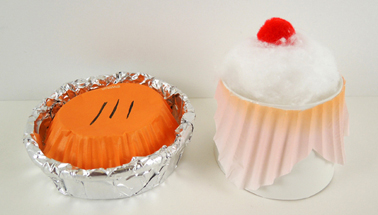 The pie tin is the top of the paper cup (i.e. the open mouth part of the cup) wrapped in tin foil. The pie is the bottom of a paper baking cup.
The cake is the bottom of the same paper cup with the fluted sides of the paper baking cup taped to it. Cotton ball whipped cream and a mini pom-pom cherry optional!
Once kids made a pie and cake, they proceeded to the “black hole” to play a little comparison game. The black hole was a vinyl kiddie pool ring we draped with black sheets and illuminated with green glow sticks.
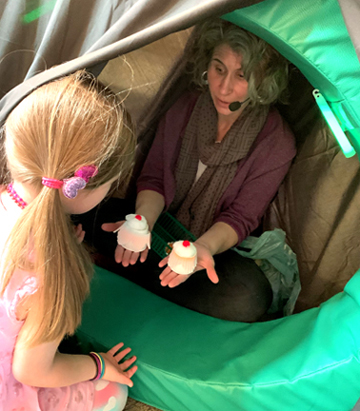 I sat inside, and kids had to enter the black hole, look at the 2 cakes and 2 pies “floating” inside it, and select the one they had created!
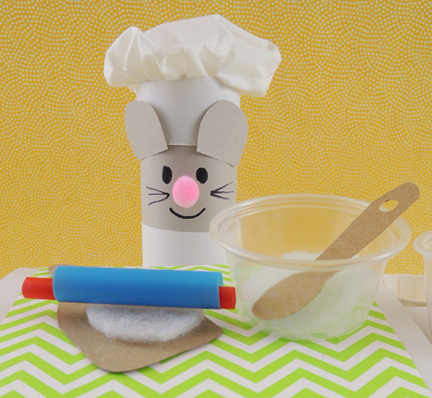 Let this Sous Chef Souris help you make delicious pies! Your miniature kitchen has everything you need for creative baking – mixing bowls, wooden spoons, cutting board, rolling pin, pie pans, fresh felt ingredients, and, of course, matching chef hats!
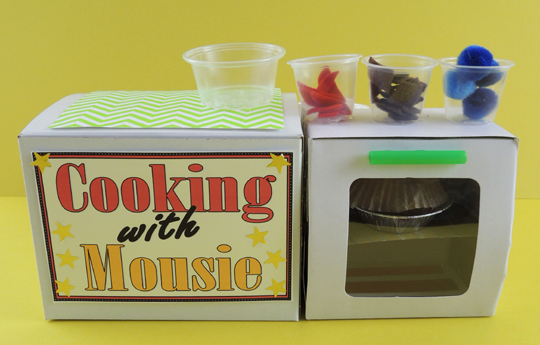
 On top of the cooking counter is some
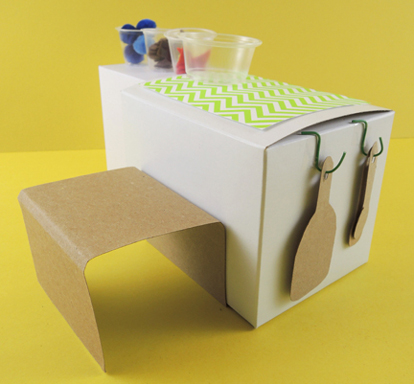
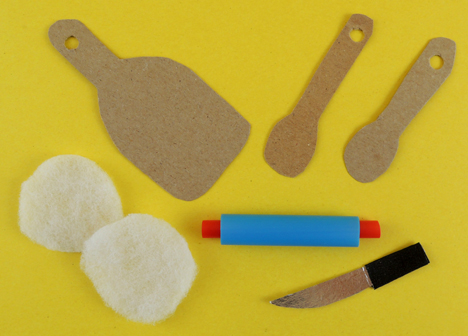 The cutting board and wooden spoons are tagboard. The knife is a little piece of silver mirror board with a black masking tape handle. Those two white circles are polyester batting “pie dough” for the mixing bowl, and the rolling pin is a 2.25″ snippet of bubble tea straw with a 3″ piece of drinking straw threaded into it.
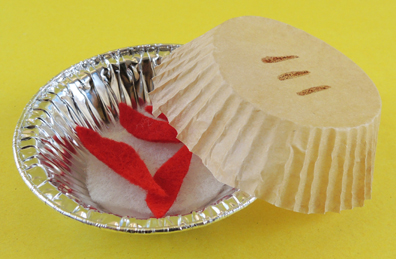 The toilet paper tube mouse is sporting a chef hat made from construction paper and a bunched up facial tissue.
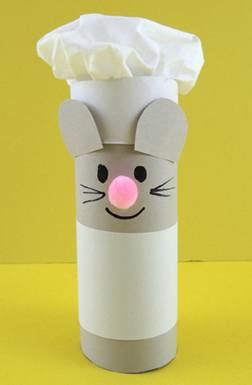 Your chef hat is made out of cardboard and white tissue paper. Instructions for making it can be found in
  When the kitchens were finished and the chefs were ready, we brought out our camera equipment (learn how to construct it
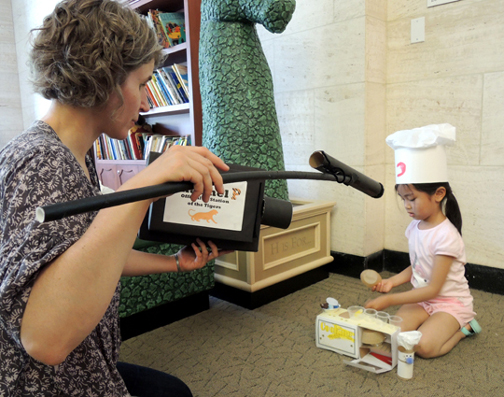
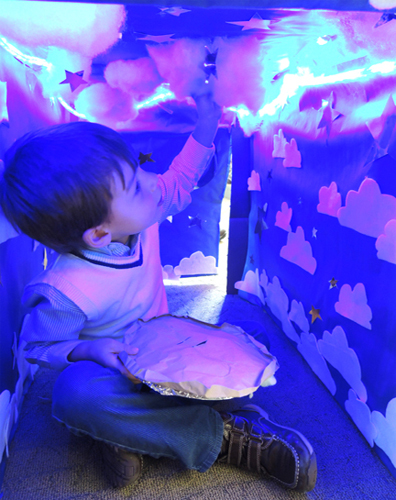
 Travel through a cloud-covered dream tunnel which doubles as a magical oven for a pie full of sweet dreams. Dreams and pie…is there a book than can connect the two? Oh my yes.
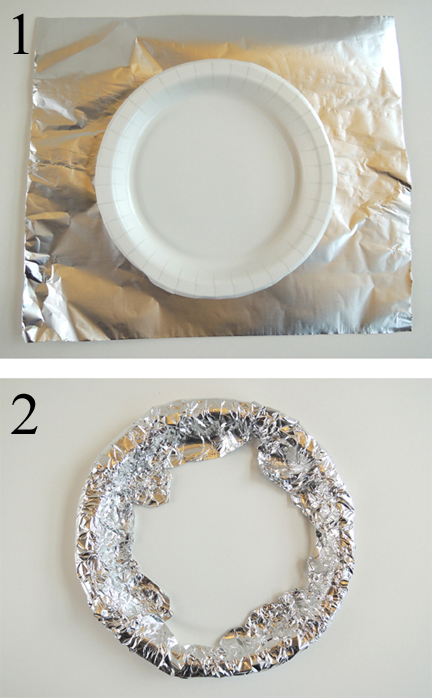 Hot glue a tagboard or poster board circle to the center of the plate.
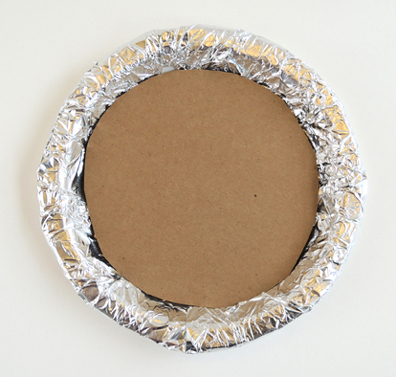 Decorate the tagboard circle with your dream scene! First, we gave kids a quarter of a sheet of paper and asked them to draw a dream character or scene.
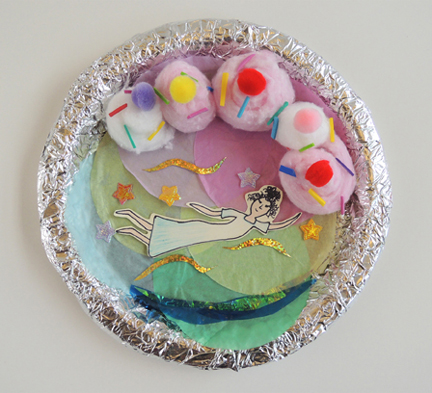 And here are the dream pies the kids made! We asked the kids to describe the dreams for us, but I must admit, those who did offer their interpretations were still somewhat vague. Below, see if you can spot a ballerina, Valentine’s Day, flying, unicorn wonderland, ghost, mountains, butterflies, Spider-man, a birthday party, “purple,” “Antiga,” “shy,” and hippo.
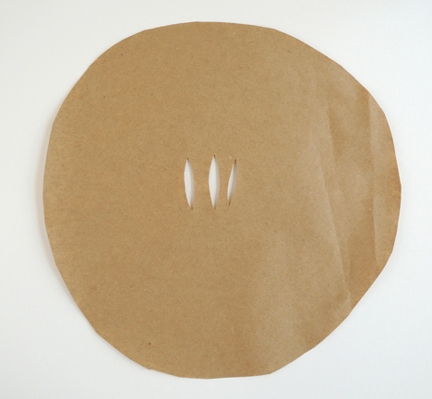 Next, roll the edges of the circle upwards and inwards (about 0.25″ should do it). These are the edges of your “pie crust.”
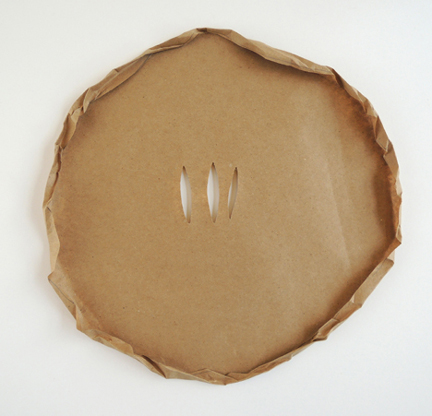 Now to add the “dome” to the top of your crust. Flip a paper bowl upside down and press and smooth the crust over the top of the bowl. You’ll need some height here to cover that crazy dream scene you created.
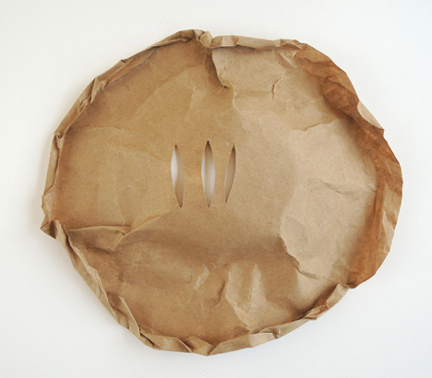 Place the crust on top of the paper pie plate. It’s very cool to see the dream scene through the little ventilation holes of the pie crust!
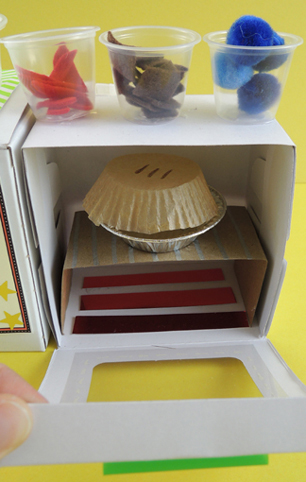
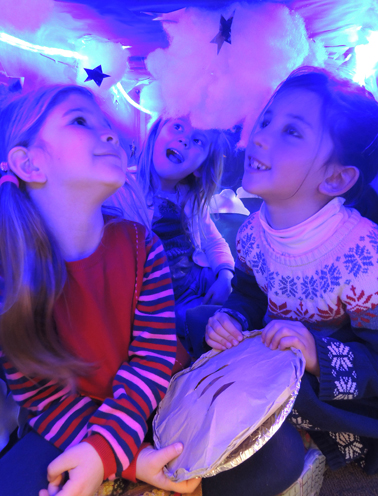
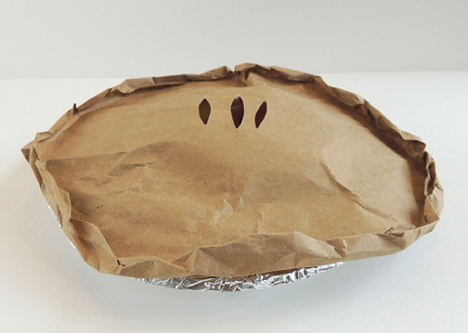 You can stop the project there, or you can take it a step further and go through a dream oven! This doesn’t have to be fancy. You can drape a sheet over a table, or head into a darkened closet with some blue lights or glow sticks. But if you’d like to replicate our dream oven, here’s how we did it. Basically, it was a big box with door flaps cut out on both ends. On the outside, the box looked like an oven set to “Special.”
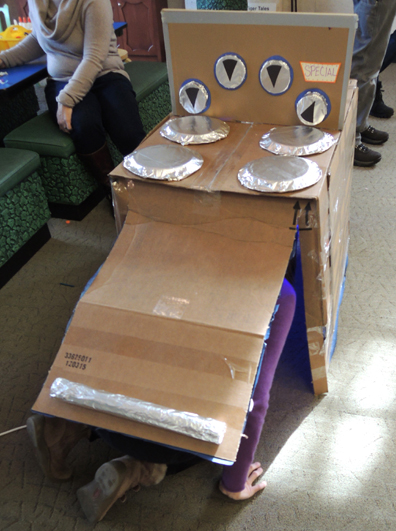 But inside, it was a fantastic dreamscape! Marissa lined the box with blue paper, hot glued white felt clouds to the walls, rigged up dangling
 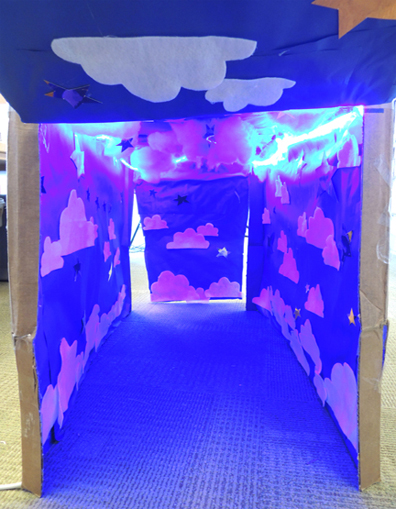 Grasping their dream pies, the kids entered the oven and scooted through the tunnel, “cooking” their pies amidst clouds and stars. Some kids charged through the tunnel and lined right back up for another turn. Others meandered slowly through the tunnel, pausing to take in the dreamy atmosphere. Sweet dreams to one and all!