
Join a big blue whale on an ocean of adventures, and don’t forget to stop by your adorable lighthouse island to play in some waves, chill on the beach, and collect shells!
We read Beachy and Me by Bob Staake ( Random House, 2016). Pixie Picklespeare is the only child living on a very tiny lighthouse island. She is BORED. But after rescuing a beached blue whale, the new friends spend a whole summer playing games, riding waves, and exploring the ocean. But when Beachy the whale hears the call of migration, Pixie is alone and bored AGAIN. But what’s that she hears? Her whale friend, coming back to visit, just like he promised.
You’ll need:
- 1 corrugated cardboard base
- 1 small box
- 1 small oatmeal container
- 1 plastic cocktail cup
- 1 wine cork
- Construction paper
- Scissors, tape, and glue for construction
- Markers for decorating
- Hot glue
The lighthouse island is basically a small oatmeal container and small box, hot glued to the top of a corrugated cardboard base. The light is a plastic cocktail cup flipped upside down and placed on top of the oatmeal container (we left it unattached so the construction paper light bulb taped inside can rotate).
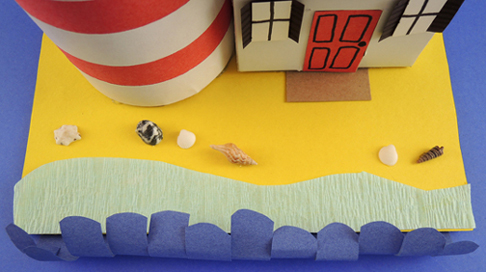
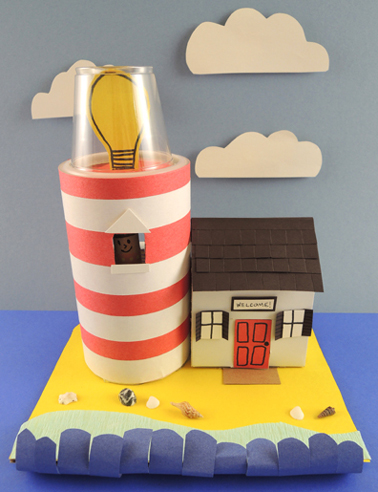 Our “ocean” consists of a curved, light blue crepe paper streamer and a fringe of dark blue construction paper waves. We had mini shells handy for the beach, but you can use images of shells, or just have the kids draw the shells on the beach with markers.
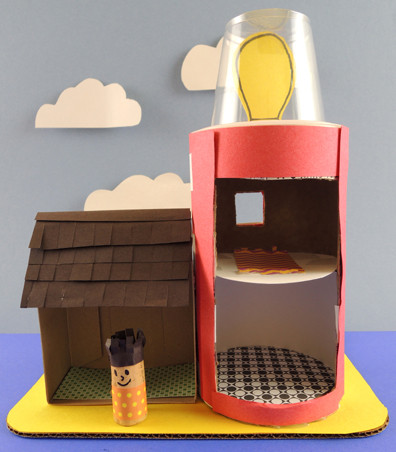
 We also decided to cut the backs out of the box and the oatmeal container to create a dollhouse. Use a circle of white card stock to create the second floor of the lighthouse, then decorate the walls and floors with paper. Need furniture and some framed artwork? You’ll find templates and instructions in this post.
You can see our cork person creation in the photo as well:
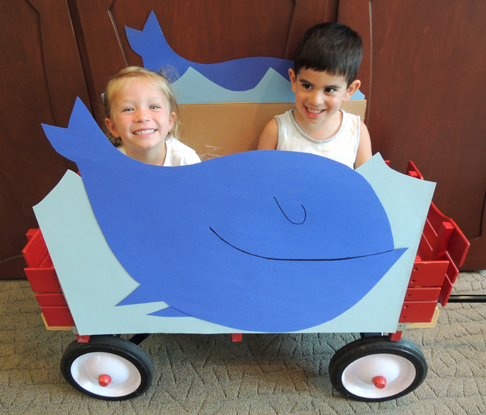
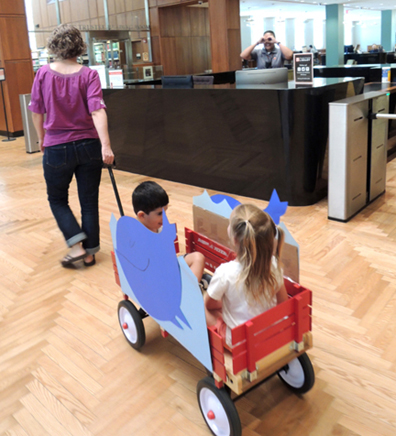
 When the lighthouse islands were done, we announced that a whale had been spotted in the library’s main lobby. This was a red wagon with a whale facades taped to both sides. Kids took turns getting rides and smiling at local whale watchers!
 A trio of birds has invaded your kitchen, intent on repeatedly interrupting your bonding with a baked good. Can you get the birds out of the kitchen and still take the cake?
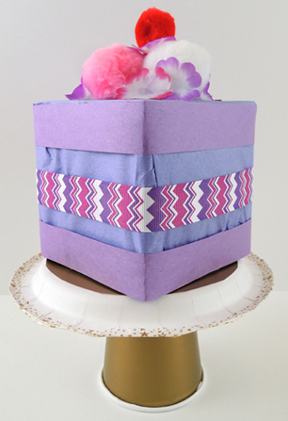 To make the birds, wrap 3 toilet paper tubes with construction paper and add paper wings. Optional:
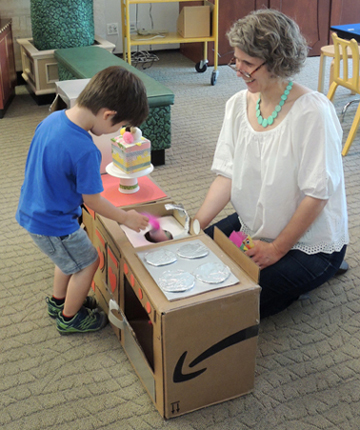
 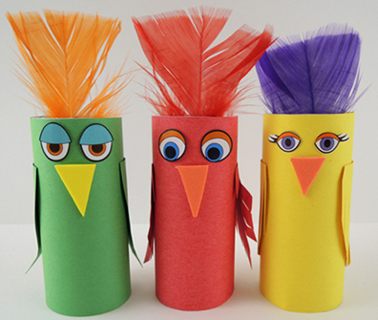 Once you have your cake, cake stand, and birds, it’s time to play the kitchen game! Katie and I used a bunch of recycled boxes to build a kitchen with a fridge, counter, sink, range, and oven.
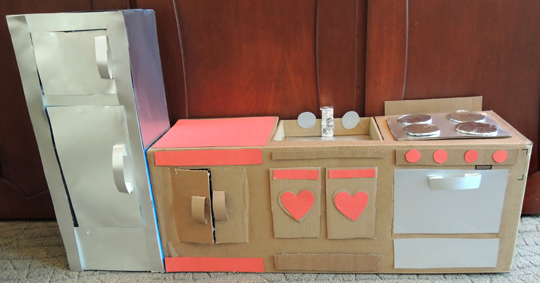 Cut into the back of the set were little trap doors. The trap doors (and the hole in the sink) allowed me to sneak the toilet paper tube birds into the kitchen.
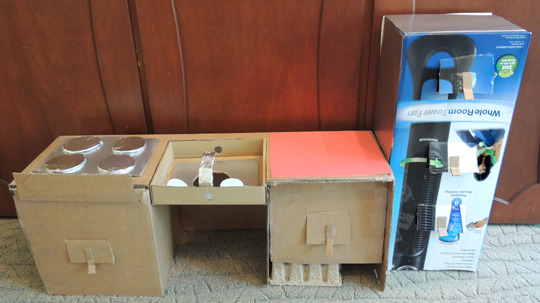 Ready to play the kitchen game? First, kids handed me their birds and placed their cakes on the counter. Then, they took 10 steps back to the starting line. I would hide 1 bird in the kitchen and shout “The bird’s in the freezer!” The kid would race forward, find the bird, and run back to the starting line. We repeated this, using different kitchen locations, until all 3 birds were captured. The prize was their cake!
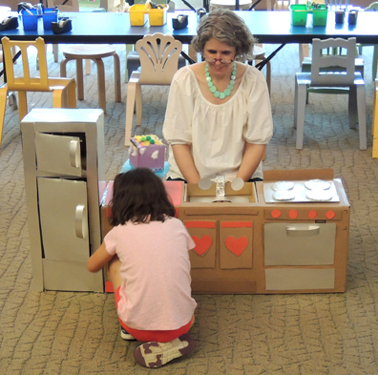 If you don’t have time to construct a kitchen, simply tape images of kitchen elements onto boxes. Then drop the birds into the boxes for the kids to locate.
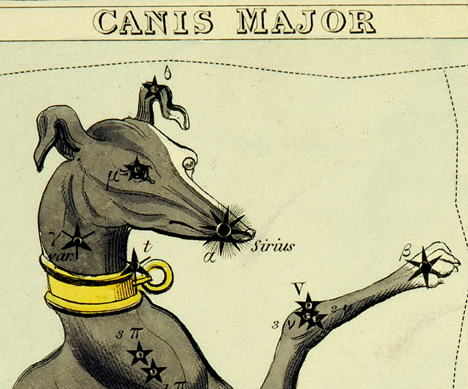 Thought these might come in handy for your summer reading “Universe of Stories” theme…with a historical twist!
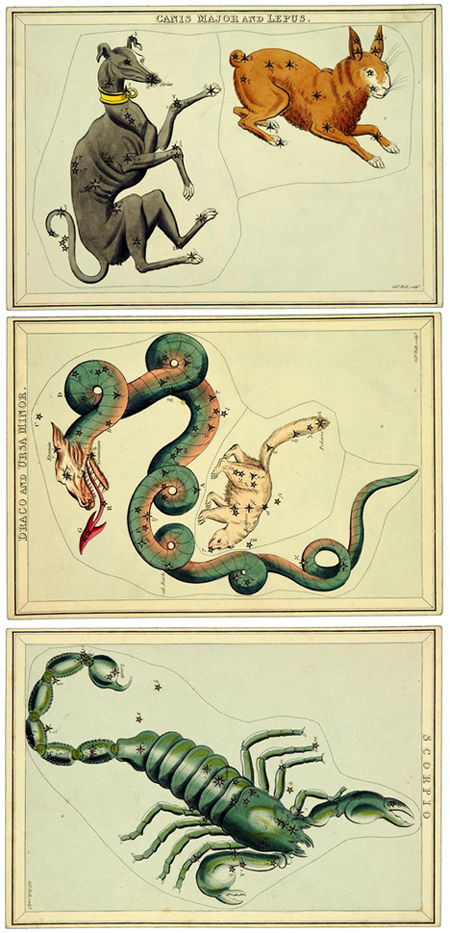 Did you catch that the 3 cards I pulled from the deck are Harry Potter references? Sirius, Draco, and Scorpius, respectfully. So a little stargazing, a little history, a little literacy, and an awesome bookmark for your summer reading books to boot.