
Image courtesy of U.S. 1
Q: Do you have any suggestions for promoting programs on a small budget?
Sure! I’ll start with the obvious ones first, and then move on to the not-so-typical. These days, the go-to promotional mechanism is online media – Facebook, Twitter, Instagram, blogs, etc. Lower tech options are to make door signs, or put out a stack of flyers so people can grab one and stick it on their fridge. Once, for a major event at a children’s museum, I took over an entire bulletin board, adding updates to it in creative ways. I would see families stop by during visits to see what was new.
E-mail notifications are also a great ways to get the word out. We run our e-notification list through a University listserv service, but you can use the Contact Group mechanism in Microsoft Outlook (go to Contacts tab > New Contact Group):
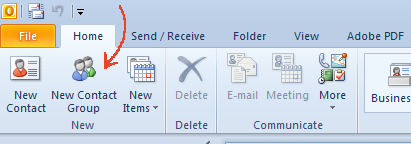 I believe Google has some Group Mail options too. One very, very important thing to remember when sending group mailings? Only insert the e-mail addresses in the bcc (otherwise known as the “blind copy”) field! Otherwise, everyone on the list is going to see the addresses, which leads to privacy issues.
Press releases to local newspapers (and online news sources) are also a great way to get the word out. Here are my 4 rules for press releases:
- Keep it short.
- Include your contact information in the release.
- In the subject line of the e-mail, include the date the program is happening. This helps the editor file it more effectively, increasing your chances of having it run.
- Send the release at least 3 weeks in advance. Newspapers have crazy publishing schedules. Give them time to put your press release in place.
But my BIG hint when it comes to press releases is to include a promo photo. Most newspaper calendar listings include a smattering of photos. Nab one of those photo spots! Your promo photo does not have to be elaborate. Here, for example, is the photo for a 2007 Harry Potter event.
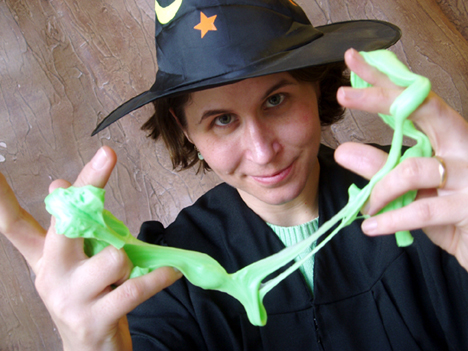 That’s a donated graduation robe, a witch hat from the Dollar Store, and some goop I bought from a gumball machine for 50 cents. The photo ended up running in 5 local publications. How about this one for a 2011 Lightning Thief event?
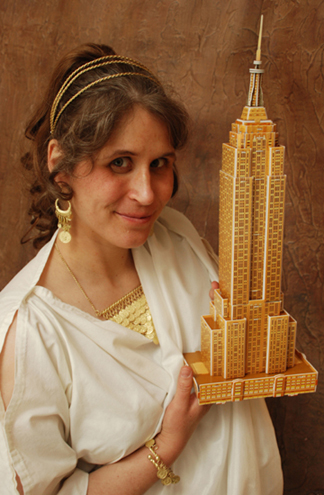 I’m wearing a bed sheet tacked together with hot glue, an old curtain, some costume jewelry, and a fake ponytail I bought on Amazon (which made a comeback for my Victorian Tea costume, woot woot!). That’s a paper puzzle of the Empire State Building. Oh, and I’m 6 months pregnant.
If you don’t feel like being the subject in the photo, you can always ask your co-worker, significant other, relative, or neighbor to pose. Here’s my student assistant Katie McGee in 2009. Isn’t she an amazing Alice?
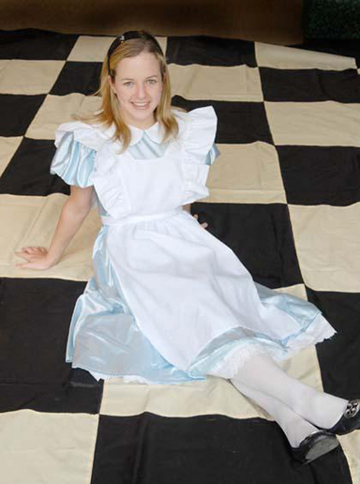
Courtesy of the Princeton Packet, photo by Mark Czajkowski
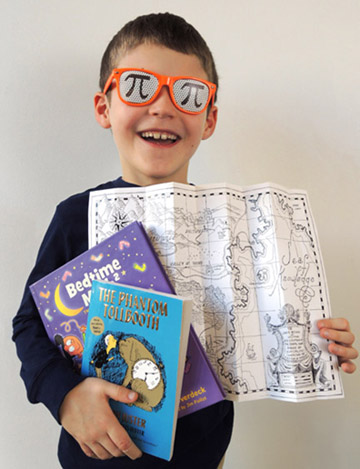
You can ask kids to pose too (with parental permission of course). This lad is gearing up for A Day in Digitopolis, our massive math event, which you can read about here and here. If you do photograph kids, be prepared to take lots of photos very quickly. Kids can get wiggly, distracted, bored, or suddenly shy. Also, the fewer props kids have to handle, the better.
 You can also use objects for your promo photos. When we did a Richard Scarry creative car-building program in 2015 (read about it here), I couldn’t use an image from his books, nor could I pose a person as a car. So I sculpted Mr. Frumble’s pickle car out of an oatmeal container:
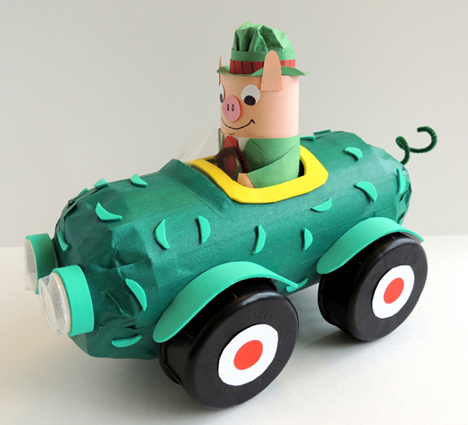 It took some time to make (especially that fedora) but it paid off! The photo ran in quite a few places, including a highly visible pop-up box in Town Topics, one of our local papers.
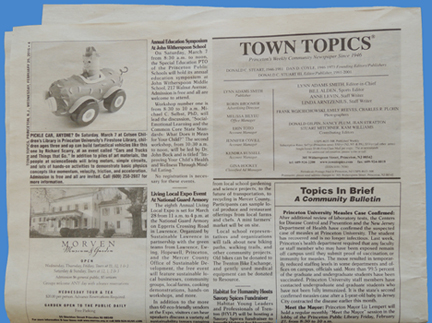
Town Topics, February 25 2015 edition
Mr. Frumble enjoyed an encore performance when we took the program to the Eric Carle Museum of Picture Book Art (you can read about that here). His final destination? Jeanne Birdsall’s studio in Northampton. I am pickle green with envy because he’s totally going to get to read the final Penderwicks book before I do. Lucky pig. Jeanne sent me this shot of Mr. Frumble happily zipping along under blue skies and puffy clouds.
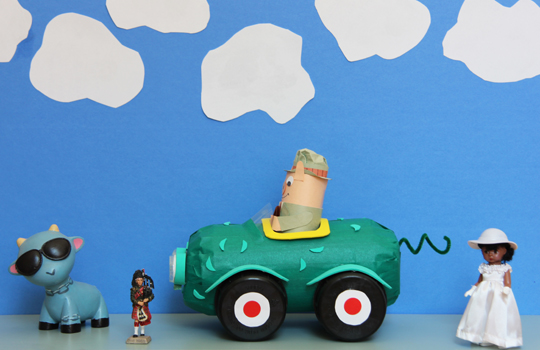
Photo by Jeanne Birdsall
By the way, the goat on the left is from Jarrett Krosoczka’s picture book, Punk Farm. It’s hand-painted by Jarrett himself (and as a quick aside, check out this fantastic timeline of his childhood artwork – wish I had saved mine!).
You don’t have to spend hours hand-crafting an object for a promo photo. Here, for example, is a photo for our annual 350 for 50 writing contest. I borrowed a typewriter from a colleague, put it against a red background, and voila! A lovely, bold photo.
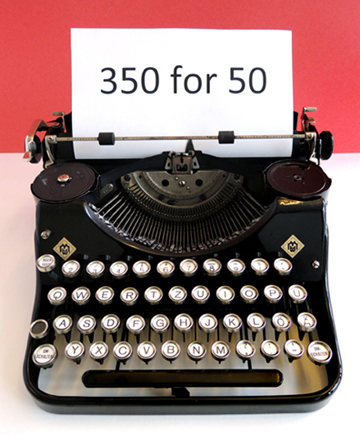
If you do send a promo photo to a newspaper, make sure the photo is high resolution (300 or higher). Anything lower will blur when they print it, and they won’t use it. If you’re taking the photo with your phone and it only captures images at 72, that’s OK. Just leave the image as large as possible. My phone shoots in 72 and the resulting image is 34″ x 45.” The newspapers can shrink a large, low resolution file down and still print it. But 300 is really the ideal.
If you’re having an event, starting a new initiative, or just have something of interest to the community, you can always call newspapers and pitch an idea for a story. That is how my student assistant Emily Garcia and I ended up on the cover of Central New Jersey’s publication U.S. 1. Michele Alperin wrote a fantastic feature article about the event as well, which you can read here.
Image courtesy of U.S. 1
Another local newspaper, the Princeton Packet, would often (and very graciously) premiere our annual literary extravaganza with a “sneak peek” article. Like U.S. 1, they would send a photographer to take a couple of fun photos to run with the article. Sometimes, one of those photos would end up on the cover of TimeOFF, their weekend insert! Here’s one of their 2010 photos from an article on Treasure Island. Aye, that’s Katie McGee again, this time sporting an eye patch and carrying a old shovel from my neighbor’s garage.
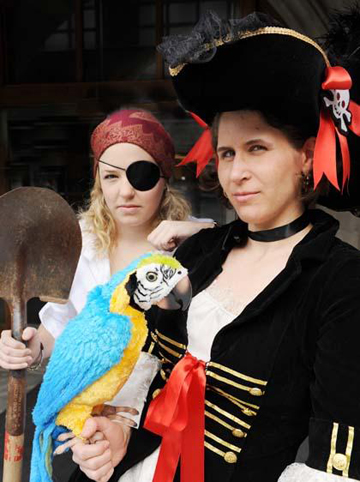
Courtesy of the Princeton Packet, photo by Mark Czajkowski
A word of advice…if you do decide to suggest an article to a newspaper, choose your topic wisely. Don’t call the editor all the time, pitching every single program you’re offering. Pick and choose, and don’t be discouraged if he/she declines.
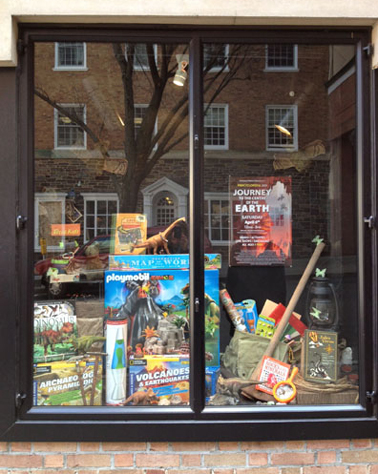
One final bit of unusual promo? The windows of local stores. We have a stupendous family-owned local toy store called JaZams. In 2013, they not only agreed to host an activity table at our Journey to the Centre of the Earth event, they let us promote the event in one of their picture windows! Katie and I gathered all the dinosaur, geology, cave, Jules Verne, and night creature related things we could find in their store and put together a thing of beauty.
 In 2015, JaZams let us use the window again, this time for our Very Hungry Caterpillar food drive. If you’re wondering who created that beautiful poster, it was our very own Aliisa Lee, artist extraordinaire.
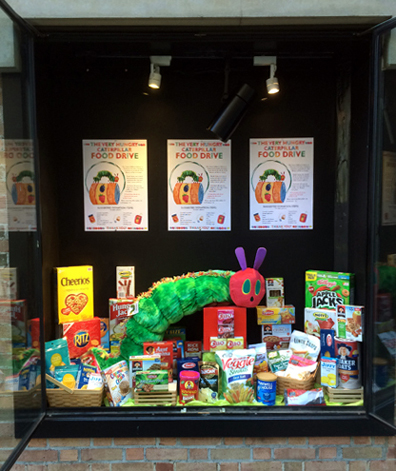
Food drive title and art inspired by the work of Eric Carle.
The nice thing about the food drive was that every donated food item earned the donator a chance to win that gigantic stuffed caterpillar. One generous little girl came every week with new groceries to give. Pounds and pounds. And she won, too!
I always love getting questions from you guys, so keep ’em coming! danas@princeton.edu

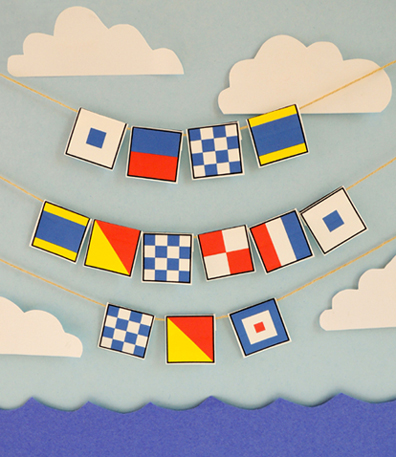 This project is a unique blend of literacy, non-fiction, and the high seas! I designed these personalized nautical flag necklaces for a Treasure Island event we hosted in 2010. In addition to being easy and fun to make, the inexpensive supply list won’t deplete your buried treasure stash.
 If you’re doing this project for a big event like we did, I suggest you make a letter tray to put the individual flags in. This can be as simple as paper cups, marked with post-its, hot glued to the inside of a copy paper lid.
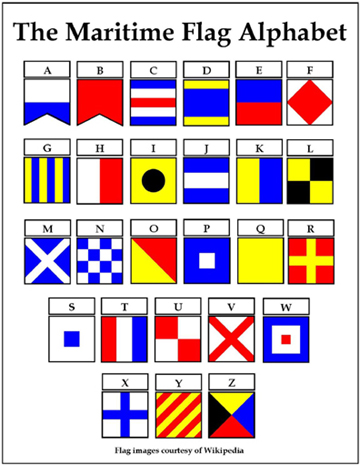 You could also use the alphabet to decode my flag message at the top of this post! Ha ha!
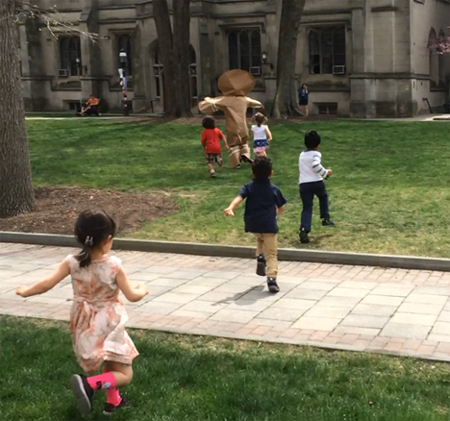 Yes, that’s me. Dressed as a giant gingerbread cookie, on the run from some extremely determined children. We made adorable (and non-edible) gingerbread houses with a surprise inside. Pull the peppermint loop on the roof, and up pops a gingerbread person! However, in order to get one of those little gingerbread persons, you have to catch the BIG one first (scroll to the bottom of the post for the video)!
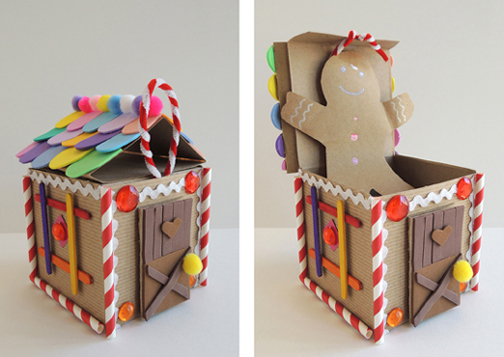 We read The Gingerbread Baby by Jan Brett (G.P. Putnam’s Sons, 1999). On a cold, snowy day, Matti and his mother decide to make gingerbread. The cookbook instructs them to bake the cookie for eight minutes without peeking, but Matti can’t resist. He opens the oven and out leaps a feisty Gingerbread Baby, who promptly bolts out the door. A merry chase ensues involving Matti’s parents, the cat, the dog, the goats, two girls, a pig, a fox, a milk & cheese man, and assorted villagers. But clever Matti has his own plan. He builds an enticing gingerbread house, leaves it in the woods, and the Gingerbread Baby dashes inside. Home sweet home!
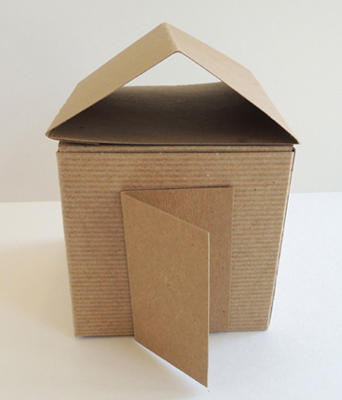 Twist a red and a white pipe cleaner together. Circle the pipe cleaners into a loop, and twist them together tightly at the bottom. Tape the peppermint loop to the lid of your box, bending any excess pipe cleaner underneath the lid.
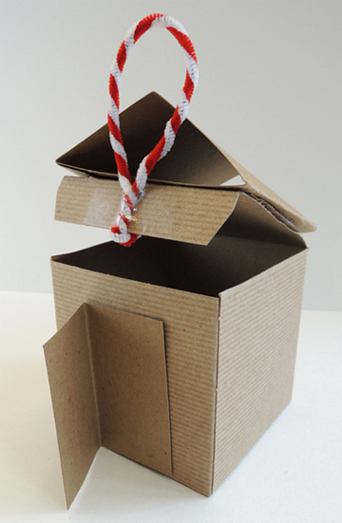 If you don’t have a box like mine, no problem! Just use a small tissue box. Flip the tissue box over (so the bottom is facing up) and use a box cutter to cut a square lid. Then follow the same steps for the roof, door, and peppermint loop. Here’s what a tissue box version of the house looks like:
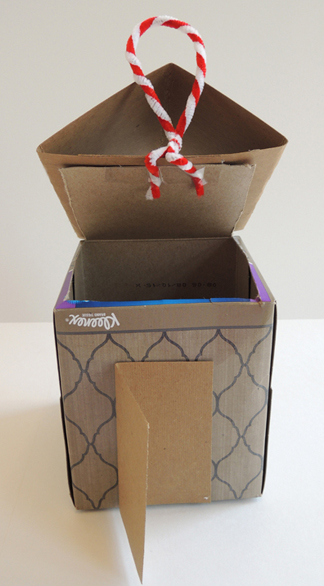 When the basic house is done, all you have to do is decorate! We offered
 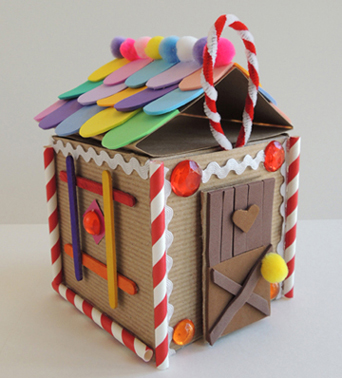 Markers can also be used, especially if you want to draw a gingerbread person peeking out of the front door! We found that metallic markers worked best on the brown tagboard.
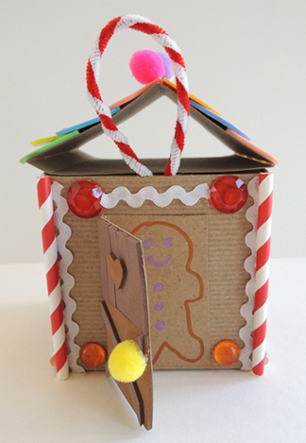 Finally, the gingerbread person that pops up when you tug the peppermint loop! Marissa and I prepped the gingerbread people in advance (we cut them out of brown packing paper and colored them with metallic markers). My only tip is to make sure the cookie fits neatly inside your house. In our early attempts, the cookie’s arms were too long. They jutted out past the roof, which, when closed, looked rather torturous for the cookie.
 Attach your gingerbread person to the underside of the lid with tape. Done!
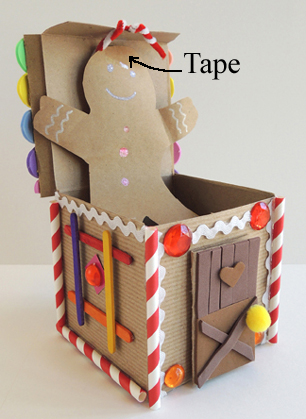 You could stop there and be finished with the project. But we decided to take it one step further. In order to get that little gingerbread cookie, you had to catch the BIG one first!
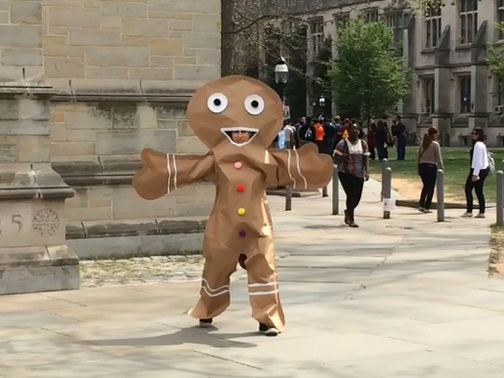 I used brown packing paper to create this stupendous costume (the thicker the paper, the better). The paper roll wasn’t wide enough to cover my full arm span, so we taped 2 long pieces of the paper together, reinforcing the seam with extra-wide masking tape. I didn’t photograph the step with the big taped pieces of paper, but here is a shot of a tape seam on one of the finished costume pieces:
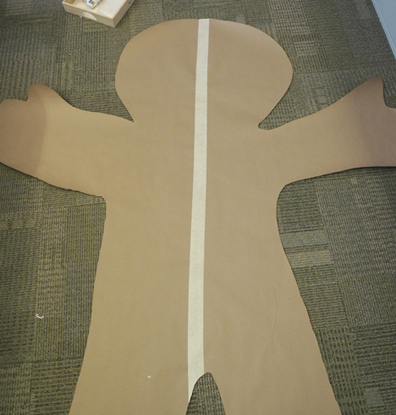 Since you want the masking tape seams on the inside of the costume, flip one of the taped pieces of paper over. The taped seams should now face each other. Then lay down on the paper and have someone trace your body in the shape of a cookie. A couple things to keep in mind while doing this:
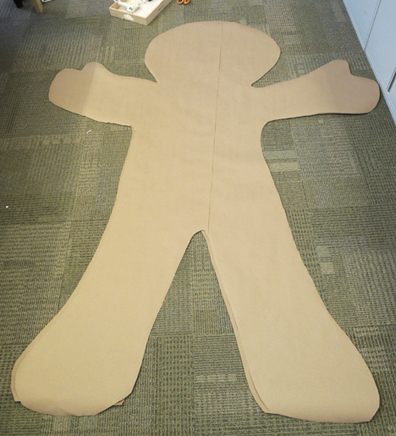 To “stitch” the pieces together, we made a double seam of hot glue and staples. The hot glue goes first, and should be about 1″ from the edge of the paper. Really goop it on! The staple seam should be about 0.5″ from the edge of the paper. Each staple should be no more than 0.75″ apart.
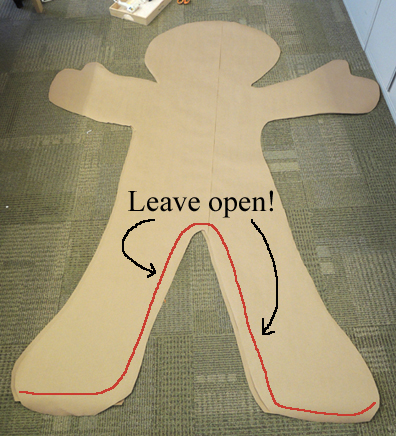 Once the seams are done, have the person who will be wearing the costume slide it over his/her head. You will definitely need help with this step! Marissa stood on a stool and gently lowered the costume while I shimmied my arms into place. Then we marked where my mouth was and trimmed the excess paper from around my feet.
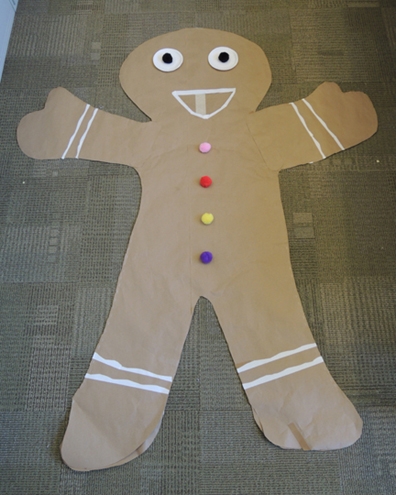 They’re hard to see in the above photo, but there are additional paper patches hot glued along the cookie’s armpits. When I tried the costume on the first time, the armpits ripped right away, so we added the patches to reinforce those areas.
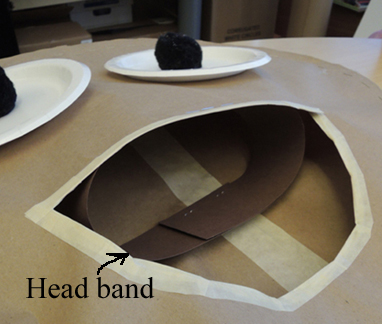 When it was time for the cookie chase, Marissa and I ducked out of the library with the costume, a stapler, and the cookie prizes. We hid behind a building, and, using some stairs to get some height, Marissa slid the costume over my head. Then she used the stapler to quickly close the seams along the insides of my legs.