Vikings and Dragon Riders! Don your horned helmets, grab your shields, and get ready for the ultimate How To Train Your Dragon theater experience, complete with real reptiles!
 After watching How to Train Your Dragon with my kids, I was delighted to learn that the movie was based on the book series by Cressida Cowell. When the Princeton Garden Theater (our local, non-profit movie theater) gamely agreed to a book-to-film outreach collaboration, How to Train Your Dragon was the first on my list.
Our program had three parts. Viking activities in the lobby, a live reptile show, and then the film itself. We’ll start with the lobby activities first. There were tables for making helmets and shields, a replica of a Viking game, and a local artist making custom sketches of the movie’s characters.
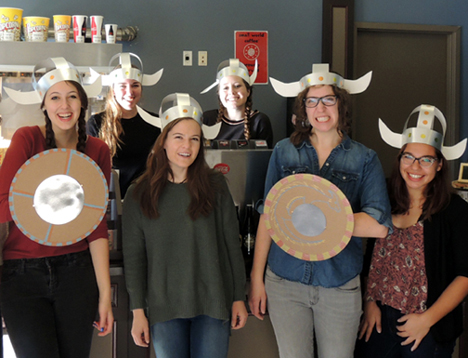
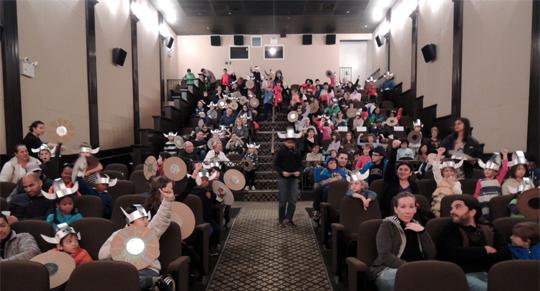
Viking helmets were a must, and we needed something quick and easy-to-assemble. Here’s the gang, sporting some seriously awesome headgear.
 You’ll need:
- A long strip of silver poster board (approximately 2.5″ x 24.5″)
- A short strip of silver poster board (approximately 2.5″ x 14″)
- White poster board for your Viking “horns”
- Stapler
- Metallic dot stickers (optional)
First, circle the long strip of silver poster board around your head (we purchased our poster board online from Blick Art Materials). Staple it. This is your hatband. Next, staple the short strip of poster board to the front and back of the hatband. Tab and staple a pair of white poster board horns to the sides of the hatband (here’s our horn template if you’d like it). Decorate the hatband with (optional) metallic dot stickers.
 It never hurts to thrown in a little history, so we included informational table signs at all the hands-on activity tables. Here’s the table sign for helmets. Next up…shields!

You’ll need:
- 1 silver poster board circle (approximately 5″ in diameter)
- 1 circle of corrugated cardboard (approximately 14″ in diameter)
- 2 strips of poster board (approximately 2.25″ x 11″)
- 2 brass fasteners
- Metallic markers
- Hole punch
- Stapler
Since we needed a slew of shields, we used cake circles and – believe it or not – the silver foil circles that fit onto take-out containers. Both were purchased at a local restaurant supply outlet. But you can cut a shield from any corrugated cardboard box, and the silver circle from silver poster board.
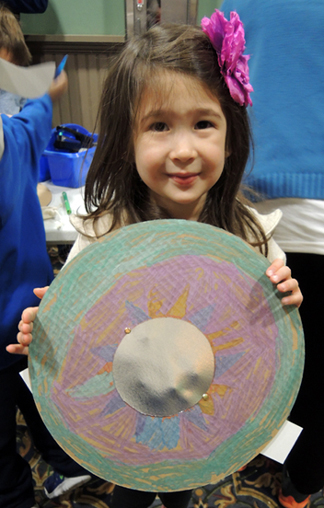
Hot glue a 5″ silver circle onto the center of a 14″ brown cardboard circle. Push the prongs of 2 brass fasteners through the cardboard shield (one on each side of the silver circle). Decorate the shield with metallic markers.
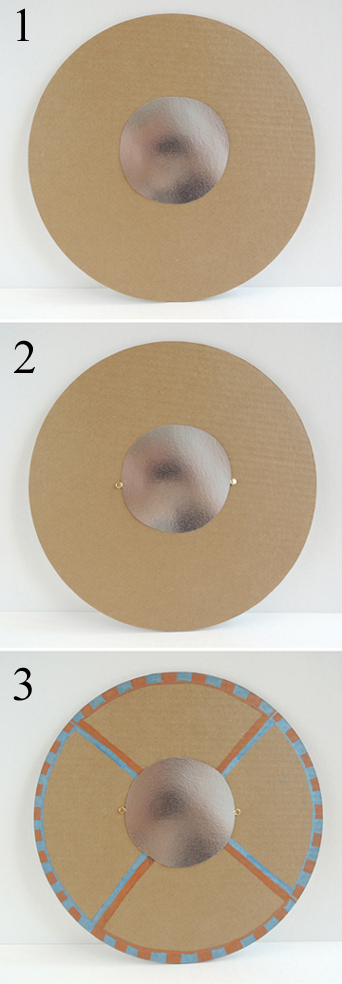 Next, loop 2 strips of poster board loosely around your forearm. Stapled them closed. Punch a hole in each loop, then thread the prongs of the brass fasteners through each hole. The back of your shield will now look like this:
 If you’re worried about scratched forearms, put tape over the prongs of the fasteners. Here’s the shield table sign. Did you know that metal knob in the center of a shield is called a “boss?” I did not know that.
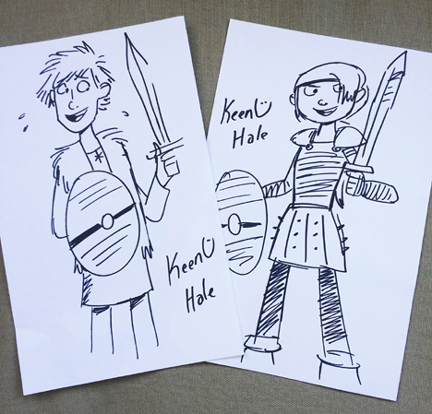
 Not far from the helmet and shield tables was the very talented Keenu Hale, a local artist who is the master of quick cartoon sketches. The kids kept him very busy drawing their favorite Dragon characters (they got to take the sketches home too)!
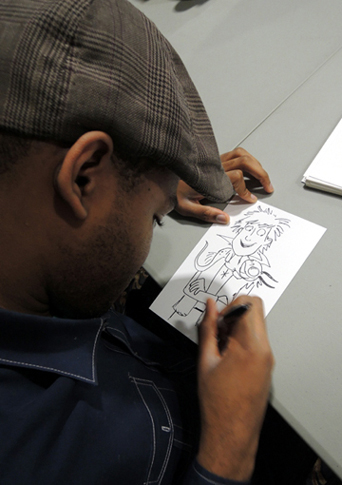
Keenu drew these in minutes. Wow.
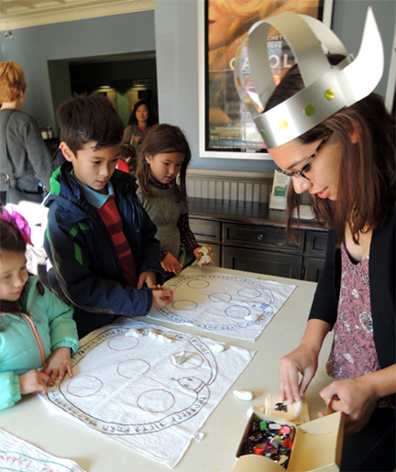
 The final activity table was a replica of a Viking game. It was WAY popular. Marissa found it in Hands On America Volume 1: Art Activities About Viking, Woodland Indians, and Early Colonists by Yvonne Y. Merrill (Kits Publishing, 2001). It’s a snap to put together.
You’ll need:
- 1 white bandanna
- Fabric or permanent markers
- Air dry clay
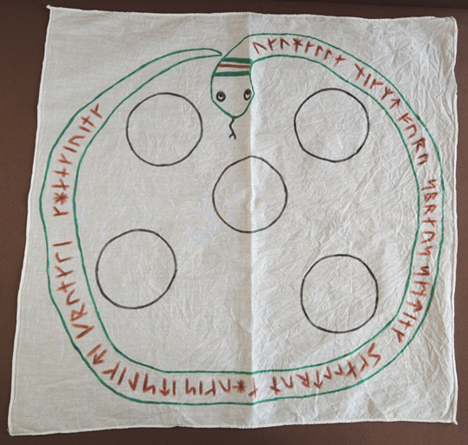
Use markers to draw the game board below on a white bandanna (I bought ours at Michaels Craft Store). The runes are optional, of course. Our runes spell out the names of the different types of dragons. Can you spot “Night Fury?”
 The game pieces are little birds (about 2″ long), made with air dry clay.
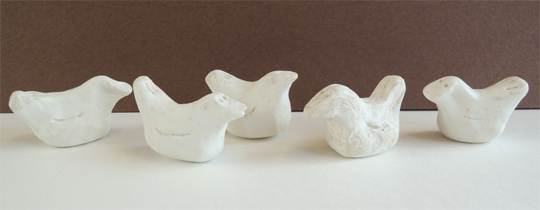 To play the game, toss the clay birds onto the game board.
You get 1 point if a bird lands upright anywhere on the board
You get 2 points if a bird lands in a circle
You get 3 points if a bird lands upright in a circle
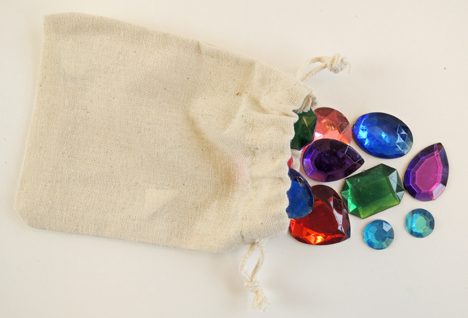
Here’s the game table sign, should you need it. We offered winners 2 prize choices. The first choice was a plastic gemstone. Each gemstone was worth 1 point. Win 6 points, and you got to select 6 gemstones! We provided 3″ x 4.5″ cotton drawstring bags to hold your riches (I bought my bags from Nashville Wraps).
 The other prize was a chance to win a cardboard Toothless standee (purchased on Amazon for $30). Kids automatically got a chance to win when they first entered the theater, but at the Viking game table, 1 point equaled 1 extra chance to win. So 3 points equaled 3 more chances to win. The kids really liked that!
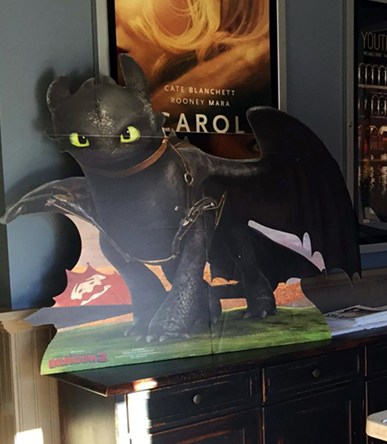
Image courtesy of the Princeton Garden Theater
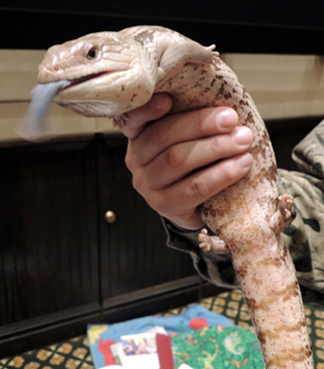
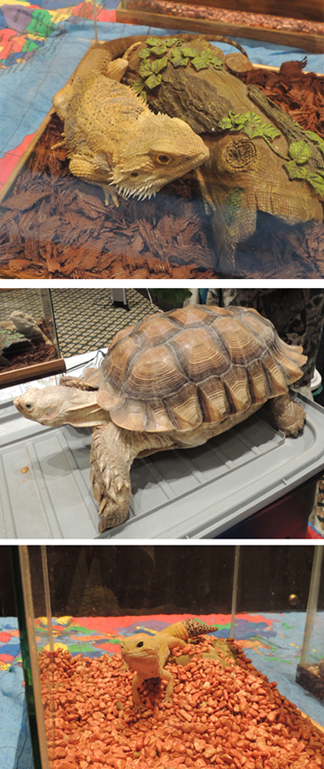
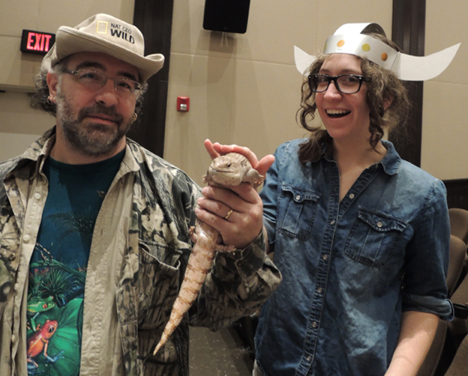
In addition to the hands-on activities, there was a reptile exhibit and live show by Enzo from The Lizard Guys. Enzo brought a terrific array of critters, and shared an astounding amount of knowledge with the kids and their parents.
Here’s Marissa bonding with a blue-tongued skink. Soon, she will be a mighty Dragon Rider of Berk!
 Finally, it was time for the film. Having only seen it on my laptop, I can say I was completely blown away watching it on the big screen. The flying! The fire! The CLOUDS!
I’d like to express my extreme gratitude to the Princeton Garden Theater for collaborating with us on this program. They were up for anything, and didn’t bat an eye when I asked if we could take over the lobby with multiple craft projects and bring in live reptiles. In fact, their response was a very enthusiastic “YES!” Thanks so much guys!

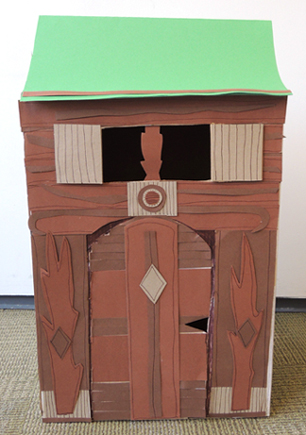
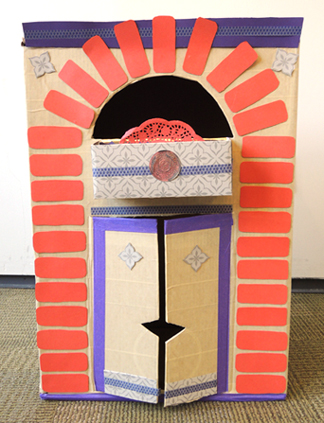
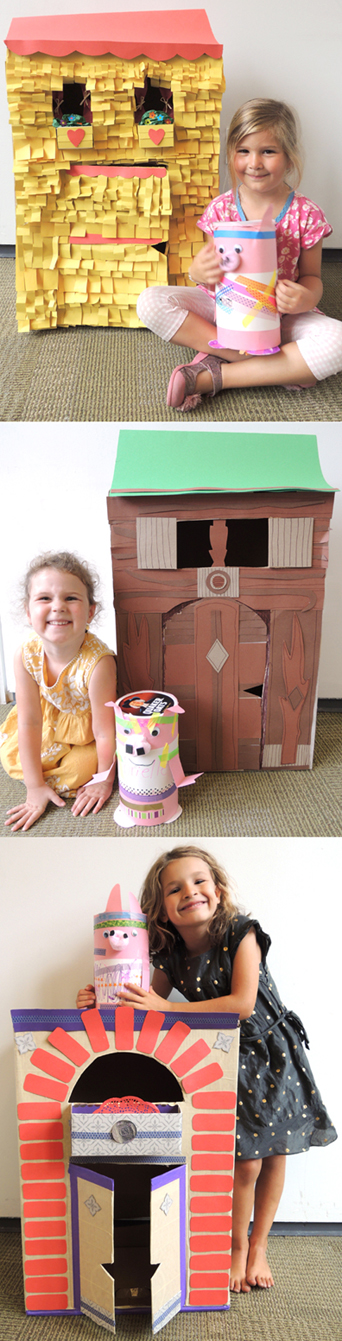 Let’s see. There’s a pig in a house of straw, a pig in a house of sticks, a pig in a house of bricks, and a pig on a sailboat. Wait…what?!? A fourth little pig? On a sailboat?
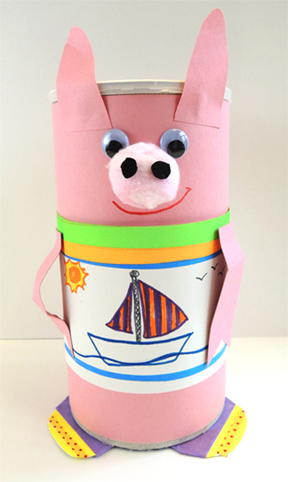
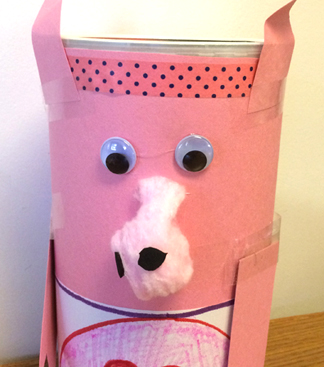 As time passes, the cotton ball sloooowly unfurls, leaving your pig with a droopy nose. Definitely use a pom-pom.
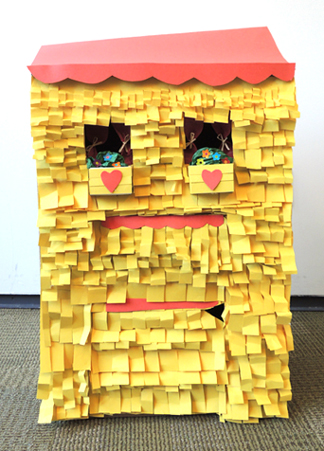
 I drew a Big Bad Wolf on a piece of poster board, and taped him to a piece of
 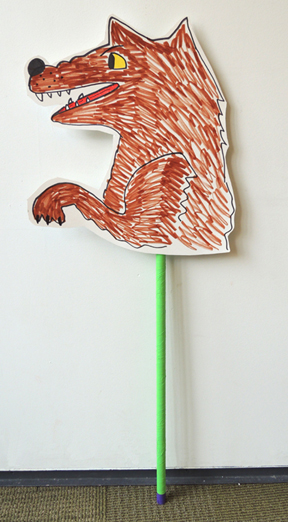 Finally, the sailboat. It doesn’t have to be elaborate. Seriously. A shoe box pulled on a string will work great. I just happen to have this awesome sailboat my Dad made for me.
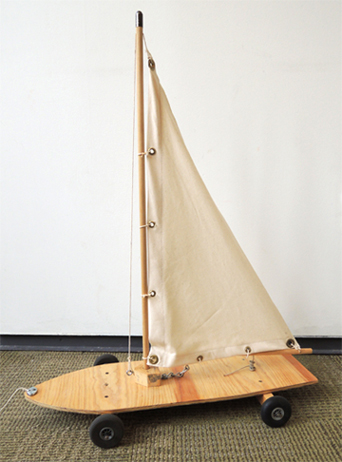 Originally, it was used at a Treasure Island event. One of the student groups at the event (Students United for a Responsible Global Environment, to be precise) wanted to demonstrate wind power. So I asked my Dad (hi Dad!) if he could build a sailboat that would roll down a table, propelled by a fan. It worked great!
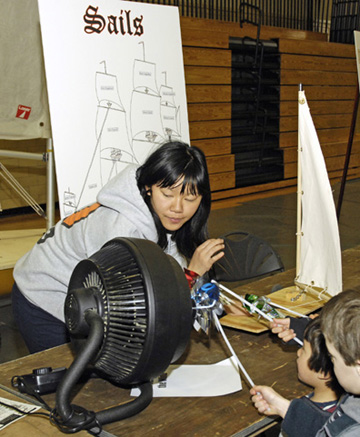 On windy days, we bring the sailboat out of the attic and take it outside. In a brisk breeze, you really have to run to keep up with it!
 But back to pigs. Here’s how we played the Ziggy Piggy game. I lined up the three houses and asked the kids to sit down in front of them. Then one kid covered his/her eyes while I hid a sailboat ride ticket inside one of the houses. When I shouted “Go!” and the kid had 10 seconds to find the ticket before the Big Bad Wolf rose from behind the houses. Sometimes I had to slow the count, but in the end, everyone won.
 Marissa and I then ushered the kids and their pigs out to the library’s main lobby, where we sat in two groups. Marissa was “Dock 1.” This is where all the pigs gathered. Some distance away, I was “Dock 2,” where all the kids gathered. Between the two docks was the sailboat, rigged up on a loooong string. One by one, Marissa would call out a kid’s name and place his/her pig on the sailboat. The kid would come and stand next to me. Once I confirmed that their pig had a ticket, I would reel in the string, causing the sailboat to whizz over to the kid!
 When story time was over, we drew names to see who was going to take the 3 houses home. The winners are the little girls posing at the start of this post. They were super thrilled!