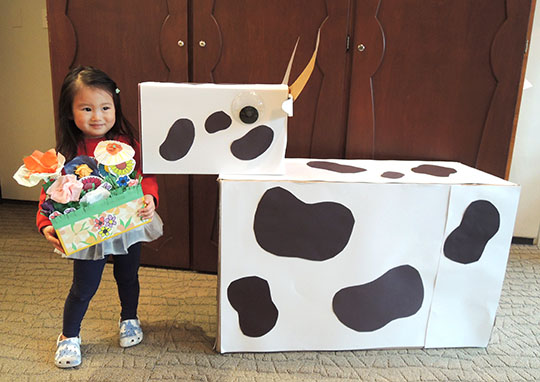
Book Bouquet

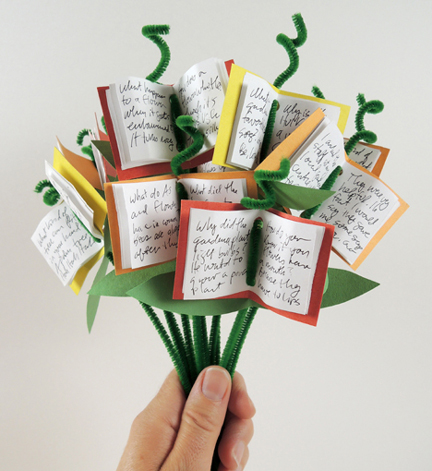
The countdown to spring has begun, and we wanted to usher in the flowers with this  awesome bouquet project! With outdoor festivals in the future, this is a great little project to host at your library’s next special event, or just to brighten up your bookshelves at home.
You’ll need:

  • 1 craft stem
  • Poster board
  • White printer paper
  • Green construction paper
  • Hole punch and scissors for construction
  • Pen or pencil

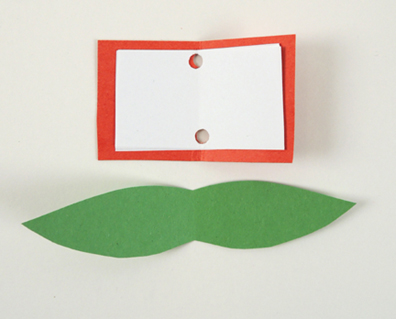
First, the little book! The cover is a 3″ x 2″ piece of poster board, and the pages are white printer paper. Our books had 3 layers of pages. Fold the cover and pages together, then use a hold punch to create holes in the top and bottom of the little book like so:

In the above photos you’ll also notice the book flower’s leaves. Those are a piece of green construction paper I folded and cut to create two matching sides. Punch a craft stem through the middle of the leaves, then thread the craft stem upwards through the bottom hole of the book, then downwards through the top hole. Extend the pipe cleaner stem 1-2″ from the top of the book, and curl the end with a pen or pencil.
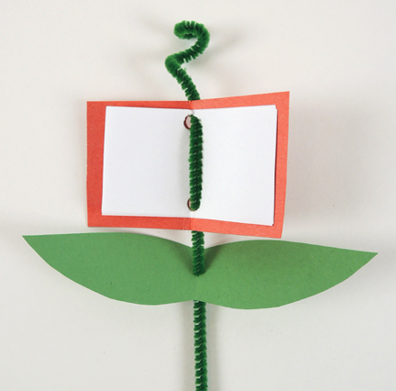
Push the leaves snug under the little book to keep it in place. You can leave your book blank, or add some words or illustrations to the pages!. If you squint really close at the lead image of this post, you’ll see that I filled my book bouquet with flower and garden jokes.

Including this gem: Sherlock Holmes was planting something in his garden, and Watson asked him what it was. Holmes replied “A lemon tree, My dear Watson.”

Flowers for Ferdinand

It’s warm, it’s raining, it’s spring, and that means FLOWERS! If there’s one character close to Katie’s heart, it’s the peaceful, flower-loving Ferdinand the Bull. Pair this simple project up with a nifty wildflower identification activity, and you have yourself a nature walk!

We recommend The Story of Ferdinand, written by Munro Leaf, and illustrated by Robert Lawson (Viking, 1936). Read aloud here by Brighly Storytime. This tale of a peaceful bull who would rather enjoy flowers then battle in a bull ring is a children’s classic. And if you’d like to read Alexis Antracoli’s excellent essay during banned Book Week 2019, click over to the curatorial blog!

You’ll need:

  • 1 toilet paper tube
  • Brown and white construction paper
  • Scissors and glue for construction
  • Markers for decorating

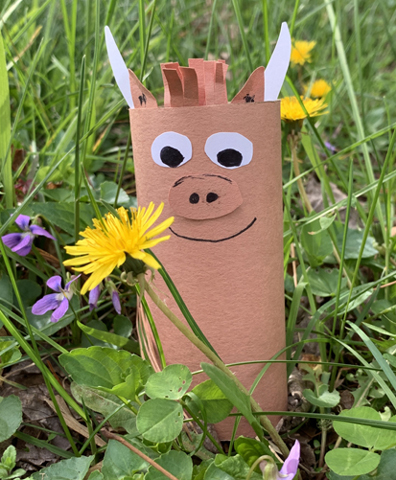
Use the materials above to craft a bull, then head outside with your camera! Keep an eye out for plants and flowers, then take a photo of Ferdinand enjoying them.

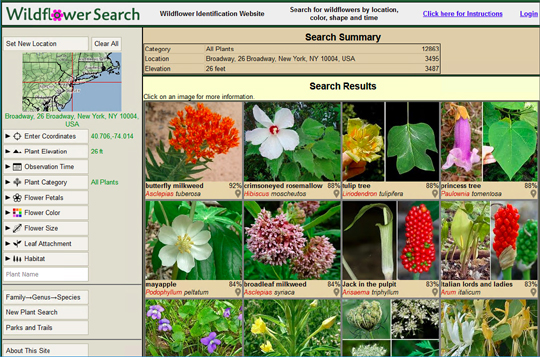
Now to identify your botanical finds! Katie discovered this awesome website for flower identification, Wildflower Search. You can set your locations with the assistance of Google Maps and the site will generate an illustrated list of the wildflowers in your area. It’s an awesome resource!

Using the site, Katie was able to identify a bunch of flowers, as evidenced in this lovely spring photo montage. I think the Bull Thistle is my favorite:

This slideshow requires JavaScript.

If you live in a more urban area, not to worry! Enter your location and see what happens…you might be surprised to find that there are more flowers then you expected. The screen shot of results I took for this post? That’s not New Jersey! I selected a location in New York City, Financial District, Manhatten. The site of famous Charging Bull statue to be exact.

Buzz Worthy

buzz worthyPut on your splendid beekeeping hat and follow an oatmeal container bee to a flower! Today, we’re collecting nectar, taking it back to the hive, and turning it into something delicious!

We read A Taste of Honey by Nancy Elizabeth Wallace (Winslow Press, 2001). A golden jar of honey prompts Lily the bear to ask her Poppy a series of questions about its origins. Where does honey come from? Well, where does it come from before it’s put in a jar? Where does it come from before it’s purchased at the store? And before that? And before that? In addition to being a clever succession of questions and answers, this book is stocked with facts about beekeeping equipment, protective clothing, honey harvesting, beehives, varieties of wildflowers, and more!You’ll need:

  • 1 large oatmeal container
  • Yellow construction paper
  • 2 long strips of black construction paper (approximately 2.25″ x 18″ each)
  • A 5.25″ circle of yellow construction paper
  • 2, 1.5″ circles of black construction paper
  • 2 yellow dot stickers
  • 6 pipe cleaners (2 black, 4 any color you’d like)
  • 1 bee wings template, printed on 8.5″ x 11″ white card stock
  • 1 plastic fedora (I purchased mine from Oriental Trading Company)
  • A 1.5″ x 22″ strip of white poster board for hat band
  • 1 little bees template, color printed on 8.5″ x 11″ white card stock
  • A 12″ x 32″ piece of white tulle
  • 1 “Find the Nectar” game (more on this later!)
  • Scissors, glue, and tape for construction
  • Markers for decorating

finished beeWe’ll start with the bee! Wrap a large oatmeal container with yellow construction paper, then wrap two strips of black construction paper around the container to create stripes.

Next, stick 2 yellow dot stickers onto 2 circles of black construction paper. These are your bee’s eyes. Tape (or glue) the eyes onto a large circle of yellow construction paper. Draw a pointy nose and smiley mouth on the circle, then tape (or hot glue) it to the lid of the oatmeal container. Curl both ends of a pipe cleaner and tape it onto the container to create your bee’s antennae.

bee faceTo make the legs, cut 2 black pipe cleaners into thirds and bend each piece into a loose, inverted “Z.”

bent pipe cleanerAttach the pieces to the sides of the oatmeal container with tape.

bee legsCut the wings from the bee wings template, fold each wing upwards along the dotted line, then tape the middle of the wings to the back of your bee. Done!

wingsSet the bee aside for a moment, it’s time for the hat! Use markers to decorate a strip of white poster board, then wrap it around the hat like a hat band. Cut some bees from the little bee template (at our story time, each kid got 6 bees). Attach 3 of the bees to the ends of curled pipe cleaners, then tuck the bottom of the pipe cleaners into the hat band. The remaining 3 bees can be taped directly to the plastic hat. The final touch is to wrap a long piece of white tulle around the hat. Secure the fabric to the back of the hat with tape.

hatYou can stop here, or you can proceed to the “Find the Nectar” game! First, Katie made 4 amazing flowers (2 blue, 2 red) out of poster board, tissue paper, construction paper, and pipe cleaners.

flowersThe flowers were taped (using nice strong packing tape) onto 40.5″ pieces of PVC pipe. Later, the PVC was wrapped with green masking tape and adorned with green poster board leaves. At the center of each flower was a plastic cup to hold nectar. Because little hands would be repeatedly bumping into the cups, Katie secured each cup to the poster board with a brass fastener.

flower with brass tackFor the beehive, Katie raided her basement (nicknamed “The Magic Basement” for all the unusual and useful things she unearths from it) and found this 13.5″ x 17″ styrofoam block used to ship wine.

wine shipping styrofoamKatie was already coloring the front of the styrofoam with yellow highlighters when I snapped this picture. The highlighter pens worked a treat, but there were lots of squeaky, scratchy, pens-on-styrofoam sounds. Eeeee! Next, Katie added a yellow poster board facade to the hive, lined the holes with rolls of yellow construction paper, and added 6 little bees to the front.

beehiveDuring story time, I placed the hive at one end of the gallery, and “planted” the flowers at the other end of the gallery. Each flower cup was loaded with a single yellow cotton ball to represent “nectar.”

nectarI split the kids into two teams – Red Flower Team and Blue Flower Team. Each kid on the team had to fly his/her bee to the flowers, find the 2 flowers that corresponded with his/her team color, remove a ball of nectar from each flower cup…

bee game collectionAnd then zoom back to the hive and deposit the nectar inside!

bee game drop offGranted, you could way simplify this game with a set of cups representing the flowers and a shoe box covered with yellow paper representing the hive. But sometimes, you just get a hankering to make giant flowers.

Two important things about the game:

  1. Just put one cotton ball into a cup at a time. If you stuff the cups full of nectar, some kids will be tempted to grab everything, leaving nothing for the other bees! During our game, we had Miss Joani next to the flowers, patiently reloading the cups with nectar.
  2. Make sure to emphasize that this is not a race. It’s all the bees working together to collect nectar for the hive!