Puppies and kitties in our Storytime Shelter eagerly await adoption…bring your custom pet set (complete with carrier, treats, blanket, ball, collar, and food dishes) and find your forever friend!
We read Who Wants Broccoli? by Val Jones (Harper, 2015). Breezly’s Animal Shelter has many pets, but none quite as big, energetic, loud, and messy as Broccoli the dog. The problem is, most people want a slightly less…ah…enthusiastic pet in their homes. So Broccoli gets passed over time and time again. But when little Oscar moves across the street, a big energetic dog is EXACTLY what he wants. Yes! Broccoli and Oscar, together in love and loudness.
You’ll need:
- 1 large tissue box
- A box cutter
- 1 strip of poster board
- 1 toilet paper tube
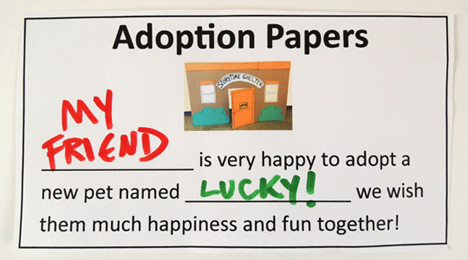
- 1 dog adoption papers template, printed on 8.5″ x 11″ paper
- Various pet accessories (more on this below!)
- Scissors, tape, and stapler for construction
- Markers for decorating
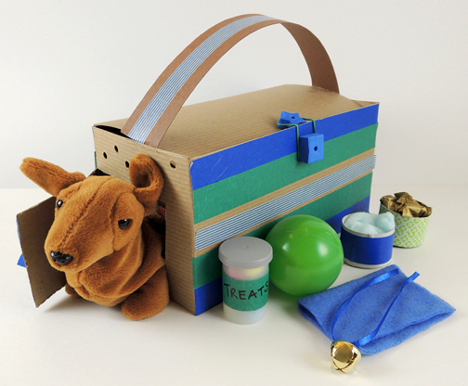
Accessories vary according to what you have on hand, but here’s our pet set…a carrier, treat canister, plastic ball, blanket, collar with bell, and a water and food dish.
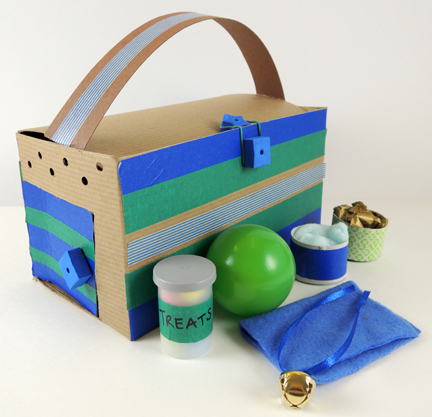
We used a 4.5” X 4.5” x 9” craft box, but a large tissue box works too! Use a box cutter to make a little door in one side of the box. We added a foam bead knob to the door, and used a hole punch to create “air holes” as well. The pet carrier’s handle is a strip of poster board stapled to the lid. You can decorate the carrier with markers, or used color masking tape and patterned tape like we did.
We wanted the top of the carrier to open so kids could stash their supplies, but we didn’t want the lid flying open while they were carrying the box. So we rigged up a latch using foam beads and a small rubber band. It worked great!
 In terms of accessories, our treat jars were old film canisters, the balls were leftover from our Willy Wonka escape room, and the food and water dishes were snippets of a toilet paper tube. A little bit of ribbon, a bell, and a square of fleece fabric completed the set.
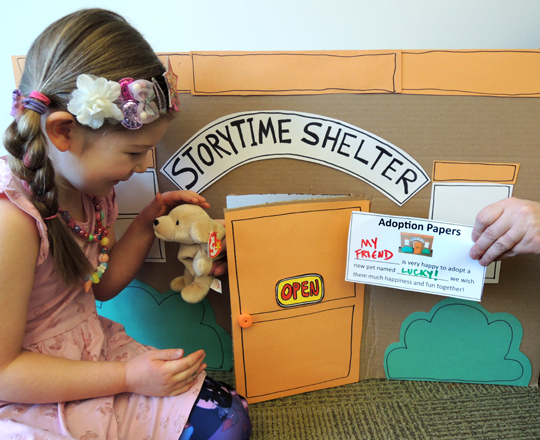
But the REAL surprise? You actually got to take a dog home, courtesy of a major Beanie Baby donation to our library!
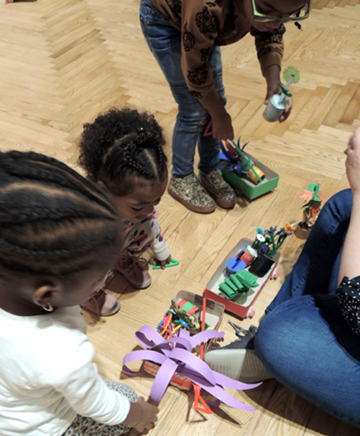
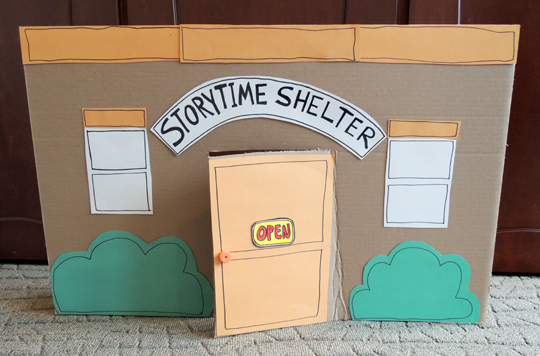
Yes! When kids were finished their pet carrier set, they walked over to our Storytime Shelter (which was a cardboard facade propped up by two small tissue boxes).
 Kids waited outside the shelter while Katie asked them the following questions…
Do you like dogs that bark, or dogs that are more quiet?
Do you like dogs that do tricks?
Do you like to play ball?
Do you want an adult dog? Or a puppy?
Will you take good care of your dog?
When all the questions were answered, Katie would select a Beanie Baby dog and “run” it out the shelter door to the kids, and the official adoption papers would be signed!
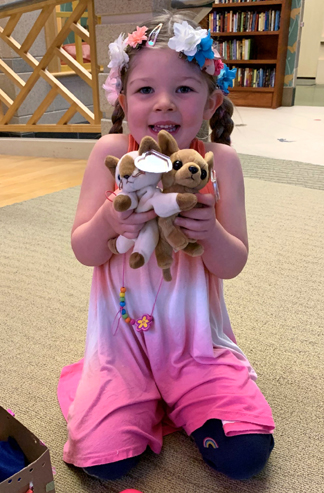
After everyone had a dog, we made another special announcement. You would get to select ANOTHER Beanie Baby companion for it! And out came a massive box of Beanie Babies to choose from. Were the kids excited? Oh, they were WAY excited! So were the grown ups! Hah!

We had enough Beanie Babies to allow younger siblings to adopt pets as well. So no one left the Storytime Shelter empty handed.
 And now, an incredibly sweet coincidence…one little girl selected a cat from the big box of Beanies. She selected the VERY same version of the Beanie Baby kitty that had been her mom’s lovie so many years before. As the lovie was in storage, the little girl couldn’t have possibly known it was the twin to her mom’s. But she picked the very one.
Tears in my eyes!
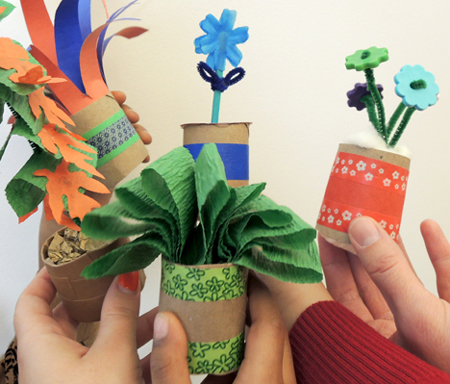
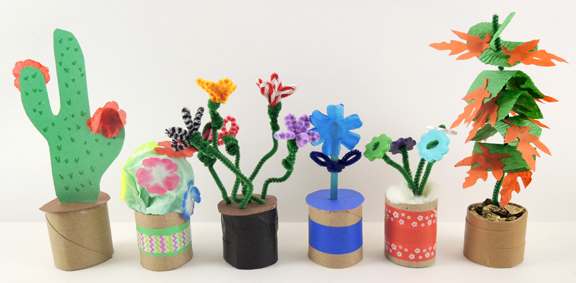
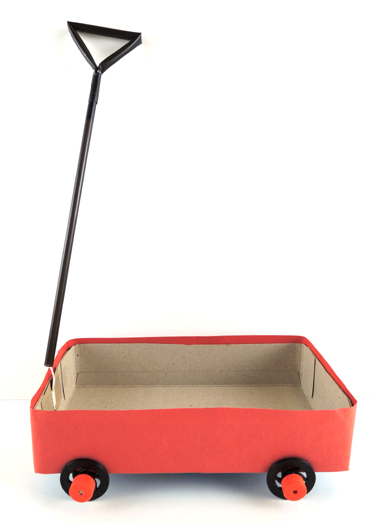 When the wagons were assembled, kids popped their potted plants in and we circled the library’s lobby. Everyone was invited to trade at least one pot with Katie (and we pre-made a number pots for this purpose).