The Holly and the Ivy (and we mean that quite literally)!

It’s time to deck the halls, and this historical house pulled out all the stops, compliments of the talented individuals in the West Trenton Garden Club! In today’s post, we’re visiting the holiday display inside the library at Drumthwacket, the official residence of the Governor of New Jersey. This year, the theme was children’s literature, and the exhibit featured ten different tables with innovative and gorgeous takes on holiday classics! Katie’s been a docent at Drumthwacket for over a decade, and she is going to do her docent duty and drop in cool little facts as we meander through this delightful tour. Her parts will be in italics!

The library was added to Drumthwacket by the second private owner, Moses Taylor Pyne. Pyne graduated from Princeton in 1877 and never missed a meeting during his 37 year tenure on the University Board of Trustees.

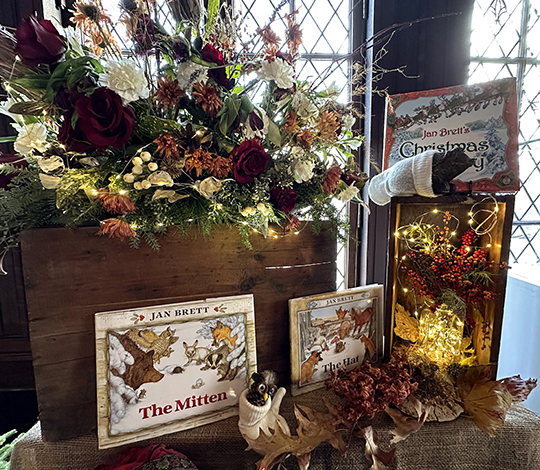
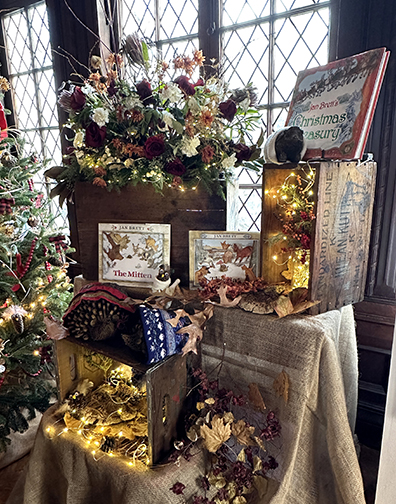
Here’s another glimpse at the arrangement that started this post – a table for Jan Brett’s fantastic books, including The Mitten and The Hat. Did you notice the little pine cone owl in the mitten? Adorable.

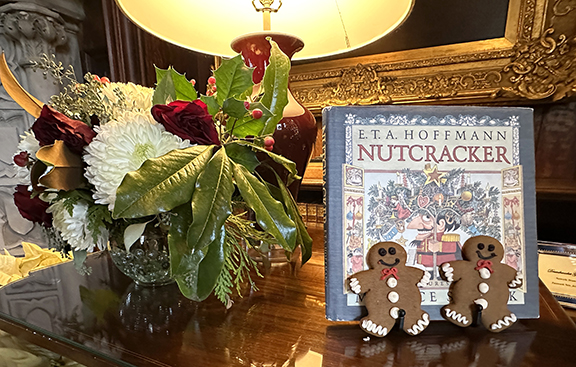
Another cozy classic is Nutcracker, written by E.T.A. Hoffman, and illustrated by Maurice Sendak (and here’s a little Sendak special collections gem for you to enjoy as well).

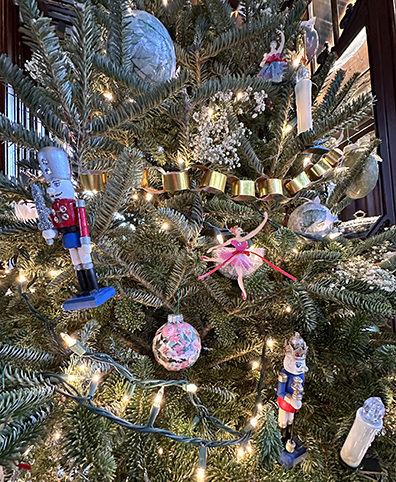
Nearby was a Nutcracker-inspired tree festooned with sweet little ballet ornaments:
At the next display, the West Trenton Garden Club stole my heart with this innovative white carnation snowman, aptly paired with Raymond Brigg’s classic The Snowman. Look that snowman’s little baby carrot nose. Perfection!
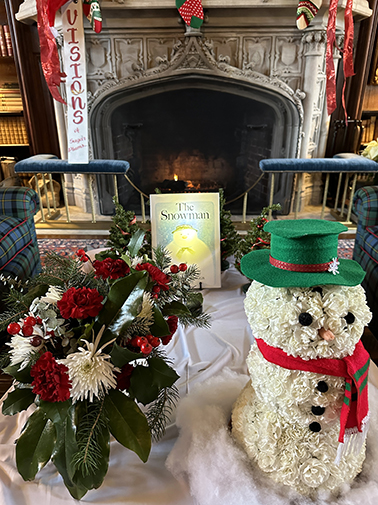
The fireplace is one large block of Caen stone from France, which was brought to Drumthwacket and carved onsite by stonemasons. Can you see the Princeton University shield hidden in the middle of the fireplace?

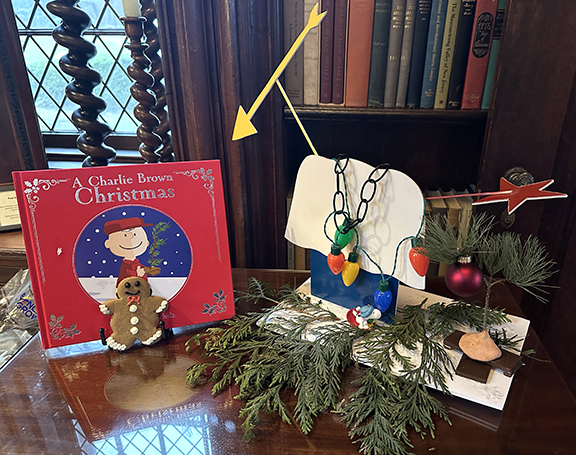
Up next we have none other than Charlie Brown and his little tree that could…

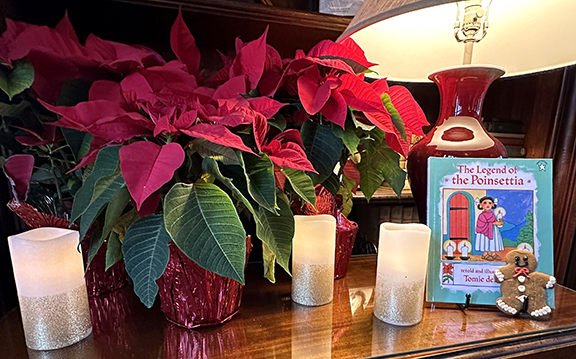
And a Mexican holiday legend retold and illustrated by Tomie dePaola. If you’re a fan of dePaola’s work, don’t miss this original Strega Nona gingerbread cottage. Its massively talented architect, Jen Carson, would return to our blog eleven years later with her own bakery and children’s book!
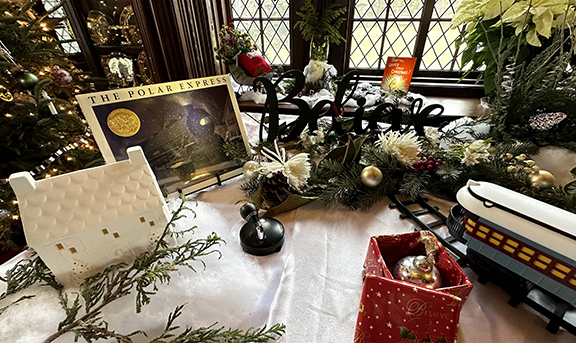
Caldecott Medal winner The Polar Express made an appearance. My son would have absolutely loved this display for the trains – it’s simply not the holidays without trains!:

The Polar Express rests on Moses Taylor Pyne’s partner desk, which is original to the room. The desk has two complete working sets of drawers on each side, allowing two people to easily work across from each other.

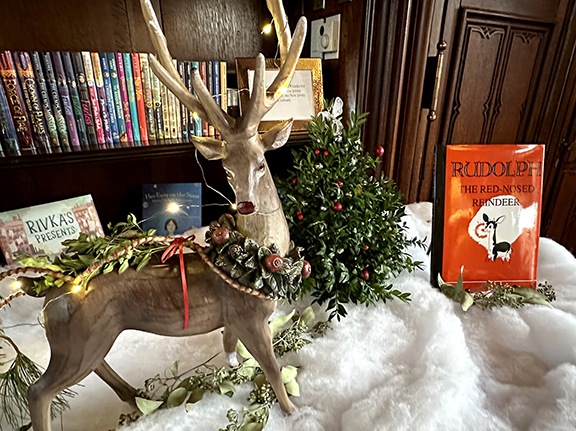
Rudolph flew in for a visit to Drumthwacket as well. See the books on the shelf behind him? That’s just one small section of a massive floor to ceiling bookcase stuffed with children’s books exclusively authored by New Jersey writers, including Sayantani DasGupta, who we interview here!

This next table is one of our absolutely favorites. Dr. Seuss’ The Grinch, which boasted a delightful sled bouquet in a decorated sack.
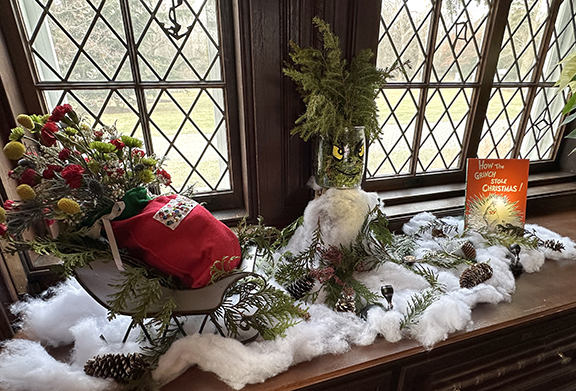
And to the person who created a Grinch out of evergreen branches and a painted vase? You made our hearts grow three sizes larger. You deserve a gold medal for creativity, and I hope you don’t mind if I replicate this idea for my front porch next year? Incredible!
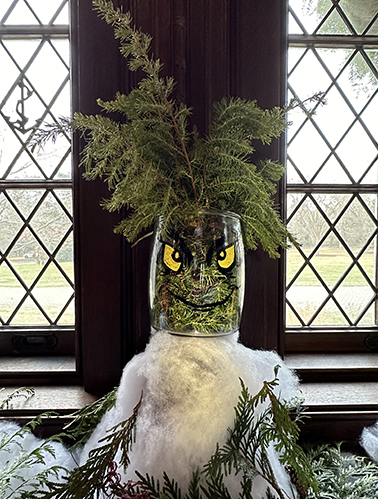
The library’s diamond shape leaded glass windows are adorned with different images, including a sailboat, the fleur de lis, a bow and arrow, and the anchor and serpent. East Pyne Hall, which used to be Princeton University’s main library and is named after Pyne, has the very same style of leaded glass windows.

Finally we come to the grand finale, and this was just so touching and innovative. A table featuring Charles Dickens’ A Christmas Carol. The three ghosts are represented with delicate custom bouquets. I don’t know when or how, but we are going to do something with this idea in the future. It’s absolutely wonderful.
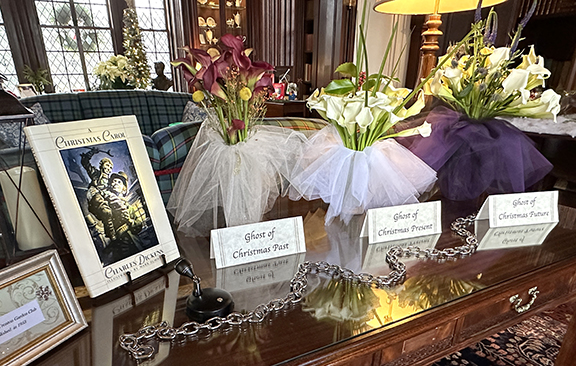
Many thanks to Drumthwacket for allowing us to photograph their display, and a hearty round of applause to the West Trenton Garden Club for their masterful creations. Thank you too, Docent Katie for your awesome historical facts. Happy holidays, one and all!

Oh, The Places You’ll Snow!

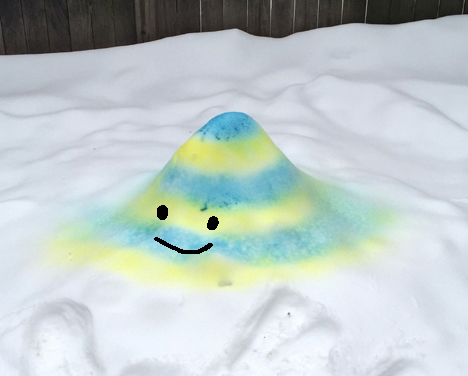
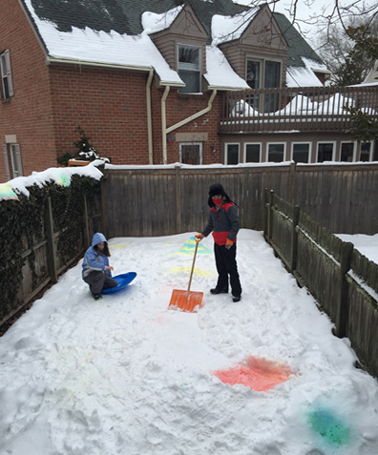
We’ve had PLENTY of snow this winter, and the last storm to blow through resulted in an unexpectedly zany backyard colorscape! The blue and yellow snow mound you see above is a nod to the striped tower on the cover of Dr. Seuss’ book, Oh, The Places You’ll Go! (I couldn’t resist adding a smiley face too). And today is Dr. Seuss’ birthday, so it’s timely as well!
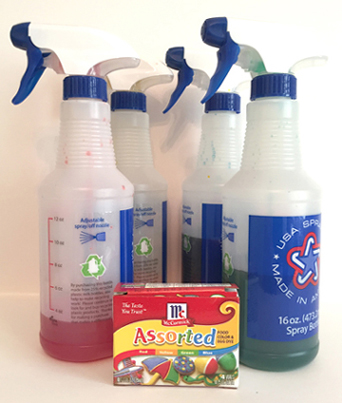
You’ll need:

  • Snow
  • A box of liquid food coloring
  • Spray bottles filled with water

dye bottles 4

I used McCormick brand food coloring and spray bottles I found in the housecleaning section of my local grocery store (I’ve also seen them at Dollar Stores and in the beauty/travel size section of Target). I filled the bottles with warm water, then dribbled in dye until the desired color was achieved. Then we headed out to the backyard!

backyard 4

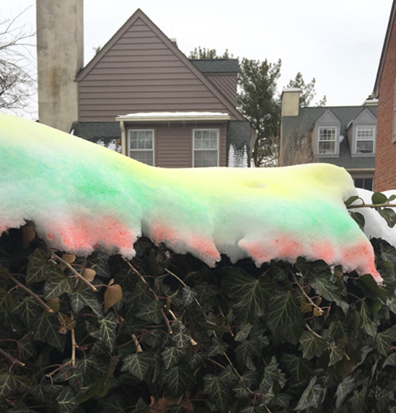
This photo was taken at the very beginning of our adventures…I’m afraid I don’t have a crazy “after” photo! But the kids painted a multi-color path around the yard (and constructed a micro sledding hill as well). I decorated a little higher, spraying the snow along the top of our fence:

snow hedge 3

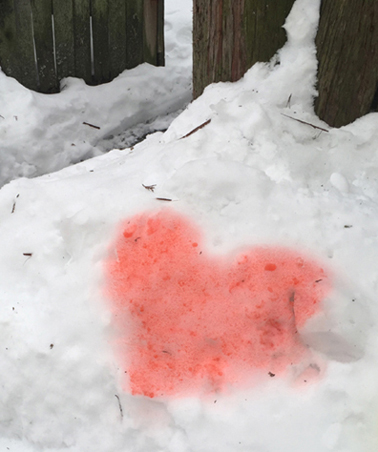
We also made some hearts on the opposite side, for the neighbors to enjoy…

heart in snow 4

A couple hints:

  1. Fill the water bottles to the top, so you don’t have to keep going inside to refill.
  2. Make sure the tops are screwed on tightly. Hah!
  3. Wear gloves (fleece or knit). Bulky mittens make it difficult to operate the spray lever.

Did this project make a huge mess? Actually no! I thought it was going to be much worse. Our clothes didn’t get stained, and I didn’t even need to wash our gloves afterwards. The melting snow has NOT left dye on anything, including foliage or the wood fence.

If you’re looking for another Seuss-inspired activity, but need to keep it indoors, check out our Seuss mini golf post! Here, you’ll find instructions for making inexpensive putters and holes.

You’ll also find suggestions for putting together a custom course! You can build it with recycled boxes, plastic cups, paper tubes, old pool noodles…and just about anything else you can haul out of your closet!

oh the places you'll go 2


As part of our library’s mission of diversity, equity, and inclusion, we would like to share a link to a statement from Dr. Seuss Enterprises addressing their commitment to action regarding the content of six particular Seuss titles

Seuss Mini Golf

March is Dr. Seuss’ birthday, and this year, the actual day (March 2nd) fell on a Saturday. Which we took as a big ‘ol green light to create a huge, crazy weekend event. Ladies and gentleman, I bring you…Seuss Mini Golf!

The art of Dr. Seuss is perfect for mini golf. The curves! the colors! The zaniness! But we wanted to encourage personal creativity as well, so we decided that, in addition to building a few holes, we would also provide the supplies for families to build-their-own. The results? 4 hours of 400 enthusiastic, highly artistic golfers!

This is going to be a long post, so I’ve split it into three parts: 1) The basics on how we designed the event; 2) The special golf holes we created; 3) An interview with our talented course designer, Ricky Feig!

PART 1: THE BASICS

The great thing about this event is its flexibility, both in size and in cost (especially when it comes to the materials you use for your course). Here’s a quick list of what we utilized for the event:

  • Green 6′ x 8′  outdoor rugs
  • PVC pipe
  • Pool noodles
  • Toilet paper tubes
  • Wrapping paper tubes
  • Paper plates
  • Drinking straws
  • Construction paper
  • Plastic ball pit balls

This event really came together when Katie and I discovered these 6′ x 8′ green outdoor rugs at Lowe’s ($21 each). Their turf-like texture was perfect for the greens, and they didn’t have any backing, so they were easy to cut with fabric scissors.

You could do the event without the rugs (and we priced green felt to cost approximately the same) but we highly recommend them. Not only do they give you a good physical parameter for each hole, they just make the course work visually.

Also in the cart you’ll notice a BIG coil of white PVC pipe (a 0.5″ diameter x 100′ coil costs $12). We used the PVC pipe to make the barriers / bumpers for the course. You can use the PVC pipe on its own, or do what we did – shove them into pool noodles!

Pool noodles can get pricey (we purchased ours on Amazon – a 35 pack is $60), so you can save a little in your event budget by leaving them out. Or raid your local Dollar Store this summer. The kids LOVED sculpting with the noodles. We also discovered that if you put a pool noodle under the rug, it makes a really cool “hill” on your putting green.

Also on our course were pieces of cardboard, boxes, and tubes all scored from our library recycling program. Some of these we fashioned into ramps, which went over REALLY big at the event. We threw in stuff left over from other programs too. Like inflatable candy canes and Smartie rolls from our Willy Wonka escape room. And straight pool noodles sans PVC pipe. Here’s a shot of someone putting our items to good use…

At the top of that last photo is an example of the golf clubs and holes we created for the event. We wanted each kid to leave with a ball, club, and hole, so we kept it simple. The golf club is a toilet paper tube cut in the middle with a wrapping paper tube shove into it. Reinforce the connection with tape.

We had all the toilet paper tubes we needed at the office, but had to order the wrapping paper tubes online from Ace Paper Tube Corporation. We ordered 300 tubes and the total came to $300 (but mind you – shipping was $65 of that total). If you’d like to avoid that price tag, start saving wrapping paper tubes now, or explore the costs of PVC golf club handles. Lowe’s sells straight, 0.5″ x 10′ PVC tubes for $2.31. You can get four, 30″ club handles out of 1 tube. So you would pay around $175 for 300 club handles. Another option? Make a certain number of clubs in advance, and ask families to return them when they’re finished playing.

Ultimately, we splurged and ordered the wrapping paper tubes. At the event, we offered color masking tape, stickers, and markers to decorate the clubs. And decorate they did!

The golf hole is a paper plate with a drinking straw flag which kids could decorate with markers and stickers. Note the keyhole shape of the hole. After testing a couple different shapes, this is definitely the one that works, catching the ball in place as it rolls in.

Finally, the balls. Ping pong balls were too light, golf balls too heavy (and a little dangerous when hit by an enthusiastic 5 year-old). Plastic ball pit balls were perfect. And inexpensive! On Amazon, 400 balls cost $45. That’s 11 cents per ball. Yay.

As far as event logistics, we had the club, hole, and ball tables as you entered the room, the greens laid out, and building supplies in strategic piles around the event floor. Did we have fun? Oh, we had fun.

This slideshow requires JavaScript.

In conclusion, if you’d like to budget down on this event, skip the green rugs and pool noodles and build your course using PVC pipe as bumpers. Add in recycled boxes, cardboard, and other odds & ends to the course and you’ll be set! You can’t go any cheaper then plastic ball pit balls and paper plate holes, but you can save by hording wrapping paper tubes and/or having a limited number of clubs at the event.

Oh! One last thing. Have Sharpies on hand to write kids’ names on the plastic balls. This will allow them to keep track of them in the golfing chaos.


PART 2: SPECIAL HOLES

Never ones to rein ourselves in (please see Katie’s comments under #3 in this post), we decided to up the event a notch by having a few Seussian holes already in place. Katie led the charge by designing a “Pair of Pants with No One Inside Them.” The boat was salvaged from an art installation, and the waistband of those green toddler pants are strung with wire.

Katie also used a deeply discounted pool float and cellophane to make a Green Eggs and Ham hole. The float was propped up on oatmeal containers. And, if you can’t see it in the photos, rhymes from the book are written on the white parts of the bacon. YES!

Princeton University student Michelle Vilarino also crafted some holes. Here is her Seuss tunnel, which also doubled a secret clubhouse hideaway for many kids during the event…

And here are Thing 1 and Thing 2 on a teeter totter! By the way, those are Styrofoam wine holders, reused from this bee hive story time.

Michelle also made a One Fish, Two Fish, Three Fish hole/ toss game for the younger kids. A ramp she built inside the box automatically rolled your ball back to you.

And THIS special Whoville hole was designed by my 10 year-old son! #superproudmom

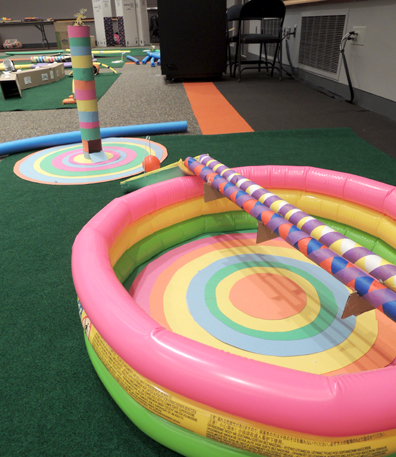
But the ROCK STAR of Seuss mini golf? That would be Princeton University student Ricky Feig. He put in many mighty hours of research, design, and construction to make something truly special. Beginning with Oh, The Places You’ll Go

And look at this! The Sneetches! By the way, if you’re wondering if the Sneetches coming and going from their respective machines have stars or no stars on thars, the answer is YES. Ricky didn’t miss a single detail.

Below is Ricky’s rendition of The Butter Battle Book. His cleverly crafted mechanisms rigged with elastic bands allowed you to launch the ball in different ways. The cardboard wall was plastered with Yook and Zook propaganda posters…

But the total show-stealer was Ricky’s Onceler’s tower from The Lorax, complete with boarded up windows, a swooping wire ladder, fish swimming in ponds, and four gorgeous Truffula trees crafted from tissue and pool noodles.

Ready to meet the artistic genius behind these amazing creations?


PART 3: AN INTERVIEW WITH COURSE DESIGNER RICKY FEIG

Tell us a little about yourself!

Ever since I was a little kid, I have liked building things. I started off with LEGO’s and train tracks, but in middle school I started doing Odyssey of the Mind (which is a creative problem solving competition for teams of up to seven students). The best part about Odyssey is that there are strict non-interference rules for non-team members (especially parents).

As a result, I built a lot of cardboard and PVC structures (most of which failed). On the other hand I feel like these failures mean that I’ve gained a deeper understanding of how to build things than I would have if I had just been told what was possible. Since starting at Princeton, I’ve become pretty involved in the tech theater community on campus. Though I would not consider myself artistically talented, since I started designing sets for Princeton University’s Theatre Intime, I’ve really enjoyed finding ways to apply my talents to artistic projects.

What was the research and development process for your creations?

I started by just looking through images from all of my favorite Dr. Seuss books to get ideas of what I wanted to build. My image for the course was to base different holes off of different Dr. Seuss books because while Seuss has a distinct drawing style, many of the books have their own unique look (especially the color scheme). Once I selected the books I wanted to recreate I made some sketches of each hole.

In many ways, it was the same initial process I would use for designing a set, except that Dr. Seuss has a strange aversion to right angles. The lack of right angles made it difficult to draft out more detailed designs, and I also knew that I would have a hard time recreating those sketches working with cardboard. So I decided to just dive right in and start building.

Is this the weirdest thing you’ve created?

Fortunately or unfortunately this is not the weirdest thing I’ve created. In Odyssey of the Mind, I built a twenty foot tall giant (which I think you can still find if you Google me). I also hope to continue to out do myself and create weirder and weirder things as I get older.

What was the greatest challenge?

The greatest challenge I faced was creating irregular 3 dimensional shapes out of cardboard. The construction method for the Sneetches holes and the Onceler tower were not techniques that I had used before. What I ended up doing was cutting out two irregular faces and creating an interior column to hold them at a fixed distance. Then I curved cardboard around strips around the edge to create a seal container.

Do you have a favorite hole on the course?

It’s hard to pick a favorite hole. I think the Onceler hole came out closest to how I pictured it looking, and was the most physically impressive because of how big the tower was.

What was it like to see kids play your course?

It was a lot of fun to watch people play the course. This is a little evil of me, but I really enjoyed how much trouble parents had with the Oh, The Place’s You’ll Go hole. That was the first hole I built and I only got the ball in the hole once, even when it was perfectly set up. There were a couple parents trying to up their kids golf game on that hole, and I really enjoyed knowing that I had them beat.

I also enjoyed watching kids have fun and be creative with the course. At the end some of the kids had figured out how to build some really cool structures with the pool noodles. This really impressed me because I had more or less given up on the noodles as an impossible material to work with.


In conclusion, this event was a lot of work, but it was AWESOME. The room was a total frenzy of creative activity for 4 hours. All the holes took a serious beating and eventually succumbed to the crowds. Especially the Trufulla trees. However! At the end of the day, there was one Trufulla tree still standing. And so, I will end this post with a final nod to Seuss…