
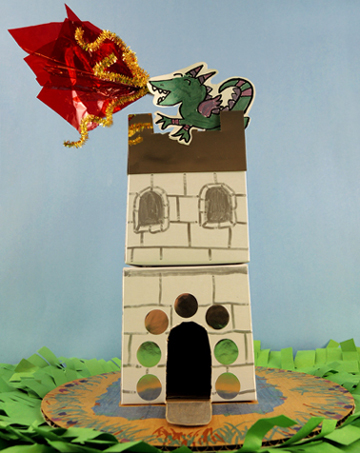
It’s party time at the castle as two dragons provide some colorful fireworks… just pull the paper dragon to get the firework to “launch” from the top of the castle!
We read Over at the Castle, written by Boni Ashburn, and illustrated by Kelly Murphy (Abrams, 2010). A mother and baby dragon await nightfall outside a bustling castle. Page by page, the numerous castle activities count down until it’s time for the grand finale – a firework show, provided by the dragons!
You’ll need:
- 2 small boxes (we used a 4″ x 4″ x 4″ – small tissue boxes work too)
- A box cutter
- 1 cake pad (ours was 10″ in diameter)
- 2 squares of cellophane (ours were 10″ x 10″)
- 4 sparkle stems
- 2 pieces of clear elastic beading cord (ours was 10″ long)
- 1 mother and baby dragon template, printed on 8.5″ x 11″ white card stock
- Scissors, tape, and glue for construction
- Markers for decorating
- Hot glue
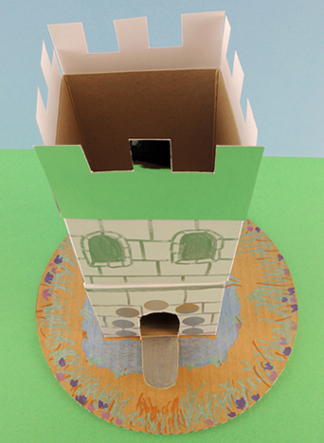
Construction of this castle is very easy. First, use a box cutter to cut a drawbridge in one of the small boxes. Hot glue the drawbridge box to the top of a cake pad. Cut the top off a second box, and hot glue it on top of the drawbridge box. Decorate the castle and its base with metallic markers. We added silver mirror board battlements and some silver metallic dot stickers as well. Next, the dragon fireworks!
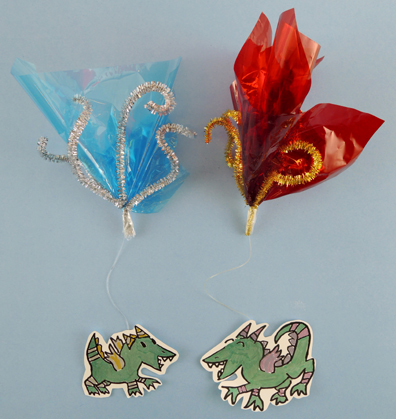 Fold 2 sparkle stems into a V shape, then tape them to the bottom of a bunched 10″ x 10″ square of cellophane, Secure with tape. Knot one end of a 10″ piece of clear beading cord around the bunch, then secure with tape. Repeat these steps to create a second firework. Color and cut the mother and baby dragon from the template, then tape them to the free ends of the firework cords.
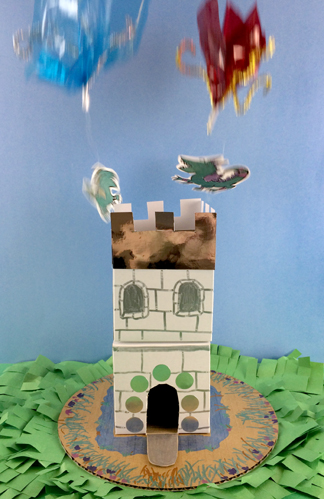
To create the firework show, gently tuck the fireworks into the top of the castle, but let the attached dragons dangle down the sides the castle. Grab a dragon and yank it upwards, sending it – and the attached firework – flying into the air!
Many thanks to the Hopewell branch of the Mercer County Library System (proud home of Fang the Spider) for allowing us to do pop up story time while our library is under renovation! We really appreciate it!
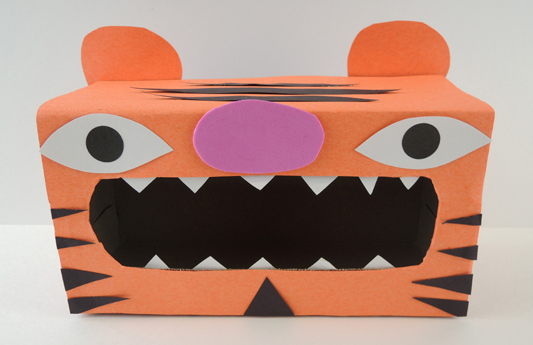 Tyger Tyger burning bright! Make it past the teeth, and you’ll be all right!
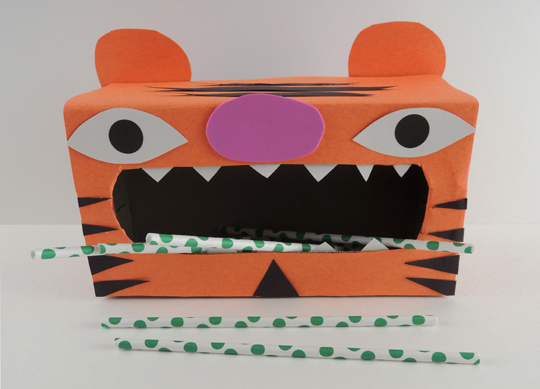
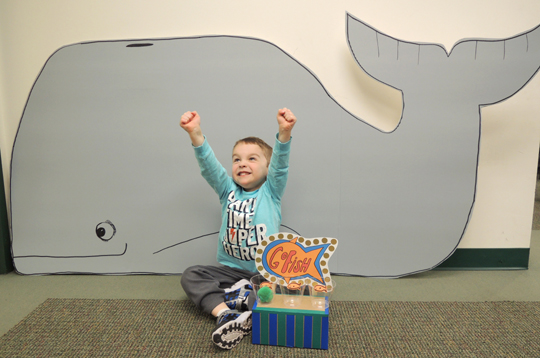
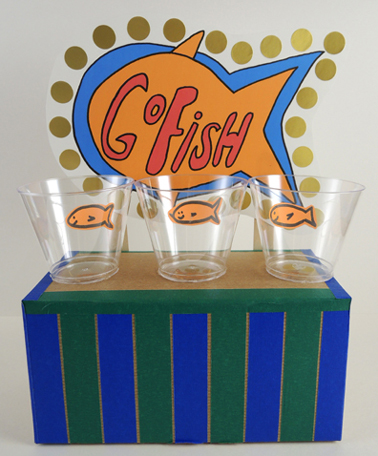
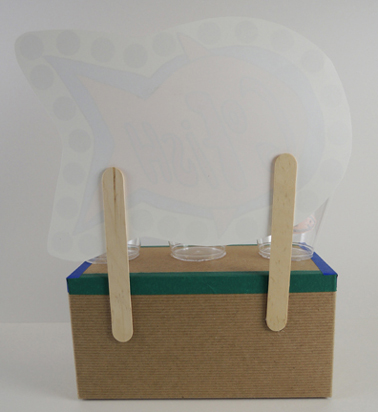 The “ball” for the game was a jumbo pom-pom, but ping pong balls or crumbled paper works too! To play the game, toss the ball into the cup. But what do you win? A WHALE!
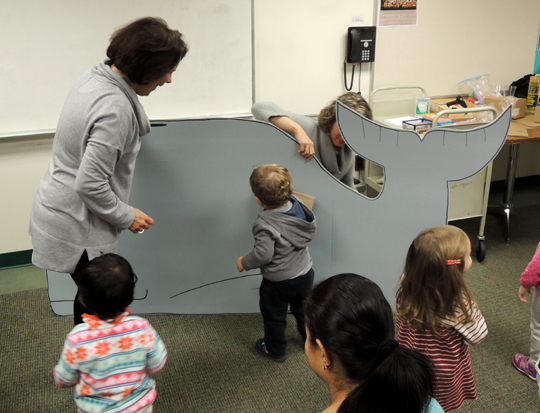 We snagged a big flat of grey cardboard from library recycling, and Katie turned it into a fantastic whale. Like the book, kids were expected to take care of the whale. They took it on a little walk, wiped it clean with a cloth, and scooped its poop (i.e. brown jumbo pom-poms)! This part of the program was great for building physical skills – balancing, circular hand motions, scooping. Check out this pro at work:
 If you’re wondering why our story time area doesn’t look quite the same as