Everyone’s world feels a little smaller these days, and today’s simple project is a reminder of the blessings we have in the four walls around us, the family and friends by our sides, and the life that exists, beautifully, outside our windows.
We recommend The Hello, Goodbye Window, written by Norton Juster, and illustrated by Chris Rashka (Hyperion Books, 2005). Read here by Sankofa Read Aloud. A child fondly narrates Nanna and Poppy’s “Hello, Goodbye Window.” It might appear to be a regular kitchen window, but it’s so much more…it’s for waving hello, it’s a mirror, it’s for viewing stars, it’s for family to share, it’s for new discoveries, and it’s for special visitors who could come by at any minute. Maybe even the Queen of England…but more likely the Pizza Guy!
You’ll Need:
- A window
- A set of window crayons, or washable markers
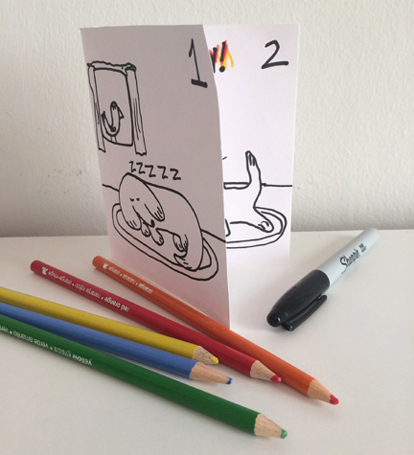
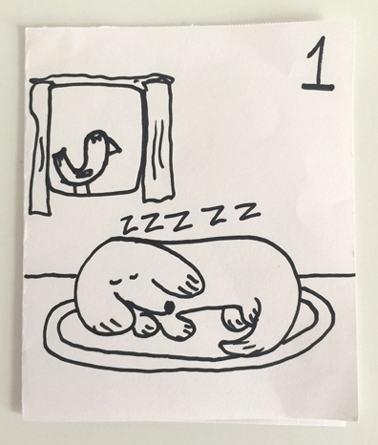
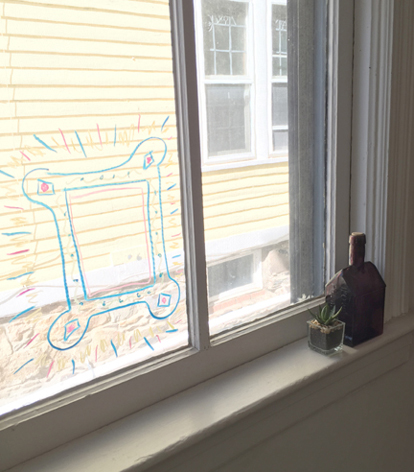
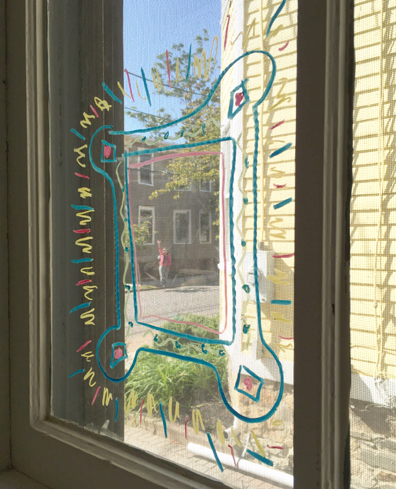
While the Hello, Goodbye Window in the story appears ordinary, this project jazzes things up a tad…I draw a special window frame to gaze out of! Specifically, I used these awesome Crayola window crayons, which can be purchased for around $5-$7 (I snagged my set at Michael’s Craft store with a 20% off coupon).
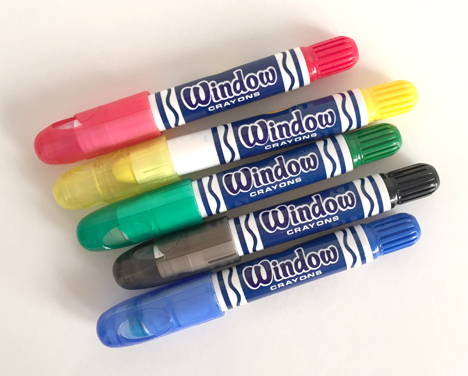 However, I also tested regular markers (Target’s washable brand for under $4) and they work on the glass too (and most importantly, cleaned right OFF with a standard glass cleaner, no problemo).
You can draw your window frame just about anywhere…in draw as many as you like! Draw one for each family member, draw one for the dog! Best, of all, if you line yourself up juuuuust right, you can step outside to create a lovely portrait for your delighted viewers.
Norton Juster is also the author of The Phantom Tollbooth. I had the honor of interviewing him in front of a live audience in 2016, and you can find the full interview here!