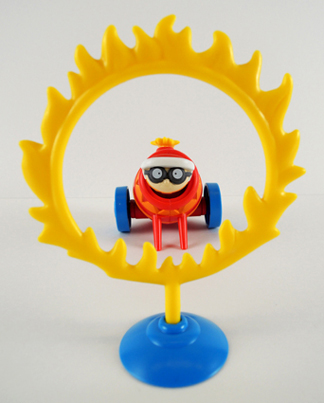
 A monkey on a unicycle rolls down a ramp towards a snake. The bar holding the snake drops, which causes a bag of peanuts to fall into a container that sends a cart down a ramp into a tennis racket rigged to a mechanism that touches a match to a cannon fuse and fires an acrobat through a ring of fire!
Rube Goldberg’s inventive cartoons have fascinated me since I was a kid. A few years ago, our library even hosted a Rube Goldberg program, complete with a behemoth of a page turner and other activities. So imagine my delight when I spotted Wonderology’s Rube Goldberg kits on the shelves at Target.
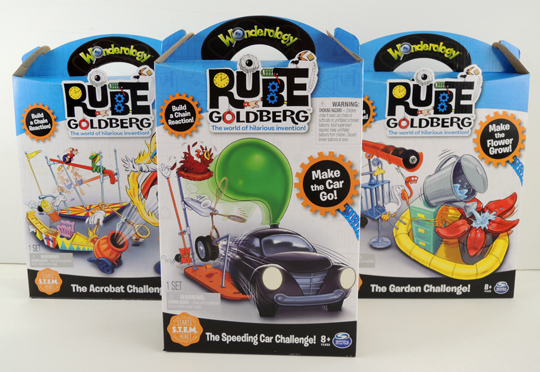 Intended for ages 8 and up, Wonderology offers 6 different kits that cost between $10 – $20. Each kit contains a plethora of parts and a fully illustrated set of instructions. I purchased the Acrobat Challenge, the Garden Challenge, and the Speeding Car Challenge, then invited 3 kid testers (ages 6, 8, and 10) to try them out.
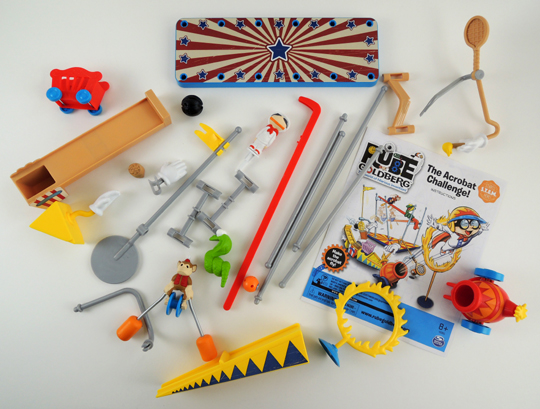
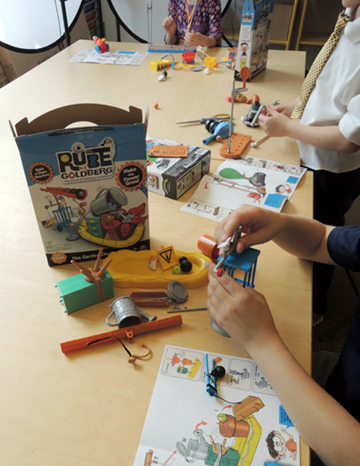 The kids were very excited as they unpacked the kits. The parts are fun, bright, and nice quality plastic. Here, for example, are the various pieces of the Acrobat Challenge:
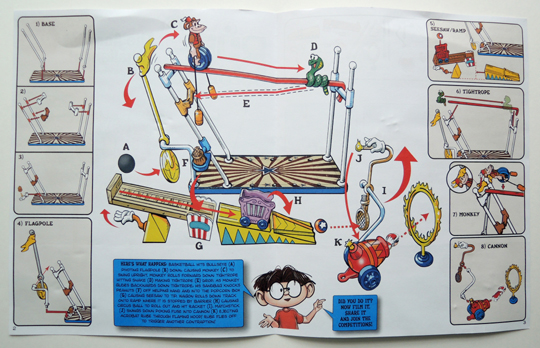
 Here are the kit’s illustrated instructions. They’re presented in classic Rube Goldberg format (they even use his special font!):
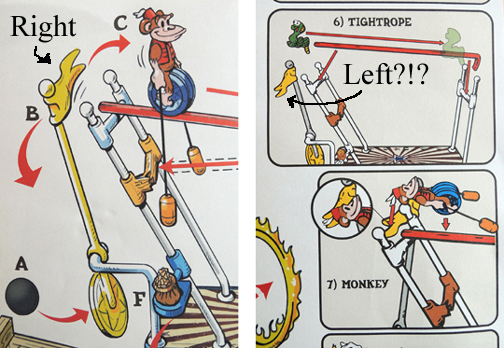
 But as soon as construction started on the kits, well…that’s when things started to go wrong. Take the Acrobat Challenge, for example. In one part of the instructions, it clearly shows the yellow “monkey release” flag facing right. In two other sections of the instructions, it’s facing to the left! Also, either way I turned the flag, I never could get the monkey to work quite right.
 There was a lot more of this I’m afraid – mechanisms not working like the instructions suggested, confusion with where to place the various pieces, the whole schbang toppling over when you tried to adjust it. Soon, there were shouts of frustration, explosive sounds of exasperation, creative G-rated cursing, and a box kicked across the floor (and it wasn’t just the kids doing all that).
Between me and the 6 year-old, we never did get the Acrobat Challenge to work. So our kid tester used it like a play set instead, creating and narrating an involved story about a monkey snake circus. Cool.
Meanwhile, things were looking a bit more promising at the Speeding Car Challenge. It was, against all odds, assembled with somewhat minimal adult assistance.
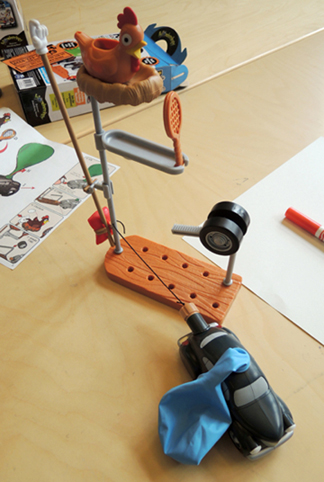 But…see that chicken? It’s supposed to get a feather “plucked” from its tail, which causes it to lay an egg, which triggers the tennis racket, etc. But the egg just wouldn’t stay under the chicken. It just kept dropping and triggering the rest of the mechanism. So you had to skip the chicken all together, which is rather disappointing.
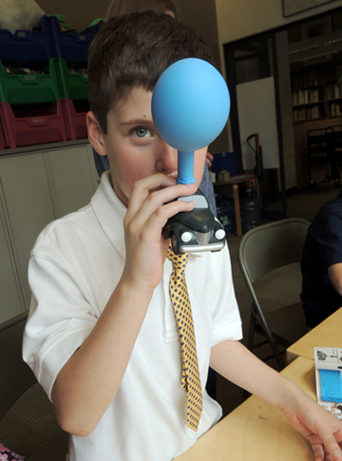
Also, the 8 year-old kid tester wants you to know that the balloon on the car is a little tricky. Once you blow it up, you have to: 1) Block the tailpipe with your finger; 2) Rapidly remove your finger; then 3) Plug in a plastic cork in juuuuuust right. The seal on the balloon starts to leak pretty quickly too. But it was, he admits, a cool-looking car.
 So that just leaves the Garden Challenge. This kit was particularly intriguing to me because it involves real water! Our 10 year-old tester managed to assemble it just fine.
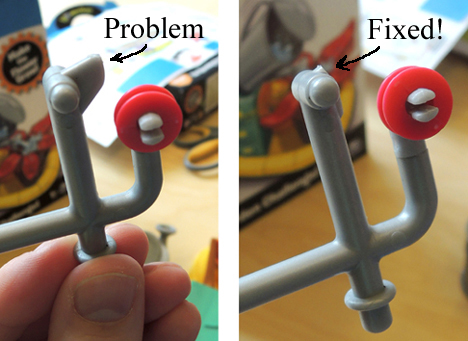
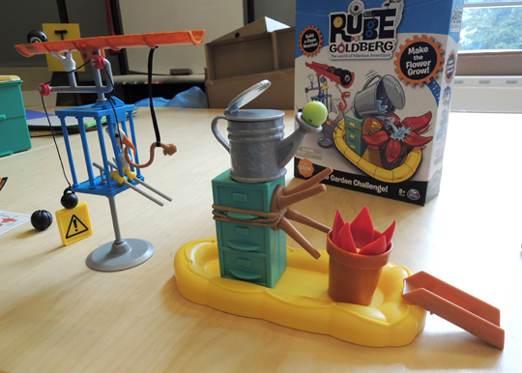 But we soon discovered a fatal manufacturing flaw. See the orange gutter at the top of the mechanism? It’s supposed to tilt downward and let the 8 ball roll down and hit the watering can. But there was a little plastic piece that wouldn’t allow the gutter to tip down far enough! Katie had to saw the piece off with a box cutter in order to get it to finally work.
 Then it was test, adjust, retest, adjust, curse quietly under one’s breath, test, adjust, and retest. It took dozens and dozens of attempts, close to an hour of concentration, and Katie’s sheer determination to get it to work. And yes, I did say work. Katie and the kid tester got it to work! Drumroll please…
OK. So maybe the ball bounced off that final ramp, but I’ll take it and call it DONE.
I really admire Wonderology’s concept. The kits are a clever idea, they look fantastic, and the quality of the plastic is good. However, they’re simply not for kids. Especially 8 – 10 year-olds (unless said 8 – 10 year-olds have the patience of saints and the hands of neurosurgeons). Heck, some of us adults had trouble getting them to work! Our testing group found them difficult and rather vexing. While we ultimately had success with one kit, we encountered enough flaws along the way that the ultimate take-away was more exhaustion than exhilaration. Alas, not recommended.
















 A monkey on a unicycle rolls down a ramp towards a snake. The bar holding the snake drops, which causes a bag of peanuts to fall into a container that sends a cart down a ramp into a tennis racket rigged to a mechanism that touches a match to a cannon fuse and fires an acrobat through a ring of fire!
 Intended for ages 8 and up, Wonderology offers 6 different kits that cost between $10 – $20. Each kit contains a plethora of parts and a fully illustrated set of instructions. I purchased the Acrobat Challenge, the Garden Challenge, and the Speeding Car Challenge, then invited 3 kid testers (ages 6, 8, and 10) to try them out.
 The kids were very excited as they unpacked the kits. The parts are fun, bright, and nice quality plastic. Here, for example, are the various pieces of the Acrobat Challenge:
 Here are the kit’s illustrated instructions. They’re presented in classic Rube Goldberg format (they even use his special font!):
 But as soon as construction started on the kits, well…that’s when things started to go wrong. Take the Acrobat Challenge, for example. In one part of the instructions, it clearly shows the yellow “monkey release” flag facing right. In two other sections of the instructions, it’s facing to the left! Also, either way I turned the flag, I never could get the monkey to work quite right.
 There was a lot more of this I’m afraid – mechanisms not working like the instructions suggested, confusion with where to place the various pieces, the whole schbang toppling over when you tried to adjust it. Soon, there were shouts of frustration, explosive sounds of exasperation, creative G-rated cursing, and a box kicked across the floor (and it wasn’t just the kids doing all that).
 But…see that chicken? It’s supposed to get a feather “plucked” from its tail, which causes it to lay an egg, which triggers the tennis racket, etc. But the egg just wouldn’t stay under the chicken. It just kept dropping and triggering the rest of the mechanism. So you had to skip the chicken all together, which is rather disappointing.
 So that just leaves the Garden Challenge. This kit was particularly intriguing to me because it involves real water! Our 10 year-old tester managed to assemble it just fine.
 But we soon discovered a fatal manufacturing flaw. See the orange gutter at the top of the mechanism? It’s supposed to tilt downward and let the 8 ball roll down and hit the watering can. But there was a little plastic piece that wouldn’t allow the gutter to tip down far enough! Katie had to saw the piece off with a box cutter in order to get it to finally work.
 Then it was test, adjust, retest, adjust, curse quietly under one’s breath, test, adjust, and retest. It took dozens and dozens of attempts, close to an hour of concentration, and Katie’s sheer determination to get it to work. And yes, I did say work. Katie and the kid tester got it to work! Drumroll please…