
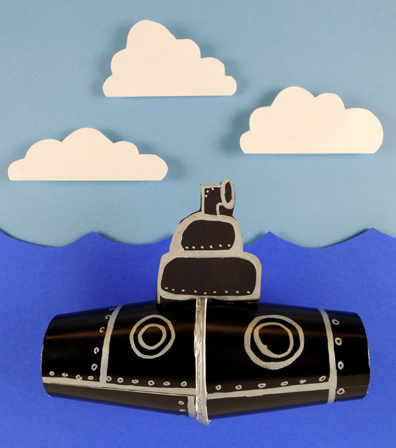
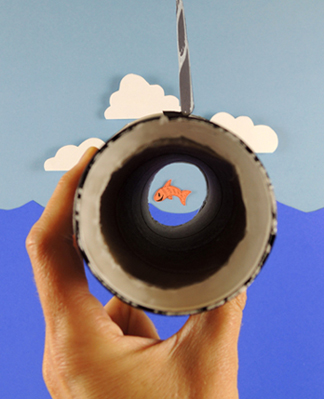
Undersea adventure abounds as you cruise the sea in your sub! The sub also doubles as a spyglass, so you can spot all sorts of aquatic wildlife. See the happy jumping fish?
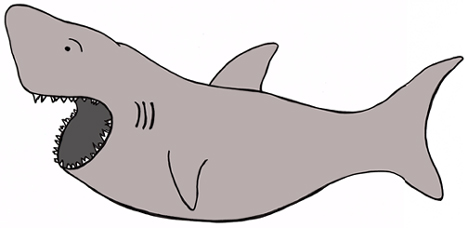
 We recommend Rub-a-Dub Sub, written by Linda Ashman, and illustrated by Jeff Mack (Harcourt, 2003). Zooming around in an orange submarine, a little boy encounters numerous ocean creatures – a seal, a manta ray, a horseshoe crab, and an eel to name a few! But an encounter with an enormous shark forces him to quickly retrace his steps to the surface, where he finds himself safe and sound – in his very own bathtub.
You’ll need:
- 2 paper cups
- A box cutter
- Construction paper
- Scissors and tape for construction
- Markers for decorating
Optional:
- 1 paper towel tube
- Hot glue
I’ll show you the simplest version of the sub project first, then follow it with the paper towel tube variation. Use a box cutter to cut the circles in the bottoms of 2 paper cups. Make sure to leave a little ledge around the bottom of the cup.
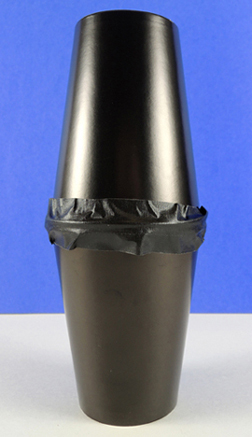
 Next, turn the cups end-to-end and connect them together with hot glue. If you can’t do hot glue, simply connect the cups with tape. We used black masking tape for the photo below, but regular tape works just as well.
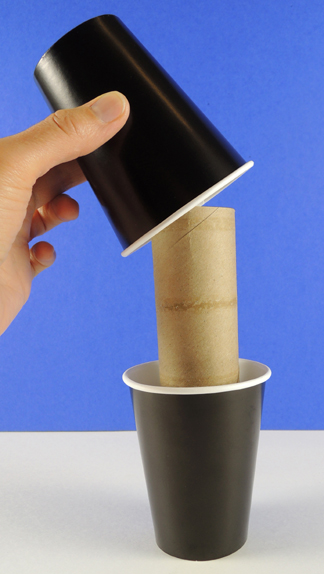
 For the paper towel tube version of the project, cut the holes in the bottoms of the cups. Then place a piece of paper towel tube inside the bottom cup (our tube piece was 6.75″ long but you might have to adjust yours a little). Place the second cup over top of the first…
 Then hot glue (or tape) the two cups together. So…is the extra effort for the paper towel version worth it? You decide! Here’s a side-by-side comparison of the 2 projects. One could argue that the paper towel tube version looks more like a spyglass, but the cups-only version is cute too.
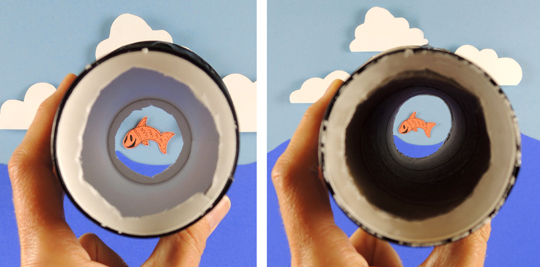 Next, cut a periscope shape out of construction paper, tab the bottom, and attach the periscope to the top of the sub. Finally, use markers to give your sub portholes, plates, rivets, and bolts. Any markers will do, but we really liked how silver metallic marker looked on the black paper cups.
 Miss Marissa designed this awesome project, and she made a fantastic I-Spy game to go with it! To play, print up the characters in this template (click here for small on a single page, click here for large on multiple pages). Tape the characters in different locations and have the kids find them with their sub spyglasses. However, if you spot the shark you have to immediately head back to “home base.” This is especially funny if the shark is taped to the back of an adult who is wandering among the submarine searchers!
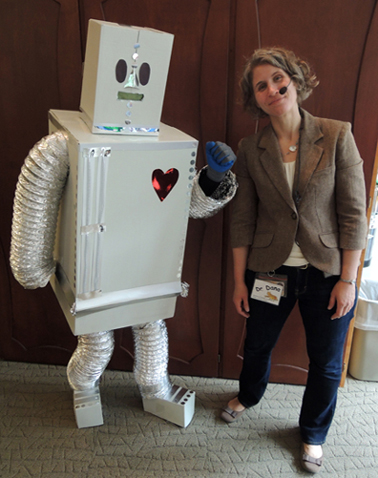 Our robot project has something very special inside – open its chest door to reveal a burst of birdsong, straight from the heart! And for an extra story time surprise, a life-size robot stopped by for hugs and high fives! Here’s the robot project in action:
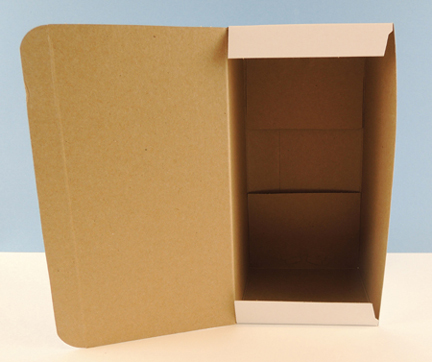 But you can also use a large tissue box. Just use a box cutter to create a hinged lid out of the bottom of the box like so:
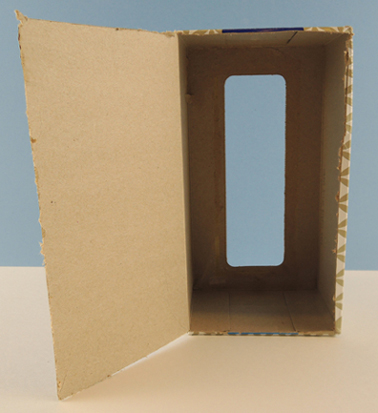 Next, fit a small box inside the large box. The small box is the robot’s chest cavity, so you will need to place it near the center or the large box. We did this by hot gluing a packing tape core to the bottom of the small box, then attaching the whole assembly inside the large box with more hot glue.
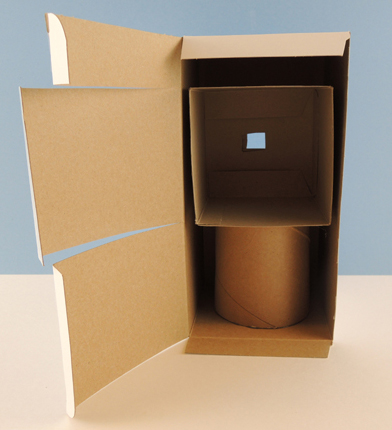 You’ll notice that the lid of the box is cut into 3 sections. These sections eventually fold over to form the front of the robot. Secure the top and bottom sections closed with tape, but leave the middle section open so you can access your bird whistle later.
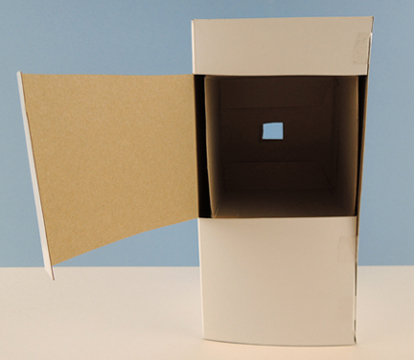 In the above image, you’ll also notice a small square cut in the back of the box. That’s for the mouthpiece of the bird whistle. Use a box cutter to create the square, making sure your cut goes through both the large and the small box. Next, cut a bubble tea straw down to approximately 5″, and slide it onto the mouth piece of a wooden bird whistle (we got ours on Amazon, $8 for 12). Just make sure the little opening in the whistle isn’t covered, or the whistle won’t tweet!
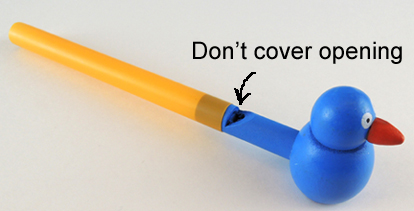 Thread the straw through the square hole in the back of the box. Now your bird whistle is resting inside the box, and the bubble tea straw is extended out the back.
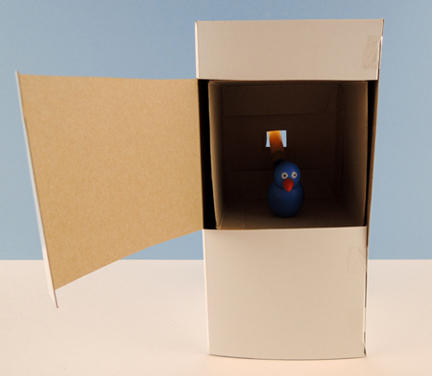 Time to decorate the robot! We offered extra boxes for heads, poster board strips for the arms and legs, tin foil, mini aluminum cake tins,
 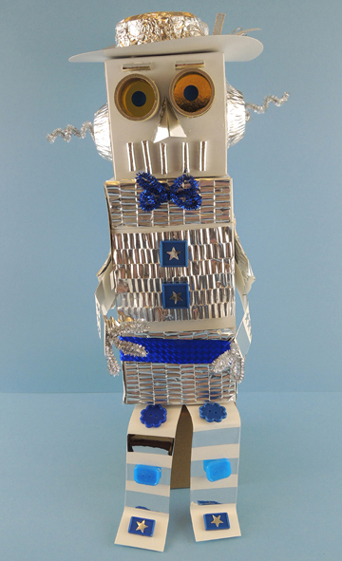 So that’s the project, but there’s ONE thing we did to make this story time extra special. Instead of giving the kids bird whistles while they were making the project, we waited until everyone was finished. Then, a LIFE-SIZED ROBOT came walking into the gallery, carrying a flock of bird whistles for the kids to choose from!
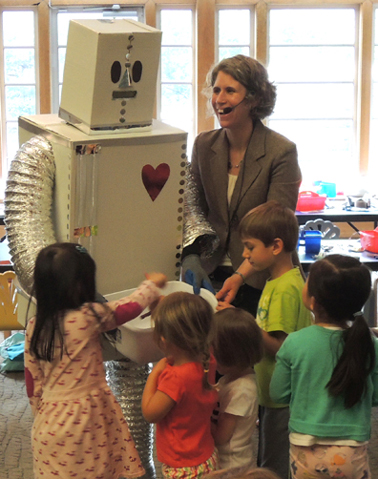 That’s Ian in there, expertly playing the robot (also on his resume –
 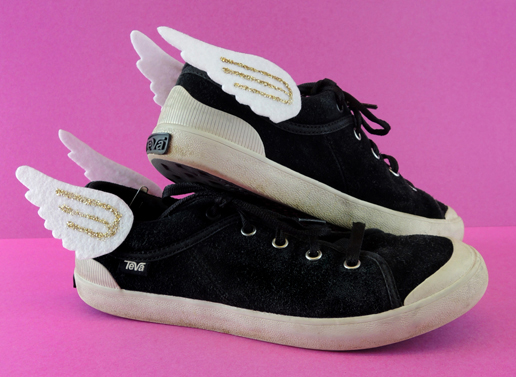 Calling all demigods and satyrs…with the simple command of “Maia!” your sneakers will sprout wings and fly! This project looks awesome and is super easy to put together. However, please note that winged sneakers are not recommended for use in or around Tartarus.
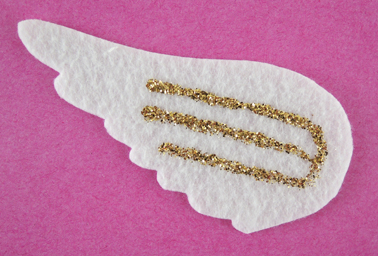 Next, take a small paperclip and bend the shorter loop backwards. Wrap the shorter loop with masking tape.
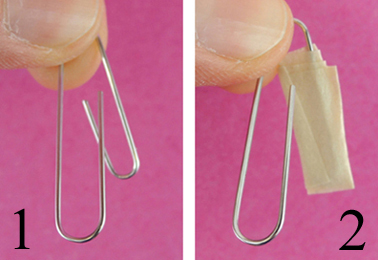 Use a glue dot or hot glue to attach the paper clip to the back of the felt wing.
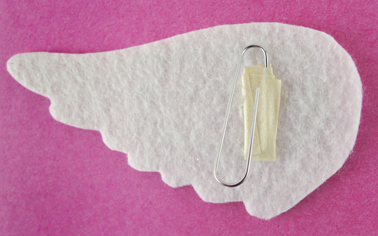 Repeat the above steps with 3 more wings, then slide the wings onto your sneakers! Feel free to experiment with different colors too. Here’s a nod to one of my favorite Percy Jackson characters, Blackjack.
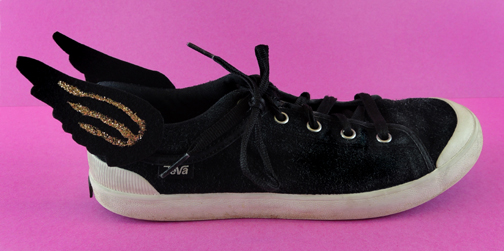 Interested in a cheaper, simpler version of this project? We did a whole post on how we