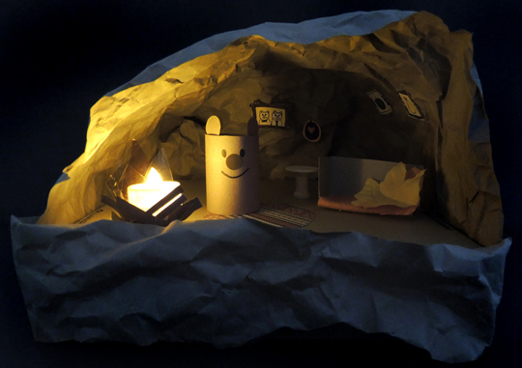
Settle in for some serious sleep in this cozy bear cave complete with all the creature comforts…sofa, table, rug, artwork, and a flickering fire!
We read Sleep Tight, Little Bear, written by Martin Waddell, illustrated by Barbara Firth (Candlewick press, 2005). When Little Bear finds a little cave close to the Big Cave, he moves right in. Soon, there’s a bed, a table, a chair, and a stuffed doll! Supper is served in the little cave and Little Bear is having a grand time…until bedtime. Will Big Bear miss him? He’d better check. Sure enough, back at the Big Cave, there’s a story and a snuggle waiting.
You’ll need:
- 1 cardboard box lid or tray
- Brown packing/wrapping paper
- 1 small box
- Felt, any color
- A selection of patterned paper
- 1 bear cave frames template, printed on 8.5″ x 11″ paper
- 1 LED votive
- Yellow and red cellophane
- 1 half of a toilet paper tube
- Brown construction paper
- Scissors and tape for construction
- Markers for decorating
The bear cave’s base is a box lid or cardboard tray. We used these 9.5″ x 11″ cardboard trays (you might recognize them from this butterfly garden post!).
 First, crinkle up brown packing or wrapping paper. Then arch it over the top of the base and secure to the sides and back of with tape. We taped a strip of crinkled paper to the front of the base as well.
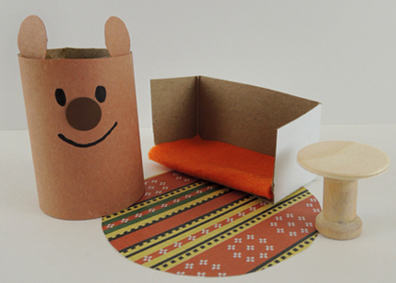
 Now, for the inside! We made a half a toilet paper tube bear (with a dot sticker nose), a sofa made out of a little box with a bit of felt glued to it, a patterned paper rug, and a table made out of a wood circle and spool.
 Ready for some artwork? Cut the frames from the template, draw some pictures, and attach your artwork to the walls of the cave with tape loops. We also added some s in fall colors to make things extra cozy (we get our leaves from Discount School Supply, 200 leaves are $6).
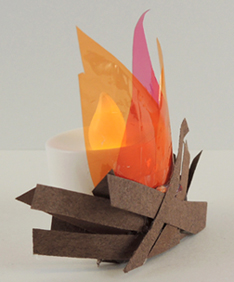
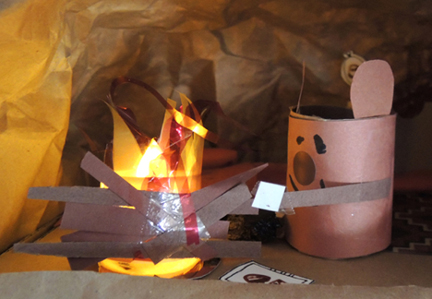
The final touch? A flickering fire! Tape red and yellow cellophane to the front of an LED votive. Then add a few construction paper “sticks” over top.
 To make things extra fun, we turned off the lights during the fire construction portion of the program. It was so cute to see these little illuminated caves on all the tables. But here’s the cave that completely captured my heart…this bear is roasting a marshmallow!
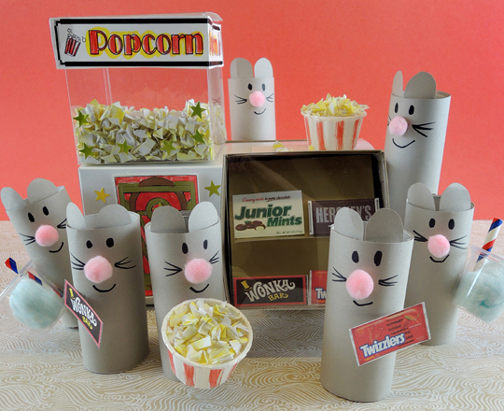

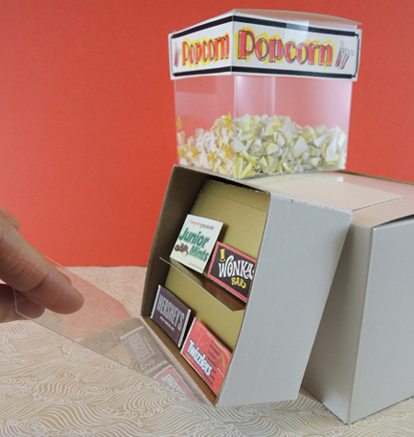
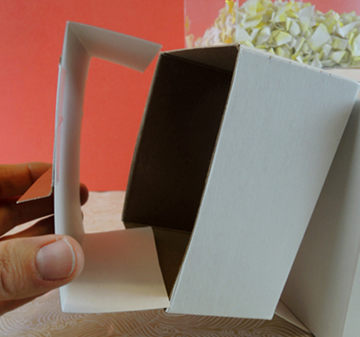
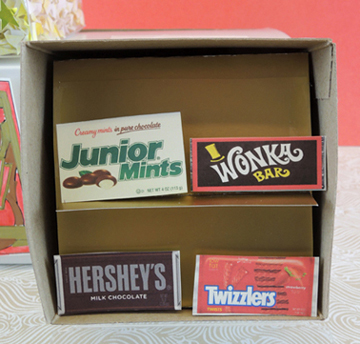
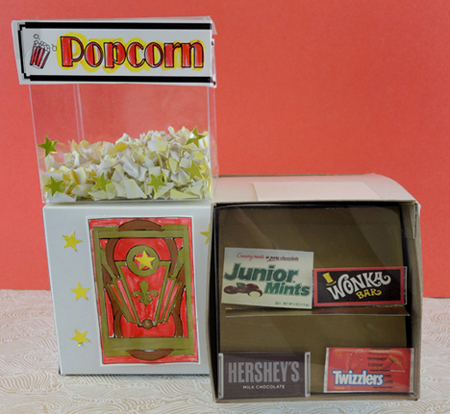 First the concession stand, starting with that awesome popcorn machine! Our popcorn machine is a 4″ x 4″ x 4″ plastic favor box from Oriental Trading Company (item #13705345, 24 boxes for $9.50). Cut the clear lid off the top of the favor box and set it aside. Later, the this lid will be the “glass” front of the candy display case. You can leave the top of the popcorn machine open, or use a piece of poster board to create a new lid.
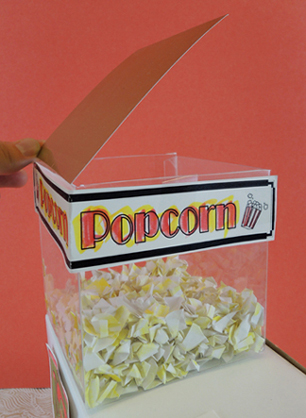 Cut and color the popcorn sign from the template and tape it to the top of the favor box. Then hot glue the popcorn machine to the top of a large box. To make the popcorn, scribble on 1-2 pieces of white printer paper with yellow marker. Cut the paper into tiny squares and crinkle them tightly. Serve your popcorn in 2 small paper sample cups. Use a marker or crayon to draw red stripes on the cup if you’d like!
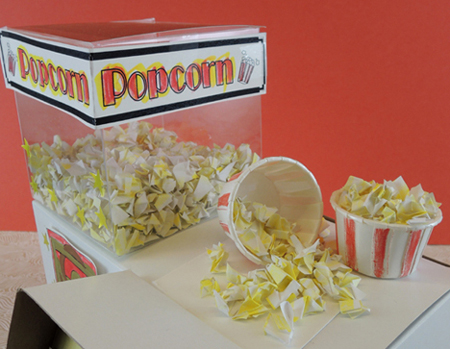
 What was playing that day? A mouse movie of course! It was
  Q: What do I do with my kid’s art projects? They’ll be upset if I toss them out, but I’m being squeezed out of the house by an army of cardboard creations!
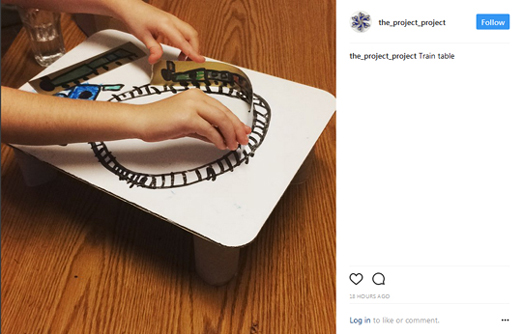
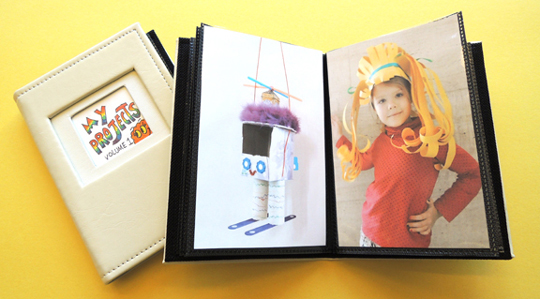 Last weekend, however, I came up with another solution! I created an Instagram account. Now, anytime a project needs recycling, I just upload a photo of it to my Instagram.
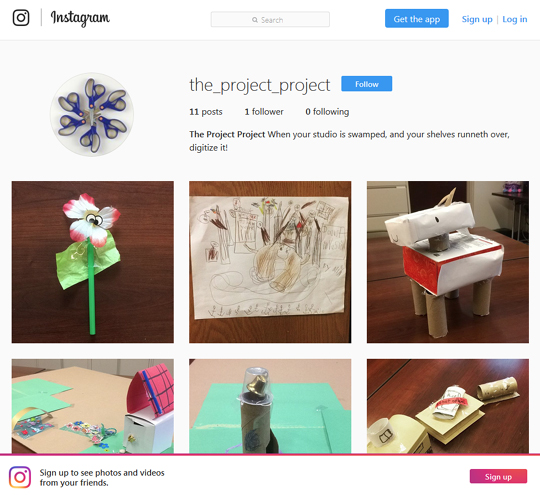 There the project remains, forever validating my kids’ imaginative musings. It’s a fun gallery documenting their tremendous creativity AND a digital representation of one less job for Mom the Recycling Cop. Bonus! Grandma and Grandpa can follow our Instagram to see what those clever grandkids are up to.