
 These days, independently owned bookstores are an endangered species. And independently owned children’s bookstores? Those are as rare as unicorns (and some may argue, just as mythological). It is with great joy, then, that I share a very special children’s bookstore situated in the little town of Hopewell, New Jersey.
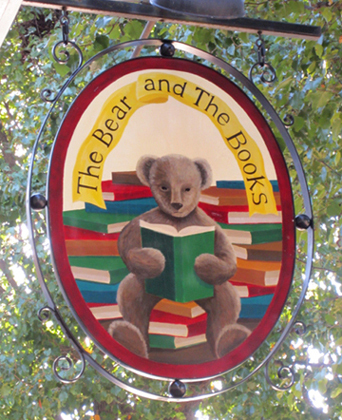
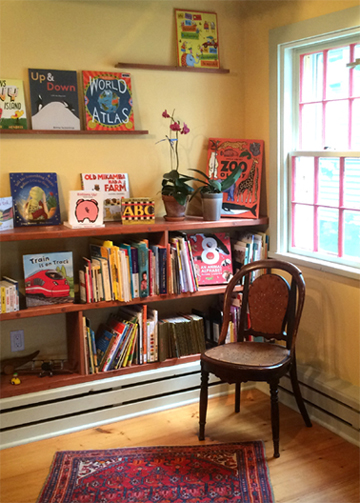
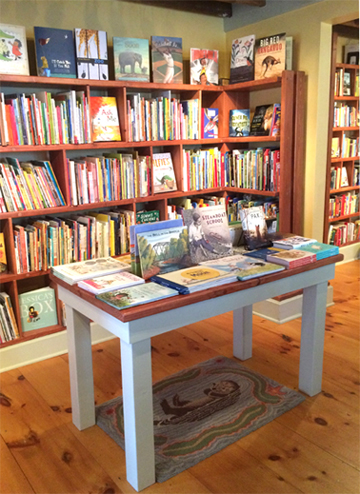
 The Bear and the Books is an utterly charming space bursting at the seams with books, imagination, and consideration for those journeying on the paths of early literature. At the store’s heart is owner Bobbie Fishman. Bobbie managed the children’s departments of two local bookstores for 14 years before opening the Bear and the Books in 2013.
Why did you decide to open the shop?
I love what I do, and I believe that children need to see good books, not necessarily the books that are being marketed heavily by the publishers and – therefore – press. Children are taught what they are supposed to want by the media, which I believe is all tangled up in marketers’ ideas of what will sell. Good books are not written to be “something that will sell.” I just want good books to have half a chance in children’s minds. I’ve often said that my job is reading children’s books in the bathtub and then getting out and talking to people about them. The conversations I have with customers about children’s books are what I’ve come to love – those conversations are what I think I have to offer. (Otherwise, I’m quite shy.)
A number of months after I left my previous job, when I was trying to figure out what was going to come next in my life and I had been thinking I would do something completely different, this space in my town was looking available. It was affordable enough for me to think about taking the risk of opening a shop. I’m afraid I was too attached to these books to leave them.
 How did you decide on the name of your shop?
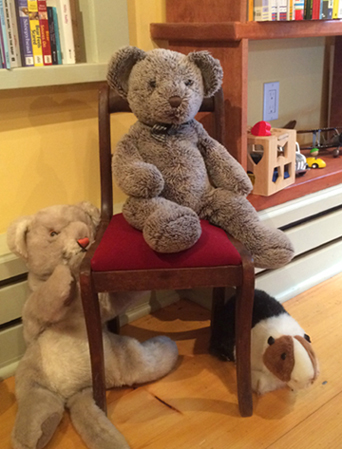
The bear was the bear left in Micawber [a former local bookstore] by my friend Liz Flemer who worked there before me; she put it there for children to play with, along with a few other toys. It got dragged around and slobbered on and put to sleep in its sleeping basket again and again. When Micawber closed I took the bear home with me until Labyrinth [a current local bookstore] opened – where it continued its role. When I left Labyrinth, so did the bear. We’ve shared all our time in bookstores together, and when I knew I would open this shop I realized that the bear was a constant. What would be in the shop? The bear and the books.
 What do you love about children’s literature?
I don’t think my love of good children’s literature is much different from my love for any good literature: it has the power to surprise us and rattle us at the exact same moment it is reaching a deeply familiar place inside; it is words and art that work to show us that we are human – that we have sympathy for and interest in so much of what happens. I actually think books remind us that we are good people and that being a person can be fun sometimes. For even the youngest readers of the simplest picture books, I think this is true: They can feel “I am part of a world I can converse with and laugh with and have feelings for. This is being human, and this is very interesting.” And what you learn about yourself when a book makes you cry could be one of the most important lessons in your life.
Who designed the interior of your store?
Mostly me, but I wouldn’t call it designing; rather, it was “making it up as we went along,” and I had the best of help from three wonderful carpenters, who knew even better than I did how to make it up as we went along: Chris Thacher, Phil Rayner, and Walter Varhley.
 What’s your philosophy on bookselling?
I guess I just see it as matchmaking: trying to figure out what can please someone. With children, I want to know what they’ve been reading or hearing that they love and I take it from there. Oddly, although I do try to go close to something the child likes, I realize a goal is to move them a small bit away to something different; and it is often when I make what I think is an out-of-their-line suggestion, that is the book they will go for. Children are often more flexible and more widely interested than they want to admit – or perhaps than they know.
What is Bear Mail Books?
Bear Mail is a plan one can sign up for to have books chosen by me for a particular child and mailed to the child at regular intervals, usually one each month. Most Bear Mail customers sign up for a year’s worth of shipments, but I will do it for any span of time, and some customers have books sent every other month, or 2 books a month. I try to send books that not everybody knows.
How do you select the books for the recipient?
I find out what I can about the child: How old? What’s he or she been hearing or reading that she likes? Are there older siblings in the house? Do they want books that will be read to the child or that the child will read? I have to confess that after a while, I have made up a version of the child in my head and I will sometimes consider a book and think: “I’m not sure Helga will like this one,” and then I have to laugh because I’ve never met Helga.
 Can you name a few of your favorite books?
Amos and Boris by William Steig
An Episode of Sparrows by Rumer Godden
Gone Away Lake by Elizabeth Enright
Our Mutual Friend by Charles Dickens
A collection of poems by Margaret Wise Brown called Nibble Nibble, illustrated by Leonard Weisgard, NOT the supposed reissue by Harper (illustrated with great stupidity by someone else and only being the illustration of one poem)
Many Moons by James Thurber
An Extraordinary Egg by Leo Lionni
Cartwheeling in Thunderstorms by Katherine Rundell
Many thanks to Bobbie Fishman for letting us roam her shop, and for providing the photo of The Bear and the Books sign!
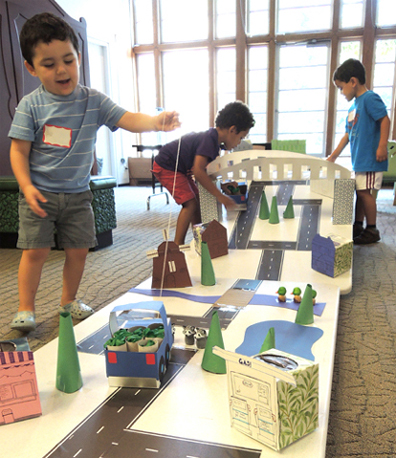 Hit the road in a totally stylin’ pull string truck. Your mission? To deliver produce to the city market. But first, you have to navigate a 12 foot obstacle course packed with trees, animals, buildings, water, and bridges!
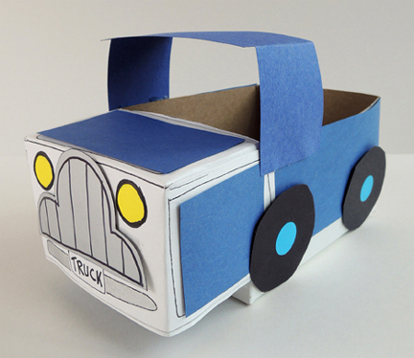 First, the pickup truck! I used a craft box with a lid, but I’ll also demonstrate how to use a small tissue box. If you’re using a craft box, begin by cutting the lid and tabs off the box. If you’re using a small tissue box, turn the box on its side and cut the side off.
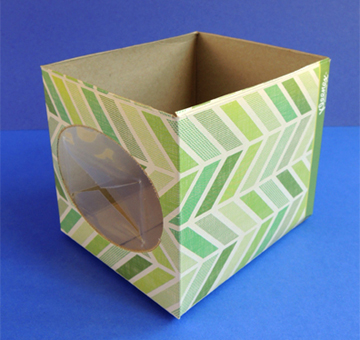 Set the box aside for a moment. Cut the front of the truck from the template. There are 5 folds you’ll need to make on the template. Each fold is marked with a dotted line. First, fold the 2 tabs on either side of the hood.
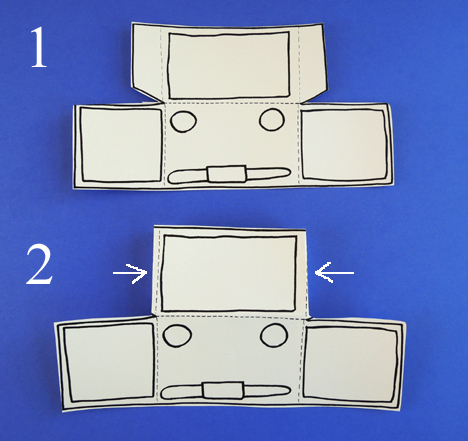 Next, fold the 2 panels on either side of the truck’s headlights.
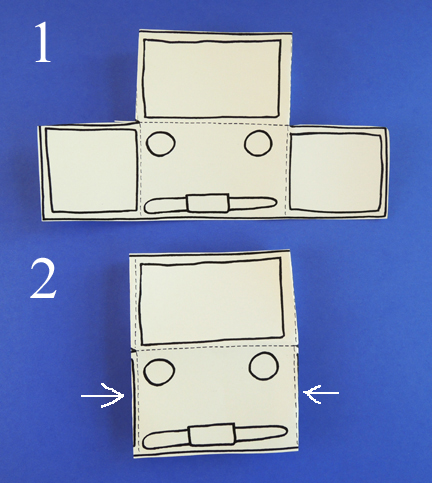 Finally, fold the hood down to meet the side panels, and secure it with tape.
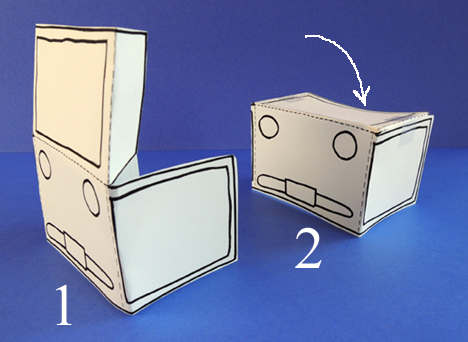 Tape the front of the truck to the front of the box like so:
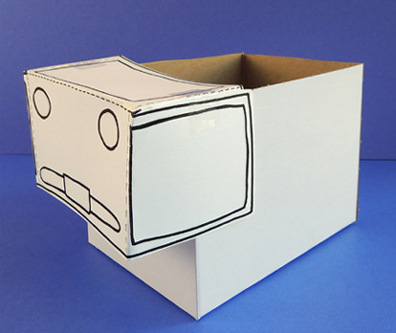 Here’s the tissue box version. As you can see, this results in a slightly shorter (but still very serviceable) truck.
 Next, cut the roof piece from the template. Fold along the dotted lines and tape the roof to the top of the box.
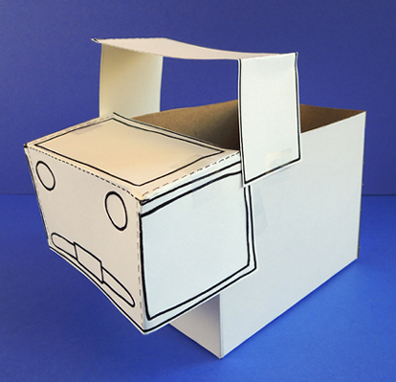 Draw some lines on the grill template, then tape it to the front of the truck. Finish by taping black construction paper wheels to the sides. Make sure the wheels don’t extend past the bottom of the truck!
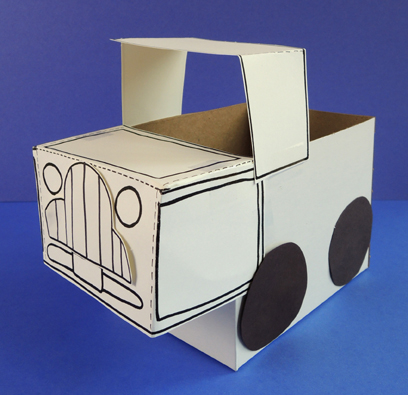 That’s the basic construction, but there are a couple variations on it. You might, for example, want to wrap the box with construction paper first. Also, we traced roof and grill templates onto different paper. Our roof was blue construction paper, and our grill was silver poster board. We also added some
 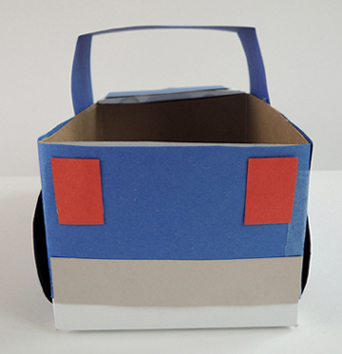 Of course, you can also skip these variations and just use the template pieces and markers! If you decide to go that route, have the kids decorate the template pieces with markers before they tape them to their boxes.
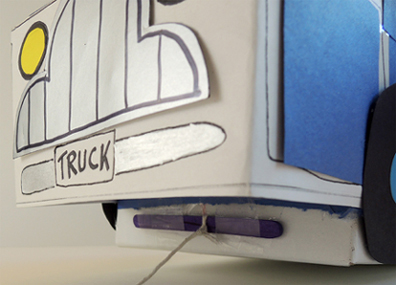 To make your “produce,” stuff the tops of 2-4 toilet paper tubes with green tissue paper. Place the tubes in the back of the truck. We didn’t secure the tubes down with tape. We wanted them to wiggle and wobble while the trucks navigated the obstacle course.
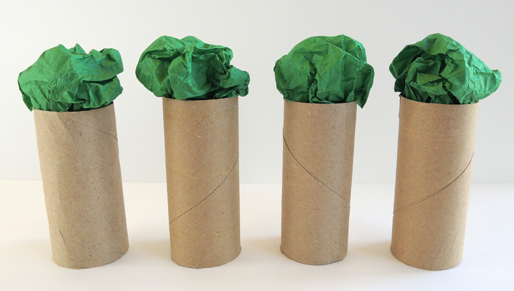 And what an obstacle course it was! We used two, 6′ plastic tabletops to create it. These tables have shown up on the blog before – once for
 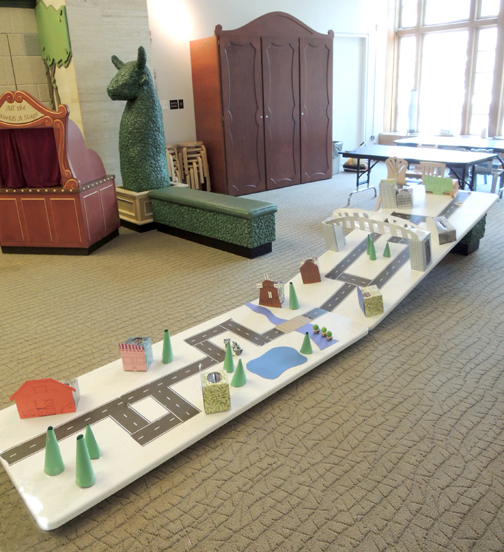 One of the tables was (securely) propped up on a cushioned stool to add a challenging hill to the course. You can also see how we made the buildings…facades taped to tissue boxes, which were then secured to the tabletop with packing tape.
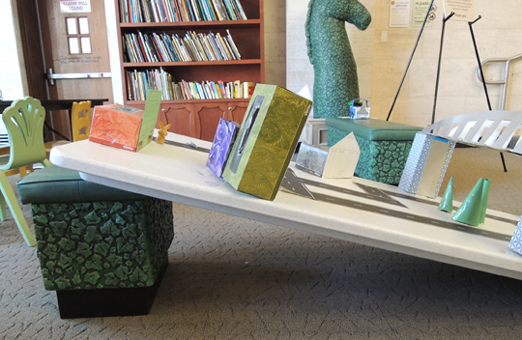 The building facades were Marissa’s handy work! Out in the country was a big red barn…
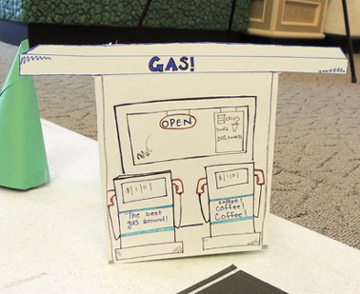
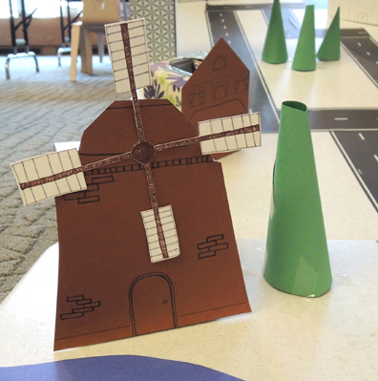
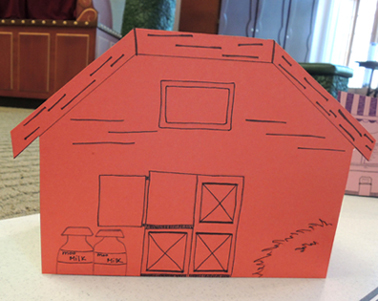 As well as an ice cream stand, a gas station, and a windmill…
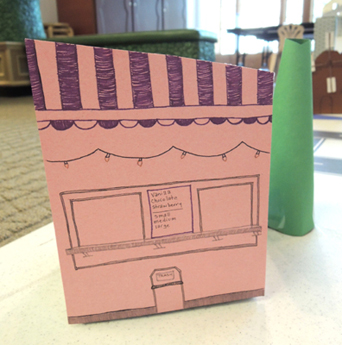
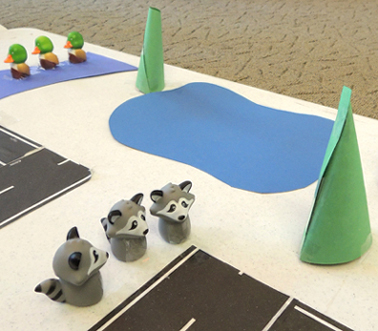
 There were ducks by a river bridge, and a trio of raccoons near a pond…and how do you like those towering conifer trees?
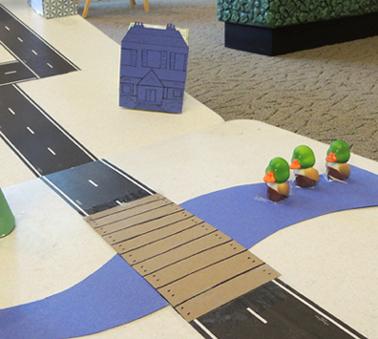
 The entrance to the city was marked with a big bridge. I made it out of a strip of cardboard, tin foil, tissue boxes, and silver poster board.
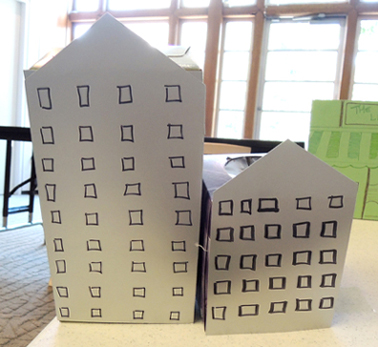
 Once in the city, there’s a bank and a couple of skyscrapers…
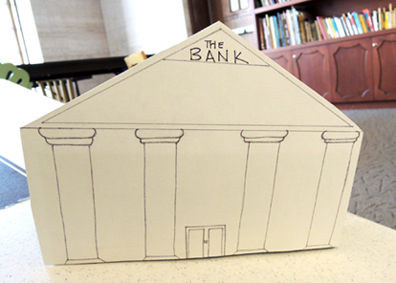
 And finally, at the veeeery top of the course, was “The Leafy Lettuce.” This is where you delivered produce to your eager customers.
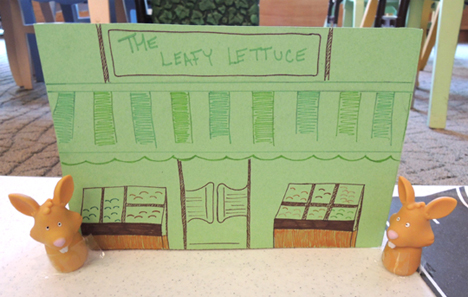 While constructing the course, we taped the buildings down first, and then added the road. We considered using long strips of black paper, contact paper, or masking tape outlines (similar to what
 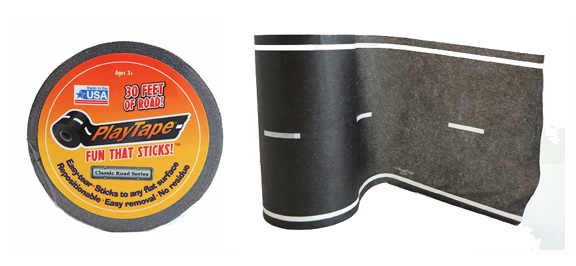 PlayTape is basically masking tape with road printed on it! The 30′ rolls came in 2 widths (2″ or 4″). I went with the 4″ size, which was $13 a roll (the 2″ size is $9). I found the tape on Amazon as well (in different colors, with special curved pieces, as train tracks, and there’s even a “Mud Madness” version!). The tape was awesome. My only complaint is that at times, the ends curled up off the plastic tabletop. The tape did much better on the rugs and hardwood floors of my home. It peeled easily off all surfaces, and left no residue behind.
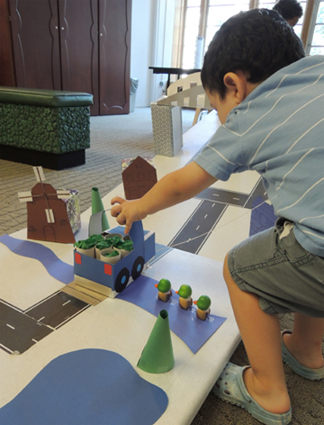 Make sure you tape everything firmly in place (even the animals) because there will be plenty of hilarious crashes. Oh yes, there will.
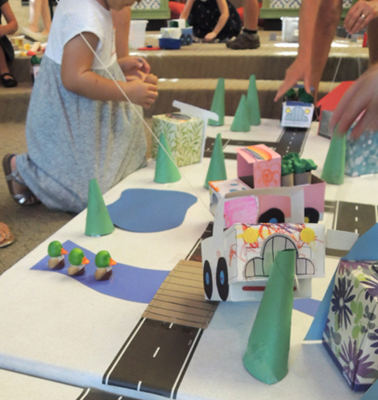 Here’s one of my favorite trucks on course. Look at that fantastic rainbow roof!
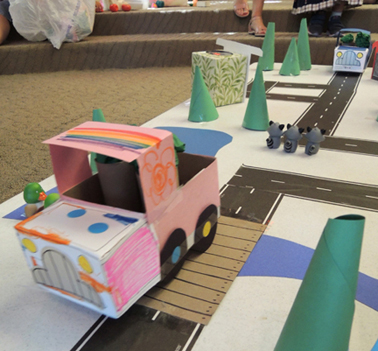 Eventually, all the trucks found their way to The Leafy Lettuce. We left the course open for a good 20 minutes after story time. It was very busy. A few Hot Wheels cars even showed up to take a drive…
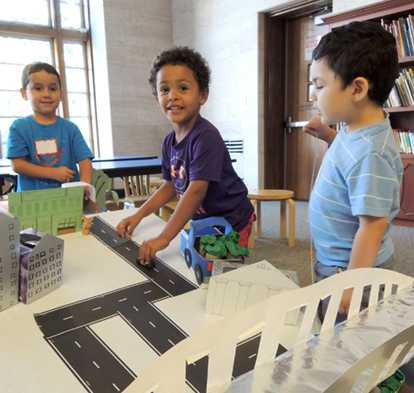
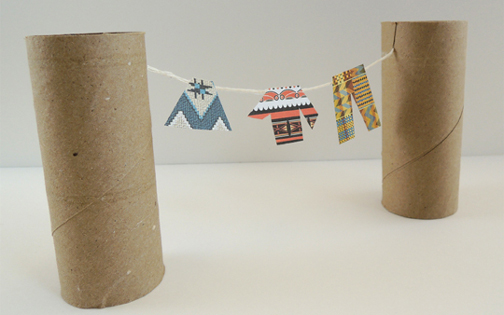
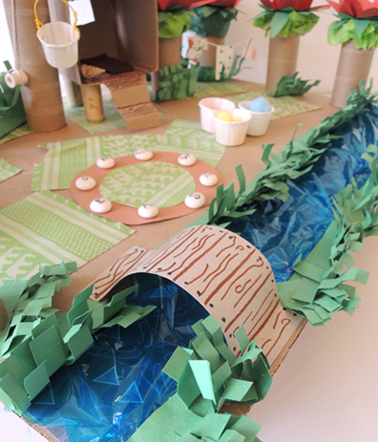
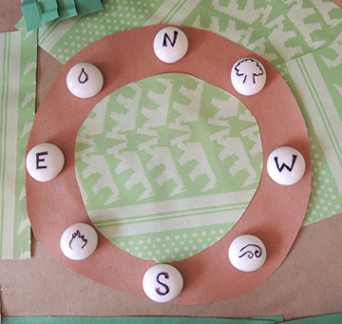
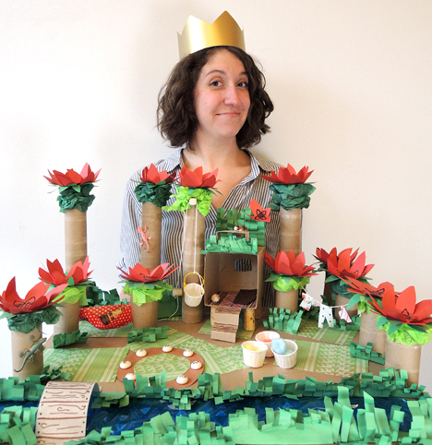 Create your perfect paradise, complete with a picturesque bridge, comfortable hammock, airy hut with a platform room, supply bucket on a pulley, convenient clothesline, and a stupendous sun clock. Do those towering red flowers remind you of anything? If you answered “swist,” you know exactly where we’re going with this!
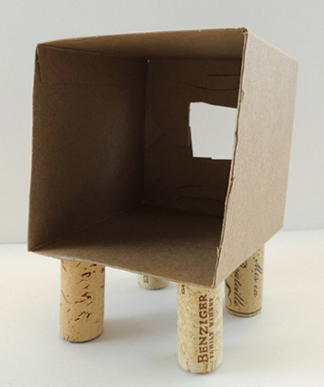
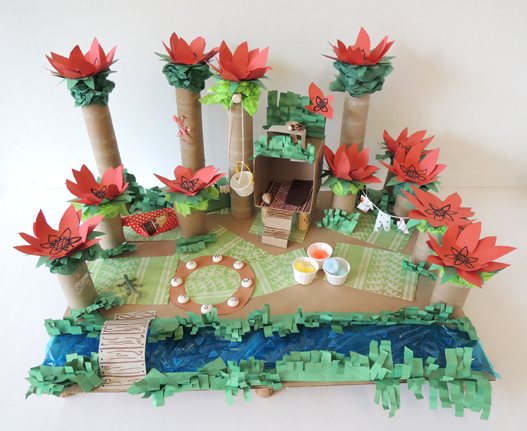 The first step is optional: hot glue legs to the bottom of your corrugated cardboard base. Champagne corks work beautifully for this purpose. Our bases were big (18″ x 24″) so we used 6 champagne corks per base. If you do use champagne corks, make sure you glue the flat part of the cork to the base (not the wider, rounded part):
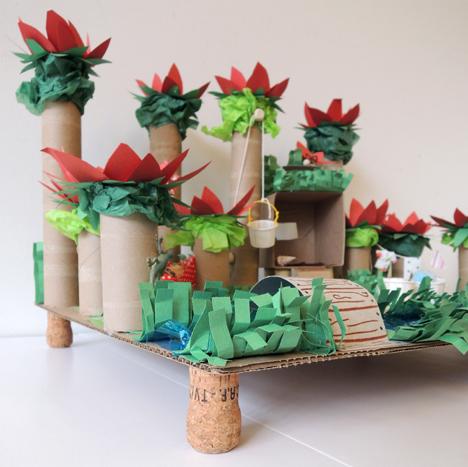

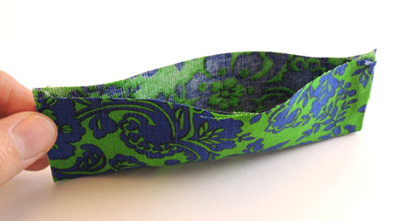 Next, cut matching 3″ slits down the sides of 2 toilet paper tubes. Slide the ends of the fabric pocket into the slits. Close the slits with tape. Hot glue the tubes to the base.
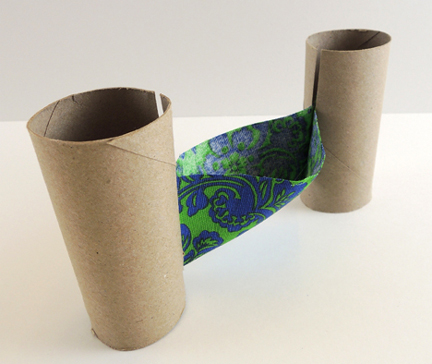
 Then add some tagboard (or construction paper) stairs! We also added a patterned paper rug and a felt sleeping pad. The hut has a platform roof as well (we added green construction paper grass and a little tagboard writing desk to it). When the hut is finished, hot glue its legs to the base.
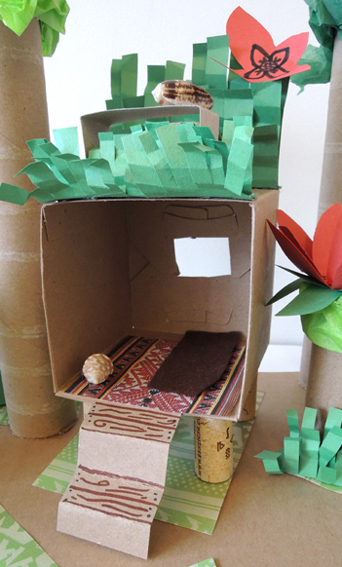

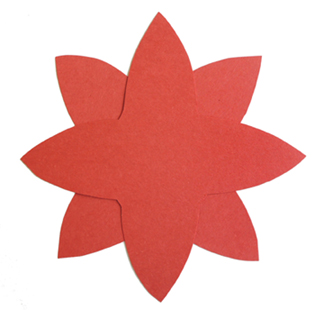 Glue the staggered petals together, then gently fold the petals upwards. Glue the flower on top of a sepal, then tape (or hot glue) the complete flower to the tops of the toilet paper and paper towel tubes. Marissa also used black marker to draw some details in the centers of the flowers and added some tissue paper underneath the sepals, but that’s totally optional! Here’s that overhead view again…