 “Check this out!” Katie said to me one morning, holding up her phone. “My friend just posted this to her Instagram!” It was a board game, based on the book Hatchet, designed by Quinn Densmore, a 5th grader in New Mexico.
First of all, wow. Hatchet is a fantastic book. Second of all, WOW! Quinn’s game board was 3-dimensional! Thirdly, what amazing muse inspired him to create a game version of the book? The answer was Kandice Tomanek, his teacher. Clever Ms. Tomanek invited her class to design board games based on their favorite books. I asked if she would be willing to share a few more creations. The whole class voted for their Top 5, which I am delighted to present to you today, in no particular order.
PETER PAN
Designed by Terra Donahue
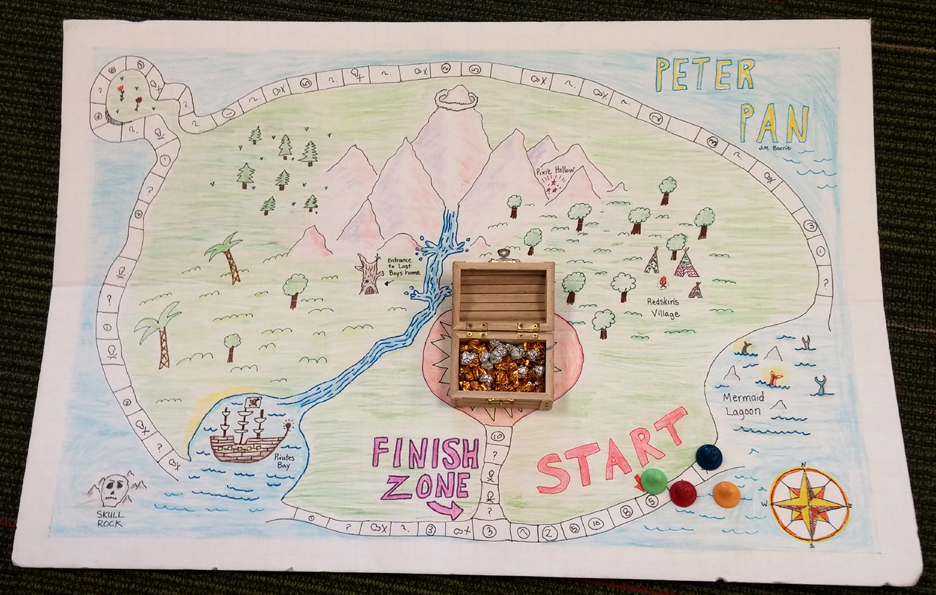
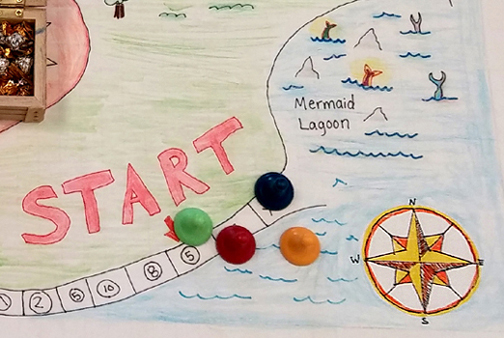
Dice rolls move 4 players around the board. Some squares contains a symbol, others a number. If you land on a marked square, you must pick a card with the matching symbol or number and follow its instructions (be they good or bad). The game ends when a player reaches the “Finish Zone,” but the winner is the person who has collected the most gold balls.
I love the way the game board opens into Mermaid Lagoon and Pirate’s Bay. I love that all the famous Neverland landmarks are there. I love the ring of clouds around the top of the tallest mountain. I love the gorgeous compass. And I especially love the upended mermaid tails in the lagoon!
UPSIDE-DOWN MAGIC: STICKS AND STONES
Designed by Ailey Cassidy-Jones
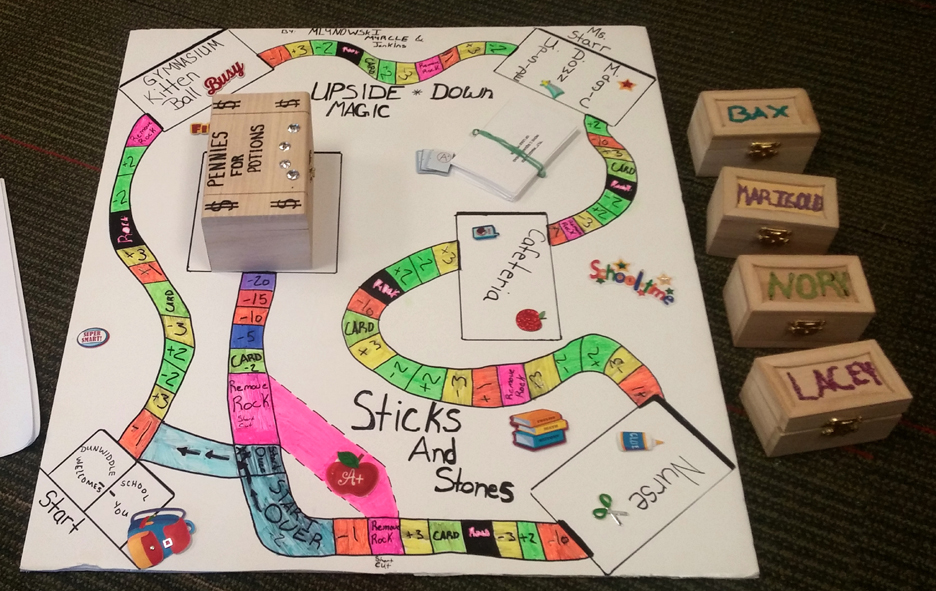 The goal of this game is to get rid of as many gems as you can before reaching the finish line (i.e. the “Pennies for Potions” square). No small feat considering that each player starts with 50 gems! As you travel the board, you can either gain or lose gems depending on the space you land on and the cards you draw.
I’m not familiar with the Upside-Down Magic books, but I can absolutely appreciate that the game players are characters from the books (such cool little wooden boxes for each of them!). I also appreciate the math involved as you navigate the board and acquire and lose gems. That and Kitten Ball in the Gymnasium. I need to know what Kitten Ball is!
THE LANDS BEYOND
Designed by Greta Smith
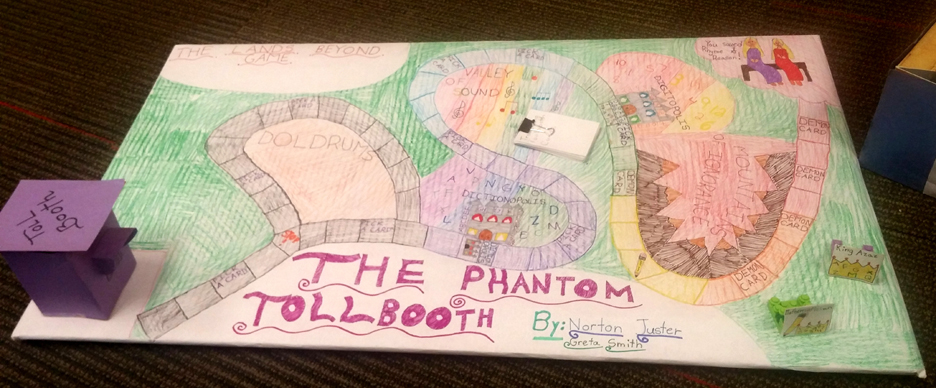 Based on The Phantom Tollbooth, players begin at the tollbooth but soon encounter the Doldrums. If you roll a 1,3, or 5, you get stuck on the Doldrums. If you roll a 2,4, or 6 you take another path. The game continues to move forward in this quirky fashion, and also includes directional cards that make you stop or allow you to roll again. Waiting at the finish line, of course, are Princesses Rhyme and Reason.
So, how much do you love that beautiful purple tollbooth? And the innovative take on dice roll navigation? As you get close to the Mountains of Ignorance, you’ll notice that the cards change from “Pick a Card” to “Demon Card” as well. So clever. And did you notice the Mathamagician’s pencil?
I can’t resist sneaking a couple Phantom Tollbooth connections in here. Click here to meet the author, and click here to visit Digitopolis, the city of math.
HATCHET
Designed by Quinn Densmore
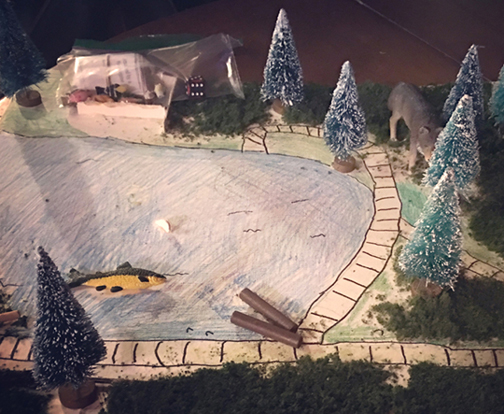 The object of this game is to get rescued from the wilderness. As you move around the board, you acquire different cards. If you get a fire card you are immune to 1 hypothermia card. If you get hit by a disaster, you must do what the card instructs (move back, lose a turn, etc.). If you get a rescue card, you are safe from the next attack card. Collect 5 rescue cards, and you win!
Not only is this board a total work of 3-dimesional art, I think Quinn really captured the uncertainty of Brian’s plight in the game play. Because sometimes Brian was just plain unlucky (plane crash, gut cherries, extremely territorial moose). Also, there’s no finish line. You wind your way back and forth through the wilderness until (hopefully) you are rescued. Very cool.
THE HOBOKEN CHICKEN EMERGENCY
Designed by Rebekah Bagwell
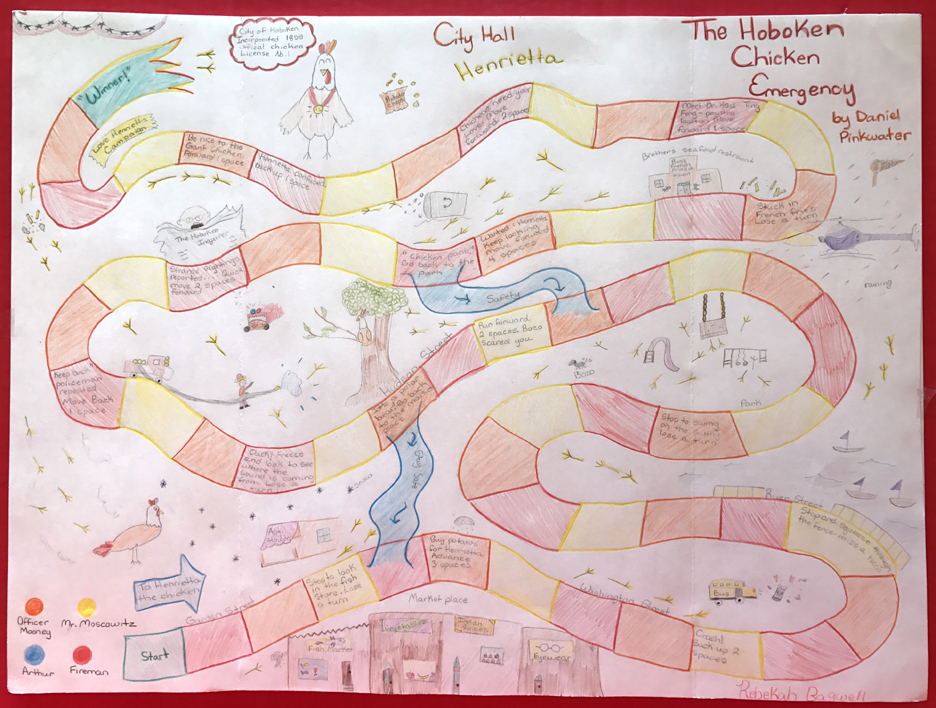 I’ve been a Daniel Pinkwater fan since I was 9, so I was thrilled to see this classic book turned into a game. Players race each other to Hokoben City Hall. Along the way, they must follow the directions on each space (if they land on a blank space, they just wait until their turn comes up again). The winner gets to take home a little Henrietta as a pet!
The details on this game are awesome. The players are characters from the book. Rebekah’s labeled the streets, the stores, and locations. There are nods to Bozo, potatoes, the Hoboken Inquirer, and Dr. Hsu Ting Feng. I tip my hat to you, Miss Bagwell.
Many thanks to Ailey, Greta, Quinn, Rebekah, and Terra for sharing their games, and to Kandice Tomanek for organizing the vote and sending the pictures (and just for being an awesome teacher)!
 Also! The PVC won’t curve gracefully (you need a heat gun for that). But it will bend into 3 sections that approximate a curve. Once the PVC is bent, wrap it with color masking tape. Hot glue a button magnet on one end of the pipe, then push the non-magnet end through the X in the lid of the box.
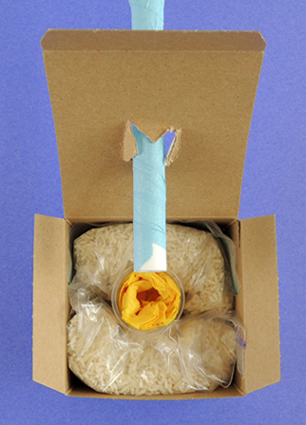
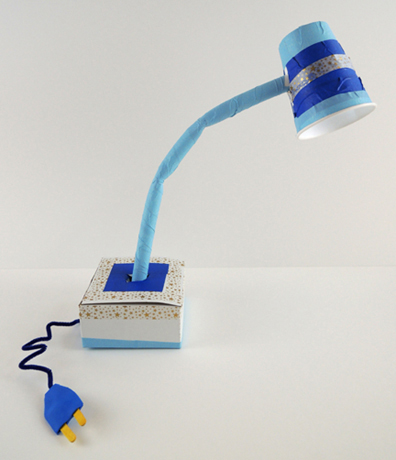
 Leaving plenty of room around the X, decorate the cup with patterned tape and/or color masking tape (or just markers). Then push the neck of the lamp through the X. Your lamp will now look like this:
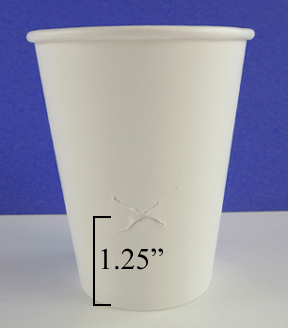
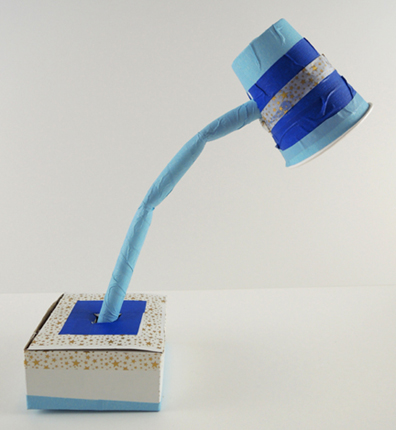 To make the cord, snap a mini craft stick in two, then place the pieces on the back of a 1.25″ x 1.5″ rectangle of self-adhesive foam. Place a pipe cleaner at the bottom the the rectangle as well, then press a matching rectangle of self-adhesive foam on top. Trim the sides down into a plug shape, then tape the plug to the bottom of the lamp’s base.
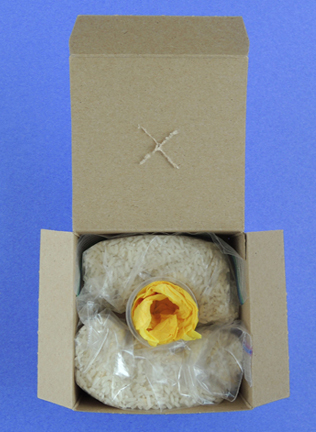
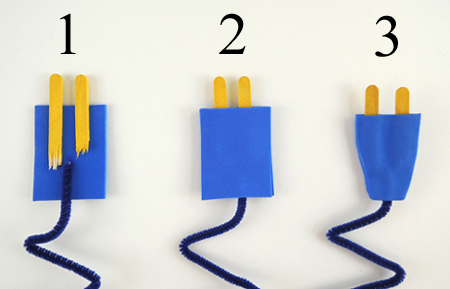 Finally, the light bulb! We wanted these lamps to shed light, but we didn’t want to mess with…oh…electricity. We also wanted kids to be able to switch the lamps on and off. LED votive candles flickered too much, and glow sticks eventually fade. But then I found these submersible LED lights in the floral section of Michaels Craft!
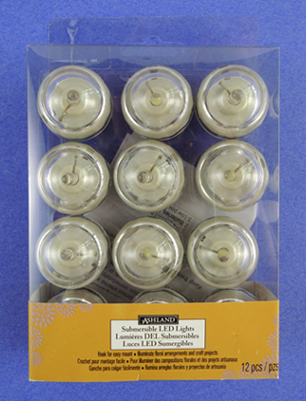 To turn the light on, you simply twist the clear dome clockwise. The LEDS also come in different colors! Woo! However, a pack of 12 costs $20, so make sure you go armed with a 40% coupon. We hot glued a button magnet to the back of each LED light, then connected it with the magnet at the end of the PVC pipe neck. Here’s a shot of the two connected pieces inside the lamp’s shade:
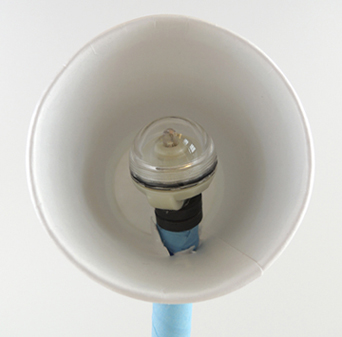 To operate the lamp, simply reach inside the shade, disconnect the magnets, and twist the LED light on. Then reconnected the illuminated LED to the magnet inside the lamp. Kids didn’t even need to peer inside the lampshade to do this – the magnets found each other quite easily.
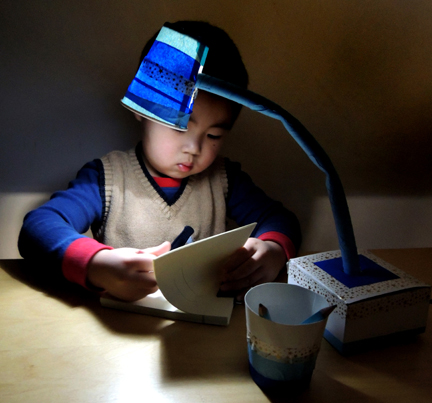
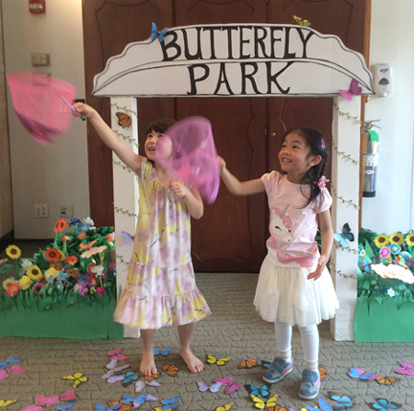
 Bring your net and your sense of wonderment – there are butterflies in the park! We crafted a beautiful community garden, then waited for the butterflies to arrive. Swooping, diving, floating, and fluttering, how many butterflies can you catch for your own little garden?
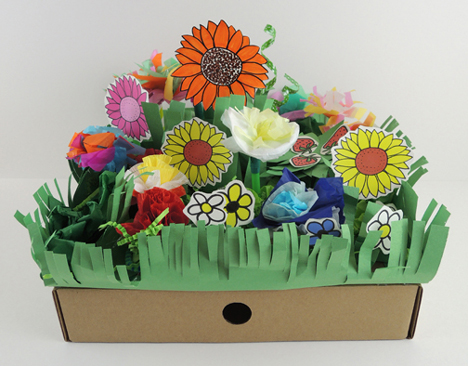 We used 9.5″ x 11″ cardboard trays rescued from the recycling bin. Flip the tray over and use a golf pencil to punch holes in the top (the golf pencils worked great with 3-5 year-olds and were much less scary than using scissors to poke holes).
 If you don’t have a tray, a large tissue box works too. Cut the top off the tissue box. Then, cut the entire box down to 2.5″. Flip it over, and use a golf pencil to punch holes in the top:
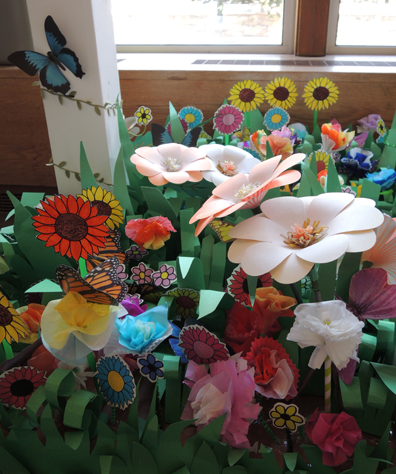
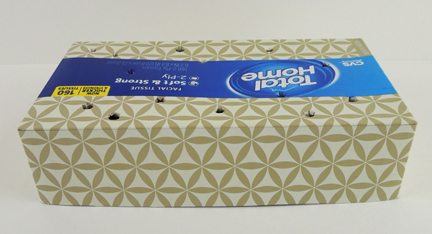 To plant your garden, cut a pipe cleaner, sparkle stem, and/or drinking straw in half. Attach a flower to one end, then poke the other end through a hole in the box. Secure the stem to the underside of the box with tape (or leave them loose so you can “pick” them!).
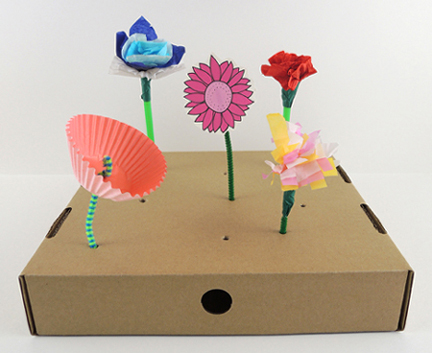 As you can see above, we offered tissue paper and baking cups for the flowers. You can also use the flowers from the template, and the kids can color them in. We brought out green construction paper grass fringes, green
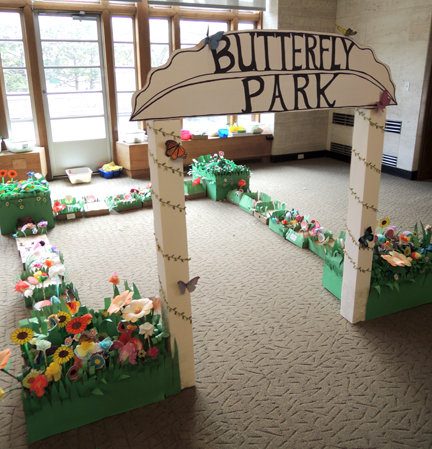
 Four at a time, kids stepped into Butterfly Park wielding toy nets (I found mine in the $1 section of Target). Then Marissa and Joani strewed butterflies down upon them. Well, sometimes there was a little more dropping into nets than strewing…
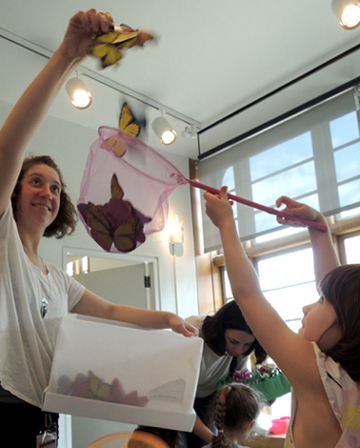 Once kids had caught some butterflies, they gently tucked them into their gardens to take home. Did they have fun? Yes they did! Some kids even stayed 20 minutes after story time ended, just to get in on some more butterfly catching fun!