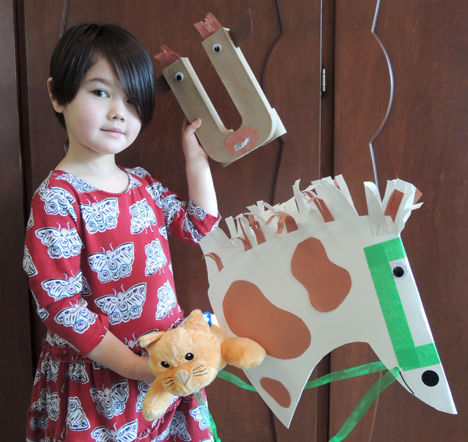
 There’s trouble at the ranch…the letters are getting mixed up and causing a word ruckus! Grab your lariat, jump up on that cow pony (with your stuffed kitty, Kiki), and let’s wrangle the alphabet ya’ll!
We read Lexie the Word Wrangler, written by Rebecca Van Slyke, and illustrated by Jessie Hartland (Nancy Paulsen Books, 2017). Lexi is a word wrangler, taking little words and roping them together into bigger words. But lately, some pretty strange things have been happening at the ranch. Someone is stealing words, putting them in different places, and switching things around. The final straw comes when Lexie goes to sleep under the S-T-A-R-S and finds herself under the R-A-T-S. Looks like she’s got a word rustler to catch, but maybe, just maybe…they can be friends?
You’ll need:
- A stick horse (more on this below)
- A paper mâché or card stock letter (more on this below too!)
- 1 toilet paper tube
- A long strip of poster board
- Yarn
- Hole punch, stapler, scissors, and tape for construction
- Markers for decorating
- Hot glue
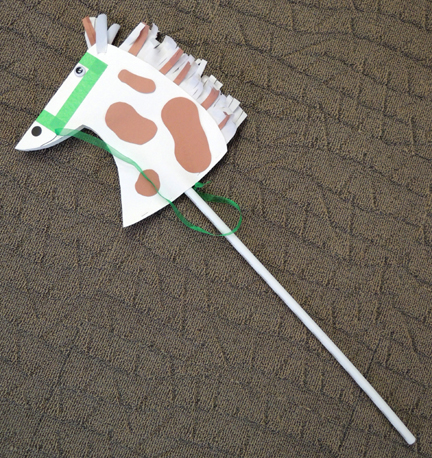
We made our standard story time stick horse for this project…you will find the instructions for it here, in our Show Jumping post. Our only modification was to add some construction paper spots. Our cow letters were also recycled from another project…
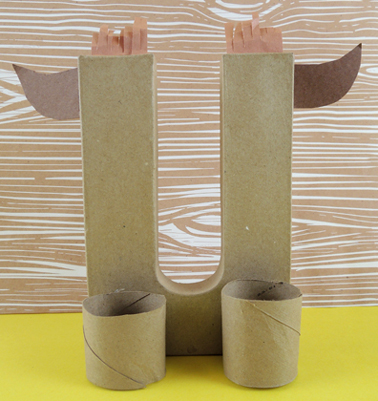
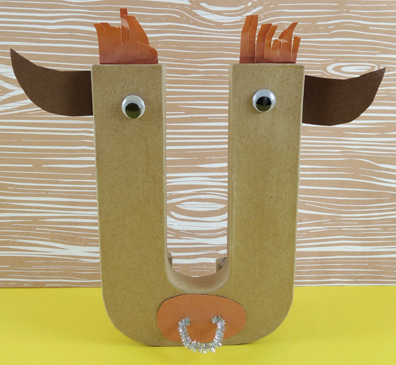 You might recognize the paper mâché letters from the activity we did at our grand gallery reopening. We added paper horns, hair fringes, wiggle eyes, and a sparkle stem nose ring to our cow letters, but you can just go with markers if you like!
The 8″ letter you see above was purchased online from Consumer Crafts. At $2 each they can be a little pricey, so our alternative is to print the card stock vowel template from our Fishing for Vowels post. In order to stand the letters upright, hot glue pieces of toilet paper tube to the back.
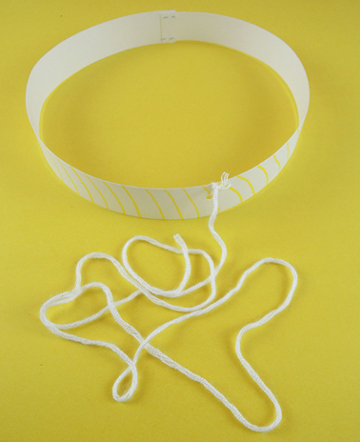
 The final piece of the project is the lariat, and this is very easy. Staple a 1.5″ x 28″ strip of poster board in a circle. Make the circle as wide as possible and definitely using staples, as it gives the lariat some heft when you’re tossing it. Punch a hole in the circle, then knot some yarn through it. Done!
 To wrangle, place your cow letter on the floor, swing up on your stick horse, circle the lariat, then drop it over the letter! Yelling “YEEHAW!” optional.
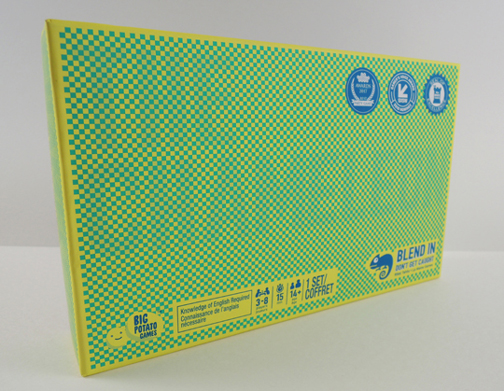 Always on the lookout for literary and word games, I spotted this fantastically stylish box on the shelves of JaZams, our local independently-owned toy store. The game came highly recommended by their staff, and has won several awards to boot. Did it live up to the hype? Read on!
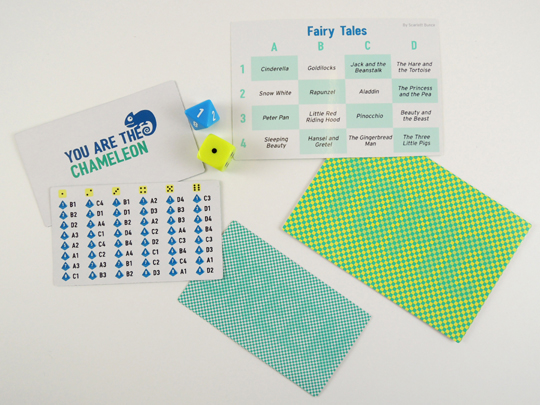 Let’s say there are 4 people playing this round. As you can see below, there are 3 identical Code Cards, but only 1 Chameleon Card. Each player randomly chooses a card and keeps it secret from the other players.
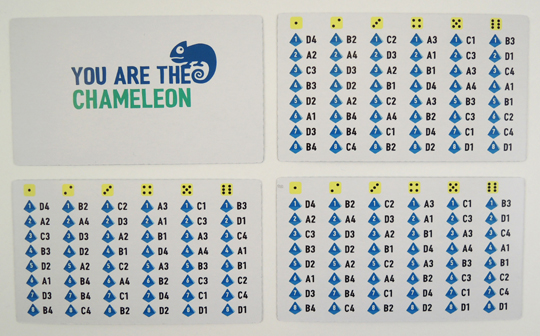 The dealer flips over the Topic Card and rolls the yellow and blue die. Players with Code Cards quietly match the die roll results to the appropriate category of the Topic Card. So, in the case of the roll below, the secret category is “The Three Little Pigs.”
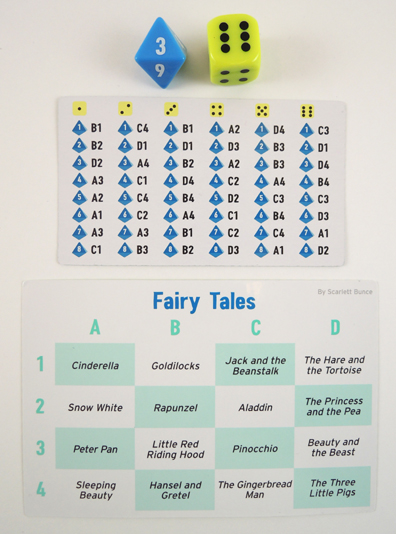 Starting with the dealer, each player takes a turn describing the secret category with one word. But if you are the chameleon, you are faking your little heart out, trying to come up with a word to describe a category you have NO idea about. But you can listen to the other players and wager a pretty good guess, all the while keeping a straight face.
 The game manufacturer’s recommended age range is 14 & up, but we test ran the game with the 9-12 year-olds in Cotsen Critix, our children’s literary society (we just made sure we pulled out some of the more mature Topic Cards, like ones that included the names of alcoholic beverages). After just a touch of trouble with the instructions and locating the secret category from the dice roll, the kids were off and running!
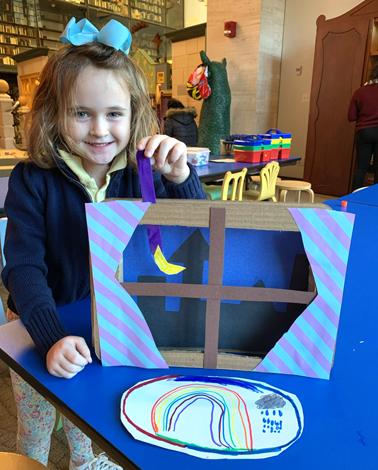
 Storms can be very scary, but this story time project lets YOU be in charge of the clouds, rain, and lightning!
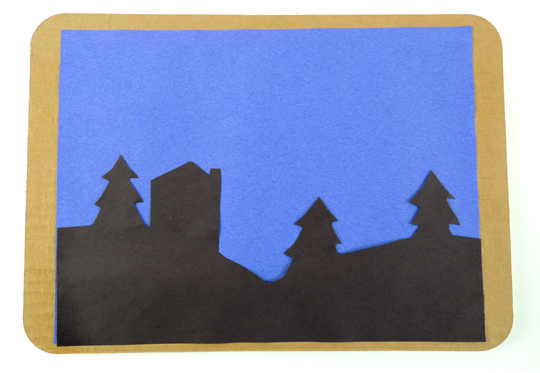 First, glue a piece of blue construction paper to a corrugated cardboard rectangle (we used 9.75″ x 13.75″
 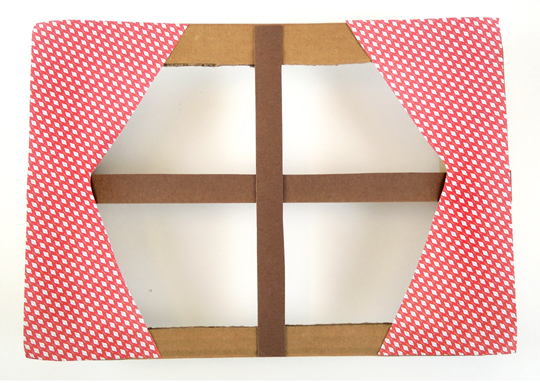 Use a box cutter to cake a window in the second corrugated cardboard rectangle. Then glue or tape 2 strips of poster board to the front of the window (definitely use poster board, construction paper is a little too saggy). Add a pair of optional window curtains. Then flip the front piece over…
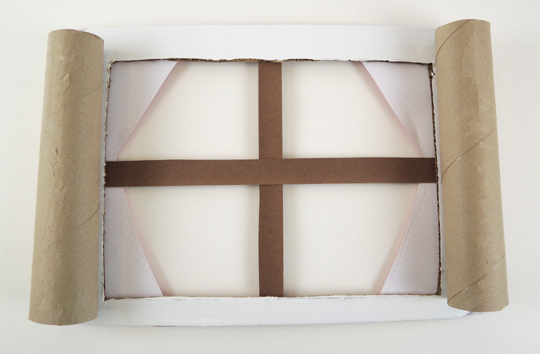 Shorten 2 paper towel tubes so they fit inside the sides of the window, then hot glue them firmly in place (we reinforced the connection with tape as well). Hot glue the tubes to the back piece of the theater. Now there is a gap between the front and back of the theater. This is where you drop your stick puppets! We also hot glued a small box to the very back of the theater to keep it more steady (our box was white, sorry, it’s a little hard to see in the photo!).
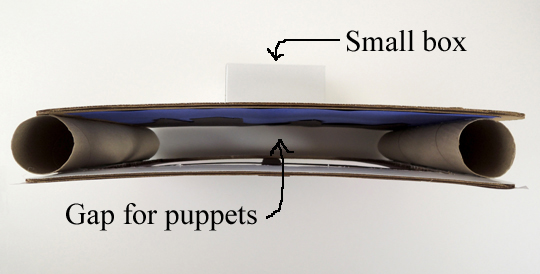 To make the stick puppets, cut a lightning bolt, fringe of rain, crescent moon, and storm cloud from construction paper, then glue or tape them to the bottom of a jumbo craft stick (ours were 8″ long).
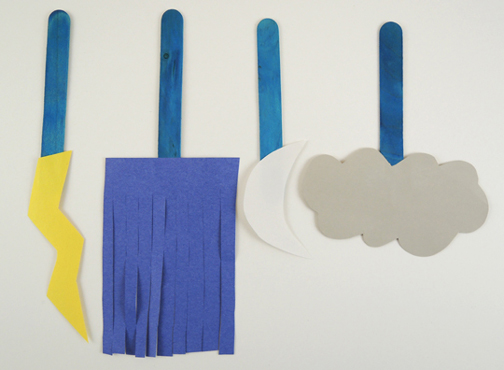 To operate the theater, simply drop the puppets into the gap and narrate the story as storm clouds move in, rain comes, lightning strikes, and the skies finally clear to reveal the moon!