 Always on the lookout for literary and word games, I spotted this fantastically stylish box on the shelves of JaZams, our local independently-owned toy store. The game came highly recommended by their staff, and has won several awards to boot. Did it live up to the hype? Read on!
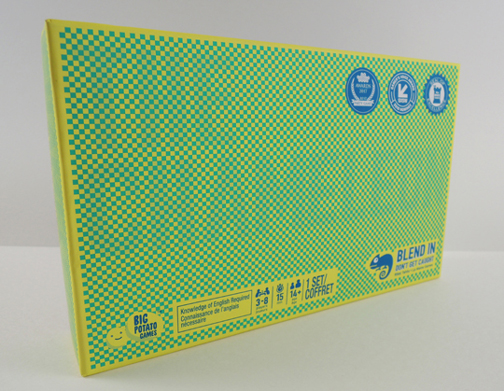
“The Chameleon,” released by Big Potato Games, retails for around $15. It’s a card and category game for 3-8 players. But it’s also a game of deception, because the whole point is to fake out the other players when you are the “chameleon.” The game includes 40 topic cards, 14 code cards, 2 chameleon cards, 2 die, a marker and custom card, instructions, and one super awesome Big Potato Games logo sticker. Here’s a sample of the box contents:
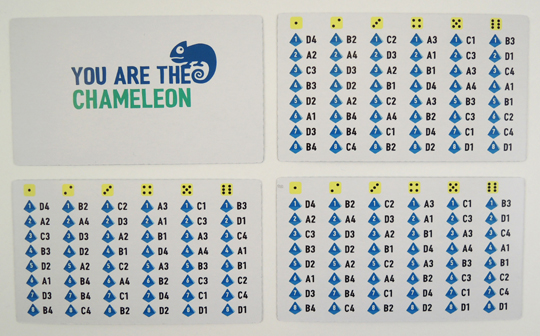
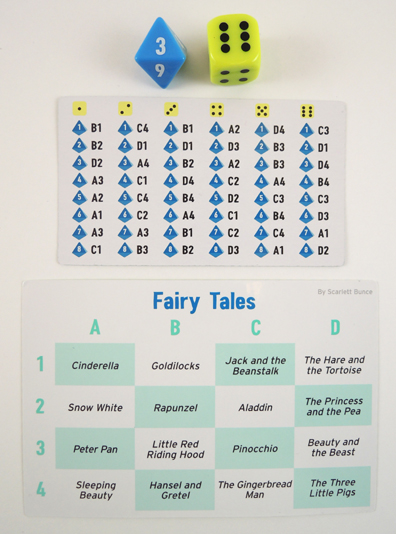
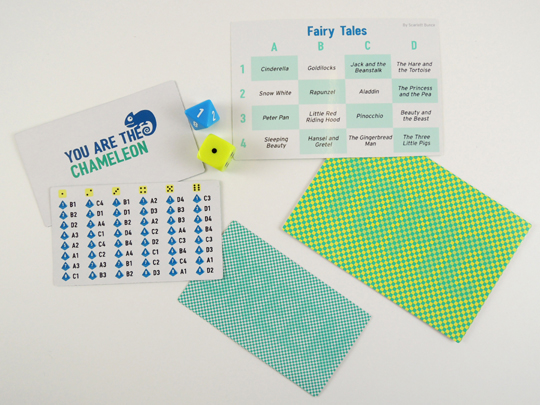 Let’s say there are 4 people playing this round. As you can see below, there are 3 identical Code Cards, but only 1 Chameleon Card. Each player randomly chooses a card and keeps it secret from the other players.
 The dealer flips over the Topic Card and rolls the yellow and blue die. Players with Code Cards quietly match the die roll results to the appropriate category of the Topic Card. So, in the case of the roll below, the secret category is “The Three Little Pigs.”
 Starting with the dealer, each player takes a turn describing the secret category with one word. But if you are the chameleon, you are faking your little heart out, trying to come up with a word to describe a category you have NO idea about. But you can listen to the other players and wager a pretty good guess, all the while keeping a straight face.
When everyone has said a word, the players have to guess who the chameleon is.
Having played a couple rounds, I can say that this game is a LOT of fun! The creative word usage, fake outs, shifty looks, pointing fingers, and increasingly bold accusations make it low stress, non-competitive, and utterly hilarious. The more players involved, the funnier it gets. Bonus…there’s also a blank laminated Topic Card and dry erase marker to make a custom Topic Card!
 The game manufacturer’s recommended age range is 14 & up, but we test ran the game with the 9-12 year-olds in Cotsen Critix, our children’s literary society (we just made sure we pulled out some of the more mature Topic Cards, like ones that included the names of alcoholic beverages). After just a touch of trouble with the instructions and locating the secret category from the dice roll, the kids were off and running!
They liked the various topics, coming up with the description word, and how funny it was to both be, and try to figure out, the chameleon. As one kid so aptly put it “Something is fun about lying to your friends’ faces.” Hah!
The beautiful packaging, clever concept, interesting topics, clear instructions, and devious social nature of this game make it extremely enjoyable. 5 out of 5 stars. Highly recommended!

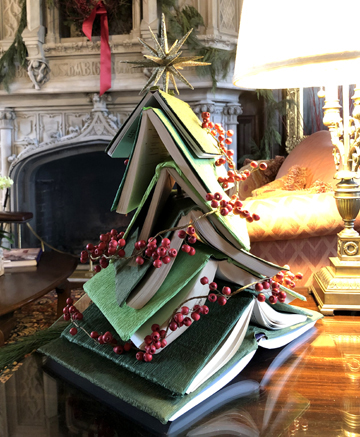 Let me start by saying that Katie selected six OLD books for this project…retired editions that had torn pages, faded covers, and ripped bindings. Because otherwise we would have been cringing during the first step of the project…drilling holes in the spines of the books! Katie used the largest drill bit in the set – a 5/16″ bit to be exact – to drill holes in the center of the books’ spines.
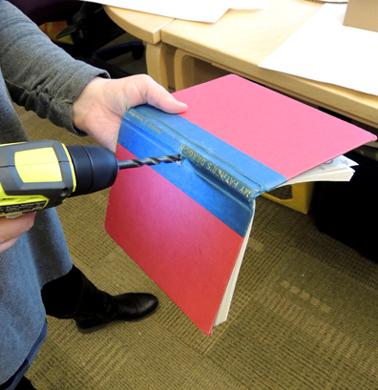 Next, she used a bottle of Mod Podge and a foam paint brush to glue wrapping paper onto the covers of the books. We went all schmancy and bought our wrapping paper from Paper Source.
 While the book covers were drying, Katie construct the tree base. She glued together two, 12″ cake pads, then glued wrapping paper on the top circle. She again drilled a hole in the center of the base, then threaded a cake support rod upwards, through the hole.
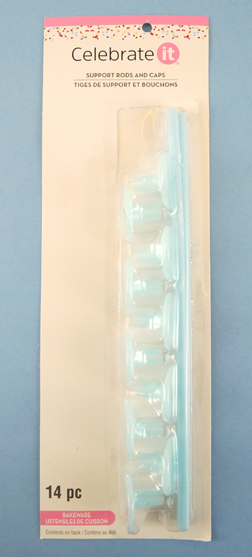 Annnnd here’s the finished base, ready to support some books!
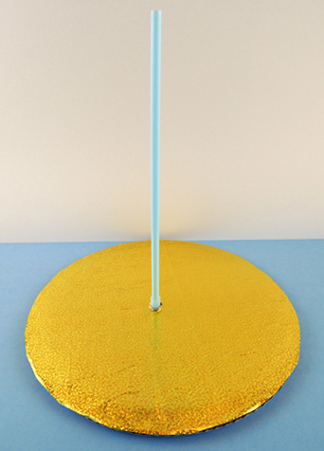 Since the initial holes Katie drilled in the books were covered with wrapping paper, she carefully re-drilled them. Then she threaded the books onto the support rod. Almost immediately, she noticed a problem. The books sagged down the smooth rod and flattening out! Katie quickly fixed the problem by wrapping rubber bands around the rod to brace each book.
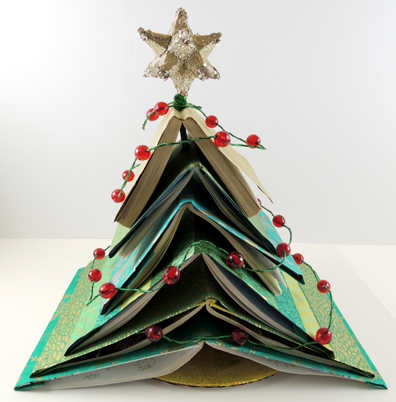
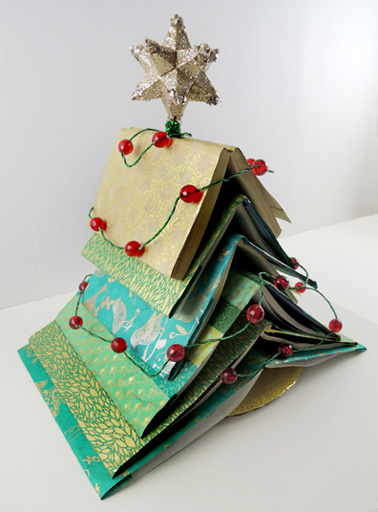
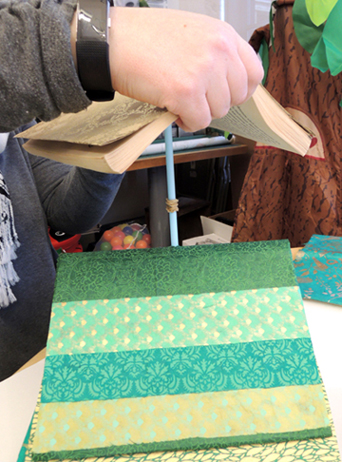 When the books were stacked, Katie added a star to the top. This was a cheap ornament with a sparkle stem wrapped around the ornament’s loop. The sparkle stem was threaded inside the cake support rod, then the star/rod connection was reinforced by a second sparkle stem. Add a strand of lights and you are done!