Hoist the sail and glide down a tin foil waterway! You can race another boat, or simply bob along at your own pace. This project was designed for a story time at my community pool. The project had to be simple, creative, and appeal to a wide age range. Since there were 50 kids at the program, the project also needed to be inexpensive and easy to assemble, with minimal adult assistance.
We also needed a super fun book. And I knew just the one to read!
We enjoyed The Old Pirate of Central Park by Robert Priest (Houghton Mifflin, 1999). In an apartment in New York City, an old retired pirate builds a model of his former ship. Excited, he take the ship to the Central Park Sailboat Pond. The Laughing Dog sails the waves beautifully, and the Pirate is delighted. But then a retired Queen arrives with her ship, the S.S. Uppity Duchess. The Queen’s ship races around the pond, being rude and swamping other boats. When the Pirate tries to put a stop to the rampage, the Queen’s ship opens fire! The Laughing Dog fires back and the “infamous battle of Central Park” begins (very funny, you must read it). Finally, in need of a nap, the Queen declares an end to the battle and proposes a truce. The Queen and the Pirate shake hands and peace returns to the pond. Now the Queen and the Pirate are friends, they enjoy the sailboat pond together – the two “Old Retirates” of Central Park.
You’ll need:
- 4 wine corks
- 4 craft sticks (mine were 4.5″ long)
- 1 wooden bead
- 1 wooden coffee stirrer
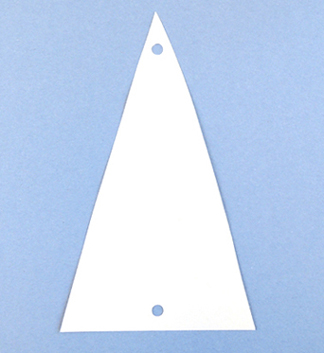
- 1 triangle of white construction paper (mine was 6.5″ tall)
- A selection of color masking tape
- Hole punch
- Scissors
- Markers for decorating
- Roll of tin foil
- Hot glue
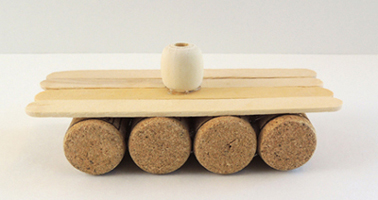
Begin by hot gluing 4 corks together. Then, hot glue 4 craft sticks on top of the corks. Finish by hot gluing a wooden bead to the center of the craft stick deck. Your boat’s base should now look like this:
 We prepped 50 of these boat bases in advance of the program. We also prepped the sails by punching holes in the top and bottom of a triangle of white construction paper.
 I made a dozen extra sails in case some ripped, got dunked the water, got lost in the fray, or someone made a coloring mistake and wanted to start again (and all four things happened at the program, multiple times!).
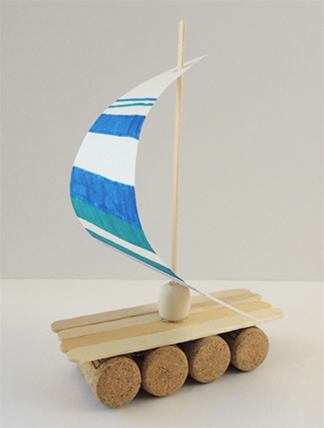
Insert a wooden coffee stirrer into the hole of the wooden bead. If necessary, stabilize the coffee stirrer with hot glue or color masking tape. Make sure to have extra stirrers on hand, in case the first one you grab doesn’t fit into the bead’s hole.
 Decorate the sail with markers, then slide it onto the coffee stirrer
 To make the sailboat’s flag, wrap a section of color masking tape around the top of the coffee stirrer. You can leave your flag square, or trim the sides with scissors to make it triangular.
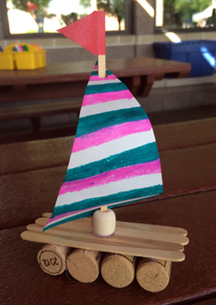
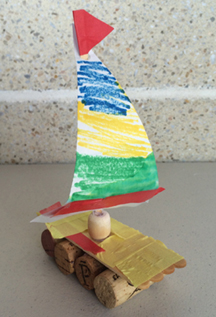
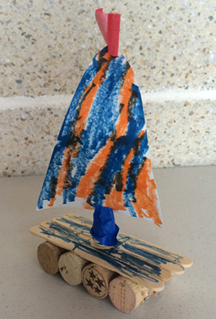
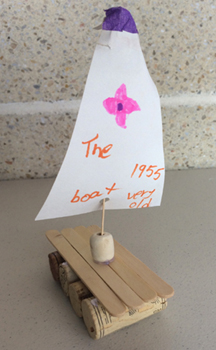
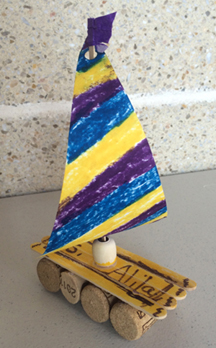
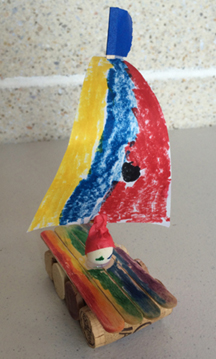
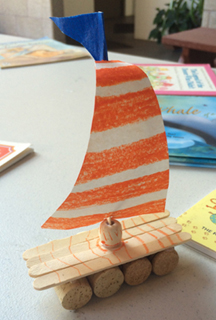
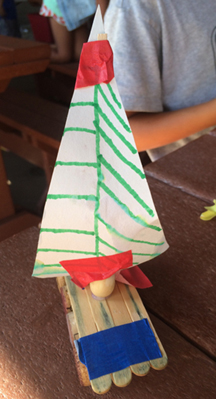
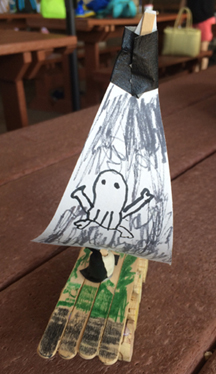
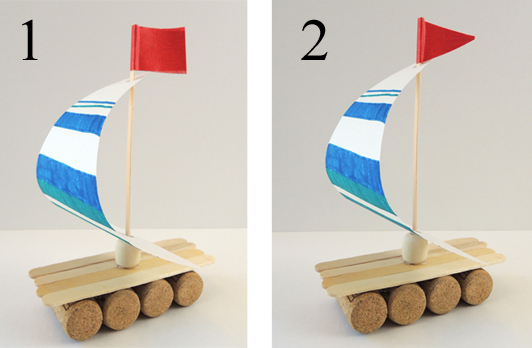 Your boat is finished! I managed to snap a few photos of boats at the program. Look how much personality they have!
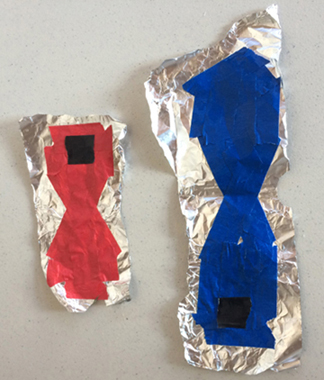
We also had this fantastic non-boat creation…a pair of fish made out of tin foil and color masking tape. Awesome.
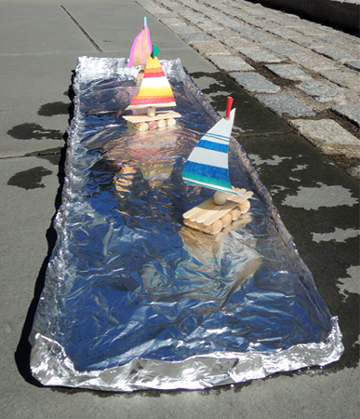
 Now for the waterway! The waterway idea is from FamilyFun magazine (they called it “The Tinnissippi River.” How cute is that?). Basically, you use a whole lot of tin foil to make a long, high-sided tray (I recommend doubling up the tin foil to make it extra strong). Then you fill the tray with water. Our waterway was 10-12 feet long. I didn’t get a good photo of the waterway during the program, so I recreated a shorter version of it for this post:
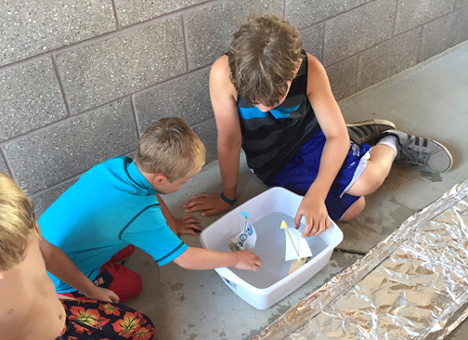
 Alas, our waterway sprung a leak during the pool program. But quick-thinking Katie filled up several dish tubs with water. The kids were just as happy to float their boats in the tubs, so if you don’t want go the tin foil route, just grab a couple dish tubs and set sail. Or haul that old baby pool out of the garage and fill it up!
 If you want to turn this activity into a riveting regatta, give the kids drinking straws and instruct them to use the straws to blow their boats down the waterway. First one to the end wins!