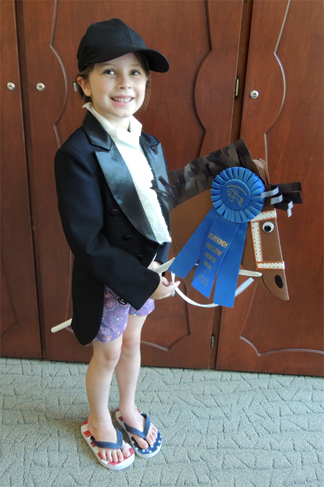
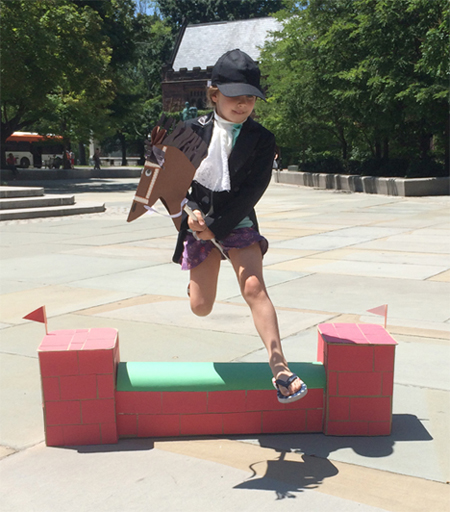
 Saddle up! Today, we’re jumping stick horses over fences at the ultimate story time horse show! When a slew of horse show ribbons were donated to my library, I knew exactly what we had to do. Design a 6-fence course and jump our little hearts out. Scroll to the bottom of the post to see this pair on course, completing a clear round!
We read Scamper and the Horse Show, written by Jessie Haas and illustrated by Margot Apple (Greenwillow Books, 2004). Sisters Anna and Molly are excited about tomorrow’s horse show. But Scamper the pony isn’t too thrilled about being caught and bathed. He arrives at the show with a few brown and green stains, but there’s no time to worry about that – the classes are starting! Unfortunately, during Costume Class, a sudden rainstorm soaks the show grounds. Scamper’s costume (an American flag) leaks all over his grey coat. He’s now a multi-colored mess. But when the judge arrives, she sees a handsome rainbow pony displaying all the colors of horse show ribbons – purple, green, pink, white, yellow, red, and…finally…a blue ribbon for first place!
We made stick horses, affixed good luck charms to our “riding helmets,” and then jumped a course. Waiting at the finish line was a real horse show ribbon to take home!
- A 10″ x 22″ piece of poster board for horse head (we offered brown, white, or black)
- 1 horse head template, printed on 11″ x 17″ paper
- A 9″ x 12″ piece of construction paper for mane (we offered brown, white, or black)
- 2 long strips of poster board (approximately 0.5″ x 6.75″)
- 2 short strips of poster board (approximately 0.5″ x 4″)
- A 32.5″ length of PVC pipe
- Packing tape
- 2 large wiggle eyes
- Hole punch
- A 29.5″ piece of ribbon
- 1 baseball cap
- 1 good luck token template, printed on 8.5″ x 11″ white card stock
- 1 horse show ribbon
- 1 set of stadium jumps (more on these later!)
- Scissors, stapler, glue, and tape for construction
- Markers for decorating
- Hot glue
 We’ll start with your steed! Fold a large, 10″ x 22″ piece of poster board in half. Next, print and cut the horse head template. Lay the template on top of the folded poster board – the horse’s nose should be flush against the fold in the poster board. Cut the head along the template.
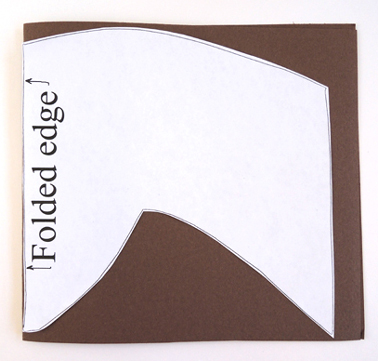 Does this horse head looks familiar to you? That’s because it’s very similar to the stick ponies from this post. These horse heads are smaller (and the sticks shorter) because I wanted to avoid trip hazards while kids were jumping fences. The construction, however, is exactly the same. So I’m going to reuse the instructional photos from the past post here.
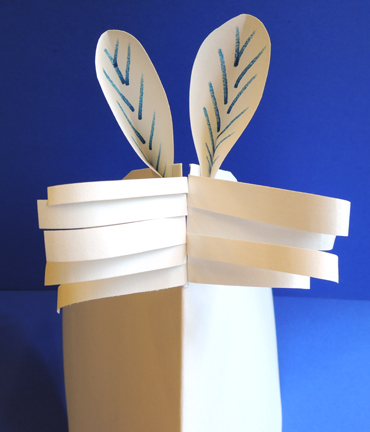
Use scrap pieces from the folded poster board to cut a pair of ears. Color the insides with marker, then staple them at the bottom.
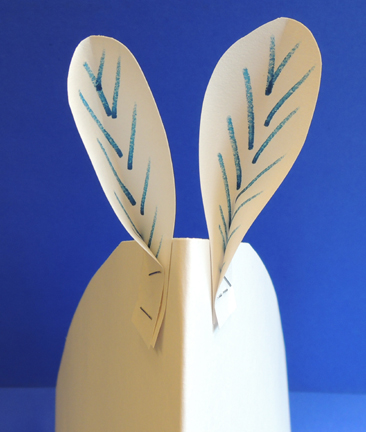
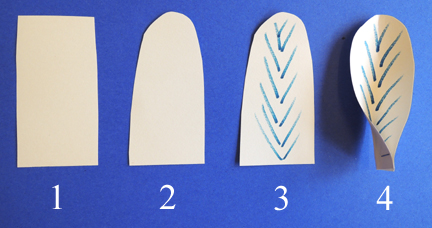 Staple or hot glue the ears on each side of the horse’s head (you can attach them to the outside of the head, as seen below, or the inside the head):
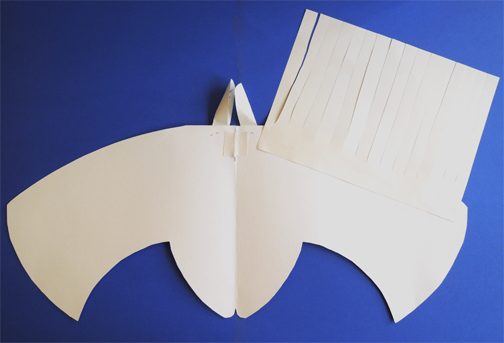
 To create the mane, cut a 9″ X 12″ piece of construction paper in half lengthwise, and fringe the 2 pieces. Cut two, 3″ pieces of fringe off the ends and set those aside (you’ll use them for the horse’s forelock later). Now use hot glue, glue, or tape to secure 1 mane piece to the right side of the horse’s head. Repeat this same step on the left side.
 To create a forelock, make a 1.5″ cut down the fold of the head, directly between the ears.
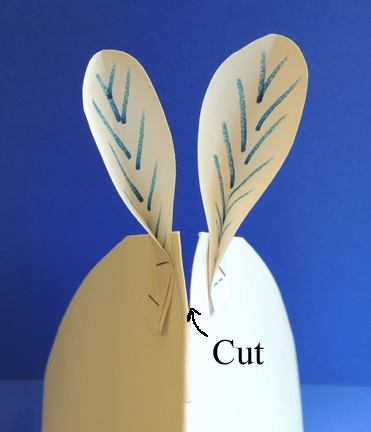 Slide a 3″ piece of fridge into the cut and secure it to the interior of the horse’s head with hot glue, glue, or tape. Repeat the same step on the other side. Trim (or curl) the forelock and mane if needed.
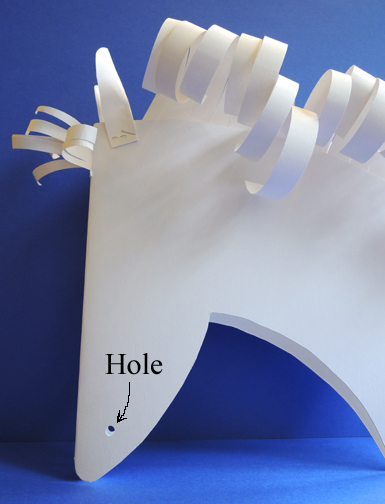
 Punch a hole on each side of the horse’s mouth. This is where the reins will thread through later.
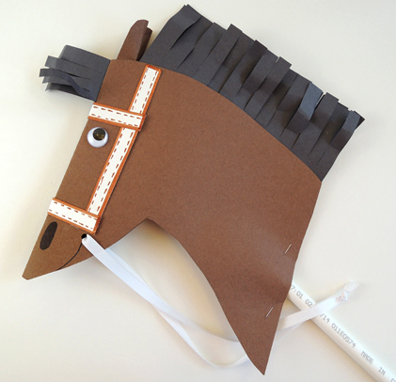
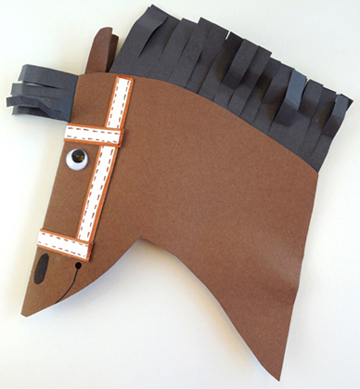
 Time to decorate! Hot glue 2 wiggle eyes to the head and draw the nostrils and mouth with markers. To make a bridle, decorate 4 poster board strips with markers. The longest strips go down the sides of the horse’s head. The short strips fold across the horse’s forehead and nose. You can attach them with tape or hot glue. Here’s what a finished head looks like:
 Next, unfold the head. Lay a piece of PVC pipe on one side of the head, making sure that the end of the pipe is approximately 1.5″ away from the fold. Use packing tape (not regular tape) to attach the pipe to the neck. Use at least 4 pieces of packing tape to make it really secure.
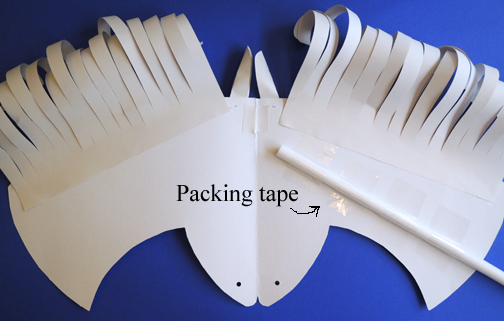 Refold the head and put a few staples into the base of the head, around the pipe.
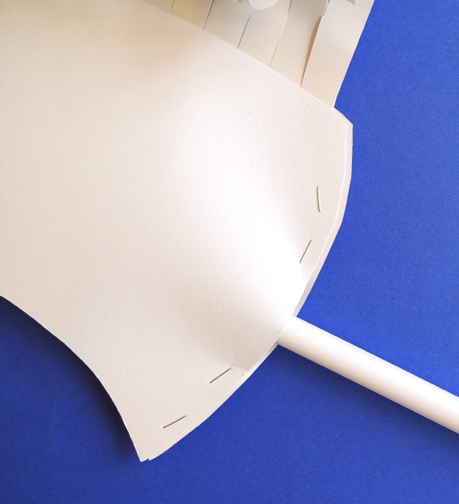 Thread a piece of ribbon through the punched holes, and tie it behind the horse’s head! You’re done!
 We needed to keep the kids busy while we set up the show jumping course, so we handed out black baseball cap “riding helmets” (which I purchased from Oriental Trading Company) and good luck token templates to color. To attach the token, simply fold it along the dotted line, slide it through the back strap of the cap, and staple both sides together.
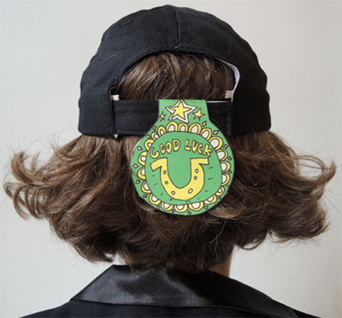 Good luck tokens securely attached. Hard hats on tightly, horses and riders gathered outside the library, where their show jumping course awaited!
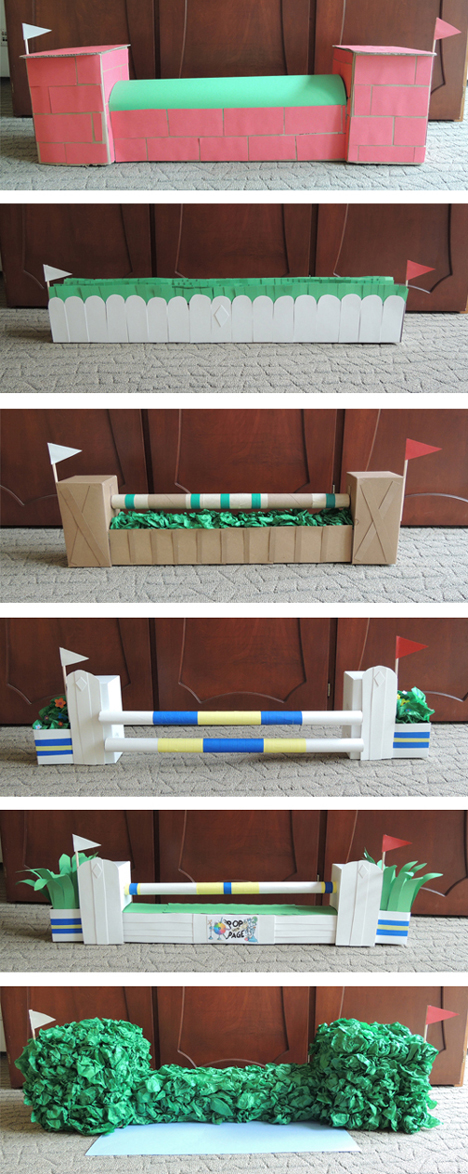 Katie and I constructed these out of various boxes, wrapping paper tubes, tissue paper, poster board, and colored masking tape. I’ll admit, we went a little crazy. Yup, this one definitely ranks up there with the haunted dollhouse in terms of effort and mess. But just look at that topiary water jump folks! Beautiful! At the end of the program, we had a drawing and 6 lucky kids got to take home a jump.
A few practical matters. We kept the height of the jumps very low. The tallest jump (the brick wall) was only 10″ high. The jumps were made out of light material so they would fall over easily if hit (and not stub any toes). Happily, we had no falls and everyone (even the most timid 3-year-old) made it over the jumps with no problem. I had grand plans for an intricate jumping course. But in the end, good sense (i.e. Katie) prevailed and I set the jumps up in an easy-to-follow horseshoe.
On the show grounds, the riders lined up in single file at the starting cones. At the sound of a bell, each rider took a turn jumping the course. When he/she passed the finish cones, he/she got to choose a ribbon. The kids were THRILLED.
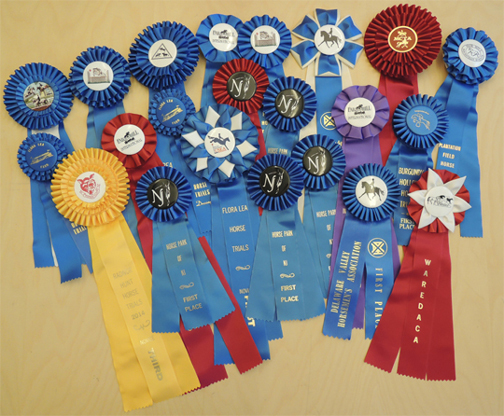 While there were plenty of ribbons to chose from, we made sure to hold one super fancy ribbon back for the last kid riding the course. And now, how about seeing a rider in action?
The black jacket the little girl is wearing is a ring-bearer’s tux. Katie’s son wore it when he was 4 and a half. The lacy stock tie is from a “Colonial Gentleman” costume I wore for a history program. Who knew these items would later become the perfect riding ensemble?

