Rev up this fantastic ambulance stocked with medical equipment…your patients need you, stat! This project is entirely Katie’s brainchild, including the BEST craft stethoscope and syringe the world has ever seen. Ever.
We read Dr. Duck, written by H.M. Ehrlich, and illustrated by Laura Rader (Orchard Books, 2000). Dr. Duck is a very busy doctor indeed, visiting various patients in his big red van. There are weasels with sneezles, hoarse cows, and a moose whose antlers are loose. At the end of the day, however, it’s Dr. Duck who catches a bug and crawls into bed, feeling horrible. His panicking patients rush to his bedside with advise and TLC. Soon, Dr. Duck is back on his feet again, thankful that he has friends who care so much about him.
You’ll need:
- 1 box (ours was 4.5” X 4.5” x 9” – a large tissue box works too)
- 1 ambulance template, printed on 8.5″ x 11″ card stock
- Red, black, and white construction paper
- 1 small piece of bubble tea straw (ours was 2.75″)
- 1 small rectangle of red cellophane (ours was 3.5″ x 5″)
- 1 piece of yarn (ours was 40″ long)
- 1 doctor kit template, printed on 8.5″ x11″ card stock
- Doctor’s kit contents (more on this later!)
- Scissors and tape for construction
- Markers for decorating
- Hot glue
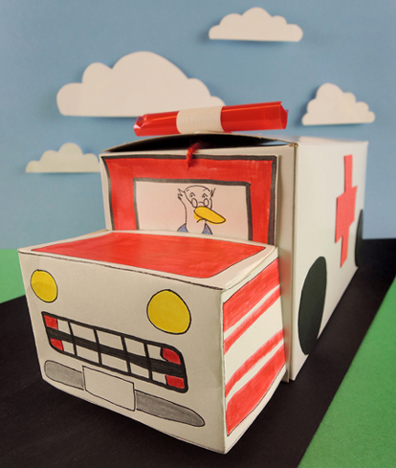
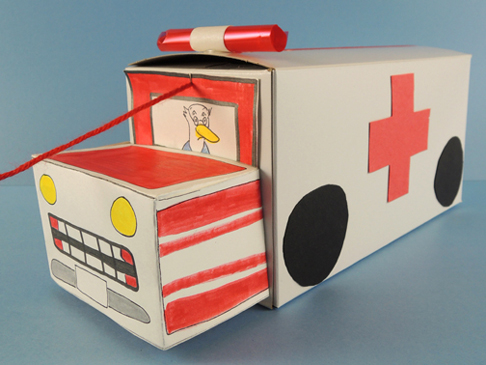 We’ll start with the ambulance! It’s basically a box on a pull string…but look at Katie’s awesome light on the roof! That’s a rectangle of cellophane wrapped around a snippet of red bubble tea straw. Wrap a piece of masking tape or white construction paper around the middle, and hot glue it to the roof. Add a construction paper windshield, wheels, and red crosses for the sides (or draw them on with markers).
The hood of the vehicle is exactly the same as this pickup truck project, so I’ll repeat the steps here. Cut the front of the truck from the template. There are 5 folds you’ll need to make on the template. Each fold is marked with a dotted line. First, fold the 2 tabs on either side of the hood.
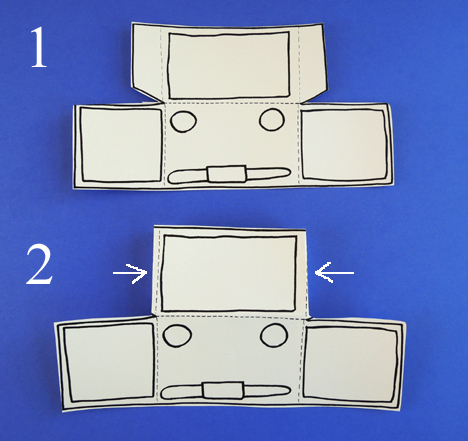 Next, fold the 2 panels on either side of the truck’s headlights.
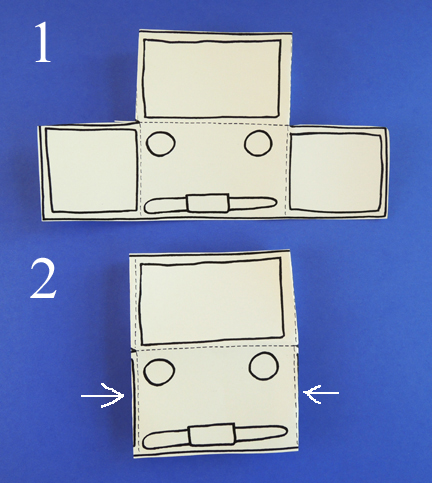 Finally, fold the hood down to meet the side panels, and secure it with tape.
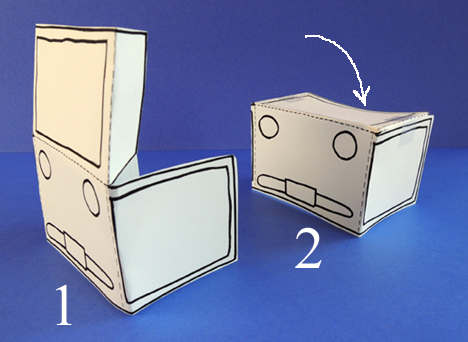 Tape it to the front of the box (use markers to color it before you fold it, or after). Finish the ambulance by attaching a yarn pull string to the front. Up next is all your medical equipment, which gets conveniently stored in your ambulance box.
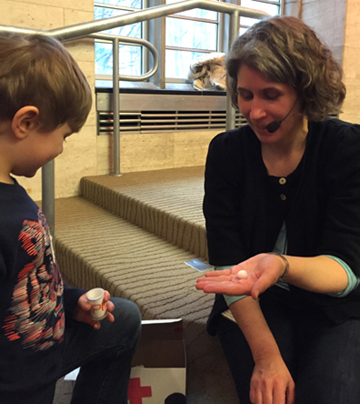
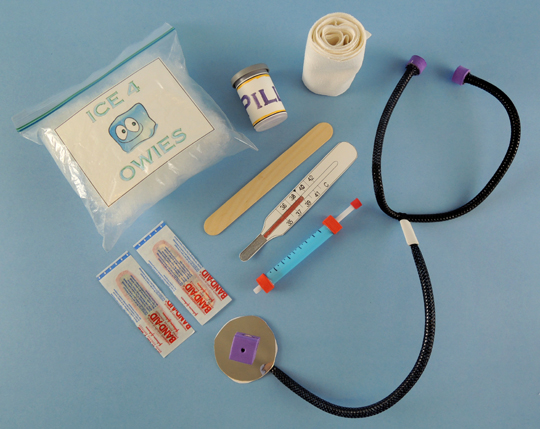 Most of the items in the kit are quick to assemble. The ice pack is polyester fill in a sandwich bag with a template label. The pill bottle is a plastic film canister with mini pom-pom pills and a template label. The bandage roll is cut is from a white tablecloth someone donated, and the thermometer is on the template. A craft stick tongue depressor, a couple real Band-Aids, and you’re set!
Now for the most amazing craft stethoscope of the century. It’s easier to explain it if I label the stethoscope parts with their actual names (I had to look these up – you learn something new every day!).
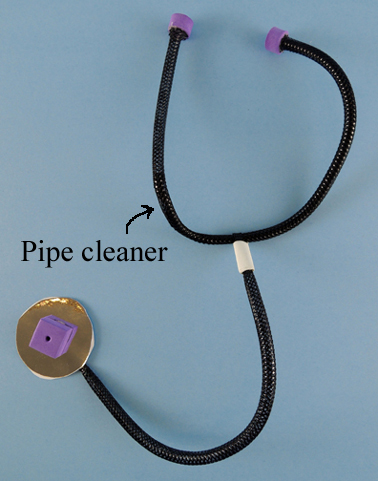
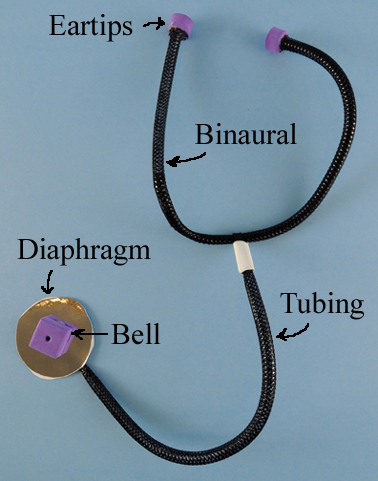 The stethoscope is basically constructed out of of two, 15″ pieces of black mesh tubing. To make the binaural, insert a black pipe cleaner into the center of a piece of mesh tubing, then bend it upwards into a U shape. You can just see the pipe cleaner in the image below.
 Hot glue 2 foam beads to the end of the mesh tubing to create your ear tips. What’s cool is that these actually fit in your ears and stay there, making your stethoscope look all the more fabulous. The dangling tubing part of the stethoscope is the second piece of mesh tubing. The mesh tubing is folded around the binaural, and secured with a piece of masking tape. The diaphragm is a piece of mirror board, and the bell is a foam bead.
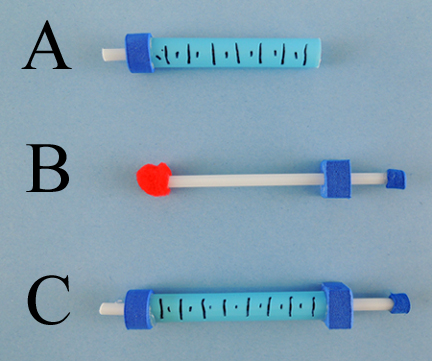 To make the syringe, you’re going to need a 2.75″ piece of bubble tea straw, a 4.25″ piece of balloon stick, a mini pom-pom and 3 foam beads. You’ll need a square foam bead, a round one, and a little itty bitty one (or another round one). Here are the steps:
A. Hot glue the round foam bead to the bottom of the bubble tea straw. Cut a 0.5″ piece off the balloon stick, and hot glue it to the foam bead. Use a Sharpie to add lines to the syringe if you wish.
B. Hot glue an itty bitty (or round) foam bead to one end of the remaining section of the balloon stick. Then slide a square bead up the stick. Make sure the foam bead slides easily up and down the stick. Hot glue a mini pom-pom to the bottom of the stick.
C. Slide the pom-pom into the syringe, then hot glue the square bead to the bubble tea straw. The pom-pom acts as a cushion as you push the plunger up and down in the syringe. It feels legit!
After that, it was time to treat some patients! I must say, I got quite a few treatments that day. Some pom-pom pills…
 Lots of bandaging…
 And LOTS of shots…
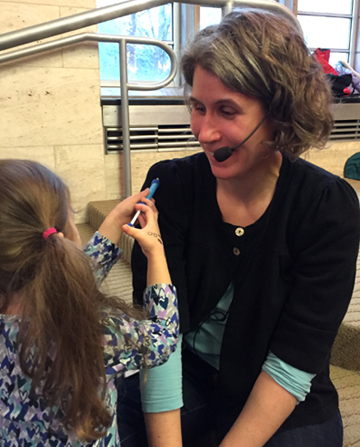 At one point, six kids were crowding around me, administering shots. I was a very, very, healthy person by the end of story time.

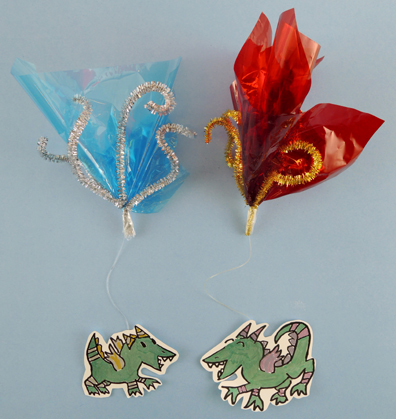 Fold 2 sparkle stems into a V shape, then tape them to the bottom of a bunched 10″ x 10″ square of cellophane, Secure with tape. Knot one end of a 10″ piece of clear beading cord around the bunch, then secure with tape. Repeat these steps to create a second firework. Color and cut the mother and baby dragon from the template, then tape them to the free ends of the firework cords.
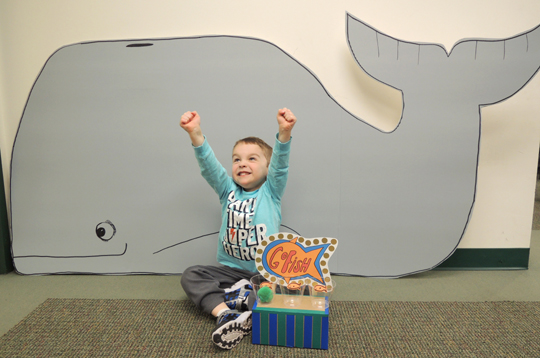
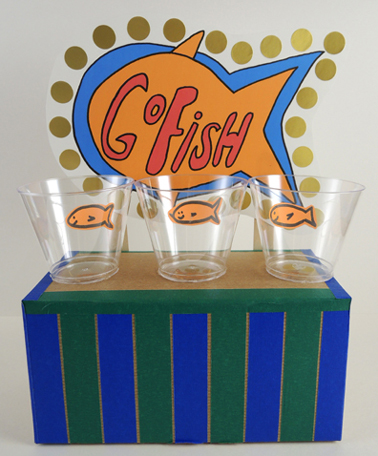
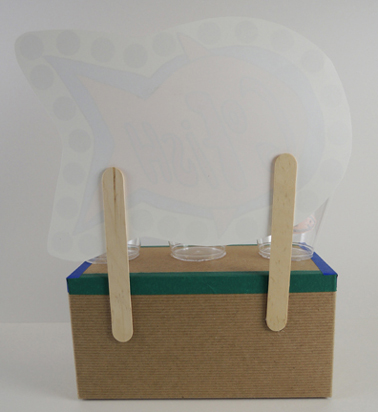 The “ball” for the game was a jumbo pom-pom, but ping pong balls or crumbled paper works too! To play the game, toss the ball into the cup. But what do you win? A WHALE!
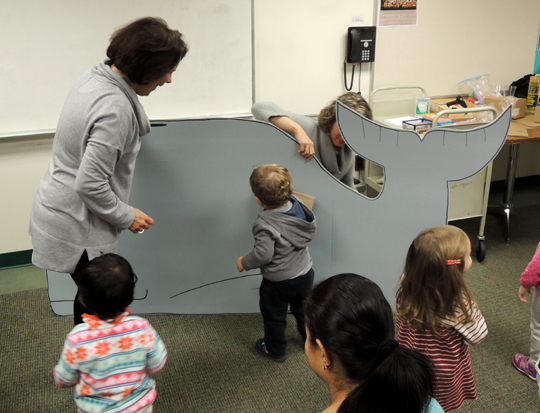 We snagged a big flat of grey cardboard from library recycling, and Katie turned it into a fantastic whale. Like the book, kids were expected to take care of the whale. They took it on a little walk, wiped it clean with a cloth, and scooped its poop (i.e. brown jumbo pom-poms)! This part of the program was great for building physical skills – balancing, circular hand motions, scooping. Check out this pro at work:
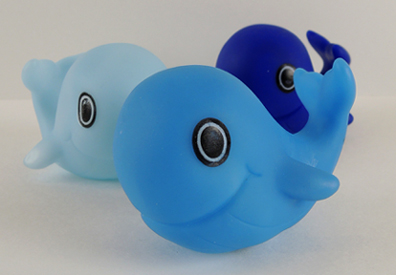 If you’re wondering why our story time area doesn’t look quite the same as