
 You love books. You think it’s a clever idea. You’ve picked it up while shopping and mused over it a dozen time. But each time you put it back, thinking…do those make your own book mail-in kits really deliver the goods? Well, ponder no more! Today, we’re reviewing the IlluStory Make Your Own Book kit by Lulu Jr.
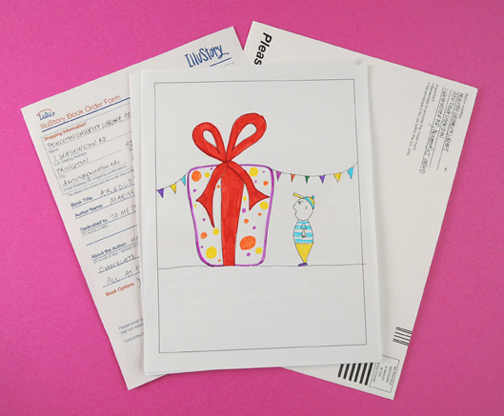
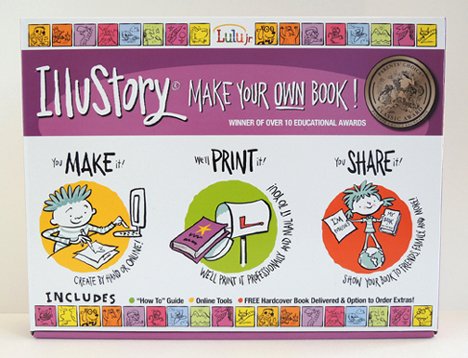 The kit retails for around $20 – $30. It includes 10 washable markers, 20 blank book pages, 2 blank cover pages, a mailing envelope, and detailed instructions. It also has multiple prompt sheets to get young writers going (including – and I really liked this – nonfiction stories and biographies). The kit price includes the production of your book and shipping costs from, and back to, your house (USA only). The final product is a 7.25″ x 9.25″ hardcover book with an illustrated story that is a maximum of 18 pages long.
 Getting started, you have two creation options with this kit: 1) Draw the book by hand; or 2) Design it online using templates, backgrounds, and digital stickers (you can also upload drawings and photos). We went as low tech as possible and chose to create the book by hand. The 8.5″ x 11″ story pages have a big box for illustrations, and 5 lines for text. Since your story can’t be over 18 pages, there are a couple of extra pages, just in case you mess up.
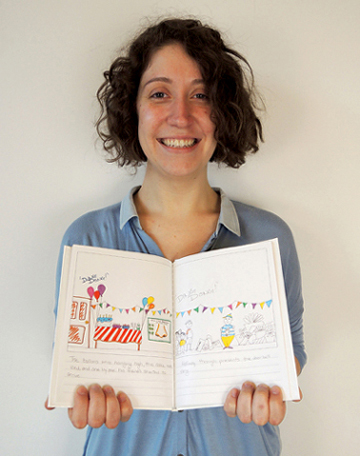
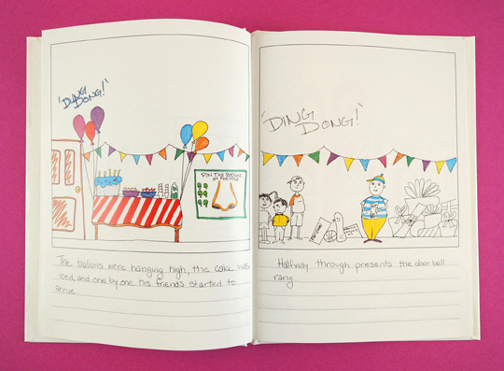
Marissa bravely agreed to write and illustrate a story she titled Arnold’s Birthday Party. She reports that the markers were “awesome.” IlluStory recommends using dark pencil or pen. Marissa used ballpoint pen for her illustrations and text, which worked just fine.
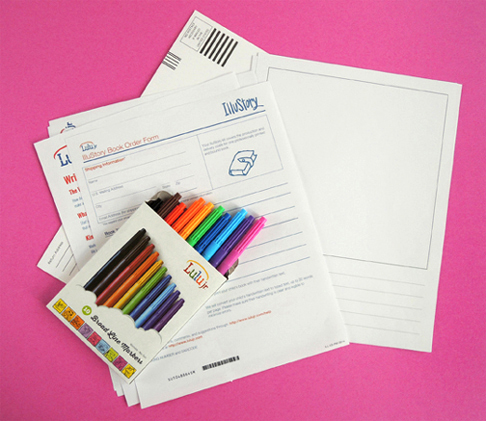
 When the book was finished, we turned to the order form. Here, we were presented with two options: 1) Produce the book using your handwritten text; or 2) Have the company convert your handwritten words to type (but there is a 20 word per page limit, and they don’t correct spelling or edit). We went with hand lettering.
Make sure you read the kit instructions and the order form carefully! Because otherwise you might miss that you need to number the pages, in pencil, on the back of each page (otherwise, they’ll just print them in the order received). You need to write “Cover” on the back of your cover page. And you definitely don’t was to miss the free options to add a dedication page, or author photo and bio on the back of the book!
Ready to send it off? You have two options: 1) Send it via snail mail in the prepaid envelope; or 2) Upload scans of your cover and story pages to the IlluStory website. We stayed low-tech and went with snail mail.
 IlluStory say the books are printed less than 2 weeks from the date received, and ship 3-5 days after printing. They were right on the money. In just under 3 weeks, Marissa’s book was back. It looked fantastic.
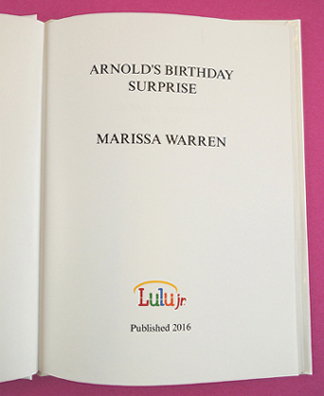
 I was worried that the binding might look cheap. Nope. This is a real, honest-to-goodness book. Glossy white cover, crisp printing, text well clear of the binding margins. The author photo we sent was reproduced nicely. They even put the title and author’s name down the book’s spine! There’s a title page too. It looks really cute:
 You also have the option to purchase additional copies and send them to your adoring fans (copies of our book, for example are $14.99). You can order multiple copies in advance, or use the info printed on the back of the book to order copies later.
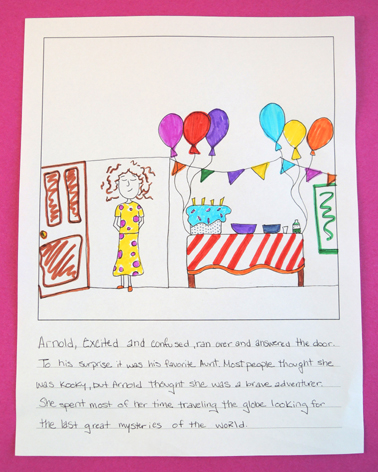
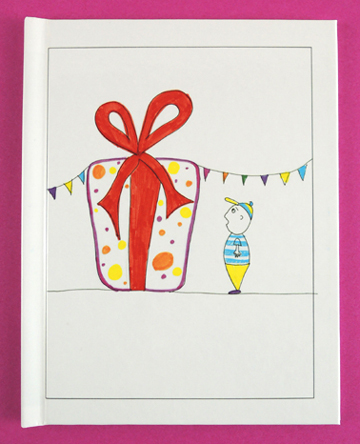
Beware, however. The production on this kit is quite literal. If you did what I did, and fill out the dedication and author bio in ALL CAPS on the order form, the production team will put those in ALL CAPS IN YOUR BOOK. Also, remember to write the title on the cover of your book. They don’t do that for you. Marissa’s book cover is missing a title, but it sort of adds to the mystery of the big package, doesn’t it? What’s in that big package anyway?*
 In summary, the IlluStory Make Your Own Book kit is terrific! It’s easy to put together with really nice, professional-looking results. Make sure to read all the instructions and fine print and remember – what you send is exactly what is printed. If you know an aspiring author or illustrator, or are looking to create something special for someone, this kit is a sure bet.
*Spoiler alert. Inside the present is a colossal spider – a gift from an eccentric aunt. The spider runs rampant through the town, swatting helicopters, before Arnold shuts it down with bug spray.
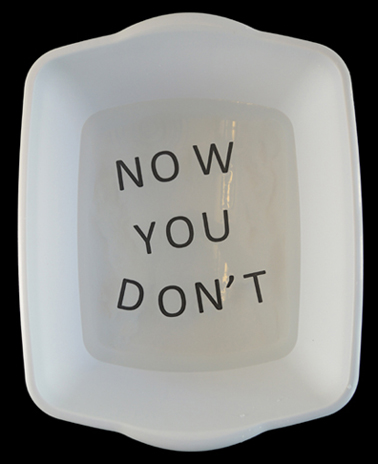 This paper disappears in water before your very eyes, leaving the letters floating free. It’s the ultimate aqueous word scramble!
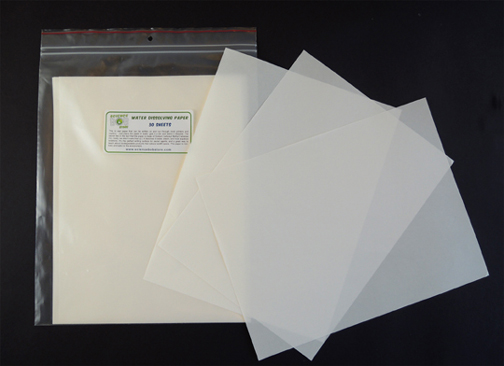 The paper is about half the thickness of standard office printer paper, but it went through both of our office printers and the copy machine with no tearing or jamming. Granted, I was just printing 1 sheet at a time. I did try 3 pages in a row on our most trustworthy office printer. Unfortunately, it had trouble grabbing the thin paper and actually missed the final sheet of the print job entirely. I was waaaay too chicken to try multiple sheets in the copy machine.
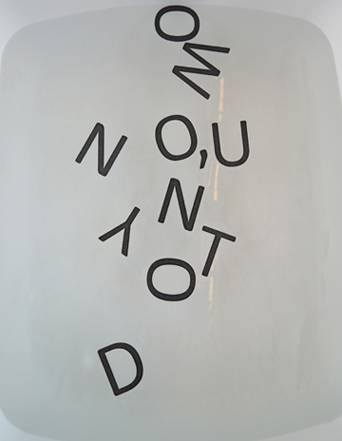 Second test, copy machine. The letters printed considerably lighter on the page (this was a toner thing with our copier, not the paper). But that didn’t impair the letters from floating on the water like little alphabet ducks!
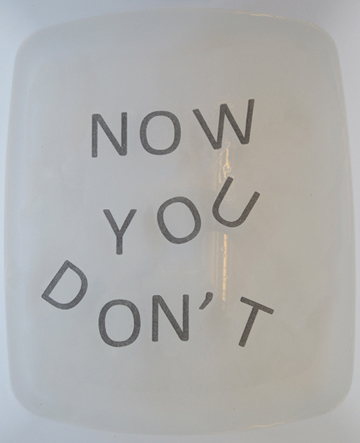 So our laser jet printer and the copy machine worked. What didn’t work? Our inkjet printer. First of all, it blotted the paper during printing…
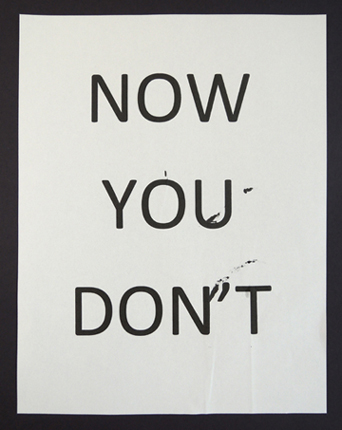 And when it came to the water test, the letters just disintegrated:
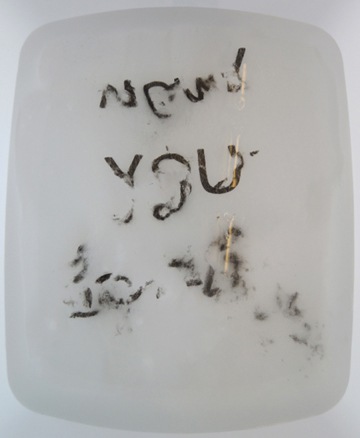 The same applies for Sharpie permanent marker:
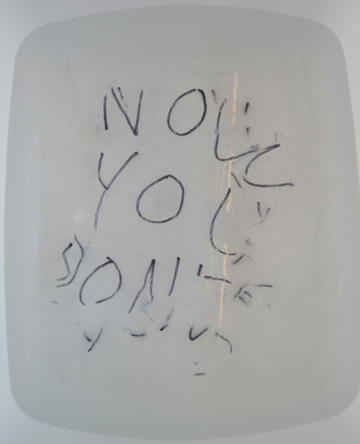 Roller ball ink and ballpoint ink also broke apart. The ballpoint ink shredded immediately (you can just see the sentence “Will ballpoint pen work?” at the bottom of the image below). Roller ball, I am surprised to report, held out a little longer.
 It was sort of cool. The roller ball ink blurred, sunk a little, and then just hung in the water. Eventually, however, the roller ball ink went the way of the ball point, Sharpie, and inkjet. It dissolved into a black smudgy mess.
 But no matter where you’re dissolving this paper – a dish tub or a commode – the letters do float apart very quickly. So leaving a secret message for someone isn’t really going to work (unless they’re standing right next to you and reading quickly). But this would be a fantastic way to introduce the concept of the anagram. Or jump-start a discussion about biodegradable materials. Or, just experience the fun of watching a sentence you’ve written slide apart and swirl across the surface of the water. Magic!
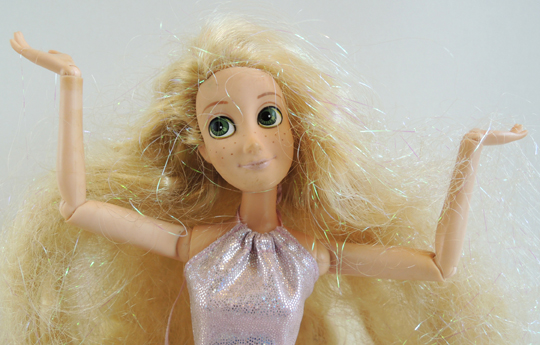 Rapunzel! Rapunzel! Let down your hair…GAAAAAAAAAAAH!
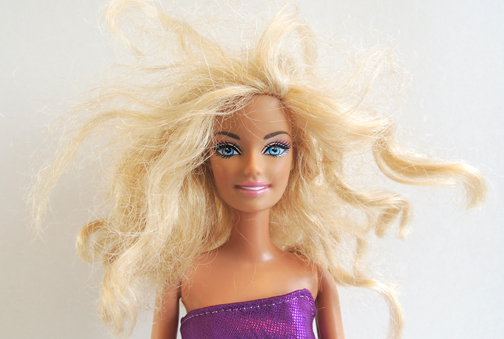
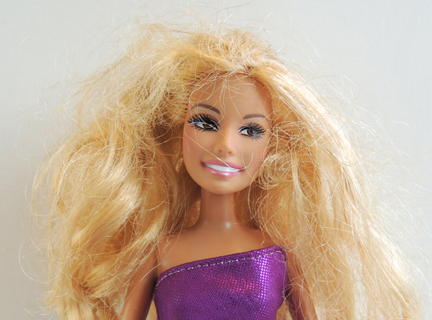
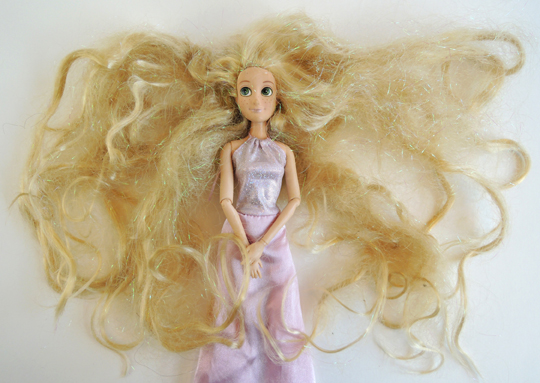 Whoa! What is this snarled, knotted, mess? Sigh. Our children’s dolls come out of the box looking so perfect. But somehow, over the course of a few weeks, their hair slowly begins to revert to a feral state. Eventually, a severe scissor intervention is required. But is a dramatic haircut really necessary? Or is there a magic recipe for working out those knots? We decided to tackle six of the Internet’s most popular methods for getting Rapunzel’s hair a little less, well…Tangled.
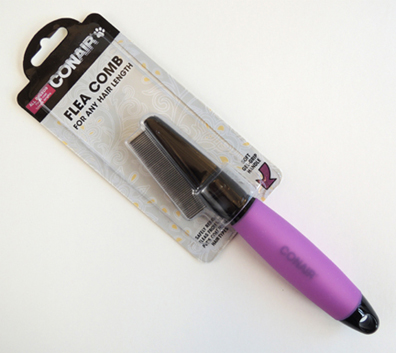 To find testing subjects, I went to the local thrift store. There, I found plenty of dolls who were having bad hair days, including Rapunzel. Then it was on to research and supply acquisition. For detangling, we decided to try spray-on detangler, fabric softener, regular hair conditioner, and white vinegar. For curling, we tried drinking straws,
 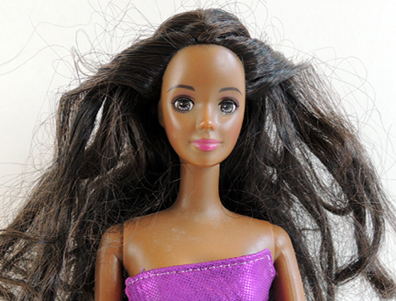 First, I thoroughly covered the doll’s hair with spray detangler (purchased from the baby care section of Target). Then, I used a plastic comb to work on the knots, brushing from the bottom of her hair and working my way up. My first piece of advice – make sure you hold the doll’s head tightly. Otherwise, it could pop right off! My second piece of advice – don’t use a plastic comb. It doesn’t work. In fact, I broke a tooth off mine and had to dig through the mess of her hair to find it. Phew! Eventually, I laid the doll’s hair flat on the counter and really tore into it with the comb. The knots came out, but so did chunks of her hair!
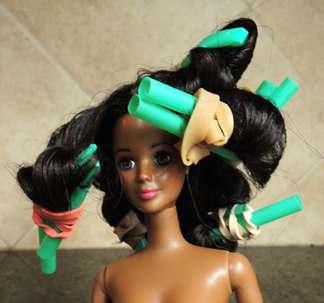 I had read that dunking the hair in hot water would lock in the curl, so I dunked the doll’s hair. Note! Be careful when you remove the doll from the water, because hot water gets into the straws and can dribble out, giving you a nasty burn. I let the hair air dry with the straw curlers in it. And…the results were great! Smooth, untangled hair with lots of soft curls.
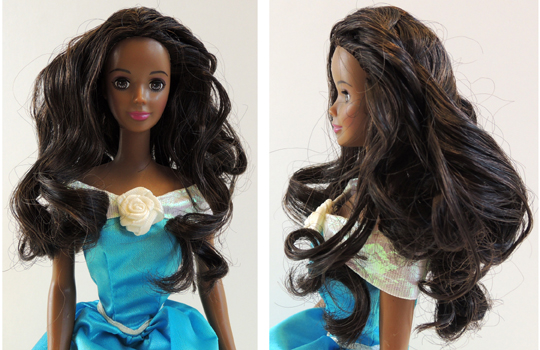
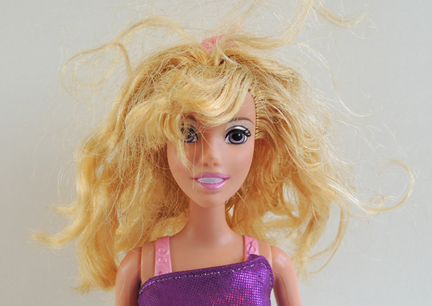
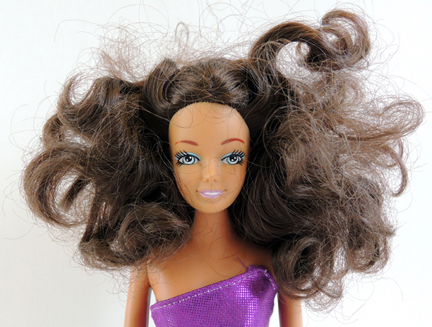
 I’ll start by saying that this doll’s hair was SUPER knotted. I didn’t think I was going to get any of the tangles out! I filled a plastic cup halfway with warm water and added a tablespoon of fabric softener (Mrs. Meyer’s Natural). Then I soaked the doll’s head in the mix for a minute or two, swirling her around to make sure her hair was completely soaked. This time I used the flea comb. It was much better than the plastic comb, but her knots were still pretty crazy. So I dunked her head in fabric softener again. It was much easier to comb after that! Finally, the knots were out, and her hair was thoroughly rinsed. Unfortunately, the doll lost a significant portion of her hair during testing, leaving parts of her scalp visible. She also lost an earring. Huh.
 I rinsed the doll’s hair under warm water, then added regular hair conditioner (Alba Botanica’s Hawaiian Coconut to be exact). Using a quarter-sized amount, I massaged it evenly through her hair. Then I started combing with the flea comb. It worked well, but pretty soon the conditioner and the loose hair make a kind of paste, which was really gross. I was happy when I finally got to rinse it out. Interestingly, this doll did not experience as much hair loss as the previous 2 dolls. Maybe it was because her hair was much shorter? In the end, her hair turned out puffy and soft. Maybe a little too puffy. It necessitated a binder clip in the back to get the wave under control for her reveal photo.
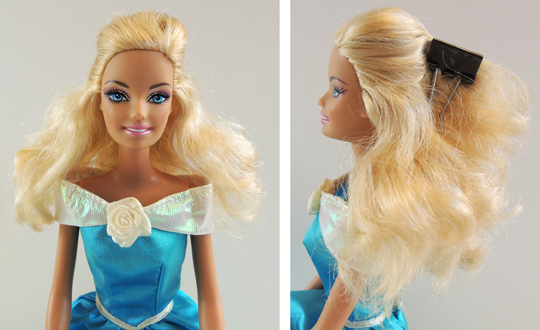
 This doll had greasy hair (ewwww!). I’m thinking a previous owner had put some product in it which left it quite unpleasant to touch. I thought she was the prime candidate for a white vinegar treatment. Hoping to dislodge some of the goop, I let her hair sit in very hot water for a few minutes. Then I used the flea comb to get the knots out.
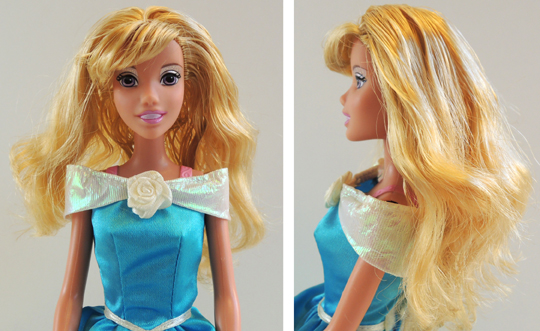
 I decided to not use any product on this doll’s hair. I just dry combed it with the flea comb. It was a bit challenging. If you use this method, I recommend laying the hair flat on the counter and working from bottom to top. Once the tangles were out, I decided to curl it using fatter
 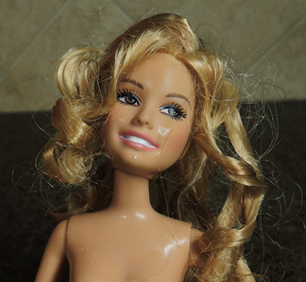 Yes, it worked! Even soaking wet, the hair was curled. It held its curl while drying too!
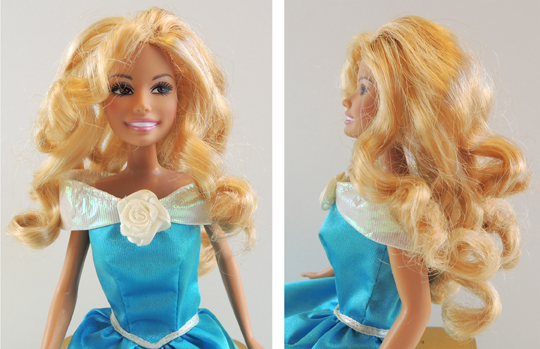
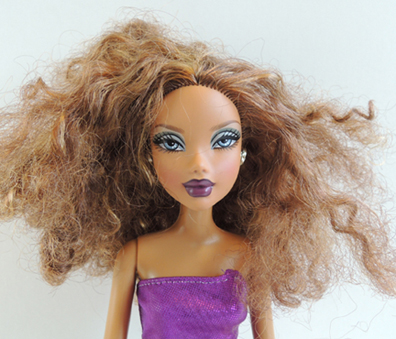
 The curl results from Method #1 and Method #5 got me wondering about the radius of the curlers and the sort of curl it produced. So for my final doll, I decided to do a side-by-side comparison. For the wide curls, I decided to try something firmer than bubble tea straws. This time, I used fat Crayola markers.
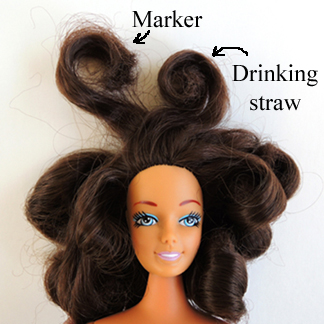 She definitely had lots of body to her hair, so we brought out the binder clip once again.
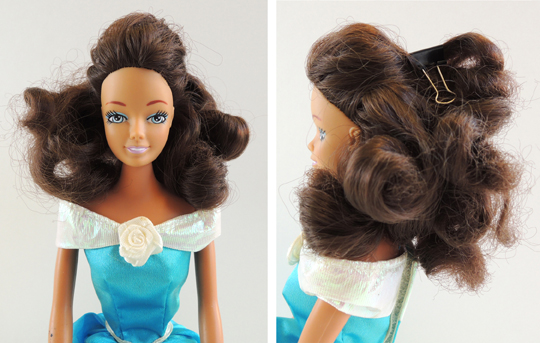
 Since her hair was 15″ long, I decided to use markers to curl it (I also read good things about using
 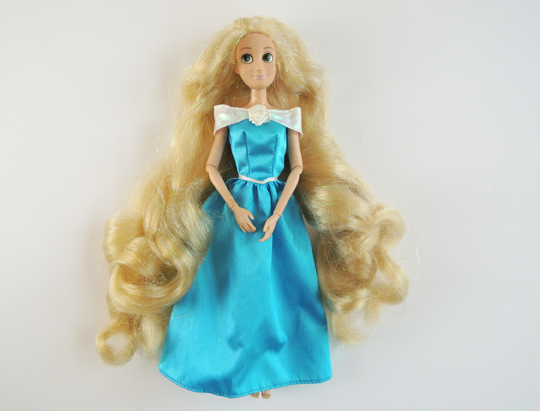 TA-DAH! You know, I think she looks pretty good! Sure, she lost a lot of hair, but there’s still enough left to climb a tower!