
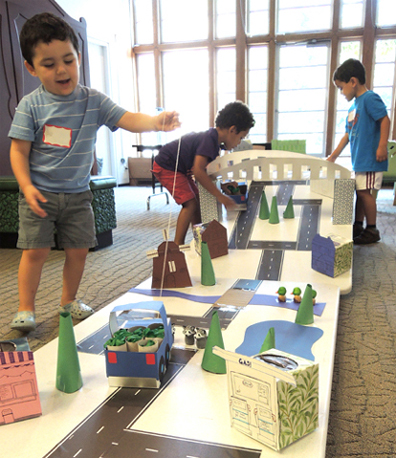
 Hit the road in a totally stylin’ pull string truck. Your mission? To deliver produce to the city market. But first, you have to navigate a 12 foot obstacle course packed with trees, animals, buildings, water, and bridges!
We read Little Blue Truck Leads the Way, written by Alice Schertle, and illustrated by Jill McElmurry (Harcourt, 2009). Little Blue Truck is heading to the city to deliver some fresh country produce. But the city is a lot bigger, faster, and unfriendlier than Little Blue expects. A bus bullies, a grocery truck shouts, a police car wails, and a street sweeper hollers. Suddenly, the limousine carrying the mayor breaks down, creating a terrible traffic jam. But when conscientious Little Blue offers to give the stranded mayor a ride, the traffic jam turns into a delightful procession through the city, ending at the grocery store just in time for Little Blue’s delivery!
You’ll need:
- 1 box (mine was 4 ½” X 4 ½” x 6” – a small tissue box works too)
- 1 pickup truck template printed on 8.5″ x 11″ card stock
- 4 circles of black construction paper (approximately 2.5″ in diameter)
- A piece of string (approximately 24″ long)
- 1 mini craft stick
- 2-4 toilet paper tubes
- 2-4 rectangles of green tissue paper (mine were 9″ x 12″)
- 1 roadway obstacle course (more on that later!)
- Scissors and tape for construction
- Markers for decorating
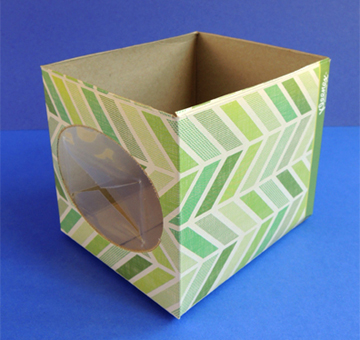
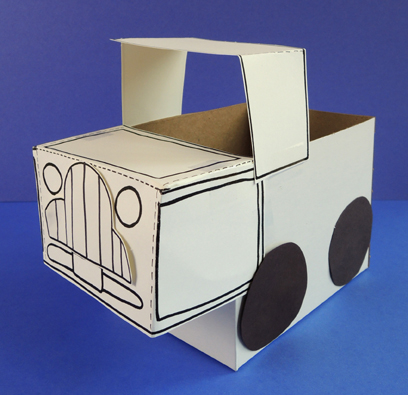
 First, the pickup truck! I used a craft box with a lid, but I’ll also demonstrate how to use a small tissue box. If you’re using a craft box, begin by cutting the lid and tabs off the box. If you’re using a small tissue box, turn the box on its side and cut the side off.
 Set the box aside for a moment. Cut the front of the truck from the template. There are 5 folds you’ll need to make on the template. Each fold is marked with a dotted line. First, fold the 2 tabs on either side of the hood.
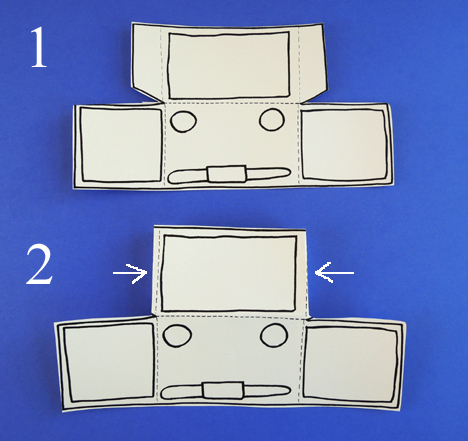 Next, fold the 2 panels on either side of the truck’s headlights.
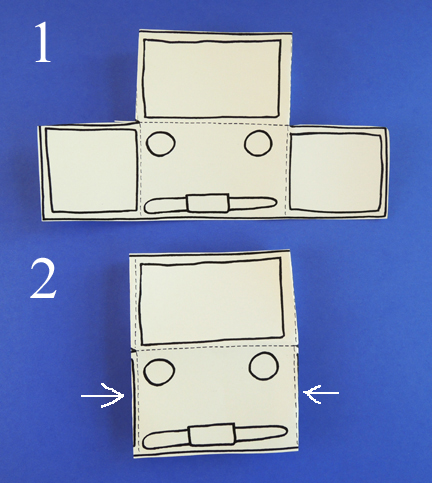 Finally, fold the hood down to meet the side panels, and secure it with tape.
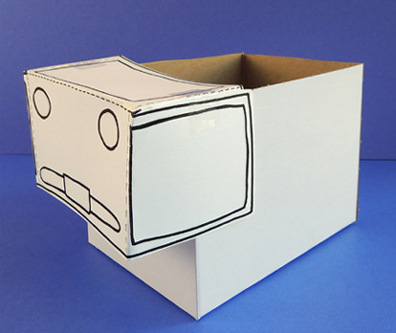
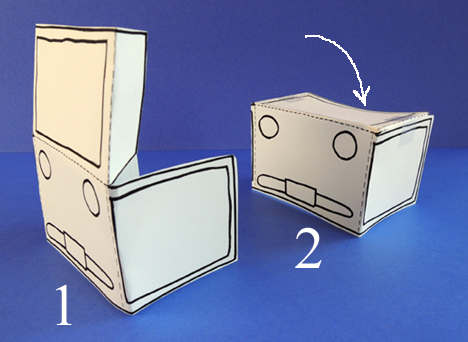 Tape the front of the truck to the front of the box like so:
 Here’s the tissue box version. As you can see, this results in a slightly shorter (but still very serviceable) truck.
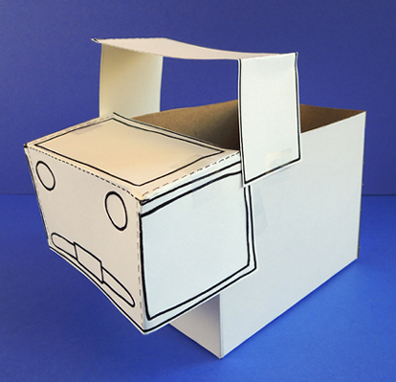
 Next, cut the roof piece from the template. Fold along the dotted lines and tape the roof to the top of the box.
 Draw some lines on the grill template, then tape it to the front of the truck. Finish by taping black construction paper wheels to the sides. Make sure the wheels don’t extend past the bottom of the truck!
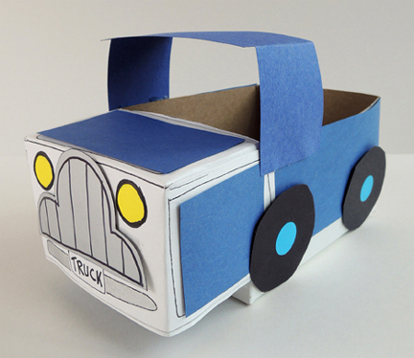
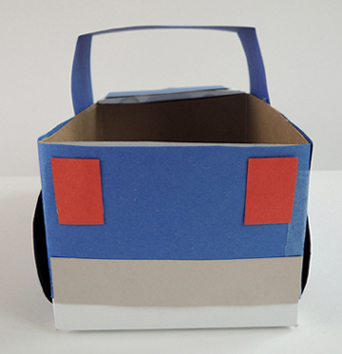
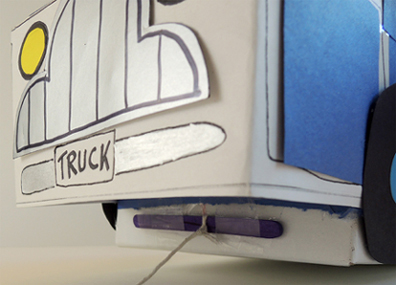
 That’s the basic construction, but there are a couple variations on it. You might, for example, want to wrap the box with construction paper first. Also, we traced roof and grill templates onto different paper. Our roof was blue construction paper, and our grill was silver poster board. We also added some dot stickers to the wheels for hubcaps.
Use red and gray construction paper to add tail lights and a rear bumper.
 Of course, you can also skip these variations and just use the template pieces and markers! If you decide to go that route, have the kids decorate the template pieces with markers before they tape them to their boxes.
The final step is to make the truck’s pull string. Knot a piece of string around a mini craft stick, then attach it to the bottom of the box with tape:
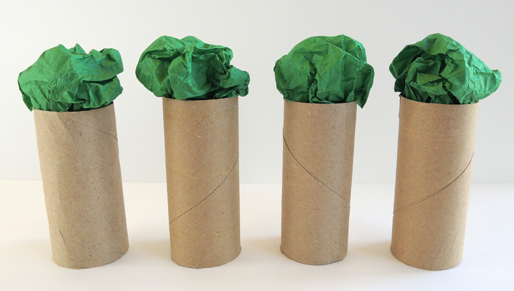
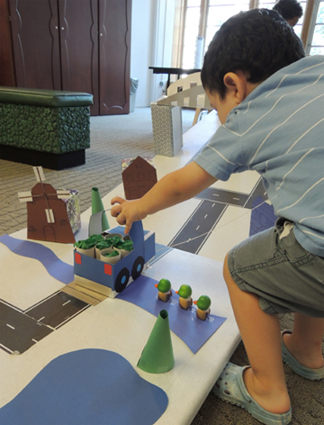
 To make your “produce,” stuff the tops of 2-4 toilet paper tubes with green tissue paper. Place the tubes in the back of the truck. We didn’t secure the tubes down with tape. We wanted them to wiggle and wobble while the trucks navigated the obstacle course.
 And what an obstacle course it was! We used two, 6′ plastic tabletops to create it. These tables have shown up on the blog before – once for sled runs, and again for snail races.
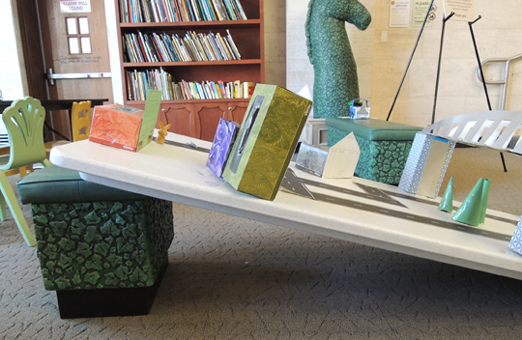
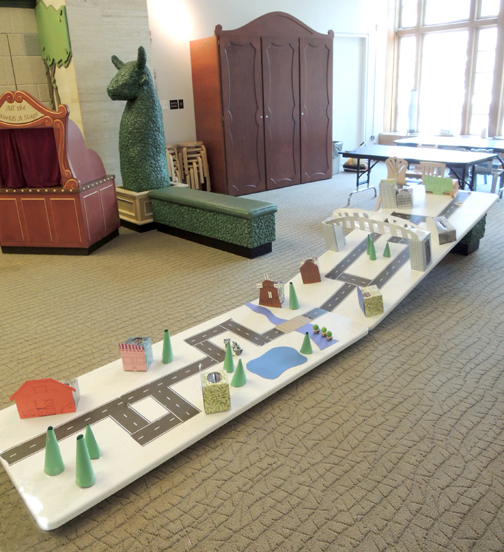 One of the tables was (securely) propped up on a cushioned stool to add a challenging hill to the course. You can also see how we made the buildings…facades taped to tissue boxes, which were then secured to the tabletop with packing tape.
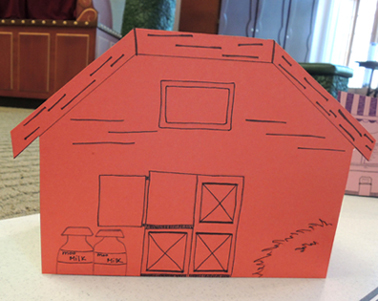
 The building facades were Marissa’s handy work! Out in the country was a big red barn…
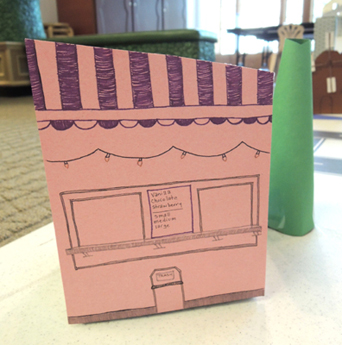
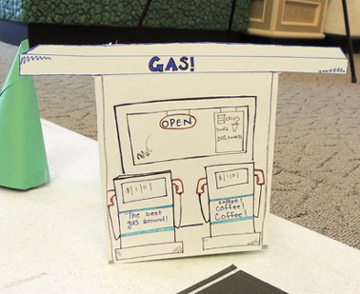
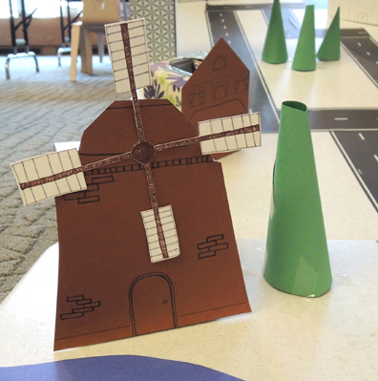
 As well as an ice cream stand, a gas station, and a windmill…
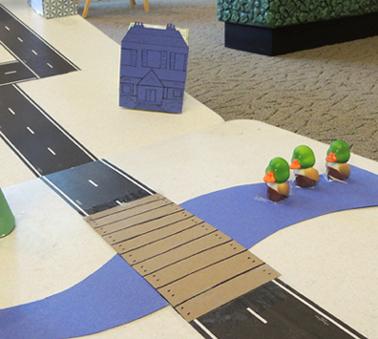
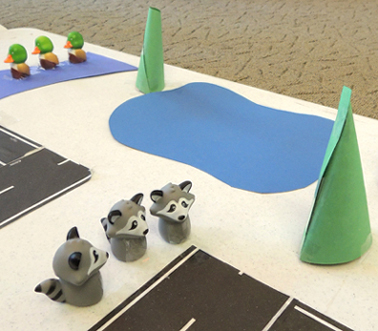
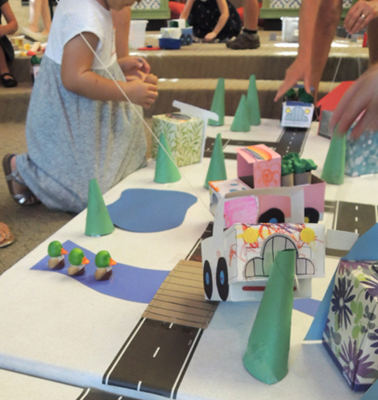
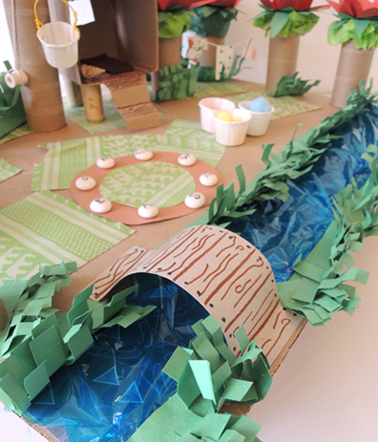
 There were ducks by a river bridge, and a trio of raccoons near a pond…and how do you like those towering conifer trees?
 The entrance to the city was marked with a big bridge. I made it out of a strip of cardboard, tin foil, tissue boxes, and silver poster board.
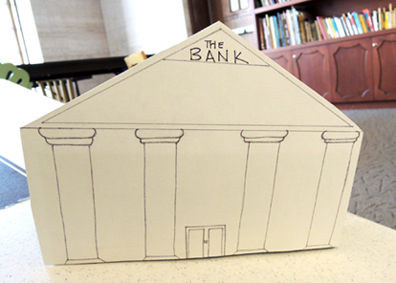
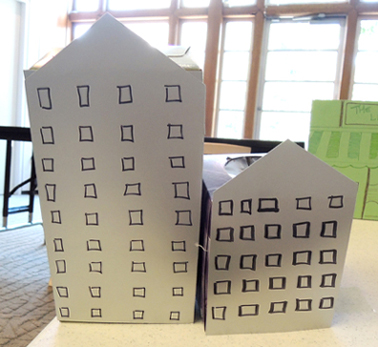
 Once in the city, there’s a bank and a couple of skyscrapers…
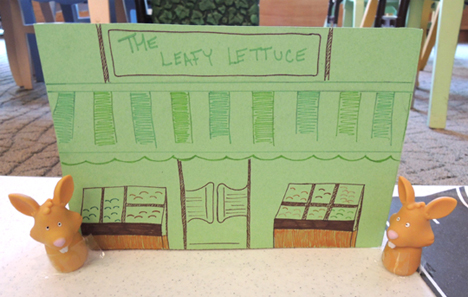
 And finally, at the veeeery top of the course, was “The Leafy Lettuce.” This is where you delivered produce to your eager customers.
 While constructing the course, we taped the buildings down first, and then added the road. We considered using long strips of black paper, contact paper, or masking tape outlines (similar to what this clever person did). But then I found this glorious stuff at our local toy store. I had to give it a test drive:
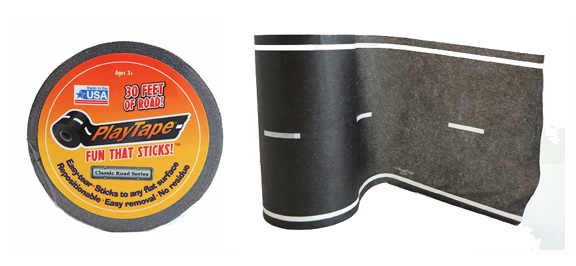 PlayTape is basically masking tape with road printed on it! The 30′ rolls came in 2 widths (2″ or 4″). I went with the 4″ size, which was $13 a roll (the 2″ size is $9). I found the tape on Amazon as well (in different colors, with special curved pieces, as train tracks, and there’s even a “Mud Madness” version!). The tape was awesome. My only complaint is that at times, the ends curled up off the plastic tabletop. The tape did much better on the rugs and hardwood floors of my home. It peeled easily off all surfaces, and left no residue behind.
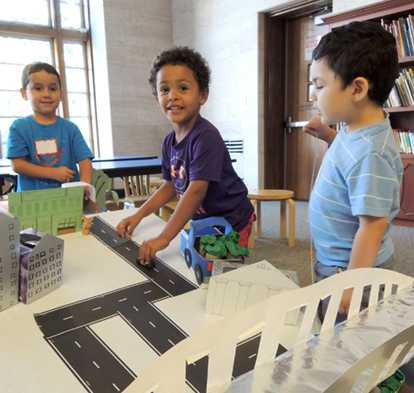
With the road in place, the course was ready! Drivers started at the bottom, then tugged, steered, turned, and yanked their cars up the course.
 Make sure you tape everything firmly in place (even the animals) because there will be plenty of hilarious crashes. Oh yes, there will.
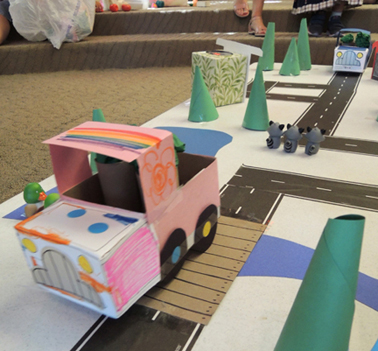
 Here’s one of my favorite trucks on course. Look at that fantastic rainbow roof!
 Eventually, all the trucks found their way to The Leafy Lettuce. We left the course open for a good 20 minutes after story time. It was very busy. A few Hot Wheels cars even showed up to take a drive…
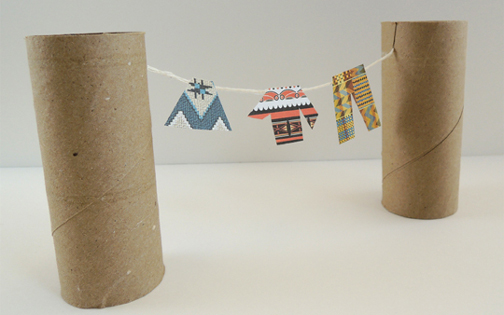
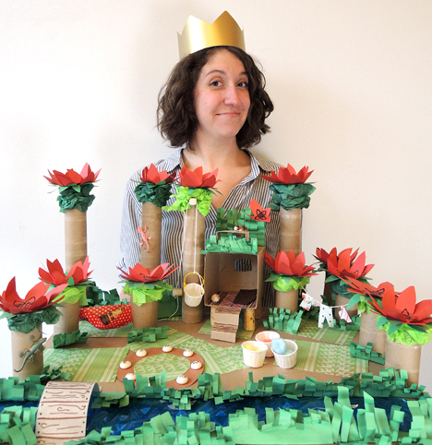 Create your perfect paradise, complete with a picturesque bridge, comfortable hammock, airy hut with a platform room, supply bucket on a pulley, convenient clothesline, and a stupendous sun clock. Do those towering red flowers remind you of anything? If you answered “swist,” you know exactly where we’re going with this!
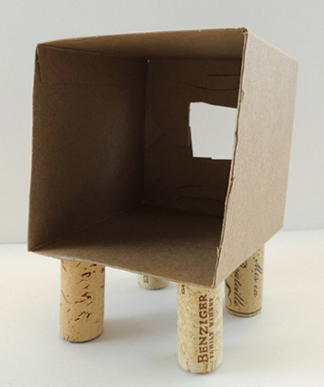
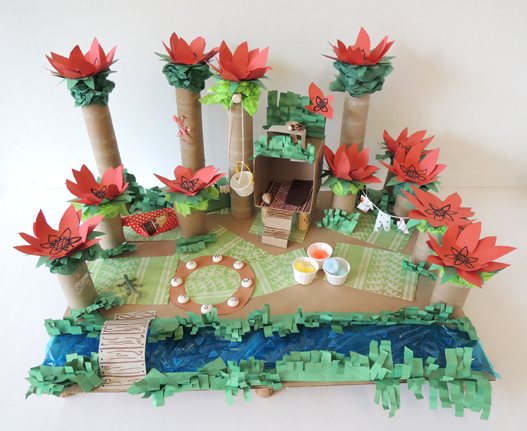 The first step is optional: hot glue legs to the bottom of your corrugated cardboard base. Champagne corks work beautifully for this purpose. Our bases were big (18″ x 24″) so we used 6 champagne corks per base. If you do use champagne corks, make sure you glue the flat part of the cork to the base (not the wider, rounded part):
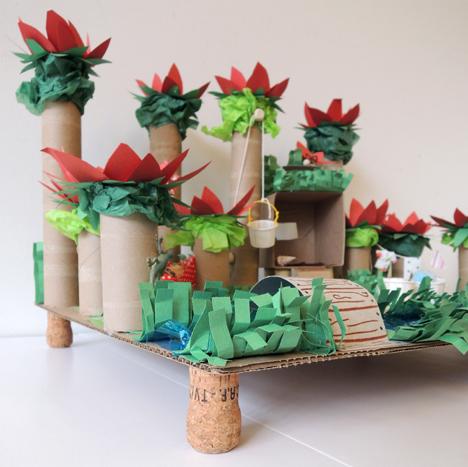

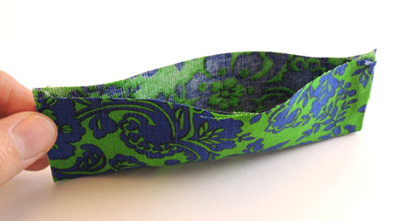 Next, cut matching 3″ slits down the sides of 2 toilet paper tubes. Slide the ends of the fabric pocket into the slits. Close the slits with tape. Hot glue the tubes to the base.
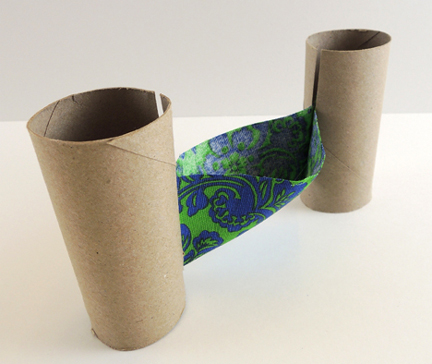
 Then add some tagboard (or construction paper) stairs! We also added a patterned paper rug and a felt sleeping pad. The hut has a platform roof as well (we added green construction paper grass and a little tagboard writing desk to it). When the hut is finished, hot glue its legs to the base.
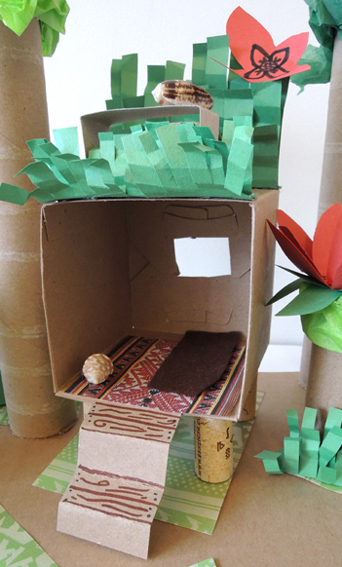

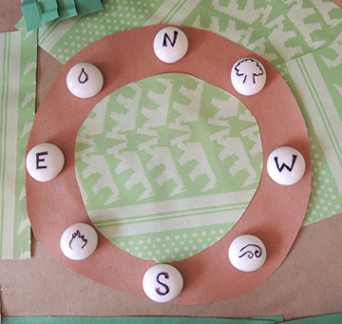
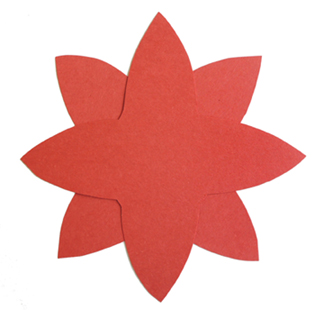 Glue the staggered petals together, then gently fold the petals upwards. Glue the flower on top of a sepal, then tape (or hot glue) the complete flower to the tops of the toilet paper and paper towel tubes. Marissa also used black marker to draw some details in the centers of the flowers and added some tissue paper underneath the sepals, but that’s totally optional! Here’s that overhead view again…
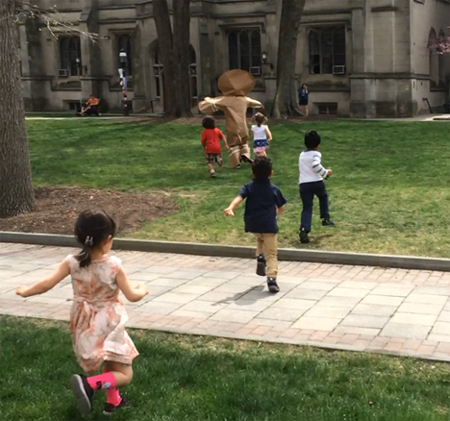 Yes, that’s me. Dressed as a giant gingerbread cookie, on the run from some extremely determined children. We made adorable (and non-edible) gingerbread houses with a surprise inside. Pull the peppermint loop on the roof, and up pops a gingerbread person! However, in order to get one of those little gingerbread persons, you have to catch the BIG one first (scroll to the bottom of the post for the video)!
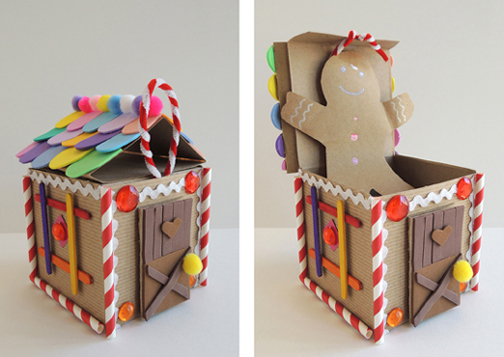 We read The Gingerbread Baby by Jan Brett (G.P. Putnam’s Sons, 1999). On a cold, snowy day, Matti and his mother decide to make gingerbread. The cookbook instructs them to bake the cookie for eight minutes without peeking, but Matti can’t resist. He opens the oven and out leaps a feisty Gingerbread Baby, who promptly bolts out the door. A merry chase ensues involving Matti’s parents, the cat, the dog, the goats, two girls, a pig, a fox, a milk & cheese man, and assorted villagers. But clever Matti has his own plan. He builds an enticing gingerbread house, leaves it in the woods, and the Gingerbread Baby dashes inside. Home sweet home!
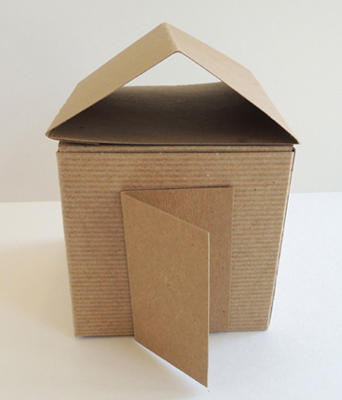 Twist a red and a white pipe cleaner together. Circle the pipe cleaners into a loop, and twist them together tightly at the bottom. Tape the peppermint loop to the lid of your box, bending any excess pipe cleaner underneath the lid.
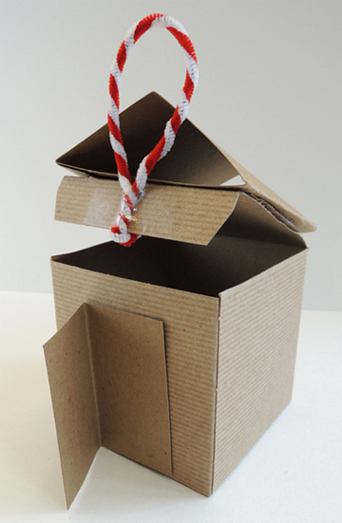 If you don’t have a box like mine, no problem! Just use a small tissue box. Flip the tissue box over (so the bottom is facing up) and use a box cutter to cut a square lid. Then follow the same steps for the roof, door, and peppermint loop. Here’s what a tissue box version of the house looks like:
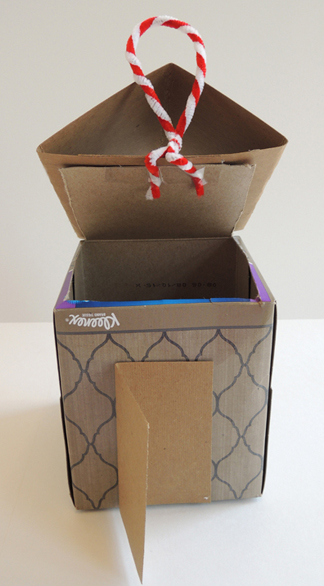 When the basic house is done, all you have to do is decorate! We offered
 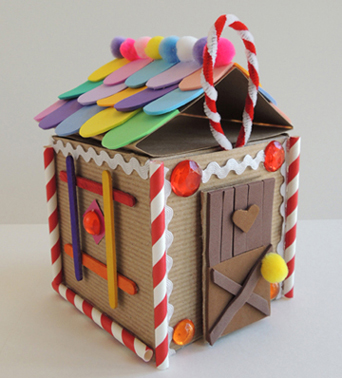 Markers can also be used, especially if you want to draw a gingerbread person peeking out of the front door! We found that metallic markers worked best on the brown tagboard.
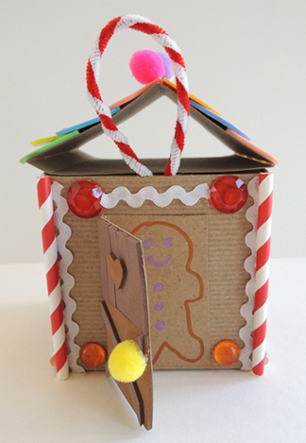 Finally, the gingerbread person that pops up when you tug the peppermint loop! Marissa and I prepped the gingerbread people in advance (we cut them out of brown packing paper and colored them with metallic markers). My only tip is to make sure the cookie fits neatly inside your house. In our early attempts, the cookie’s arms were too long. They jutted out past the roof, which, when closed, looked rather torturous for the cookie.
 Attach your gingerbread person to the underside of the lid with tape. Done!
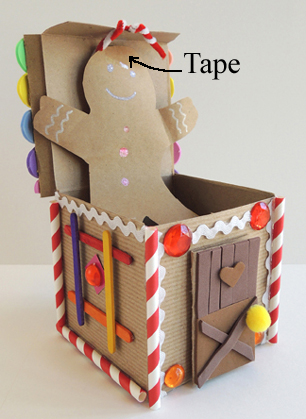 You could stop there and be finished with the project. But we decided to take it one step further. In order to get that little gingerbread cookie, you had to catch the BIG one first!
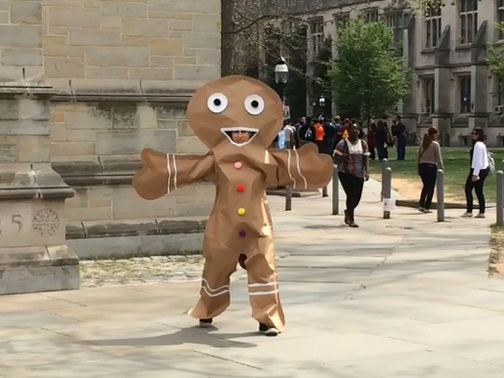 I used brown packing paper to create this stupendous costume (the thicker the paper, the better). The paper roll wasn’t wide enough to cover my full arm span, so we taped 2 long pieces of the paper together, reinforcing the seam with extra-wide masking tape. I didn’t photograph the step with the big taped pieces of paper, but here is a shot of a tape seam on one of the finished costume pieces:
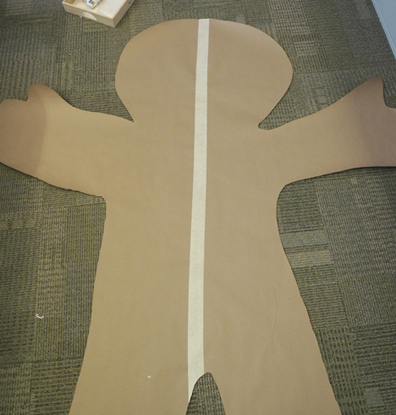 Since you want the masking tape seams on the inside of the costume, flip one of the taped pieces of paper over. The taped seams should now face each other. Then lay down on the paper and have someone trace your body in the shape of a cookie. A couple things to keep in mind while doing this:
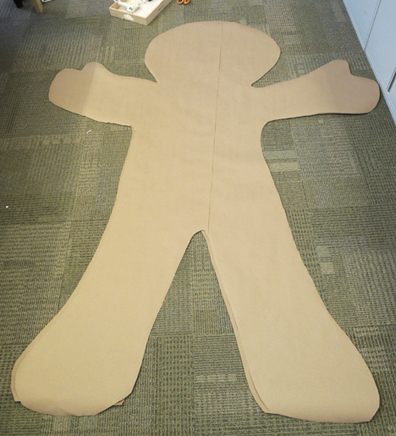 To “stitch” the pieces together, we made a double seam of hot glue and staples. The hot glue goes first, and should be about 1″ from the edge of the paper. Really goop it on! The staple seam should be about 0.5″ from the edge of the paper. Each staple should be no more than 0.75″ apart.
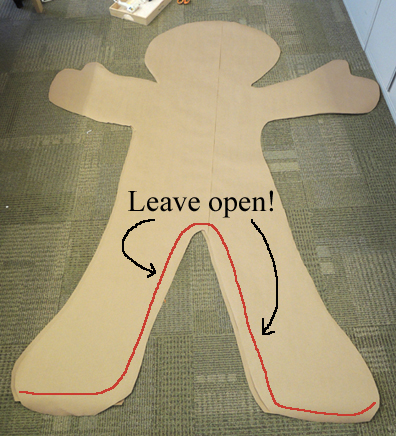 Once the seams are done, have the person who will be wearing the costume slide it over his/her head. You will definitely need help with this step! Marissa stood on a stool and gently lowered the costume while I shimmied my arms into place. Then we marked where my mouth was and trimmed the excess paper from around my feet.
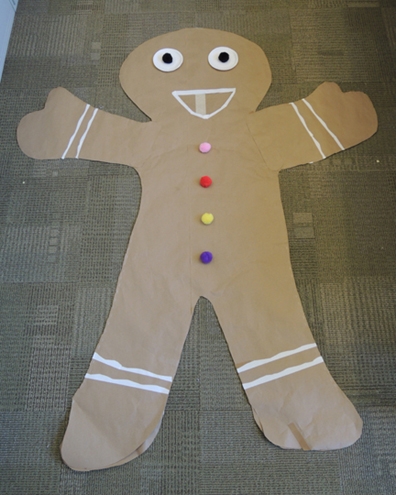 They’re hard to see in the above photo, but there are additional paper patches hot glued along the cookie’s armpits. When I tried the costume on the first time, the armpits ripped right away, so we added the patches to reinforce those areas.
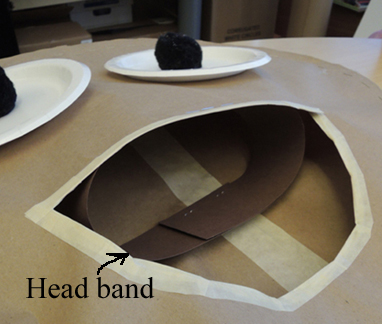 When it was time for the cookie chase, Marissa and I ducked out of the library with the costume, a stapler, and the cookie prizes. We hid behind a building, and, using some stairs to get some height, Marissa slid the costume over my head. Then she used the stapler to quickly close the seams along the insides of my legs.